Learning About the Camera
In this lesson, we’re going to learn about the camera. This lesson has been considered to be the meat and potatoes of the course. Lesson 3 is quite likely the most important technical lesson of this course. Do not skim this lesson or move on without fully grasping the concepts outlined below. Trust me!
In this lesson you’ll learn how to use your camera like a professional, rather than simply pointing and clicking. Understanding your camera’s manual features will help turn your photography from good to great. It will allow you to alter the finest detail. It will allow you to emphasis points, take emphasis away from irrelevant spots, add texture, increase contrast, decrease brightness, add interesting abstract elements and much more. Once you learn the basics of camera control you will slowly start to understand the complexities of this artistic medium.
Learning the camera’s basic control settings shouldn’t take too long. However, the practice of learning how to combine different settings can take a lifetime to master. There are so many variables which can lead to different photographic outcomes. Your camera’s settings combined with the colors in your photograph, the humidity in the air and the time of day, to name only a few elements, will all have a role in changing the outcomes of your picture. Your job as a photographer is to predict the shot you’re looking for and then arrange your camera in such a way that you capture what you visualized in your mind. While guesswork does play a small role in photography, as a photographer you should be able to set up your camera in a way that allows you to increase your chances of a predictable picture.
This lesson is aimed at teaching you how to set up your photographs in such a way that allow you achieve your desired goals for a particular photograph. There will be concepts touched upon in this lesson which are important but are brushed over because they will be covered in more detail in upcoming lessons (such as composition and emphasis). Your main concern during this lesson isn’t to understand how to compose a picture properly. In fact at this point your pictures don’t even need to look at all impressive. All you need to focus on in this lesson is understanding the workings of your main tool: your camera.
For this lesson, it doesn’t matter if you have a digital or film camera. The camera’s technical attributes are pretty much the same for both types of cameras (the images are just recorded differently). For those of you who have very basic cameras or disposable cameras, you too should pay close attention to this lesson. If your current camera lacks basic manual control you still need to understand the implications that these manual controls have so when you upgrade to a more advanced camera you’ll understand how to use these features. Likewise, when you take pictures now with basic cameras that lack basic manual control you’ll start to feel limited in your range of possibilities. When you learn what possibilities present themselves with manual control over your camera you’ll want to have those features at your disposal.
Similarly, many of you may have digital cameras where you don’t know if you have manual control of certain features or not. On SLR (Single Lens Reflex) cameras, the manual settings are visible because they are located on the exterior of the camera. On digital cameras they could be hidden somewhere in your menu options. Since each digital camera’s menu settings are different it’s impossible for us to tell you how to find your manual control panel, however we can tell you what to look for. The good news is that almost all digital cameras have some form of manual control. However, before we start talking about these settings we need to discuss a few photography facts that will help you understand your camera much better.
The camera does not discriminate
For starters, the camera does not discriminate. The human eye has the powerful ability to focus solely on certain objects that are of particular interest. The human eye has what is known as selective vision. This is controlled partially by the eye and partially by the brain. You can “notice” important images on the retina and disregard others. To see a good example of this all you need to do is look at the words you’re reading right now. Notice how the word your reading this second is very clear and obvious while the worlds surrounding it are less obvious. Selective vision eliminates distracting elements. Many amateur photographers believe that the camera has the same ability. However, as stated before, the camera does not discriminate. When people take a picture of something of interest it captures everything around that object with about the same clarity. If there are people in the background, then they will be there. If there was a garbage can in the background, then it will be there. If there was a bike rack in the background, then it will be there. Chances are none of these elements will add to the experience of the photograph. If you were trying to take a picture of great aunt Judy, chances are a bike rack doesn’t help tell that particular story. In fact, it probably detracts from your story.
This is probably the biggest mistake that amateur photographers make. They focus on their main element with complete disregard to the other elements that make it into the four walls of their photograph. It will be said again later in your learning material, but learning what to leave out of your photograph is as important as knowing what to include within your photograph. Take a look at the following example to see proof that photographs don’t discriminate.
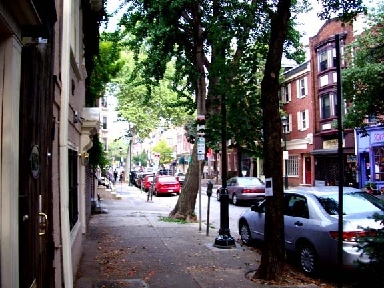
Notice how this picture lacks focus. It includes too much information. The photographer was trying to capture the essence of the street but instead captured an overexposed sky, part of a car, part of buildings, part of a door and so on. In capturing too much, the photographer failed to capture a visually impressive photograph.
Your camera is not the human eye
Your eye can render a sharp focus no matter where you look almost instantly. The human eye seldom presents you with an out-of-focus image. If you are reading this on your computer look ahead to some point in the distance. You’re eyes will refocus almost automatically. However, it is not until you hold the pages up to your face and then try to look in the distance that you realize that you can’t see both clearly at the same time. When you are looking at one the other is out of focus. A camera’s lens is a little less advanced. You must adjust the eye of your camera (the lens) to ensure it achieves the sharpest possible focus on the subject which you wish to highlight. Most focus errors when blown up to a regular picture size (3×5 inches) will not be noticeable, but once you start progressing you’ll want to enlarge your photographs even more making even small errors in focus very visible. Trust us, your hands are less steady than you think. It will be important to have a tripod and pay special attention to the focus within each of your shots. The picture below looks fairly in focus in this small size, but when blown up to 3 times the size it looks disastrous.
You also need to understand the film and your camera’s sensor is less flexible than the human eye. I’m sure you’ve all wanted to take great nighttime photographs. Maybe you’ve been laying in bed and the moonlight coming in is illuminating your room in a magical way. However, at this point you may have been laying in your room for 15 minutes and your eyes have”gotten used to seeing in the dark” as your retina will have increased it sensitivity by hundreds of times. However, film sensitivity is much more fixed and if you tried to take the photograph of the moonlight entering your room the photograph would likely turn out completely black or extremely underexposed (very dark with few details). This is because film has set attributes (ISO speeds) which will be talked about in a future lesson while the human eye can change as the lighting conditions change. This also applies to your digital camera’s CCD.
This is why most people are disappointed with their photographs. They want to be able to capture what their eyes see but very rarely do their photographs ever turn out how they expected. You always end up saying that”photography detracts from the true experience of what you saw”. However, this doesn’t always need to be the case. In fact, after taking this course you should be able to find ways to make photography enhance or exaggerate what you were seeing with your eyes.
Here is a video about the topic of the human eye and is related to this:
https://www.youtube.com/watch?v=4I5Q3UXkGd0
video by vsauce
Here is another video about this topic:
https://www.youtube.com/watch?v=SuGNhMY7fDc
video by f64.photo
Film and sensors exaggerate contrast
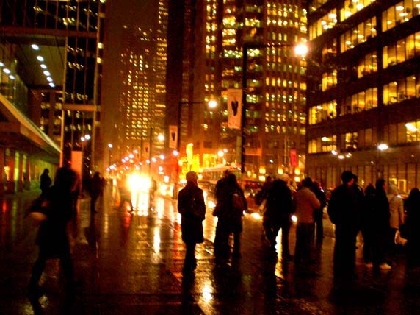
While the human eye can view both very light tones and very dark tones in the same view, photography film cannot do so. Film and camera sensors exaggerates extremely dark and light tones if they are present within the same shot. Therefore in shots like this you need to decide which tones you want to expose correctly. The dark tones or the light tones. Below is an example of a picture where both tones are exaggerated.
Photography is two dimensional
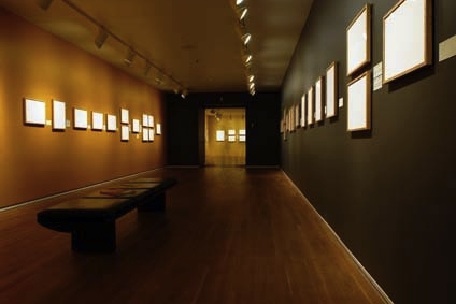
A photograph is a flat object with height and width but no depth. With photography you have to learn to suggest a third dimension. Perspective lines and lighting both help greatly, adding a sense of a third dimension. Look at the following photo for example. It is a flat object without a third dimension. However, shape, shading, lighting and lines all help create an illusion of a third dimension.
Now that you understand the differences between the human eye and the camera’s eye let’s begin with a discussion of the camera’s manual controls.
The two most important manual control settings are:
- Shutter speed
- Aperture
The shutter speed control tells the camera how quickly to open and close the shutter. Aperture is the size of the opening of the camera lens. It controls the amount of light reaching the film. It is measured in f-stops (such as f/8 or f/11). Your aperture setting also has a large impact on the photograph’s depth of field (the depth of the focal range of your photograph).
These two features are the backbone of your manual camera control. If you can alter these two settings you are in good position to control almost all elements of your photographs. We are going to start by explaining each one independently of the other one. In the end we’ll tie the importance of each one together and show you how both need to work in conjunction with the other to work properly. However, to start out you need first to understand how each system works independently of any other controls.
Shutter speed
Your camera’s shutter speed is a measurement of how long your camera’s shutter stays open when you’re taking a picture. The slower the shutter speed the longer the exposure time. When the shutter speed is set to 1/125 or simply 125 this means that the shutter will be open for exactly 1/125th of a second.
Common shutter speed options are: 2, 1, ½, ¼, 1/8 , 1/15, 1/30, 1/60, 1/125, 1/250, 1/500, 1/1000, 1/2000
A shutter speed of 2 would therefore keep the shutter open for 2 seconds, while a shutter speed of 1/2000 would keep the shutter open for 1/2000th of a second. It is also important to note that each increase in shutter speed doubles the amount of light coming in. For example, a 2 second shutter speed will let in twice as much light as a 1 second shutter speed. Similarly, a 1/15th shutter speed will let in twice as much light as a 1/30th shutter speed.
Shutter speed will affect your photographs in two major ways. First off, like aperture, it will control the amount of light allowed to hit the film (or CCD chip if you are using a digital camera). Therefore changing the shutter speed will affect your photograph’s exposure level. If you keep the shutter speed open for a long time, for example 1 or 2 seconds, your picture will be brighter and possibly too bright (over-exposed). If you don’t keep your shutter open long enough (for example, 1/2000th of a second) your picture could be too dark (under-exposed).
Secondly, your shutter speed will affect movement within your photograph. A photograph is simply a recoding of light. If you open and close your shutter speed very quickly you will freeze a moment in time with great sharpness. Quick shutter speeds are great to freeze fast moving objects or events such as sporting events or action shots while slower shutter speeds can lead to some interesting visual effects since they will capture movement within a frame.
For example, in the following picture the photographer used a long shutter speed which kept the shutter speed open for a longer period of time before closing. In this example the camera must have been on a tripod which ensured that everything was static (maintained its position). However anything which moved within the photograph left its trails in the photograph for the duration that the shutter was open for. In the example below, a car’s headlights were traced during the film’s exposure to a car driving on the following highway.
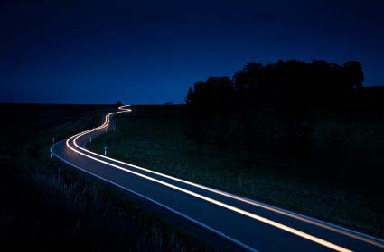
The last photograph shows an extreme example of keeping the shutter open for a long period of time as I’m sure the length of road was quite long and the car must have traveled a long distance while the shutter was open. Next we’ll show an example where the shutter speed was open for a shorter period of time. The result is that most of the static elements to the picture remain the same while the movement appears blurred.
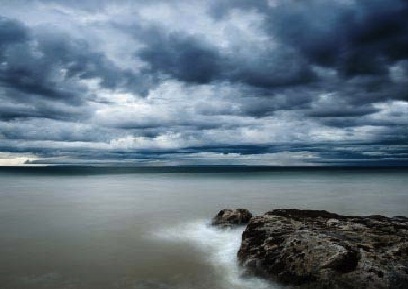
As you can see in this picture, the shutter speed was set to a less exaggerated number. We can tell this because the only element in this photograph to have its movement captured is the wave. However, we also know that clouds move and in this picture the clouds are very still so we can conclude that this was a very calm day with little cloud movement and the shutter speed was set to a less exaggerated number which captured only the quick moving waves and not the movement of other slower moving objects such as the clouds.
Another example of the neat effects that a slower shutter speed can achieve is located below.

Notice in the above photograph all elements are static and unmoving except the water of the fountain. The slower shutter speed allows us to blur the falling of the water which adds a mystical look to the fountain. Using a slow shutter speed is a great way to capture the movement of water for some interesting visual effects.
A great example of the proper use of shutter speed to capture movement can be seen in the following photograph. Notice how the boxer’s right hand has captured the movement of his punch while his left hand is still. By setting his shutter speed properly the photographer was able to capture the smallest fast movement within this shot while at the same time freezing the rest of the boxer’s body. This photograph is great because it captures the movement of the one hand and the one hand only.
Playing with your shutter speed settings allows you to play with movement within a photograph. You can show movement, you can create a mysterious feeling (as in the previous pictures with waves, or water fountains) and you can choose to use this effect to create abstract photographs which exaggerate movement throughout the shot. It’s up to you. The possibilities are endless.

On the other hand, a quick shutter speed can freeze even the fastest moving object dead in its tracks. For example a fast shutter speed could stop this falling water droplet and emphasize all of its attributes with almost perfect clarity.
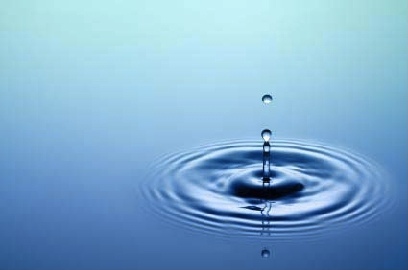
With this photograph a slow shutter speed would have resulted in an almost undistinguishable photograph. However a quick shutter speed can freeze fast moving objects dead in their tracks. Quick shutter speeds are often used at sporting events, races, or in everyday life when people just won’t sit still.
Aperture Setting
A camera’s aperture setting determines the area over which light can pass through your camera lens. Aperture is specified in terms of an f-stop value, which can at times be very confusing. This is because the area of the opening increases as the f-stop decreases. In photographer slang, when someone says they have to “stop down” or “open up” their lens, they’re referring to increasing and decreasing the f-stop values, respectively.
Below is a chart which illustrates some possible aperture settings of an SLR camera.
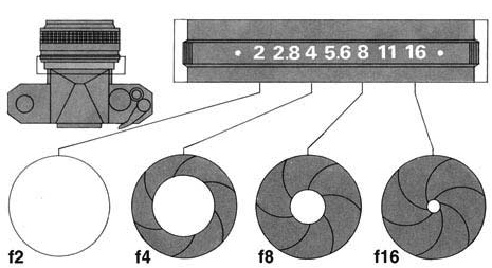
Okay, now things get a little confusing. Shutter speed settings make sense since we all know that 2 seconds is longer than 1/500th of a second. However, aperture settings often confuse beginner photographers because the numbers seem counterintuitive to logical mathematical thinking. You have to remember with aperture settings the larger the number, the smaller the hole and the smaller the number the larger the hole. Say this over and over to yourself as many times as you need in order to remember it. Therefore, an aperture setting of f/2 will let in more light than an aperture setting of f/16 This is a very important manual photography setting and understanding it will allow for great control over the outcome of your final product.
Your aperture setting also controls depth of field, which simply put, is the distance that will appear sharp, or in focus, from your foreground to your background. The larger the opening of your lens the less depth of field you’ll have. The smaller the opening the more depth of field you’ll have. The diameter of the aperture is measured in f-stops. Depending on the camera you’re using or the resources you’re reading, f-stopss will be displayed a little different.
f1, f1.4, f2, f2.8, f4, f5.6, f8, f11, f16, f22, f32, f45, f64, f90, f128
Like the shutter speed, changing your aperture settings by one f-stop will effectively double the amount of light coming through (or cut it in half depending if you’re opening the hole or closing it). An aperture of 2.8 will let in twice as much light as an aperture setting of 4. At the same time an aperture setting of f5.6 will let in half as much light as an aperture setting of f4.
While shutter speed is fairly easy to understand, aperture settings are a little more complex.
Remember this Rule
Small number = large opening / shallow depth of field
Large number = small opening / deep depth of field
Let’s take a step back now and look at a couple of photographs which will show you how aperture settings affect the depth of field of a picture. In the following example, the photographer created a shallow depth of field by using a larger aperture opening (small f-stop number). The result is a main subject who’s in focus but has a blurred background.

As you’ll learn later in our lesson on composition, being able to control your depth of field is important in order to help emphasize your main subject while slightly blurring your background without loosing the context of the photograph.
Being able to control your depth of field not only helps create emphasis by taking away distracting or unimportant elements but it also closely resembles how our eyes work. Therefore photographs that use some type of depth control are usually more pleasing to look at. Remember that humans have selective focus but the camera doesn’t. By being able to control your depth of field you are effectively creating an artificial selective focus area.
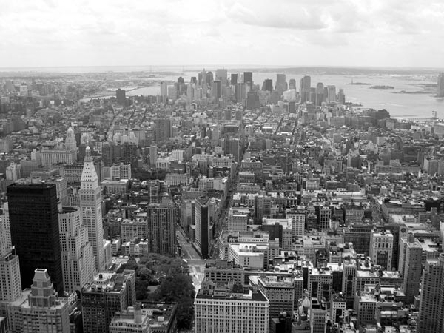
Alternatively you may want to have a large depth of field by choosing a smaller opening (larger f-stop number). Large depth of field is often used for landscape or cityscape photography when photographers are trying to achieve crispness of even the furthest points in the distance. Take a look at the photograph below for example.
Take a moment and really try to imprint all the important math from this lesson in your head. Things get a little more complicated from this point on and having a firm understanding of shutter speed and aperture control is critical if you are to grasp the concepts in the upcoming lesson.
In review, remember that:
- Each increase in shutter speed decreases the amount of light by half. Each decrease in shutter speed increases the amount of light by double the amount.
- Each time the aperture is opened to the next largest level, you are letting in twice the amount of light as the previous number. Each time the aperture is set to close by 1 f stop you are decreasing the amount of light by half.
- Shutter speed not only controls light but also affects motion within a photograph.
- Aperture not only controls light but also controls depth of field.
- The higher the aperture setting, the smaller the hole and the less light allowed in.
- The higher the aperture setting (smaller hole) the better the camera will perform at keeping a wide depth of field (keeping more of the picture in focus).
- The smaller the aperture setting (larger hole) the shorter the depth of field will be.
Here is a video on Aperture:
https://www.youtube.com/watch?v=F8T94sdiNjc
video by TonyNorthrup
Exposure Control
Now that you understand the settings of both shutter control and aperture settings you need to know what influence they have on overall exposure. Many of you are probably familiar with overexposed and underexposed pictures. Overexposed pictures are a result of too much light coming through, and underexposed pictures are those which are too dark.
Let’s say for example that we used a fast shutter speed (to limit the amount of light coming in) and a high aperture number (small hole) to capture a large depth of field and the greatest detail for a landscape photograph. The following would be the result.
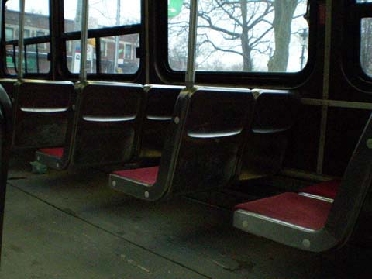
Notice how in this photograph the subject is underexposed. There is not enough light shed on the film (or CCD if the camera was digital) to bring out the details of the subject. In the case above, it may have been the intention of the photographer to create a darker image. Underexposed images are often taken intentionally. Your concern is to ensure you don’t take unintentional underexposed images.
Now imagine you set your aperture setting to a low number (larger opening to let in more light) and you set your shutter speed to a longer exposure time. The result would be a photograph which overexposes your photograph. Look at the following example.
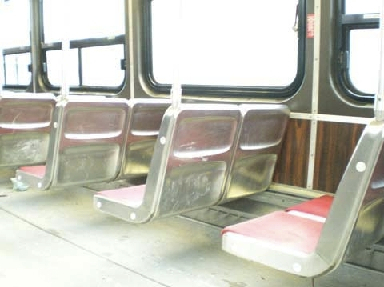
Therefore it is important to know how shutter speed and aperture work in conjunction with each other to determine the overall exposure levels of a photograph. Think of shutter speed and aperture as a teeder todder. On one side you have aperture and on the other side you have the shutter speed. As the shutter speed gets set to one increment higher the aperture setting needs to get set to one increment lower in order to keep the light coming into the camera the same.
![]()
Source: ApogeePhoto.
Learn more about the exposure triangle here.
And don’t forget that every decrease in shutter speed decreases the amount of light by half and every increment the aperture opens doubles the amount of light coming in. You can therefore use different combinations of aperture settings and shutter speed settings to achieve the exact same exposure levels.
Look at the chart below to learn more about how to balance aperture settings with shutter speed settings.
![]()
Source: Kevin Willey
Since shutter speed and aperture settings move in equal increments, you can trade shutter stops for aperture stops and have the same exposure. This gives you a range of aperture openings and shutter speeds that you can use.
Advanced shutter speed technique
As we mentioned earlier a slightly overexposed or underexposed photograph may have been desired by the photographer. Generally speaking you’re going to try and achieve a balanced and realistic exposure result. However, there may be times when you want to break the exposure rules of balance. Our philosophy here at the Icon Photography School is that it’s okay to break the rules of photography, you just need to ensure you know the rules first.
A great example of an overexposed photograph which adds an element of artistic flare to a piece can be seen below.

Notice how this picture being overexposed adds an element of mysteriousness. The washed out look of the female model against the washed out walls simplifies the photograph and places extra emphasis on the red tones the model is wearing.
For those of you who are being introduced to these manual controls for the first time, you will require a lot of patience while practicing finding the balance between shutter and aperture control. Setting both manually will take great care, quick decision making and good memory. However, for those of you who don’t want to jump head first into the world of manual control, you might want to look into cameras that have certain priority settings. For example, many cameras have two features commonly referred to as:
Shutter speed priority and Aperture priority
What these settings allow you to do is to alter one of the settings (i.e aperture) while the camera will automatically set the other setting (i.e. shutter speed) to achieve a balanced exposure level. This will allow you to play with your aperture settings and learn about depth of field without having to concern yourself with the proper shutter speed setting to offset the increased amount of light coming in from the wider aperture (shallow depth of field). It will also mean that fewer of your photos will become over or under exposed. The same is true for shutter speed priority. You can manually edit your shutter speed to play around with showing movement within a photograph without having to worry about setting the proper aperture to accompany your shutter speed setting. You can effectively control one manual element while the camera automatically controls the other for an optimal exposure setting.
Advanced Shutter Speed Technique #2 Panning
Another great shutter speed technique that impresses crowds is when you can successfully blur the background while keeping a moving object in focus. It helps first to visualize this technique. Imagine you’re standing on the side of a highway and you’re going to use a slow shutter speed to capture a moving car. As we’ve learned in the previous section, a slow shutter speed is not a good idea because whatever is moving will become blurred.
However, with this trick we’re going to show you how to blur the static part (the part that stays still: the background) while keeping in focus the moving object (the car).
To do this exercise you’ll need to move your camera at the same speed as the moving object for the duration of the time the shutter is open for. By following the moving object with your camera you will effectively freeze the object while blurring the background due to the camera movement.
To see how this works, make a circle with your fingers by placing your thumb and index finger together. Now hold the circle about 1 foot away from your face. Now with your other hand place your index finger in the frame created by the circle.
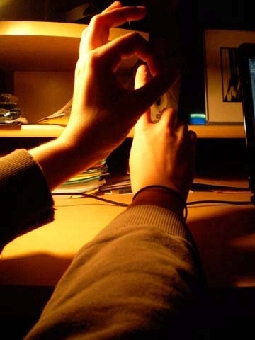
Now move your index finger from side to side and allow your circular frame to follow your finger. You will notice the main object (your finger) is now staying within the same position within your frame and it is the background which is now moving. The results are the opposite of what most slow shutter speed shots look like. Now instead of having a calm background and a blurred moving object, you’ll have a blurred background and a still moving object.
That concludes this lesson on your camera’s manual settings!