Photographic Techniques
Welcome to your 11th lesson. In this lesson we’re going to teach you how to create stunning works of digitally altered photographs. We will teach you methods of photograph post production enhancements (such as the subtle addition of extra contrast, cropping, or color manipulation), as well as more advanced and extreme forms of photograph manipulation.
Many of you using digital and non digital cameras alike probably have a substantial interest in photograph manipulation. This lesson is for those of you with photo editing software programs such as Photoshop. In this lesson we use Photoshop to manipulate our images. However, the concepts are similar in other photo editing software programs. If you don’t currently have a photo editing software suite consider downloading “the GIMP”. It is a free Photoshop alternative with much of the functionality. Visit their website at Gimp.org
Below we are going to introduce you to your digital darkroom. We will explain how to manipulate images, exaggerate certain elements and fix or touch up other elements. This is a great lesson for those of you who want to take your photography to the next level. We’re going to start out by first introducing you to some of the most common Photoshop shortcuts.
Common Photoshop shortcuts
Below you will find some of the most common Photoshop shortcuts.
Ctrl+N – New Document
Ctrl+O – Open Document
Ctrl+Tab – Switch between actively open documents within Photoshop (if you use a tabbed browser, this usually switches tabs in that as well)
Ctrl+A – Select All
Ctrl+C – Copy
Ctrl+X – Cut
Ctrl+V – Paste
Ctrl+S – Save
Ctrl+P – Print
Ctrl+Shift+S – Save As (this allows you to save the document while adjusting different parameters, such as name, location, file type, compression, etc.)
Ctrl+Z – Undo
Ctrl+Y – Redo
Ctrl+Alt+W – Close all windows
The following are mostly Photoshop-specific.
Ctrl+K – Toggle Preferences Dialog Box
Ctrl+J – Duplicate Currently Selected Layer Ctrl+Shift+N – Create New Layer
Ctrl+L – Open “Levels” Dialog Box
Ctrl+Shift+L – Apply “Auto Levels” (note that this is the same effect as opening the “Levels” Dialog Box and hitting the “Auto” button)
Ctrl+M – Open “Curves” Dialog Box
Ctrl+F – Reapply Last Used Filter (it retains the last settings used) Ctrl+U – Open Hue/Saturation Dialog Box
Ctrl+B – Open Color Balance Dialog Box
Ctrl+Alt+Z – One “Step” Back in History (this is a glorified “Undo”; the number of “steps” that Photoshop remembers can be adjusted in the Preferences Dialog Box) Ctrl+Shift+Z – One “Step” Forward in History
Ctrl+R – Toggle Ruler Display (adjusted in Preferences Dialog Box) Ctrl+’ – Toggle Grid Display (adjusted in Preferences Dialog Box) Ctrl+; – Toggle Guide Display (adjusted in Preferences Dialog Box)
Ctrl+E – Merge Down (this merges one layer into the one directly below it; it also merges layers in a group or a selection)
Ctrl+Shift+E – Merge Visible (this merges all layers that are currently visible, indicated by the presence of the little eye icon by the layer thumbnail)
Ctrl+T – Free Transform
Ctrl+Shift+T – Reapply Last Used Transform
Making a Selection: Circles
When playing around in your digital darkroom you’re going to want to first learn how to isolate certain parts of an image for use in another image. This is a very basic first step yet mastering this technique is one of a digital photographer’s most prized techniques. The difference between a bad isolation and a good isolation can be the difference between a masterpiece and an embarrassment.
We’re going to start off with using regular shapes. In our first example we’ll use a circle to illustrate how to isolate and duplicate.
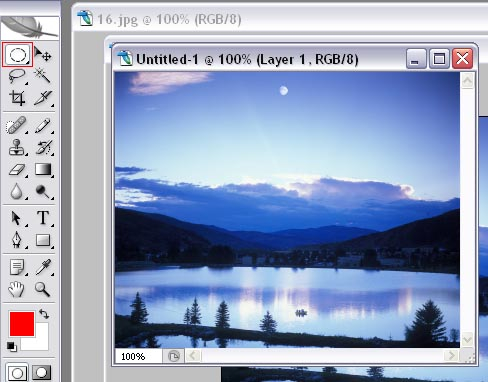
Start off by finding a photograph with a full circle or feel free to use the photograph below. Use the “elliptical Marquee Tool”
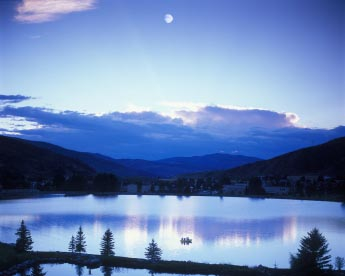
Now hold down the “shift” key while dragging the elliptical marquee tool and a perfect circle will be drawn. Anytime you hold down the shift key with these tools, it will remain in perfect formation. However, by not using the shift key you can make irregular shapes or customize a shape.
Next, go to “select” then “feather” and choose the option of 1 or 2 pixels. This will ensure the edges are slightly softened for when a copy of the selection is made.
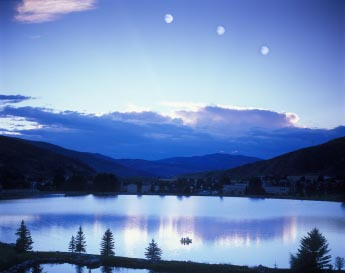
Next make a copy of the moon by clicking “ctrl c” and then paste it by clicking “ctrl v”. You can then move around the moon in as many different positions as you wish. You can also experiment with shrinking or blowing up the moon if you wish.
Making a Selection: Rectangle Marquee Tool
Next, we’re going to focus on the isolation of an object using the rectangle marquee tool. This is a great tool to use when you’re playing around with skies. Often you’ll find your skies are over or underexposed or simply boring. With this tool you can insert the sky from your most impressive photos. Let’s begin.
Again, if you wish you can use the images in this guide as a tool to help you practice this assignment. To begin take the following image.
This picture of a beach is a great example of a photograph that this technique will work well with because the horizon is flat.

Now open this photograph as well
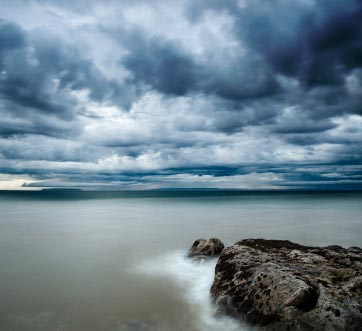
In the first image use the rectangle marquee tool to highlight the sky of the beach picture. Again click on “select” then “feature” and set the option to “2”
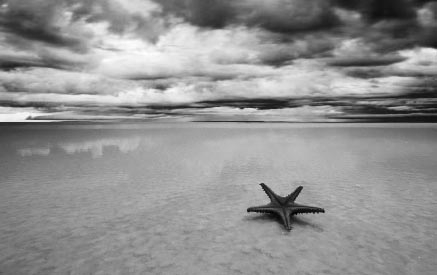
Now copy and paste the sky from the other picture onto the first picture. The results should look as follows:

Now, because there are some major differences in lighting in the two different pictures which were placed on top of each other, we’re going to make this photograph black and white to make those elements less noticeable. To do this select one of the layers then click on “image” then “adjustments’ then “desaturate”. Do the same for the second layer. Now both of your layers are black and white.
Now you also will want to adjust both the brightness and contrast of each of your two layers. Select layer 1 and then click “image” then “adjustments” then “brightness / contrast”. Adjust each layer to your desired settings. The result should look as follows:
Creating an artificial depth of field
Earlier in the course we spoke about the importance of isolation and how to use a shallow depth of field to help ensure you compose a photograph with good isolation. However, if you didn’t use a proper aperture setting when you took the photograph you can always touch up your photograph in post production. What I want to do now is to show you how to isolate the background and create an artificial and exaggerated depth of field digitally.
Look at the following image for example. Notice how the depth of field is fairly large. Both the foreground and the background are fairly focused.
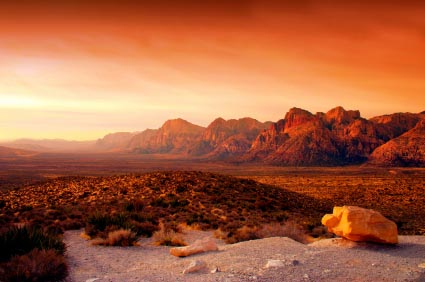
We can shorten the depth of field in a natural looking manner by highlighting the mountains and sky in the background with the rectangle marquee tool. Then feather it with a value of 50. Now go under “filter” and click on “blur” then click on
“Gaussian blur” and select whatever value (usually between 5- 30) that allows you to achieve your desire look.
Here is the final product that I created.
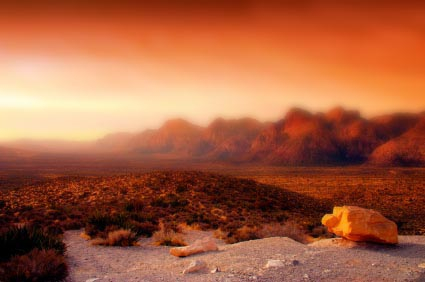
Using this technique you can edit the depth of field in post production and place emphasis on your foreground.
Magnetic Lasso Tool
The next tool I will quickly teach you to use is the magnetic lasso tool which is good in situations when you’re in a rush and the image has clearly defined tonal range. In this case you can use the magnetic lasso tool.

The magnetic lasso tool allows you to quickly trace the outline of a distinct object. To use this tool you simply need to drag your curser around your object and the lasso tool will automatically drop square anchor tags along the edges of your subject. If your tool starts tracing the wrong line simply hit the back button and the last anchor tag will be erased. This may not be your most accurate tool since the tool uses tonal and color values of your main subject against the background colors. However, there are certain tonal grades and colors which are similar which may make tracing difficult. However, if you have a picture with clearly defined separation in colors and tonal ranges this tool is great.
When you choose the magnetic lasso tool you may need to hold down the icon in order to choose the right tool. Make sure you choose the magnetic lasso tool and not the regular lasso tool or the polygonal lasso tool.
Magic Wand Tool
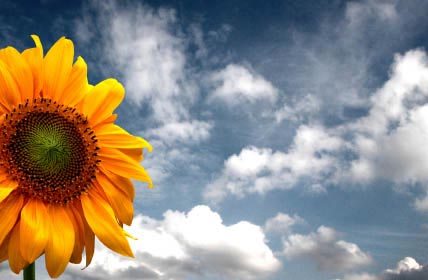
Probably the most popular tracing tool is the magic wand tool. The next photograph is a great candidate for a test with the magic wand tool. Follow these instructions.
Open an image with clearly defined tonal range and color separation
Next select the magic wand tool

Now set the “tolerance” to 75
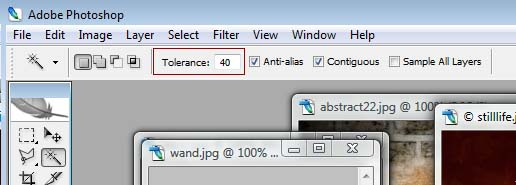
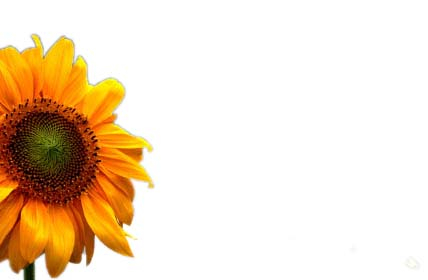
The lower the tolerance number the more specific the tool will be to a certain tonal and color range. The higher the number the broader the tonal variance will be. Hold the “shift” key and start clicking on the sky. Various parts of the sky should become highlighted but the flower should not be highlighted at all. Keep holding down the “shift” key and click on any areas outside of the flower which are not selected. Once all the sky area is selected go to “select’ then “feather” and click on “1” pixel. Click Okay. Now hit “control X” to delete the selected area. The result should look as follows.
Replacing Color
In some photographs you may wish to replace certain colors for other colors. For example you may want to make the leaves of a tree a different color than green, but you don’t want to affect the rest of the picture. There is a great tool that allows you to do just this.
It’s called the color replacement tool and it can be found in – image – adjustments – replace color.
The dialog box appears as follows
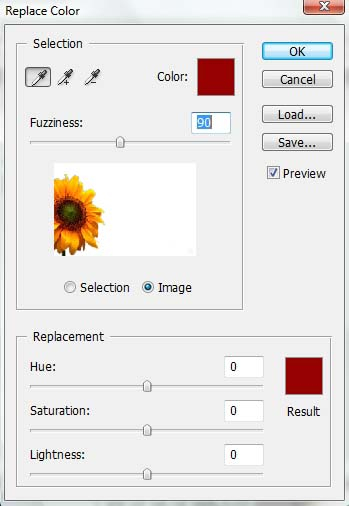
If you choose a low “fuzziness” number a narrower range of colors will be selected and if you pick a higher number, a greater range of color will be selected.
Next, click on the area of the image within the dialog box that you want to change. Next, move around the “hue” settings under “replacement” in the dialog box to change the color of the image. Keep changing the “fuzziness” settings until the color replacement tool is finding all of the color range you’re trying to change. This tool works best for colors that don’t have extreme gradients. Solid colors are a close color range will work best with this tool.
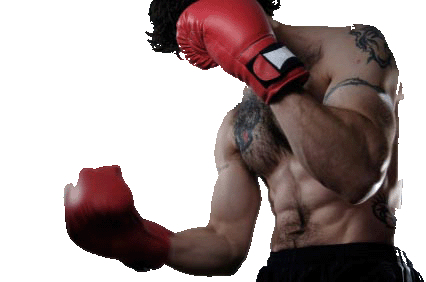
Extract
The extract tool is great for extracting elements which have fur or hair or other fine elements. Other tools will struggle with these areas but the extraction tool will be most effective with these tough areas.
Again, use the following pictures as your own examples to use in your photo editing software.
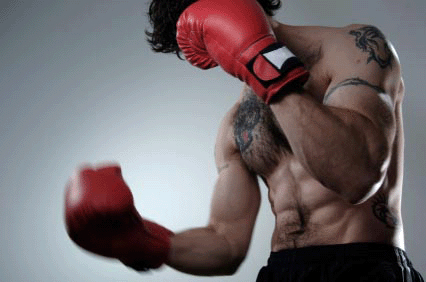
Load the following image in your photo editing software
Now click on “Filter” then “extract”. The extraction dialog box will appear. Set the brush size to about 11 and start drawing with the edge highlighter tool.
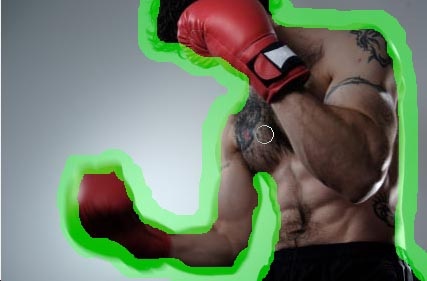
Now click the “fill tool” and fill in the area you want to extract
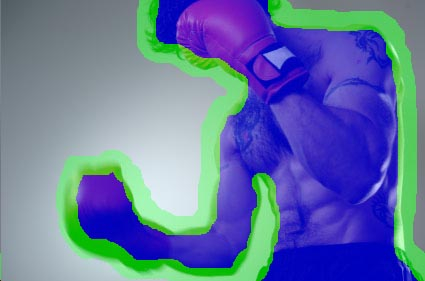
Now click “preview” to see the image and clean up the image if necessary. It is probably not necessary with this image so simply click “okay” to finish with the image.
Layer masks
Layer masks are very popular in most professional print magazines. Layer masks provide a great way to merge two or more images seamlessly into one. You will be using the masking tool in many of your future assignments, therefore our mission for your first assignment isn’t to show you the layer mask in its most advanced form. Instead we want to show you first how to use it in a basic manner.
Start by opening the following photo in Photoshop.
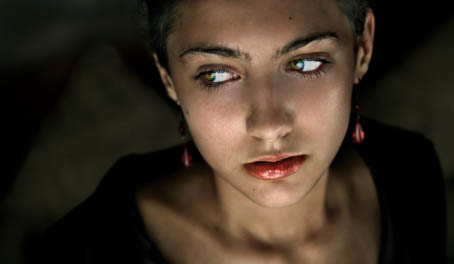
Now also open up the following photograph
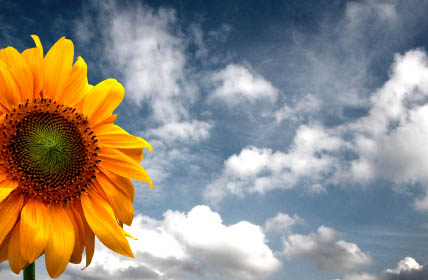
Now drag and drop the second photograph over the first.
Now click on the flower layer in your layers palette and then click the ‘add layer mask icon” at the bottom of the layers pallet.
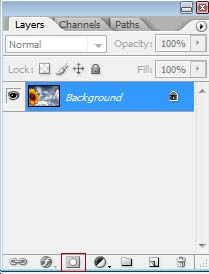
Now set your brush tool to paint with black with soft edges and then start painting over the area that you want to erase on your sunflower picture. In this example you want to start using your black brush to paint over much of the sky for the following results.
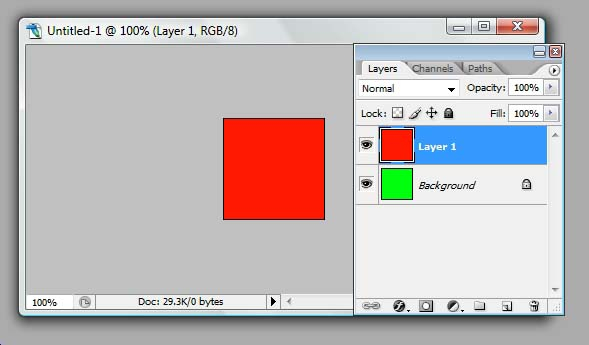
Now we want to simplify the process using basic colors and only two layers. First open up a new document. Create two layers on top of the background layer. Make the first layer green and the second layer (top layer) red.
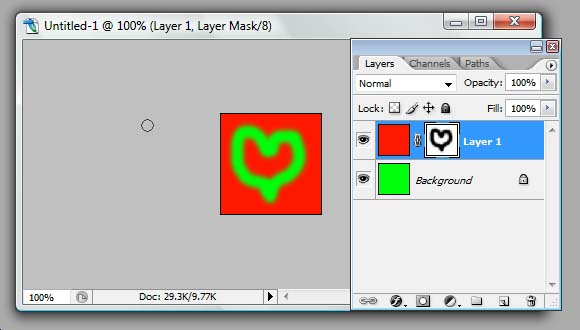
Now create a layer mask on the top layer. By default this new layer mask will look white. This is because a white layer mask does not hide any pixels. A white layer mask keeps the layer the same. This is important to remember. Now if you want to hide pixels and expose the layer underneath you need to paint with the color black. Pick a brush size, and start painting on the image. Notice how the red disappears and the green underneath becomes visible. If you made a mistake or you simply want to expose less of the under layers just paint with white to re-expose the top layer pixels.
- White keeps the layer’s pixels exposed.
- Black hides the layer’s pixels.
Your end result may look something like this.
Hue / Saturation
Next I want to talk to you about setting Hue / Saturation settings. First I want you to understand the definitions of each of these terms.
Hue: Hue is the aspect of color which is described as “red” or “yellow” etc. It is one of the three main attributes of perceived color. The other two are saturation and brightness.
Saturation: purity or strength of color, due to the absence of black, white or gray.
Brightness: Color brightness has to do with the amount of light added to a color.
Before you start using the hue / saturation tool I want to caution you with going overboard with it. Amateur photographers will often discover these tools and then overuse them so much that their photographs become unrealistic looking. This is fine if you are going for a surreal look, but if you’re looking for photographic enhancements then use this tool with extreme caution.
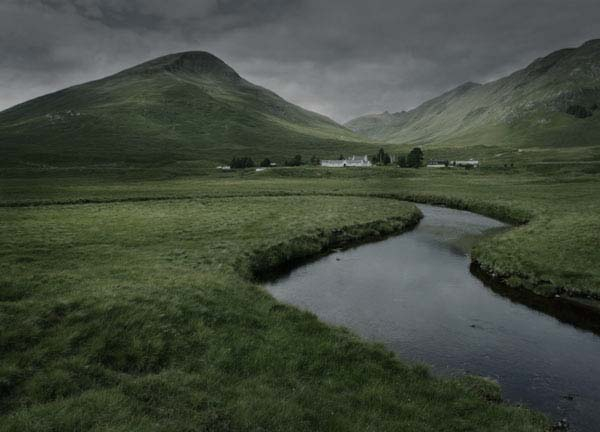
The purpose of the tool is to alter the vibrancy of the colors in the photograph. You can choose to either enhance dull colors or artificially dull bright colors. Both choices can have some interesting visual effects. Take a look at the following photograph for example.
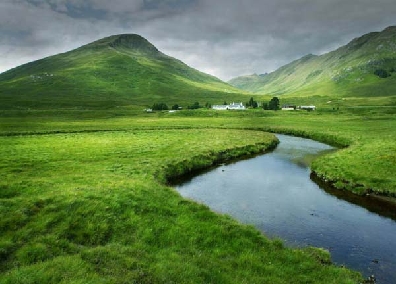
Notice how the colors are very vibrant. At this point in the course you should also be noticing other composition elements within each photograph. Notice the use of the winding “s” line in the river and the feeling that it evokes. Also notice the rule of thirds in use here with the mountains and land taking up two-thirds of the photograph. Likewise notice the leading line of the river which guides the eye into the photograph. These are just a few of the many photographic elements which have made their way into this picture.
One effect I really like to use is to slightly de-saturate photographs with vibrant colors. To edit the hue / saturation of the photograph simply go to “image – adjustment – hue / saturation” and the following dialog box will open up.
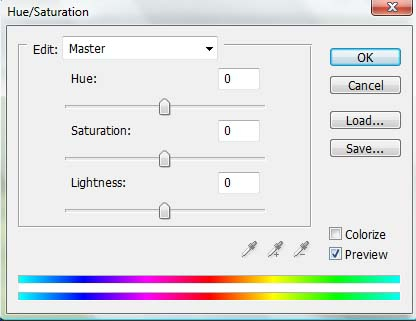
You can play with these settings to turn down or up any of the three controls in the dialog box. In the photograph above I chose to turn down the hue and saturation as well as slightly turn down the lightness for the following result.
However, the reverse can be done for photographs you take which lack vibrant colors.
The hue / saturation tool is also great for “colorizing photographs”. This adds a surreal look to your photographs but it’s a great way to add a large splash of color to your photograph. All you need to do to colorize your photograph is click the
“colorize” button (as seen in the dialog box above” and apply the color wash over the entire photograph.

Adjustment Layers
Now we’re going to learn about adjustment layers. These are great tools to help enhance your photographs. However, you must be careful not to overuse this tool as it can also cause your photographs to seem unrealistic or fake. That being said it is one of the best tools for enhancing photographs which need a little bit of work done to them. The “create a new fill or adjustment layer” tool can be found at the bottom of the layers pallet here.
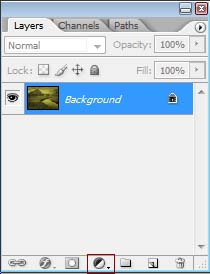
Once your photograph is opened click on the “create new fill or adjustment layer” button as shown above. You’ll be presented with a list of options. You can spend a full week in this area just playing around with all the different combinations. We’re going to show you how to use a couple of these tools.
I’ve opened up the following photograph.
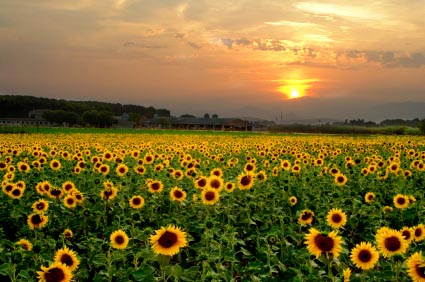
Now I’ve clicked on “create new fill or adjustment layer” and then I picked the “photo filter option”. When the dialog box opens up I picked a “cooling filter” and then I altered the density to cause my otherwise “warm” photograph to take on a slight more “cool” look. The result is below.
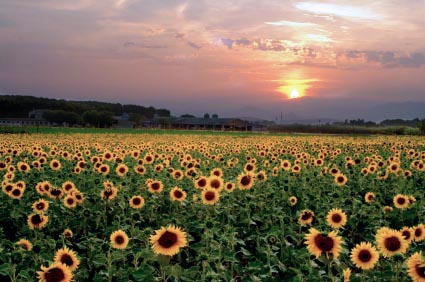
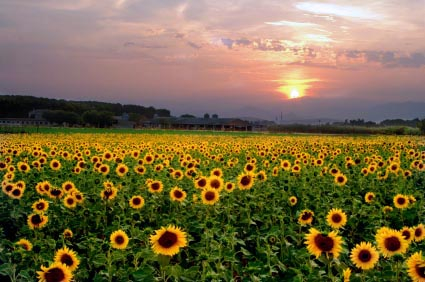
Notice how the photograph looks slightly more “cool”. However, I’m not ready to stop here. By making this photograph “cooler” I also dulled the saturation and color vibrancy of the flowers. Now I want to turn the color of the sunflowers back up. Each time you create a new “adjustment layer” it automatically comes with a layer mask.
Therefore all I need to do is use the black paint tool and paint over the sunflowers with a black paintbrush to bring back out the vibrant yellow and green colors without changing the cooled effect in the sky. The result is below.
Liquefy tool
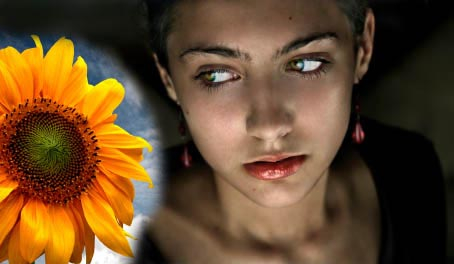
The liquefy tool is another very powerful tool within Photoshop. The liquefy tool can be found by going to “filters – liquefy”. It’s an image manipulation tool that lets you add shape to a photograph. Take a look at the following photograph for example.
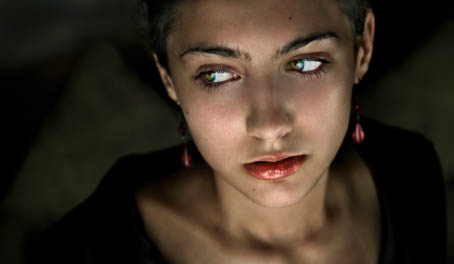
Notice how in this photograph the female model isn’t smiling. However, using the liquefy tool you can add a smile to the girls face by simply manipulating and dragging her lips up into a smile. To do this click “filter – liquefy” and then use the curser to drag her lips up slightly. The results are below. It’s really that simple.
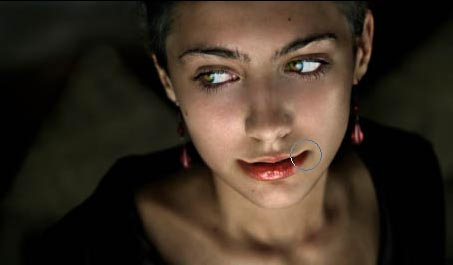
This tool is a great tool for making abstract or overly animated photographs as well. Using the same photograph and the liquefy filter I was able to stretch the models face in the following manner to create an even more exaggerated look. Notice the stretched ears, large eyes and nose. All of this was done is just seconds using the liquefy tool.
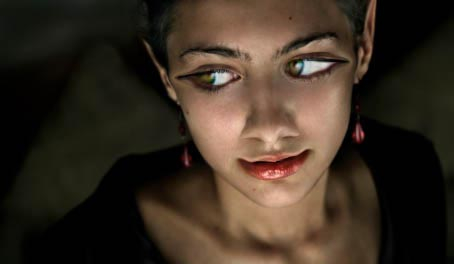
See if you can do this.
You’ve learnt all of the tools in this class to be able to do the following picture of yourself.
