Author: Duncan Rawlinson

Apocalyptic Orange Skies: How Forest Fires Unexpectedly Unveiled the Intricacies of Camera White Balance

Apocalyptic Orange Skies: How Forest Fires Unexpectedly Unveiled the Intricacies of Camera White Balance

White balance is a feature in cameras that adjusts the colors in a photograph so that they look natural to the human eye. It does this by compensating for the color of the light in the environment. Different light sources—such as sunlight, fluorescent lights, or incandescent bulbs—emit different color temperatures, which can cause the colors in a photograph to look different than they do in real life.

For example, if you take a photograph in the shade, the light is actually quite blue, so the camera adds warmth (yellow and red tones) to balance out the blue and make the photograph look natural. Similarly, if you take a photo under tungsten light, which is quite yellow, the camera will add blue to the image to neutralize the yellow and make the image look more natural.

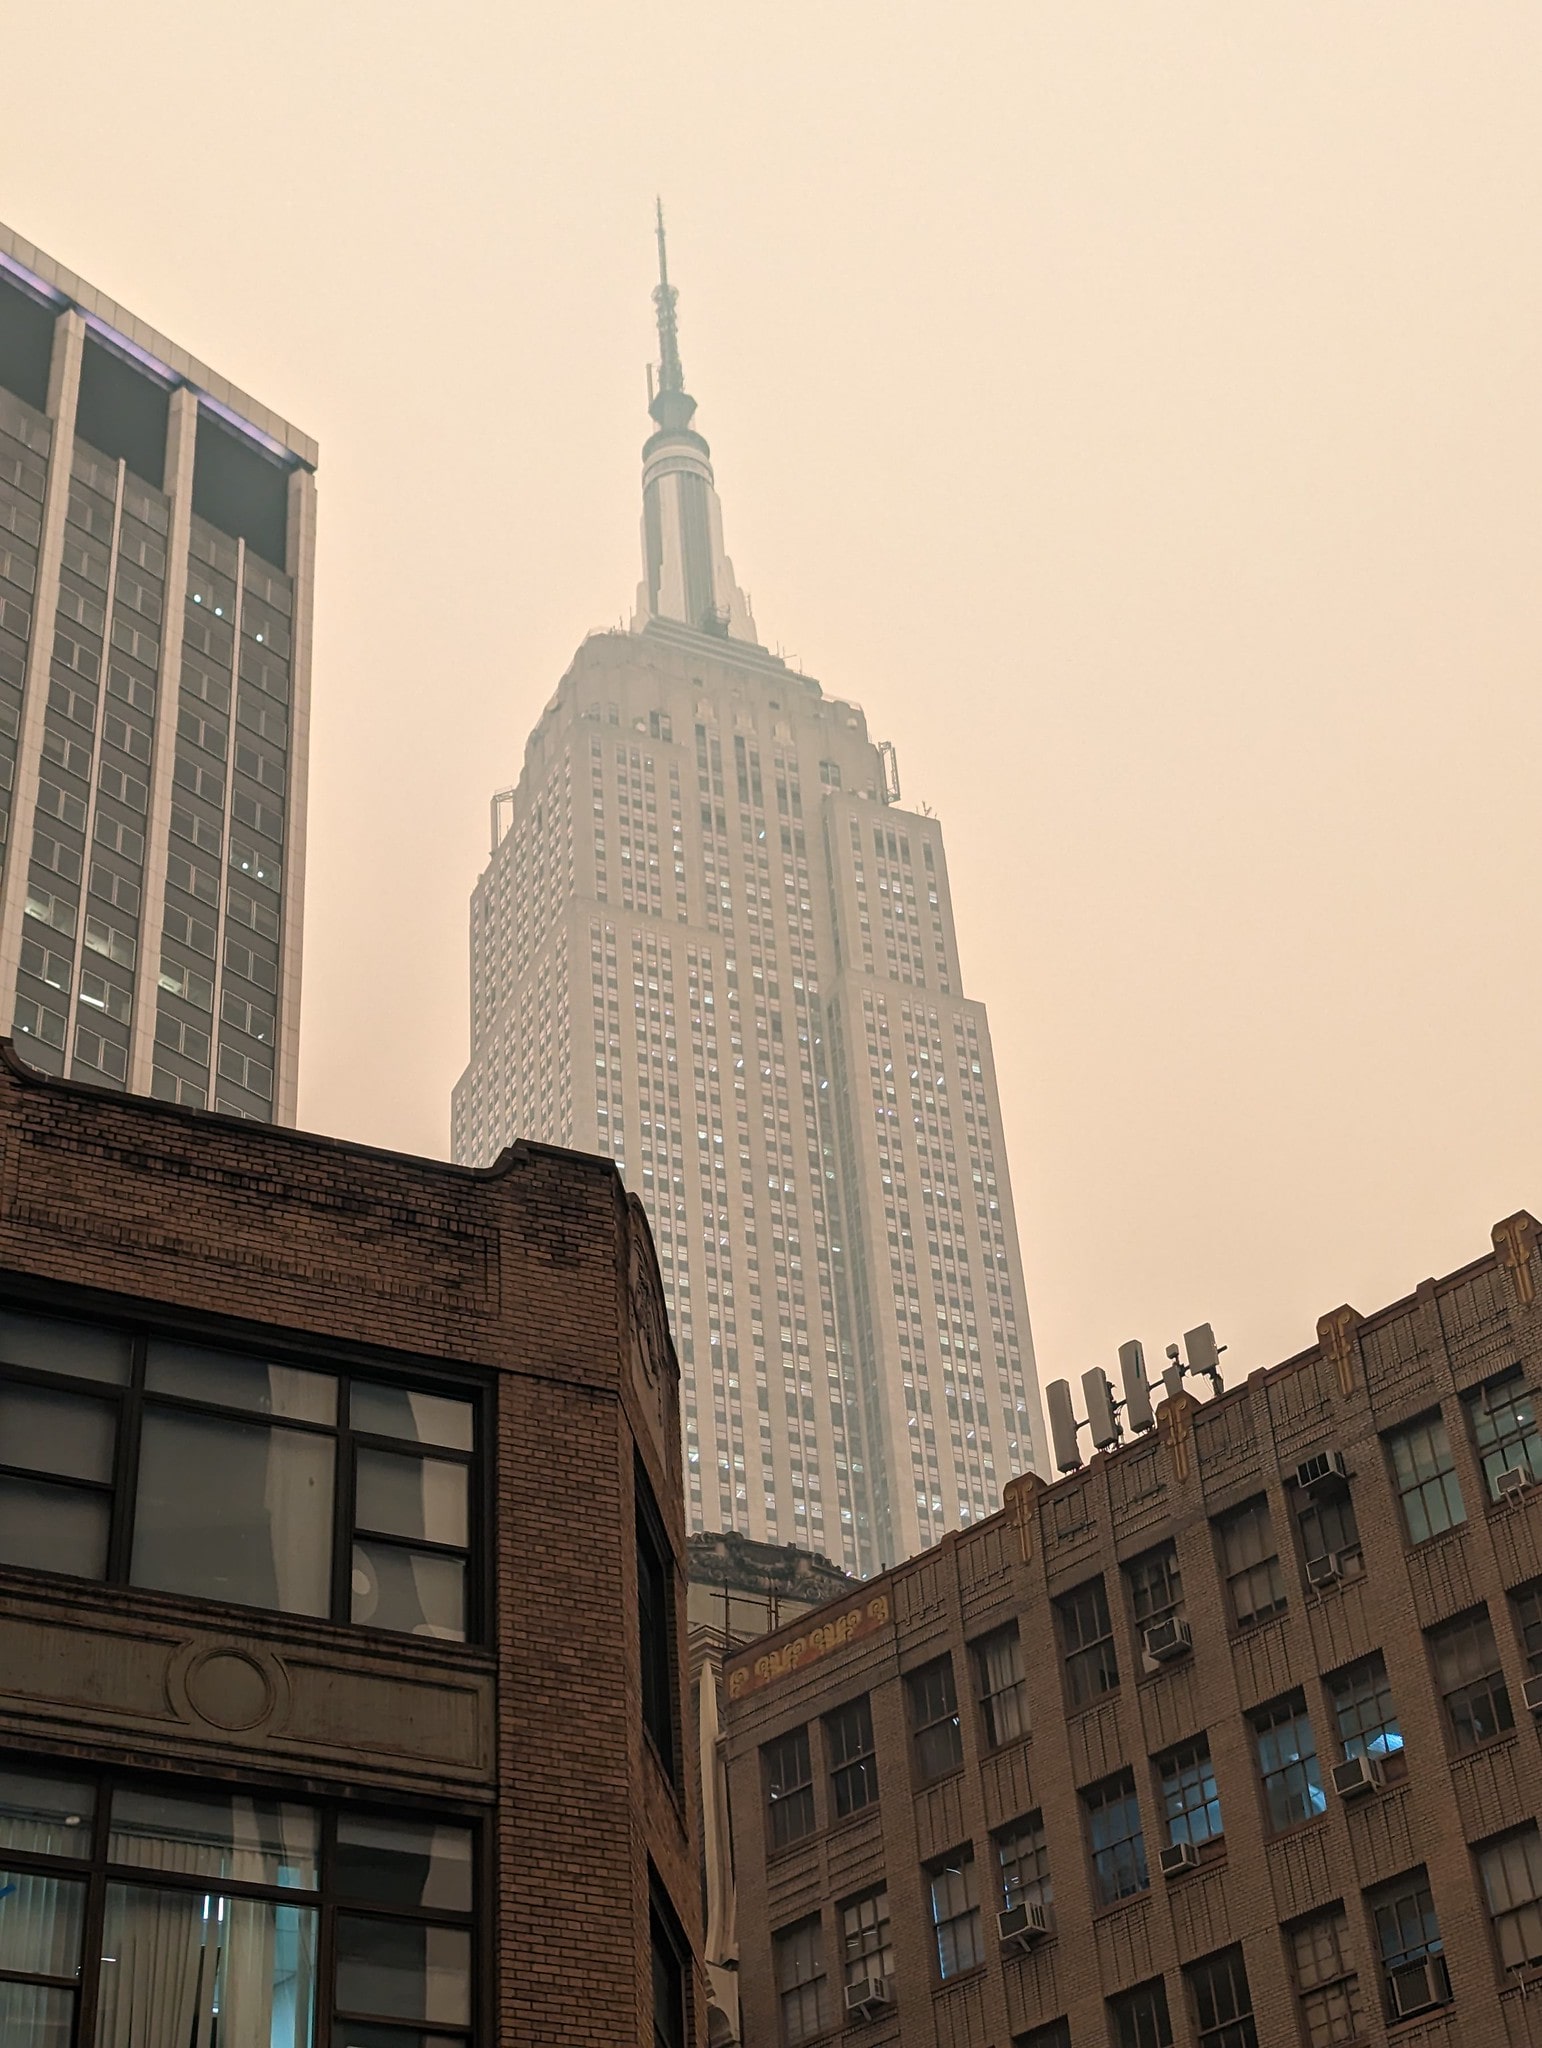
Here's where the irony comes in with the orange smoke from forest fires. The camera's automatic white balance is designed to correct for color casts in the light. But when the whole sky is filled with orange smoke, the camera interprets that as the light source itself being extremely warm (orange). In an attempt to compensate for what it perceives as overly warm light, it adds a lot of cool tones (blues and greens) to the image.

So instead of capturing the sky as it looks to our eyes—as orange—the camera might make the sky look white or even slightly cool-toned. It's trying to balance out the color of the light, but in this case, the color of the light isn't the problem; the color of the light is accurately representing the unusual environmental conditions.

This situation inadvertently educates people about white balance because they can see the camera struggling to interpret the scene accurately and trying to correct for a color cast that isn't really a color cast. It's a stark reminder that while automatic white balance can be incredibly helpful, it's not infallible and doesn't always interpret the scene the way a human would. Sometimes manual adjustment or post-processing is necessary to get the colors in a photograph to look the way we see them with our eyes.

Photo by Eden, Janine and Jim

Adobe Lightroom Classic 12.3 Update: Enhance Your Images with AI-Powered Denoise, New Masking Features, and More

Adobe has released a major update to Lightroom Classic in April 2023, version 12.3. This update introduces several new features and enhancements that make editing and managing your photos more efficient and powerful.

AI-Powered Denoise

One of the standout features in this release is the AI-powered Denoise tool, which efficiently removes noise from Bayer or X-Trans RAW images while preserving finer details. Users can access the Denoise tool from the Detail panel or the Enhance menu. The Denoise tool features an intensity slider to control the amount of noise reduction, and users can preview changes before processing the image. The enhanced image is saved as a new DNG file with an "Enhance-NR" badge for easy identification.

New Masking Features

The update also brings new masking features that allow users to automatically select facial hair, clothes, and more with the People mask. Additionally, Lightroom Classic now supports Curve in masking, allowing users to make precise local adjustments without affecting the rest of the image. Users can create and edit masks in the Develop module, making local adjustments with the Curve tool and local Histogram.

Quickly Identify Tools Used in Editing

In the Develop module, eye indicators have been added to all Edit panels, Healing, Redeye, and Masking tools. This makes it easy to track edits and tools used to quickly edit an image. Users can press and hold the eye indicator to temporarily hide the settings of a particular panel, instantly viewing changes made to an image. Holding the Alt or Option key reveals panel switches, allowing users to turn off or reset edits within panels.

Edit in Photoshop

The update also makes it easier to edit Lightroom Classic photos in Adobe Photoshop. Users can choose the version of Photoshop they want to use and open photos as Smart Objects or Smart Object Layers. Lightroom Classic automatically imports new photos saved in Photoshop into its catalog.

Support for New Cameras and Lenses

Lightroom Classic 12.3 adds support for new cameras and lenses, with full lists of supported profiles available in the Supported Camera Models and Supported Lens Profiles articles.

Other Enhancements

Additional improvements include enhanced scrolling performance in the Library module, mask names added to History steps when mask settings are changed, new Adaptive Presets for the Adaptive: Portrait group, and an updated embedded browser framework for Map and Web modules.

The April 2023 release of Lightroom Classic (version 12.3) brings powerful new features and enhancements, allowing users to make more precise edits, manage their images more efficiently, and seamlessly integrate with Adobe Photoshop.

Dreamy Snowstorm Photo Locations for Winter Wonders


Winter SnowStorm Photo by Duncan Rawlinson

Snowstorms can be a beautiful and unique time for photography. Here are some ideas for locations to make photos during and after a snowstorm:

City streets: The snow can add a magical, almost fairytale-like quality to city streets. Try capturing the snowfall against the backdrop of buildings, streetlights, and other city features.

Parks and forests: Snow-covered trees and landscapes can make for stunning photos. Try capturing the delicate, snowy branches of trees or the blanket of snow on the forest floor.

Winter sports: Snowstorms can provide the perfect opportunity to capture the excitement and action of winter sports like skiing, ice skating, and snowboarding. Try using a fast shutter speed to freeze the action in your photos.

Some potential themes and techniques to consider when shooting in snowstorms include:

Contrast: The bright white of the snow against darker colors can create striking contrast in your photos. Try including elements like black cars or dark-colored buildings in your shots to create contrast.

Movement: Snowstorms can be a great time to experiment with capturing movement in your photos. Try using a slow shutter speed to blur the snowfall, or use panning techniques to capture the motion of a skier or snowboarder.

Minimalism: The simplicity and purity of a snowy landscape can lend itself well to minimalistic compositions. Try using a wide-angle lens to capture the vastness of the snow-covered terrain, and focus on clean, uncluttered compositions.

Reflections: Snow can create beautiful reflections in water. Try finding a frozen pond or lake and capturing the reflections of the snow-covered trees and sky in the ice.

Details: The delicate patterns and textures of snowflakes can make for fascinating close-up shots. Try using a macro lens to capture the intricate details of snowflakes, snow-covered leaves, or other small snow-covered objects.

Warmth: Snowstorms can also be a great time to capture the warmth and coziness of indoor spaces. Try shooting photos of people sitting by a fire, sipping hot cocoa, or enjoying other winter activities inside.

Snowstorms can provide a wealth of photographic opportunities. Whether you're shooting in the city, in nature, or at a winter sports event, the snow can add a unique and beautiful element to your photos. By experimenting with themes and techniques like contrast, movement, and reflections, you can create truly stunning and memorable images.

10 Secrets for Taking Stunning Landscape Photos Like a Pro

As a photographer, capturing stunning landscape photos can be both rewarding and challenging. From majestic mountains and cascading waterfalls to peaceful forests and expansive oceans, there are endless possibilities for beautiful landscape photography. However, capturing these scenes in a way that truly captures their beauty and majesty can be a daunting task.

To help you take breathtaking landscape photos, here are 10 expert tips:

Plan ahead: Before heading out to shoot a landscape, do some research and planning to ensure that you are in the right place at the right time. This can include checking the weather forecast, scouting locations in advance, and familiarizing yourself with the best times of day to shoot.

Use a tripod: To capture sharp and detailed landscape photos, it is essential to use a sturdy tripod. This will allow you to use longer exposure times without blurring the image, and will also provide added stability for shooting in challenging conditions.

Use a wide-angle lens: Landscape photography often involves capturing expansive vistas, and a wide-angle lens is essential for doing this effectively. A lens with a focal length of 24-35mm is a good starting point, but a wider lens can be even more effective for capturing sweeping landscapes.

Include a foreground element: To add depth and interest to your landscape photos, include a foreground element such as a tree, rock, or other natural feature. This can help to anchor the photo and give the viewer a sense of scale.

Experiment with different compositions: Rather than simply pointing your camera at the landscape and snapping a photo, try experimenting with different compositions to add interest and variety to your shots. This can include using leading lines, framing elements, or other compositional techniques to draw the viewer's eye into the photo.

Use filters: Filters can be a useful tool for landscape photography, allowing you to control the amount of light entering the lens and to create unique effects. Neutral density filters can help to reduce the amount of light entering the lens, allowing you to use longer exposure times, while polarizing filters can reduce glare and enhance colors.

Pay attention to the light: The quality of light is a critical factor in landscape photography, and can greatly affect the mood and atmosphere of your photos. Early morning and late afternoon light is often considered the most flattering for landscapes, but don't be afraid to experiment with different lighting conditions to see what works best for your subject.

Shoot in raw format: To maximize the amount of detail and tonal range in your landscape photos, shoot in raw format rather than JPEG. This will allow you to capture a wider range of colors and tones, and will give you more flexibility in post-processing to fine-tune the exposure and colors.

Edit your photos: While it's important to get the shot right in camera, editing your landscape photos can help to bring out their full potential. This can include adjusting the exposure, color, contrast, and other image parameters to create a more polished and professional-looking image.

Try black and white: While color is often an important aspect of landscape photography, don't be afraid to try shooting in black and white. This can create a timeless and classic look, and can also help to emphasize texture and form in the landscape.
In addition to these tips, there are many other topics to explore in the world of landscape photography. Some ideas for further exploration include:

Using panoramic photography to capture expansive vistas
Experimenting with long exposure photography to create dreamy, surreal effects
Shooting landscapes at night to capture the beauty of the stars and the moon
Capturing the changing seasons in the landscape
Using aerial photography to capture a unique perspective on the landscape

By following these tips and exploring these and other topics, you can take stunning landscape photos that will impress and inspire. Happy shooting!