Mobile photography is photography with the camera in your phone, and the fundamentals are the same as with any camera: good light, clear composition, a sharp subject and a light touch in editing. What differs is the tool. A phone has a tiny sensor, fixed apertures, several lenses and a great deal of automatic processing, so taking better phone photos means knowing what the phone decides for you, which of those decisions to take back, and how to work around its limits.
This guide covers the fundamentals in the order they matter: the habits that fix most phone photos, composition, light, the controls worth learning, the phone’s lenses and modes, editing, and the situations where a phone struggles.
A phone is also a good place to learn photography itself. It is always with you, it handles the technical side well enough that you can concentrate on seeing, and everything you learn about light, composition and timing carries straight over to any camera you pick up later. For those ideas without any particular device in mind, photography basics explains light, exposure, focus and composition in plain terms.
Ten Habits That Fix Most Phone Photos
- Wipe the lens. A phone lens lives in a pocket and picks up fingerprints constantly. A smudge causes haze, soft detail and smeared flare around lights. Wipe it with a soft cloth before you shoot.
- Turn on the grid. The grid overlay in the camera settings helps you level horizons and place subjects off center.
- Tap to focus on your subject instead of trusting the phone to guess.
- Adjust brightness before you shoot. After tapping, drag the exposure slider up or down. In bright scenes, pulling it down a little saves skies and highlights that would otherwise turn white.
- Move closer instead of zooming. Pinch zoom beyond the phone’s lens steps is a crop that throws away detail.
- Put the light on your subject. Turn your subject toward the light, or have it come from one side, and the phone has an easy exposure to make.
- Hold the phone steady. Use two hands, tuck your elbows in and press the shutter gently, or use the volume button or a short timer.
- Change your height. Most phone photos are taken from standing eye level, the least interesting viewpoint. Crouch, or hold the phone high.
- Take several frames. Burst mode or a few quick shots give you a choice of expression and timing.
- Edit a little. Straighten, crop and adjust brightness; skip heavy filters.
Composition: The Same Rules on Any Camera
Composition costs nothing and has the largest effect on whether a photo works. A well-composed phone photo beats a careless one from an expensive camera every time.
The Rule of Thirds and the Grid
The rule of thirds divides the frame into a three by three grid. Placing your subject on one of the lines, or where two lines cross, usually feels more dynamic than dead center. Put a person’s eyes on the top line, put the horizon on the top or bottom line rather than through the middle, and leave space in front of a subject that is moving or looking across the frame. Leave the grid on and you will start composing this way without thinking.
Leading Lines, Framing and Layers
Roads, fences, shorelines, shadows and railings make leading lines that pull the eye into the picture. A phone’s wide main lens exaggerates them nicely when you get low and close to where they start. Doorways, windows and branches make natural frames around a subject, and placing something in the foreground, the subject in the middle and a background behind gives a flat screen a sense of depth. More in foreground interest.
Keep It Simple
The most common composition problem is too much in the frame. Decide what the picture is about, then move closer, change your angle or wait for distractions to leave until everything in the frame supports that subject. Check the edges of the screen before you press the shutter; that is where stray trash cans, poles and elbows hide. Then look behind the subject: a pole growing out of a head or a bright sign beside a face is easy to miss while you watch the subject, and a step to one side or a lower angle usually clears it. A phone’s wide main lens takes in a lot of background, which is one more reason to move closer.
Angle and Height
Shoot from low down to make a subject look larger or to show interesting ground. Shoot straight down for food, flat lays and patterns. Get down to eye level with children and pets rather than looking down at them. A phone is small enough to put almost anywhere, which is one of its real advantages: on the ground, against a window, inside a flower bed.
Light Matters More on a Phone
Small sensors struggle in difficult light, so good light makes a bigger difference to a phone than to a large camera. Learning to see light is the single biggest step toward better phone photos.
- Golden hour. The hour or so after sunrise and before sunset gives warm, low, directional light that is bright enough for clean files. Phones do some of their best work here.
- Overcast days. Cloud spreads the light evenly with soft shadows, which flatters faces, flowers and products.
- Open shade. At midday, move your subject into the shadow of a building or under a tree, facing the bright open sky. The light becomes soft and even, and you avoid squinting and dark eye sockets.
- Window light. Indoors, put your subject beside a window and turn off mixed room lights. It is one of the best portrait lights there is. More in natural light photography.
- Backlight. With the sun behind your subject you get rim light or a silhouette. Tap on the bright background and lower the exposure for a silhouette, or tap on the face and raise it for a bright, airy look.
Avoid the phone’s built-in flash when you can. It sits right next to the lens and gives flat, harsh light, red eyes and a dark background. Move toward a light source, or ask someone to light your subject with a second phone’s flashlight from the side.
The Controls Worth Learning
Auto mode handles most scenes well. These few controls fix the cases where it guesses wrong.
Focus and Exposure Lock
Tapping the screen sets focus and exposure on that spot. On most phones a long press locks both, often shown as an AE/AF lock label, so the phone stops readjusting while you recompose or wait for a moment. Lock on your subject, then frame the picture the way you want.
Exposure Compensation
The brightness slider that appears after you tap is exposure compensation. Pull it down for bright scenes, sunsets and anything with a white sky; detail lost to pure white cannot be recovered, while slightly dark shadows usually can. Raise it for snow and bright beaches, which the phone tends to make gray.
Judge brightness with care. Phone screens are usually much brighter than computer monitors and prints, so a photo that looks right on the phone often looks too bright everywhere else. Exposing a touch darker than looks right on screen protects the highlights, and the shadows are easy to lift later.
Pro or Manual Mode
Many phones offer a pro or manual mode with direct control of the settings auto mode chooses for you:
- Shutter speed: fast to freeze motion such as a splash or a running dog, slow (with the phone braced or on a tripod) to blur water or traffic.
- ISO: keep it low in good light for clean files. Raise it only as far as you need in dim light; a little noise is better than a blurred photo.
- White balance: set it to keep golden hour light warm instead of letting the phone neutralize it, or to remove a cast from indoor lighting.
- Manual focus: useful for close-ups and for scenes where autofocus keeps hunting.
Almost all phone lenses have a fixed aperture, so pro mode does not change depth of field; background blur comes from getting close to your subject or from portrait mode.
Which settings are worth changing? Best phone camera settings covers what the phone controls automatically, the settings that matter most and pro mode.
RAW Capture
Many phones can save RAW files, usually in the DNG format, from pro mode or a setting in the camera menu. RAW keeps far more data than the JPEG or HEIF the phone normally saves, so you can recover bright skies, open shadows and correct white balance without damaging the file. The trade-offs are much larger files and the need to edit every photo. Shoot RAW for scenes you plan to edit carefully, and the phone’s processed files for everyday photos. More in the mobile RAW workflow.
For those everyday files, most phones offer a choice between HEIF (sometimes labeled high efficiency) and JPEG (often labeled most compatible). HEIF holds the same picture in a smaller file and can store more tonal detail, so it is the better default unless you regularly send photos to software or people that cannot open it.
Understanding Your Phone Camera
The Small Sensor
A phone’s sensor is a small fraction of the size of the sensor in a dedicated camera. That has three consequences:
- More noise in low light. Less light reaches each pixel, so dim scenes show more noise. Phones compensate by merging many frames and applying noise reduction, which helps but can make detail look smeared or painted.
- Deep depth of field. Most of the scene is sharp from front to back, which suits landscapes and street scenes but makes natural background blur, or bokeh, hard to get.
- Less dynamic range. A single frame holds less of the range from shadow to highlight. Phones work around this by merging several exposures automatically, which is why a bright sky and a dark foreground often both look fine, until something in the scene moves.
Work with these limits: shoot in good light, avoid extreme contrast when you can, and use the deep focus to your advantage.
Multiple Lenses and Zoom
Most phones have two or three cameras, labeled by zoom step: an ultra-wide (around 0.5x), the main wide camera (1x) and often a telephoto (2x, 3x or more).
- Main camera (1x): usually the largest sensor and the best image quality, especially in low light. Use it for most photos.
- Ultra-wide (0.5x): for interiors, architecture, big landscapes and dramatic close perspectives. It stretches anything near the frame edges, so keep faces out of the corners.
- Telephoto: for portraits and distant subjects. It flatters faces because it lets you stand back; the wide main camera, held close to a face, enlarges the nose and shrinks the ears. In dim light some phones quietly switch to a cropped main camera instead of the telephoto, which lowers quality.
Switching between the marked lens steps uses separate optics and keeps quality high. Zooming between or beyond them is digital zoom, a crop and enlargement that softens detail more the further you go. When you need more reach, walk closer first.
Computational Modes
- Portrait mode estimates depth and blurs the background in software. It works best with a clear gap between the subject and a simple background. Check the edges of hair, glasses and hands, where the blur often goes wrong.
- Night mode merges many frames over one to several seconds. Hold still until it finishes, or brace the phone against something solid.
- HDR merges exposures to keep detail in both sky and shadow; most phones do it automatically. See what HDR is and when to use it.
- Panorama stitches a sweep into one wide image. Rotate the phone around its own position rather than your body and move slowly and level. More in panorama photography.
- Burst and live photos capture a run of frames so you can pick the best moment of action or expression.
- Macro mode, on phones that have one, lets you focus very close for small subjects. See smartphone macro photography.
Wondering how a phone fakes a blurred background? Portrait mode explained covers why phones cannot make real bokeh naturally and how portrait mode creates computational bokeh.
Mobile Photography by Subject
Portraits
Put your subject near a window or in open shade, use the telephoto or the 2x step, and tap on the nearer eye. Position the light so it puts a small bright catchlight in the eyes. Talk to your subject and give simple directions, and take plenty of frames to catch a natural expression. Background blur comes from portrait mode or from putting distance between the subject and the background. More in portrait photography.
- Stand back. The wide main lens held close to a face makes the nose larger and the face wider. If your phone has only one lens, step back and crop later rather than moving in.
- Window light at an angle. Turn the subject so the window is about 45 degrees to one side of their face. A window directly behind them makes a silhouette; a window directly behind you gives flat, shadowless light.
- Eyes to the lens. People tend to look at the screen. Point out where the lens is so their gaze meets the viewer.
- Set up for portrait mode. It works best with the subject a few feet from the phone and plenty of space behind them. Wispy hair, glasses and glass objects are where its edges fail, so check them before you move on.
Landscapes and Travel
Include something in the foreground, a rock, a path, flowers, to give depth and scale. Use the ultra-wide for big views and the telephoto to pick out distant layers of hills. Lower the exposure slider at sunrise and sunset to keep the color in the sky, and use panorama mode for wide vistas.
Street and Everyday Moments
A phone draws far less attention than a camera with a large lens, which makes it well suited to street photography and candid moments. Open the camera from the lock screen, prefocus by tapping where action will happen, and be ready.
- Lock before the moment. Press and hold on the spot where you expect someone to walk, so focus and exposure are locked and the phone does not hunt for focus when the moment comes.
- Shoot from waist height. Holding the phone low without raising it to your eye keeps you inconspicuous. Framing is hit and miss at first, so take several frames and level the horizon later.
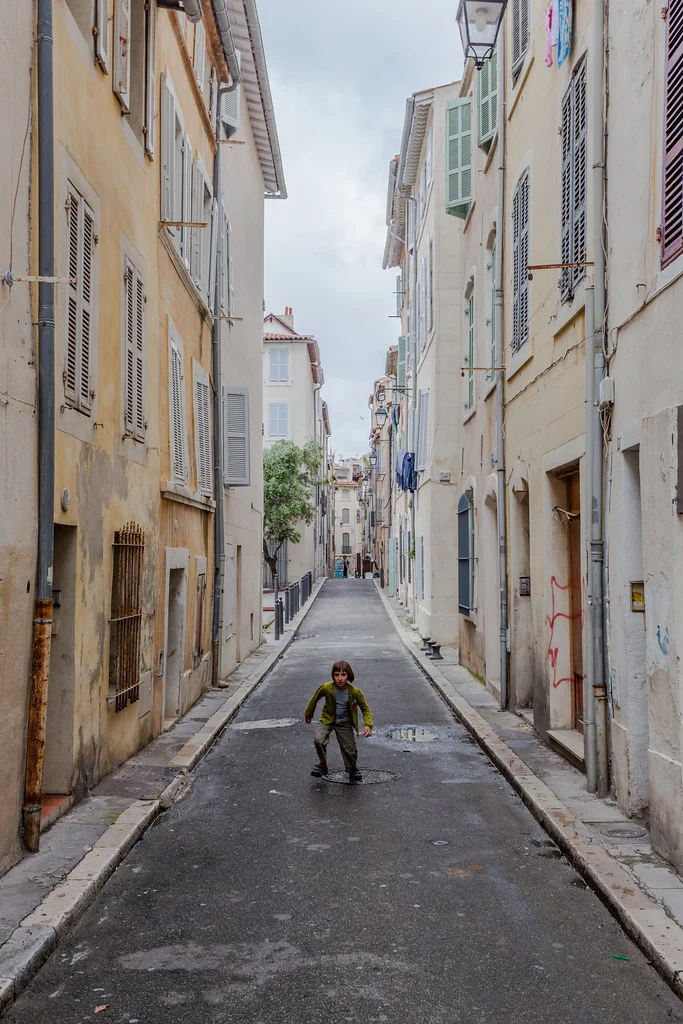
- Use the city’s light. Hard sun makes deep shadows and bright patches that turn streets into strong shapes. Doorways, arches and windows make frames, and reflections in glass and puddles add a second layer.
Night and Low Light
Brace the phone on a wall, railing or small tripod, let night mode finish, and move toward light rather than relying entirely on processing. Night mode merges frames over a second or more, so a moving subject blurs or ghosts; for a person or pet that will not keep still, a shorter capture with some noise is often the better trade. Street lamps, lit windows, signs and candles all give you something to put on a subject. For moving lights and silky water, some phones offer a long-exposure mode that blends frames. Accept that very dark scenes will be soft and noisy, and concentrate on the moment.
Shooting after dark? Night photography with a smartphone covers how night mode works and techniques for sharper night photos.
Bright, High-Contrast Scenes
A bright sky over a dark foreground, or a person in front of a sunlit window, can hold more contrast than even the phone’s automatic HDR can merge. Choose instead of hoping: tap the bright area or pull the slider down to keep the highlights, and lift the shadows when you edit; move the subject, or yourself, so the light is more even; bounce light into the shadows with a white card or wall; or let it go dark and make a deliberate silhouette.
Action and Moving Subjects
Phones choose slower shutter speeds as light falls, and a slow shutter blurs anything that moves, so action is easiest outdoors in good light. Use burst mode and pick the best frame afterward, or keep motion photos on, which lets you choose a different frame from the short clip later to rescue a blink or a missed moment. More in photographing moving subjects.
Close-Ups
Phones focus very close, and any movement at that distance is magnified, so rest your hands on something solid and take several frames, because a tiny shift moves the point of focus. For flat subjects such as a leaf, fabric or text, hold the phone parallel to the surface so all of it falls in the sharp zone.
Editing on Your Phone
You can shoot, edit and share without a computer. The built-in editor or any capable editing app covers everything below. A simple order of work:
- Straighten and crop. Level the horizon and trim distractions from the edges.
- Exposure and contrast. Set overall brightness, then add contrast if the image looks flat.
- Highlights and shadows. Pull down bright skies and lift dark areas. RAW files give much more room here.
- White balance. Warm up photos taken in shade and cool down those taken under warm indoor bulbs.
- Color. Vibrance raises muted colors and protects skin and already strong colors better than saturation does.
- Selective adjustments. Brighten a face or darken a distracting background with a brush or gradient. See the mobile masking guide.
- Light sharpening and noise reduction. Too much of either creates halos or plastic-looking skin.
Edit to enhance what was there, not to transform it. If an edit looks like a filter, it has usually gone too far. Edit at a medium screen brightness; at full brightness your photos will look too dark on other screens. Filters are fine as a starting point, at reduced strength.
Accessories Worth Having
- A small tripod or clamp mount for night shots, long exposures, time-lapses and self-portraits. See how to use a tripod.
- A remote shutter or the timer to avoid shaking the phone when you press the button.
- A microfiber cloth to keep the lens clean.
- A small LED light for portraits, food and products indoors.
- A grip or strap for steadier one-handed shooting.
- Clip-on lenses add macro or other effects, but quality varies widely; cheap ones soften the image, and many phones already have good built-in wide and macro options.
Where Phones Struggle
Knowing the limits helps you decide when a phone is enough and when a dedicated camera is the better tool.
- Fast action and distant subjects. Sports and wildlife need long lenses and fast, tracking autofocus. Digital zoom degrades quickly.
- Very low light. Night modes are impressive but still noisier and softer than a larger sensor.
- Natural shallow depth of field. Portrait mode imitates it, with errors around complex edges.
- Large prints. A 12 megapixel phone file is about 4000 by 3000 pixels, enough for a sharp print of about 10 by 13 inches at 300 pixels per inch, and larger prints viewed from farther away. Higher resolution modes help in good light.
Phones beat dedicated cameras in other ways: you always have one with you, they are discreet, they focus very close, they switch instantly between stills and video, and sharing is immediate.
Deciding which to carry? Smartphone vs camera compares image quality, creative control, convenience and speed.
Common Mistakes
- A dirty lens, the cause of many hazy, glowing photos.
- Pinch zooming past the lens steps instead of walking closer.
- Letting the phone pick the focus point in a scene with several possible subjects.
- Blown-out skies from never touching the exposure slider.
- Using the flash as the main light indoors.
- Ultra-wide portraits from close up, which distort faces.
- Heavy filters and oversaturation that date a photo quickly.
- Tilted horizons, easily fixed with the grid or a crop.
Try This
Pick one subject near a window, a plant, a mug or a person. Take four photos in ten minutes: one with auto settings from standing height, one after tapping to focus and lowering the exposure slider a little, one from a much lower angle with the subject on a grid intersection, and one at the 2x or telephoto step from farther back. Compare them side by side. The difference between the first and the last usually shows how much of a good phone photo is technique rather than the phone.
To keep going after that, give yourself constraints. Spend a week shooting only in black and white with the camera’s mono filter, which makes you see light and shape instead of color; another on texture and pattern; another only from low angles. Or take a photograph you admire, work out the time of day, where the light came from and how close the photographer stood, and try to make your own version. Then pick only your best frame from each session to show someone whose eye you trust.
Frequently Asked Questions
What are the fundamentals of mobile photography?
Clean the lens, compose deliberately with the grid, find good light, tap to set focus and adjust brightness, hold the phone steady and edit lightly. Everything else, from pro mode to RAW, builds on those habits.
Is phone photography real photography?
Yes. Photography is seeing, composing, timing and light, and the camera is a tool. Many widely seen photographs have been made on phones, and the same principles apply whatever device you use.
How do I make my phone photos look more professional?
Shoot in good light, simplify the frame, use the telephoto step for portraits, keep horizons level and edit with restraint. Consistency across a set of photos, in color and tone, also makes work look more considered.
Should I shoot RAW on my phone?
Shoot RAW when you plan to edit a photo carefully, especially in high-contrast or mixed light, because it gives much more room to recover highlights and shadows. For quick sharing, the phone’s processed files are fine.
Why are my phone photos blurry?
The usual causes are a smudged lens, camera shake in dim light, the phone focusing on the wrong thing and digital zoom. Wipe the lens, brace the phone, tap on your subject and move closer instead of zooming.
Does it matter which phone I use?
Less than most people think. The gap between current phones is smaller than the gap between a practiced and an unpracticed photographer using the same phone. Learn the technique on the phone you have before upgrading, and use the built-in camera app first, since it is tuned to the phone’s own processing; a third-party app is worth adding only when you want fuller manual control.
Can I print phone photos?
Yes. Phone photos taken in good light print well at moderate sizes, and larger when the print will be viewed from a distance. Prepare the file with sensible sharpening and the right color space for the printer.
How do you get a phone photo ready to print? Preparing photos for print covers resolution, color spaces for print, soft proofing and sharpening for print.