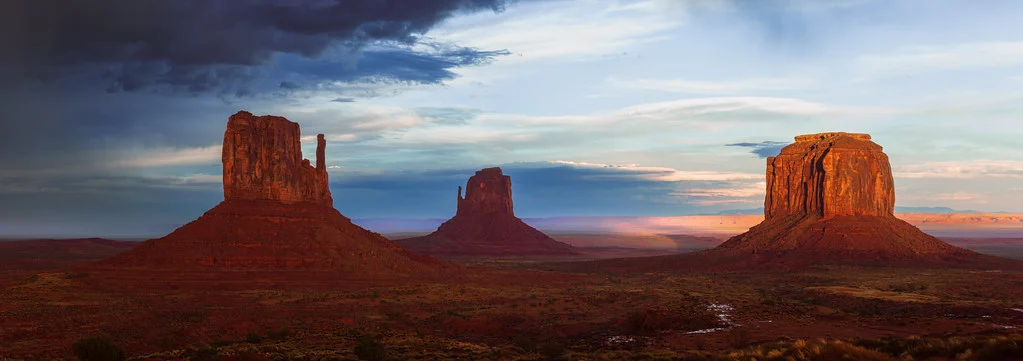
A panorama is a photograph with an unusually wide field of view, usually at least twice as wide as it is tall. Most panoramas are made by shooting a row of overlapping frames across a scene and stitching them together in software, which gives a wider view and far more resolution than any single shot. The word comes from Greek: pan, “all”, and horama, “view”.
This page covers what counts as a panorama, the types, the gear, the settings, how much to overlap, the no-parallax point, shooting technique with and without a tripod, stitching, and the errors that spoil a stitch.
What Counts as a Panorama
There is no official cutoff, but an image is generally called a panorama when its aspect ratio is 2:1 or wider, or when it shows more of a scene than the eye takes in without turning the head. Common panoramic ratios are 2:1, 3:1 and wider; a full circle stitched flat can be 6:1 or more.
There are two ways to get one:
- Crop a single frame. Any photo can be cropped to a wide ratio. It is quick, but you lose pixels and the field of view is no wider than the lens gave you.
- Stitch several frames. You turn the camera across the scene, overlapping each frame with the last, and software blends them into one image. This widens the view and multiplies the resolution. This is what most photographers mean by panorama photography.
Many cameras and phones also have a sweep panorama mode that stitches as you pan. It is convenient for casual shots but gives less control over exposure and quality than shooting the frames yourself.
Before stitching was easy, wide pictures came from dedicated panoramic cameras that expose one long frame of film. Peter Lik built his name on wide color landscapes shot on a 6×17 panoramic film camera, whose single frame is 6 cm tall and 17 cm wide, nearly three times as wide as it is tall.
Types of Panoramas
- Single-row horizontal panorama: The classic format. You rotate the camera left to right (or right to left) in a single row. This is the easiest type to shoot and stitch, and it suits landscapes, cityscapes, and wide interiors.
- Vertorama (vertical panorama): You tilt the camera from bottom to top instead of sweeping sideways. Vertoramas suit tall subjects like waterfalls, tall buildings, trees, and narrow streets.
- Multi-row panorama: Several rows of overlapping frames cover the scene both horizontally and vertically. The files are very large and can be printed huge. They need careful technique and stitching software that supports multi-row alignment.
- 360-degree panorama: A full rotation captures everything around you. These can be shown flat or as interactive images that viewers pan around. The first and last frames must join seamlessly, and the tripod’s shadow needs planning.
- Spherical panorama: A full rotation combined with full vertical coverage, from straight down (the nadir) to straight up (the zenith). Spherical panoramas are used for virtual tours and immersive viewing. They need a panoramic head and a dedicated workflow.
Planning a multi-row panorama with huge detail? How To Create Gigapixel Photos covers equipment setup, shooting the grid with overlap and rows, and stitching software.
Gear for Panoramas
You do not need special equipment to shoot a panorama, but a few things make it easier and cleaner.
- A camera with manual mode: You need the same exposure and white balance in every frame, so the settings must stay locked.
- Tripod with a level: A tripod keeps the rotation steady and the horizon level. A bubble level or the camera’s electronic level helps a great deal.
- Panoramic head (optional): A pano head or a nodal slide lets you rotate the camera around the lens’s no-parallax point (explained below), which removes parallax errors. It matters most when something is close to the camera.
- A normal to short telephoto lens: Wide-angle lenses are not always the best choice. They stretch the edges of each frame, which makes stitching harder. A normal lens or something up to about 85mm on full frame often stitches more cleanly and looks more natural. A wide-angle lens needs fewer frames and suits tight spaces.
- Remote release or self-timer: Keeps you from shaking the camera as you fire each frame.
Is your tripod really level? How to Use a Tripod Properly covers setting up in the right order, the center column problem and leveling the legs versus leveling the head.
Camera Settings for Panorama Photography
Consistency matters more than anything else. Every frame must have the same exposure, focus and white balance. If any of them shift between shots, you will see seams or bands in the stitched image.
- Mode: What to use: Manual (M). Why: Auto modes change exposure as you pan across bright and dark parts of the scene.
- Aperture: What to use: f/8 to f/11. Why: Sharp across the frame with enough depth of field for near and far parts of the scene.
- ISO: What to use: As low as the light allows, usually 100 to 400. Why: Less noise in a file that will be viewed large.
- Shutter speed: What to use: Whatever gives a correct exposure at those settings; fast enough to hand hold if you have no tripod. Why: Fixed for every frame.
- White balance: What to use: A preset such as Daylight or Cloudy, not Auto. Why: Auto can shift slightly from frame to frame.
- Focus: What to use: Focus once, then switch to manual focus and leave it. Why: The camera would otherwise refocus on whatever is in each frame.
- File format: What to use: Raw. Why: More room to match color and recover highlights.
To set the exposure, meter the brightest important part of the scene, such as the sky near the sun, set exposure so it does not clip, and lock it. If the range from bright to dark is too wide for one exposure, bracket each position and merge each set before or during stitching.
How Much Overlap Do You Need?
Overlap each frame with the one before by 30 to 50 percent. More overlap gives the stitching software more detail to match.
About 30 percent is enough for most scenes. Use 40 to 50 percent with a wide-angle lens, when shooting handheld, when the scene has few distinct features (open water, plain sky), or in a multi-row panorama. A practical method: pick something near the edge of the frame, and when you turn to the next position, place it about a third of the way into the new frame.
How Many Photos Make a Panorama?
It depends on how wide the scene is, the focal length, the camera orientation and the overlap. This table shows how many frames cover a half circle (180 degrees) and a full circle (360 degrees) with 30 percent overlap on a full-frame camera. On a smaller sensor, the same focal length covers less, so you need more frames.
| Focal length | Orientation | Horizontal view per frame | Frames for 180 degrees | Frames for 360 degrees |
|---|---|---|---|---|
| 24mm | Portrait | 53 degrees | 5 | 10 |
| 24mm | Landscape | 74 degrees | 4 | 7 |
| 35mm | Portrait | 38 degrees | 7 | 14 |
| 50mm | Portrait | 27 degrees | 10 | 20 |
| 50mm | Landscape | 40 degrees | 7 | 13 |
| 85mm | Portrait | 16 degrees | 16 | 33 |
Shooting with the camera turned to portrait orientation takes more frames, but the finished panorama is taller and has more resolution, and you have room to crop.
The No-Parallax Point (Often Called the Nodal Point)
Parallax is the apparent shift of a near object against the background when your viewpoint moves. Hold up a thumb at arm’s length and close one eye, then the other: the thumb jumps against the background. In a panorama, parallax makes near objects line up differently in neighboring frames, and the software cannot join them cleanly.
Every lens has one point it can rotate around without causing parallax. Photographers usually call it the nodal point; the correct term is the no-parallax point, and it sits at the lens’s entrance pupil. A normal tripod rotates the camera around the tripod socket, which is behind that point, so near and far objects shift relative to each other as you turn.
For distant landscapes, parallax is too small to matter and you can rotate around the tripod socket. When something sits within a few meters of the camera, rotate around the no-parallax point. To find it, mount the camera on a nodal slide, line up a near vertical object (a pole) with a far one (a building edge), turn the camera so they sit at the edge of the frame, and slide the camera forward or back until they stay lined up as you turn.
Want the parallax problem explained more fully? Understanding Parallax covers what it is, how it affects photography and how to manage it.
How to Shoot a Panorama, Step by Step
- Plan the frame. Look across the whole scene and decide where it starts and ends. Choose portrait or landscape orientation.
- Level the tripod and the head. If the camera tilts as it turns, the horizon curves and you lose a lot of picture when you crop to a rectangle.
- Set and lock exposure. Meter the brightest important area, set the exposure in manual mode, and leave it.
- Set and lock focus. Focus with autofocus, then switch to manual focus. Do not refocus between frames.
- Mark the start. Take a frame of your hand in front of the lens so the set is easy to find later.
- Shoot in one direction. Start a little beyond the left or right edge you want, and end a little beyond the other edge. This leaves room to crop.
- Overlap consistently. Turn by the same amount each time, keeping 30 to 50 percent overlap.
- Work quickly. Clouds, light and people move. The faster you finish, the better the frames match.
- Mark the end with another hand frame.
Handheld Panorama Tips
Handheld panoramas can stitch well if you keep the camera’s position steady and level.
- Turn your body, not your arms. Keep your elbows in and turn as one steady unit. Better still, pivot the camera around the lens itself by shuffling your feet around it, rather than swinging the camera in a wide arc around your body, which adds parallax.
- Keep the camera level. Tilting up or down between frames is the most common handheld error. Use the camera’s electronic level if it has one.
- Use a fast enough shutter speed. Each frame must be sharp. The hand-holding rule gives a safe minimum for your focal length; raise the ISO if you need to.
- Overlap by about 50 percent. Extra overlap makes up for less precise alignment.
- Avoid close foreground objects. Without a pano head, near objects are where parallax errors show.
Stitching Software
Image stitching, also called photo stitching, is the process of combining overlapping photos into one larger picture. The software works in four steps. It finds the same small details (corners, edges, texture) in the overlap between neighboring frames, works out how each frame must be turned and shifted so those details coincide, bends every frame onto a common projection, and blends the seams so the joins and any small brightness differences disappear. That is why overlap and texture matter so much: no shared detail, no match.
Panoramas are the most common use, but the same process builds a high-resolution picture of anything larger than one frame can hold at the detail you want: a building facade, an interior, a large painting or document copied in sections, or a product or macro subject shot as a grid of close frames.
Before you merge, give every frame the same raw settings, including the same lens profile correction, so the software matches frames that agree in color, brightness and distortion. Merge with one of these tools, then do the rest of your editing on the stitched file:
- Raw editors with a panorama merge: The easiest choice. Select the frames and choose the merge command, and the software aligns, blends and matches exposure. Most offer spherical, cylindrical and perspective projections, and some have a boundary warp setting that stretches the edges to fill the frame so you lose less to cropping. The steps in Lightroom are in how to create panoramas in Lightroom.
- Layer-based editors: Photoshop (through its Photomerge command) and similar editors can merge a panorama into layers, so you can adjust masks by hand where the blend went wrong.
- Dedicated stitching programs: Built for multi-row, 360-degree, spherical and bracketed panoramas, with manual control points, masking and batch processing.
- Open-source stitchers: Free and capable of multi-row work, with a steeper learning curve.
Which projection to choose
- Perspective (rectilinear) keeps straight lines straight. It suits narrow panoramas and architecture, but stretches the edges badly beyond about 120 degrees.
- Cylindrical keeps vertical lines straight and lets the horizon run flat across a wide view. It is the usual choice for a single-row panorama.
- Spherical maps the scene onto a sphere. It handles multi-row and 360-degree panoramas.
Common Stitching Errors and How to Fix Them
- Visible seams or bands of different brightness. Exposure or white balance changed between frames. Shoot in manual with a fixed white balance; the software’s exposure blending can hide small differences.
- Ghosts from moving things. People, cars and waves that moved between frames appear twice or half transparent. Use the stitcher’s masking to choose which frame shows the moving object, or retake the frames when the scene is clear.
- Broken or doubled foreground objects. This is parallax. Rotate around the no-parallax point, or keep near objects out of the frame.
- Curved horizon. The camera was not level as it turned. Level the tripod and head before shooting; in software, a warp or straighten tool can help.
- Frames that do not match in size or shape. The lens was zoomed between frames, or some frames were shot in portrait and others in landscape. Set the focal length once, tape the zoom ring if it creeps, and shoot the whole set in one orientation.
- Blank areas at the edges. Stitched panoramas have ragged edges that must be cropped. Shoot wider than you need, and use boundary warp or content fill where your software has it.
- The software cannot align the frames. The scene has too few distinct features. Overlap by 50 percent and include textured areas in each frame; a dedicated stitcher lets you add control points by hand.
Seeing bands across the sky after stitching? Fixing a panorama shot with a polarizing filter covers why the problem occurs, fixing banding with graduated masks and fixing the raw files before stitching.
Editing and Printing a Panorama
- Crop with intention. The final ratio is a creative choice. 2:1 feels cinematic; 3:1 or wider feels sweeping.
- Even out brightness. A panorama shot with the sun to one side often gets brighter toward that side. A graduated adjustment or brush evens it out.
- Sharpen for the output. Apply light sharpening to the stitched file, then output sharpening for the print size.
- Check the file size. Multi-row stitches can run to hundreds of megapixels. Export at a size that suits the use.
For print, divide the pixel width by the print resolution. A panorama 30,000 pixels wide prints 100 inches wide at 300 pixels per inch, which suits close viewing, or 200 inches wide at 150 pixels per inch for a large print seen from across a room.
Wondering how big your stitched file will print? Print Size Calculator checks your photo resolution against print size.
Common Mistakes
- Auto exposure or auto white balance. Settings shift between frames and leave seams.
- Too little overlap. The most common cause of a failed stitch. When in doubt, take more frames.
- Shooting too slowly. Moving clouds and changing light make the first and last frames disagree.
- No foreground interest. A strip of sky and distant hills can feel empty. Something in the foreground gives the panorama depth, provided you deal with parallax.
- Not checking the level. A tilted sweep curves the horizon and wastes picture when you crop.
Try This
Take ten minutes and a 50mm lens (or the equivalent on your camera) to a spot with a wide view. Set manual exposure, manual focus and a Daylight white balance. Shoot a handheld row of seven frames in portrait orientation with about a third overlap, then shoot the same view again on a tripod. Stitch both sets with a cylindrical projection and compare the edges of near objects and the line of the horizon.
Panorama FAQ
What is a panorama in photography?
A panorama is a photograph with a very wide field of view, usually at least twice as wide as it is tall. It is normally made by stitching several overlapping frames together, though a single photo cropped to a wide ratio is also called a panorama.
How many photos do I need for a panorama?
It depends on the width of the scene and your lens. With a 50mm lens on full frame in portrait orientation and 30 percent overlap, a half circle takes about 10 frames and a full circle about 20; a wider lens needs fewer.
Can I shoot a panorama handheld?
Yes. Turn your whole body rather than your arms, keep the camera level, use a shutter speed fast enough to keep each frame sharp, and overlap by about half. A tripod gives more reliable results for multi-row work or scenes with close foreground objects.
What is the best lens for panorama photography?
A normal to short telephoto lens, roughly 35 to 85mm on full frame, often stitches most cleanly because it distorts the edges less. A wide-angle lens needs fewer frames and suits tight spaces, at the cost of more edge stretching.
Should I shoot panoramas in portrait or landscape orientation?
Portrait orientation is usually better because it gives a taller, higher resolution panorama with room to crop. It needs more frames, so for quick handheld panoramas landscape orientation is fine.
What is the difference between a panorama and a wide-angle photo?
A wide-angle photo is one frame from a lens with a wide field of view, so its ratio stays the camera’s ratio and it stretches things near the edges. A stitched panorama can be much wider, keeps the perspective of a longer lens, and has more pixels.
Why won’t my photos stitch into a panorama?
Usually the software cannot find enough shared detail: too little overlap, a plain sky or open water filling the overlap, or frames shot at different zoom settings or orientations. Parallax from near objects and heavy uncorrected distortion from a very wide lens also defeat it. Reshoot with about 50 percent overlap, keep textured areas in every frame, apply the same lens correction to all frames, and try a different projection or layout setting before giving up.
Related Guides
- Landscape photography: where most panoramas begin.
- HDR: combining bracketed exposures for scenes too contrasty for one frame.
- Composition: arranging a wide frame so the eye has somewhere to go.
- Time-lapse photography: another tripod technique built from many frames.
- Best tripods: what makes a tripod steady enough for careful work.