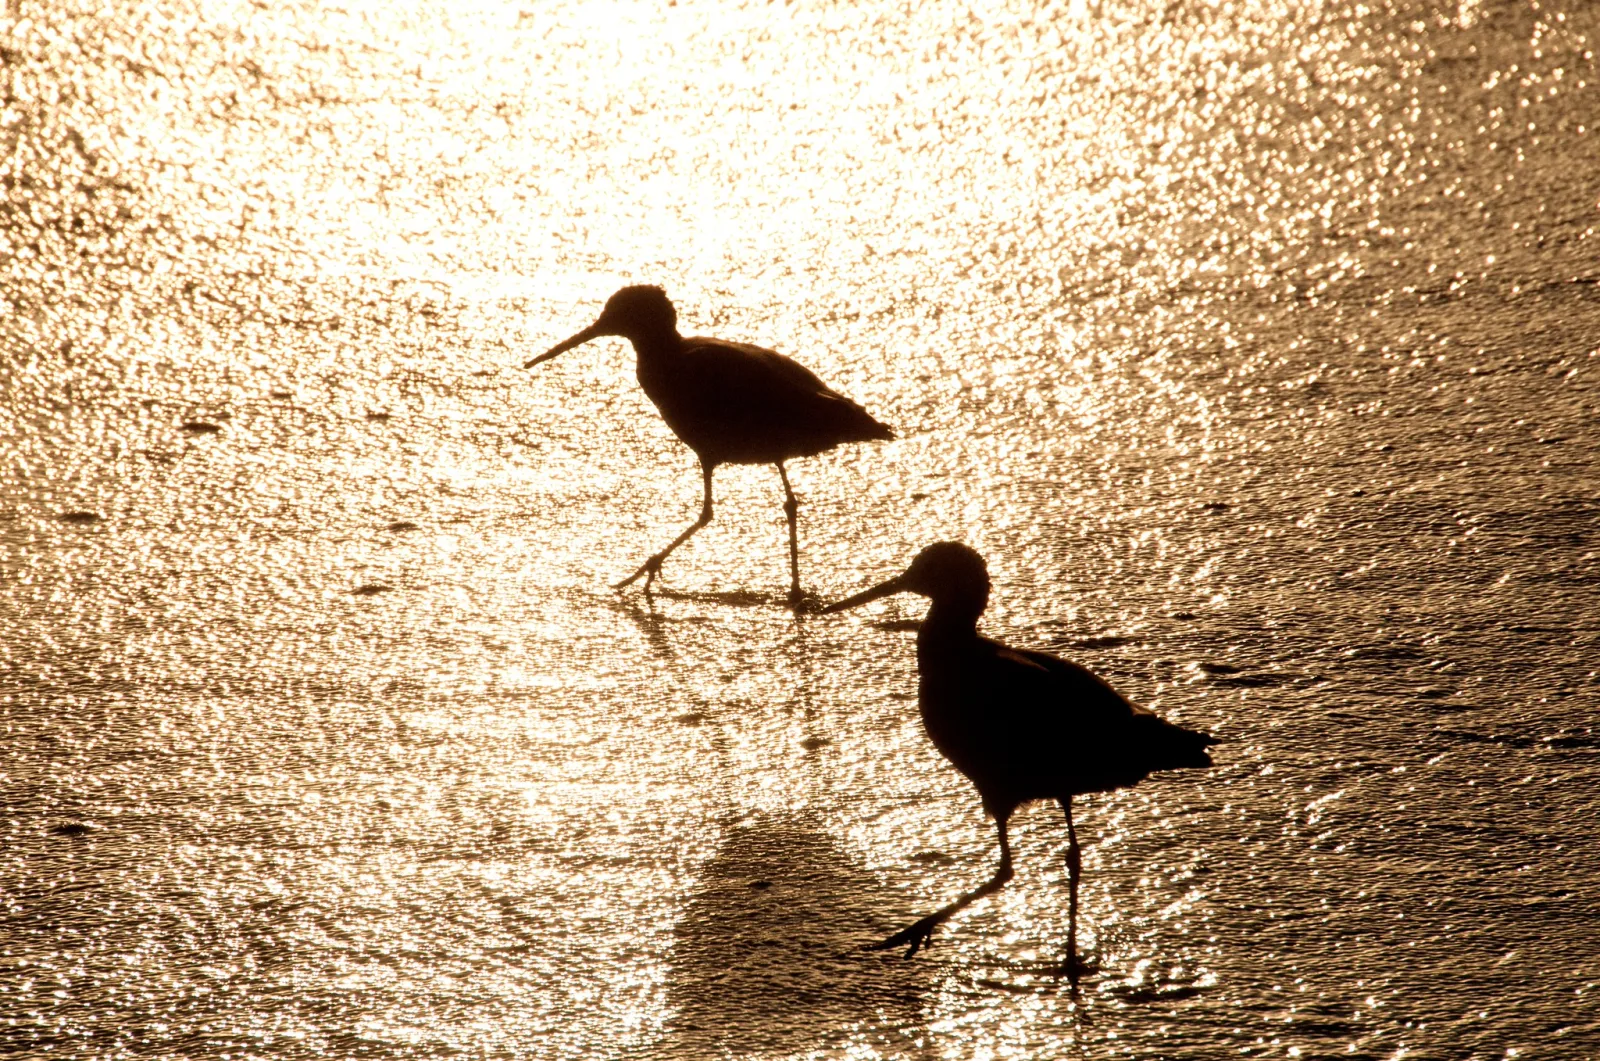
A shape in a photograph is any flat area that stands out from what surrounds it: the outline you would get if you traced around it and filled it in. Shapes are what a viewer reads first, before detail or meaning, so a picture whose main shapes are clear can be understood at a glance, and one whose shapes are muddled looks busy however sharp it is.
Look at the two birds above. There is no feather, no eye and no color on either bird, yet you know at once what they are, which way they face and that the nearer one is mid-stride, its legs apart. That is shape doing all the work. This page covers how to see shapes, how light, tone and viewpoint make or destroy them, how the spaces between shapes count as much as the shapes, and how a few shapes hold a frame together. It sits alongside the overview in design principles in photography and the arrangement habits in photography composition.
What shape is, and how it differs from form
A shape has two dimensions: height and width. A form has three: it also has depth. A ball is a form. Its shadow on a wall is a shape, and so is the ball itself once a photograph has flattened it and the light has stopped describing its roundness.
Every photograph is flat, so every form in the scene ends up as a shape on the picture surface. What varies is how much of the third dimension the picture suggests. Shading that runs from light to dark across a surface tells the eye the surface curves, and the subject reads as a form. Remove the shading and only the outline is left, and the subject reads as a shape.
Neither is better. Form gives weight, volume and realism. Shape gives clarity, graphic strength and instant recognition, which is why road signs and map symbols are flat outlines and not shaded drawings. The choice between them is mostly a choice of light, covered below.
A shape does not have to be an object
The most useful definition for a photographer is wider than “the outline of a thing”. A shape is any area of similar tone or color that the eye separates from its surroundings. A pool of sunlight on a floor is a shape. So is a dark cloud, a band of shadow across a street, the patch of sky between two buildings, or a reflection in a puddle. None of these is a subject in the usual sense, and every one of them carries weight in the frame.
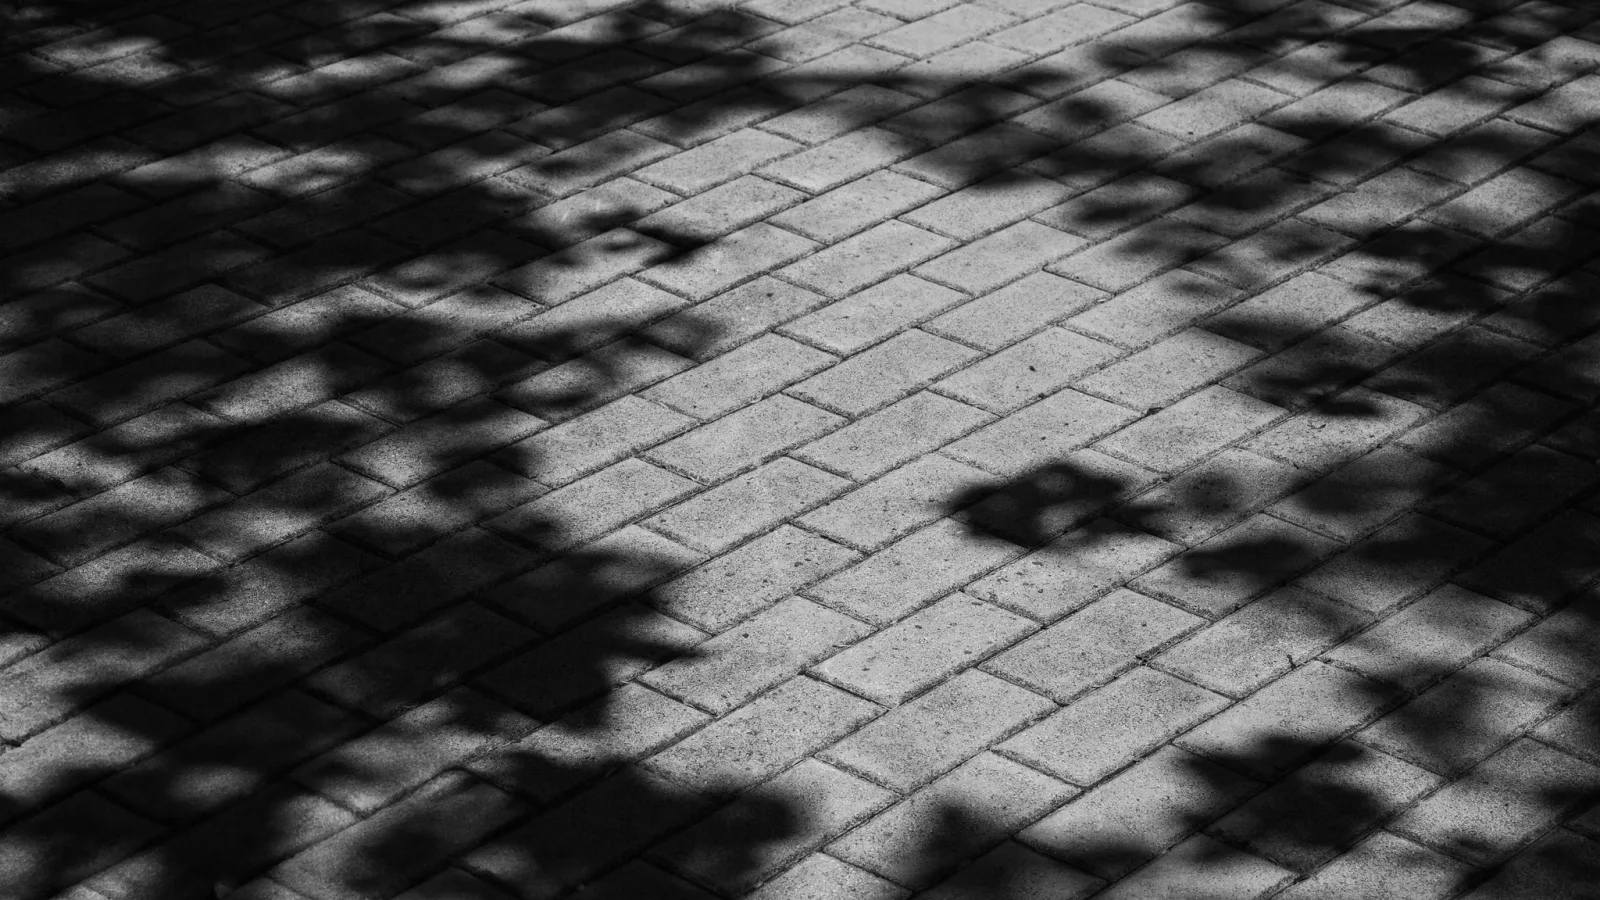
This matters because the shapes you did not intend are the ones that spoil pictures. A bright window behind a portrait, a black doorway beside a building, or a slab of shadow across the foreground will each pull the eye as strongly as the subject, because the eye responds to the mass of tone, not to whether the mass is “important”. Before you press the shutter, count every strong area of light or dark in the viewfinder, not only the objects.
Geometric and organic shapes
Shapes fall into two broad families.
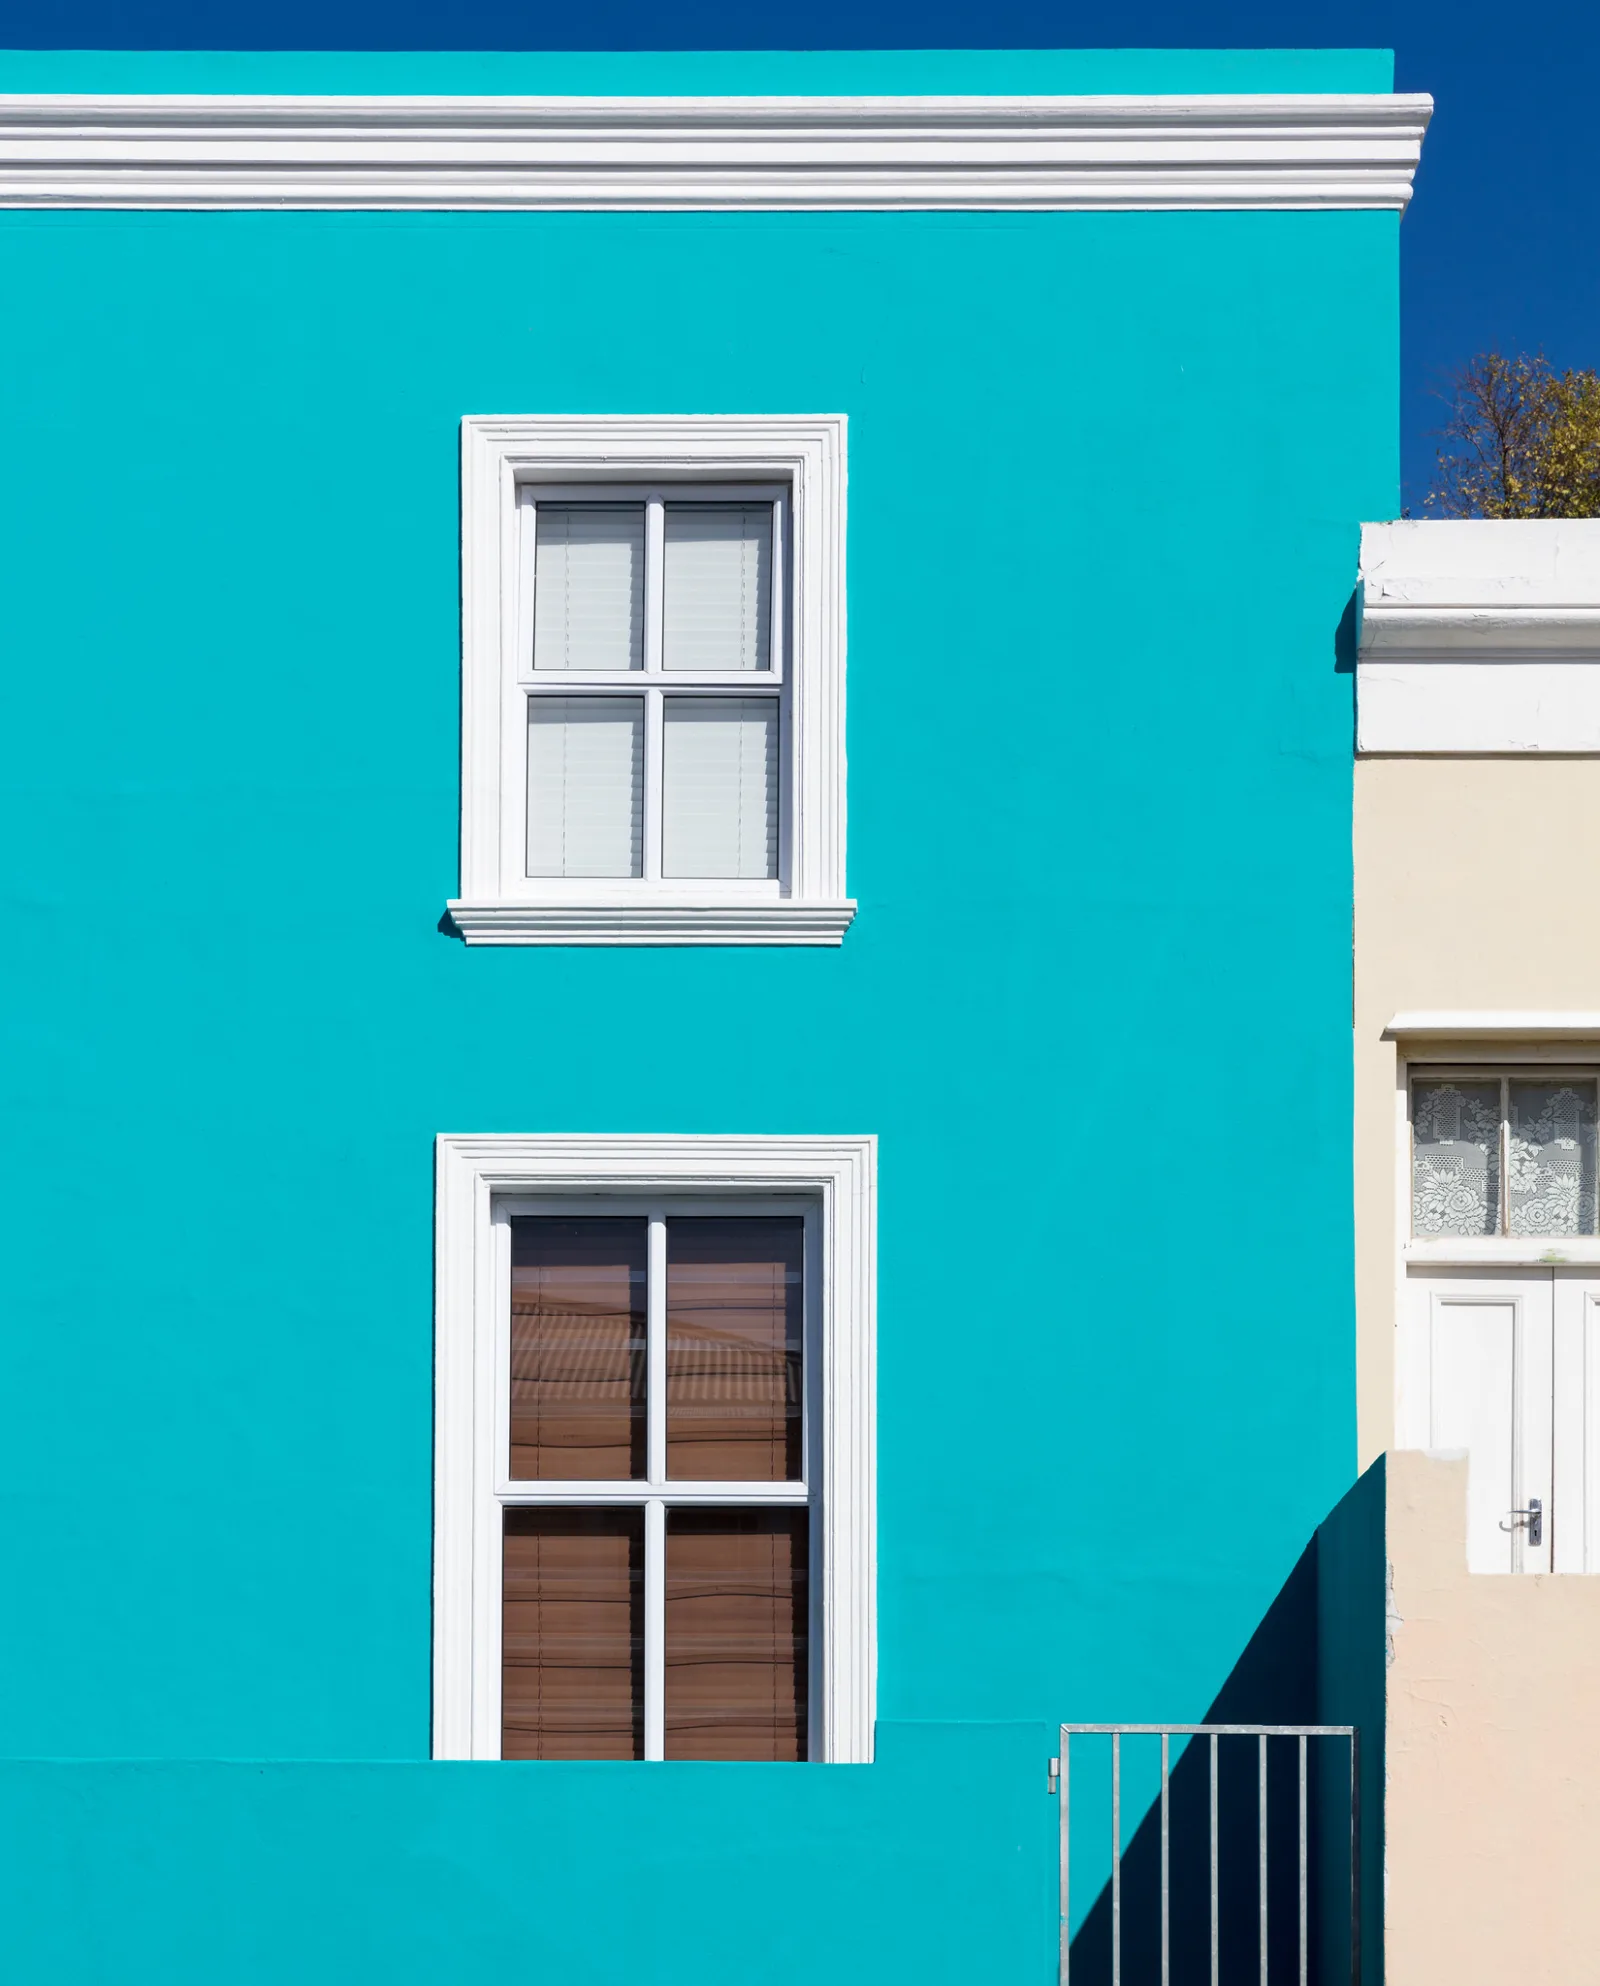
Geometric shapes are regular and mostly made by people: circles, triangles, squares and rectangles, and their relatives such as ovals and diamonds. Each tends to carry a character, though none of these is a law and context can override any of them:
- Circles have no corners and no direction, so the eye tends to travel around them and stay inside. They often feel complete and calm. Wheels, clocks, plates, domes, lamps, the sun and the moon are all circles.
- Squares and rectangles echo the frame itself, so they tend to feel orderly and stable. Windows, doors, walls, fields, screens and paving are the usual sources. The teal wall above is almost nothing but rectangles.
- Triangles have points, and points suggest direction. One resting on its base tends to look stable, like a mountain or a roof gable. One balanced on a point looks precarious. Because their sides are diagonals, triangles usually feel more active than squares; triangles in composition covers them in depth.
Organic shapes are irregular and mostly natural: leaves, clouds, puddles, rocks, animals, the human body, and the leaf shadows in the photo above. They are less predictable and usually feel softer and more alive.
The two families are most useful together. One organic shape among geometric ones, such as a person in front of a grid of windows, stands out at once, and so does a hard-edged shape in a natural scene, such as a red tent in a forest. Two shapes that differ in kind draw attention to each other. The shadow photo works this way: the soft blots of shade read more strongly because the bricks under them are so regular.
Wondering how else difference draws the eye? Contrast in photography covers tonal, color and texture contrast and what each one does.
How light direction turns form into shape
The same object can be photographed as a form or as a shape, and the difference is mostly where the light comes from relative to the camera. The full effects of each direction are in direction of light. For shape, this is what matters:
- Backlight, exposed for the bright background: What you see: The subject goes dark or black. Interior detail disappears. Shape or form: Pure shape: a silhouette.
- Backlight grazing the edges, exposed for the subject: What you see: A bright rim traces the outline. The background often turns very bright. Shape or form: Shape, drawn by a line of light.
- Flat front light (light behind the camera): What you see: Shadows fall behind the subject where the lens cannot see them. Shape or form: Shape, separated by color and tone, not by shading.
- Side light: What you see: Shading across every surface, and long cast shadows. Shape or form: Form and texture.
- Overcast or other soft light: What you see: Gentle shading and no hard shadows. Shape or form: Soft form. Shape depends on color and tone alone.
Pick the photo lit by more directional light, then compare the two: in one the shadows model the rock into form, in the other the flatter light leaves areas of tone and color with edges.
Light coming from the side sculpts a subject by casting shadows that reveal form. Light from the camera position flattens the subject into the background.
A silhouette is shape at its purest, and it is made by exposure as much as by light. The camera has to be set for the bright background so the subject falls to black; the shorebirds were shot at 1/3200 second against sun on water, which leaves nothing on the birds but their outline. The technique is covered in how to take silhouette photos, and the other things backlight can do are in backlighting. The lesson that carries over to all shape work is that a silhouette has nothing but its outline, so the outline has to explain the subject alone.
Flat front light is the less obvious route to shape. With the sun behind you, a painted door, a row of beach huts or a figure in a bright coat loses its modelling and becomes a patch of color with an edge. Pictures built from bold flat colors rely on this light. A rim of light is the third route: when the sun is behind and slightly to one side of the subject, its edges glow and draw the outline for you, as explained on rim light.
Hard light also makes shapes of its own. A cast shadow is a flat, dark copy of the thing that blocks the light, stretched or squashed by the angle of the light: long and thin when the sun is low, short and stubby near noon. And the tonal treatment of the whole picture matters. The approaches in high key and low key photography both simplify a scene into a few shapes, dark on light or light on dark.
Figure and ground: why one area reads as the shape
When you look at any scene, the eye divides it into a figure (the thing) and a ground (what the thing is seen against). The figure appears to own the edge between them and to sit in front. The ground appears to continue behind it without a shape of its own. A photograph is clear when the viewer makes this division instantly, and the way you intended.
The vase drawing by the psychologist Edgar Rubin shows how unstable the division can be: it reads either as a vase or as two faces in profile, and the shared edge belongs to whichever one you see as the figure. In photographs, an area is more likely to be read as the figure when it is:
- smaller than the area around it,
- enclosed by the other area, not running off the frame,
- clearly different in tone or color,
- sharper than its surroundings,
- a familiar outline, such as a person, a bird or a tree.
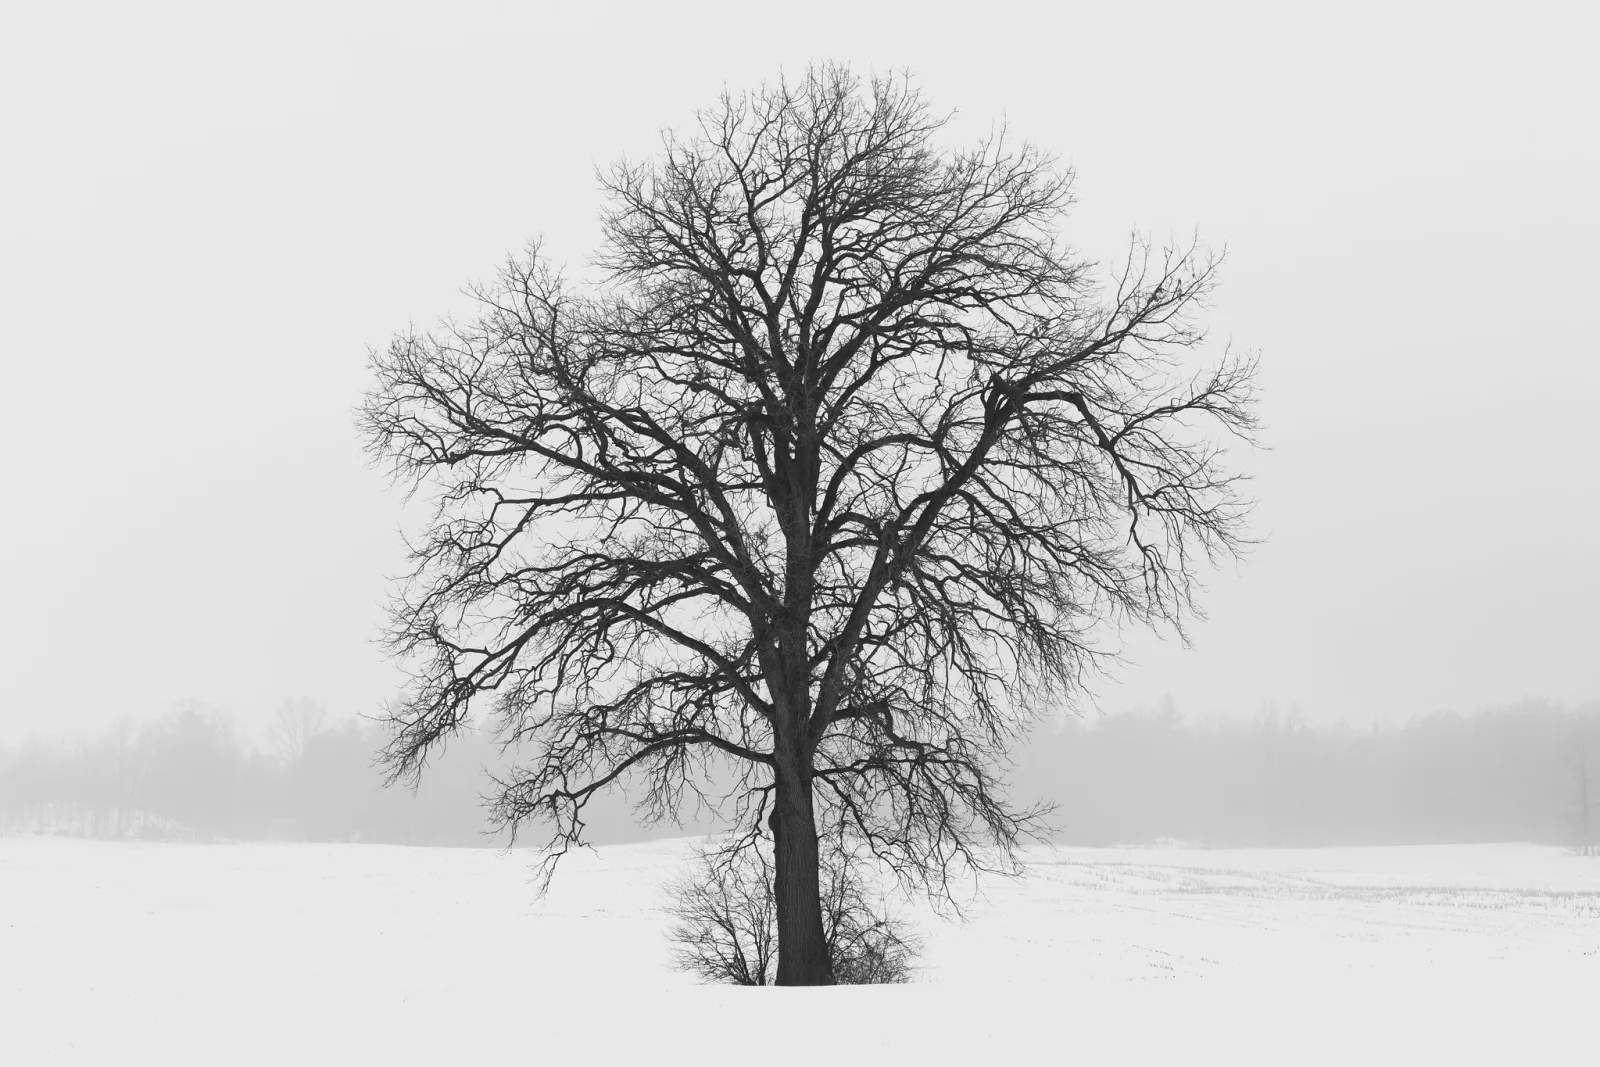
The tree in fog meets every item on that list, which is why it reads instantly. Fog has erased the woods behind it into a pale wash, so nothing competes with its outline. Notice that the gaps between the branches matter as much as the branches: fill them in and you would have a dark blob shaped like a lollipop, not a tree.
Sharp is not the same as separate. A common belief is that a subject in focus will stand out. It will not if it shares a tone with what is behind it. A dark coat against a dark doorway has no visible edge however crisp the focus. The fix is nearly always to move: step sideways or change height until a dark subject sits against something light, or a light subject against something dark. How to separate your subject from the background covers tone, color, focus and vantage point in detail.
Color can make a figure where tone does not. A small area of strong color against a plain field becomes a shape through hue alone, which is the idea behind color contrast. Such pairs can vanish in black and white if the two colors are equally bright: a red flower on green leaves often turns into gray on gray. If a picture depends on a colored shape, preview it in monochrome before deciding it works.
Positive and negative shapes
The subject is the positive shape. Everything around and between it is negative shape. The useful discovery is that negative areas are shapes too, with edges and corners, and the frame helps to make them. Once you put four edges around a scene, the sky stops being endless and becomes a shape bounded by the subject on one side and the frame on the others.
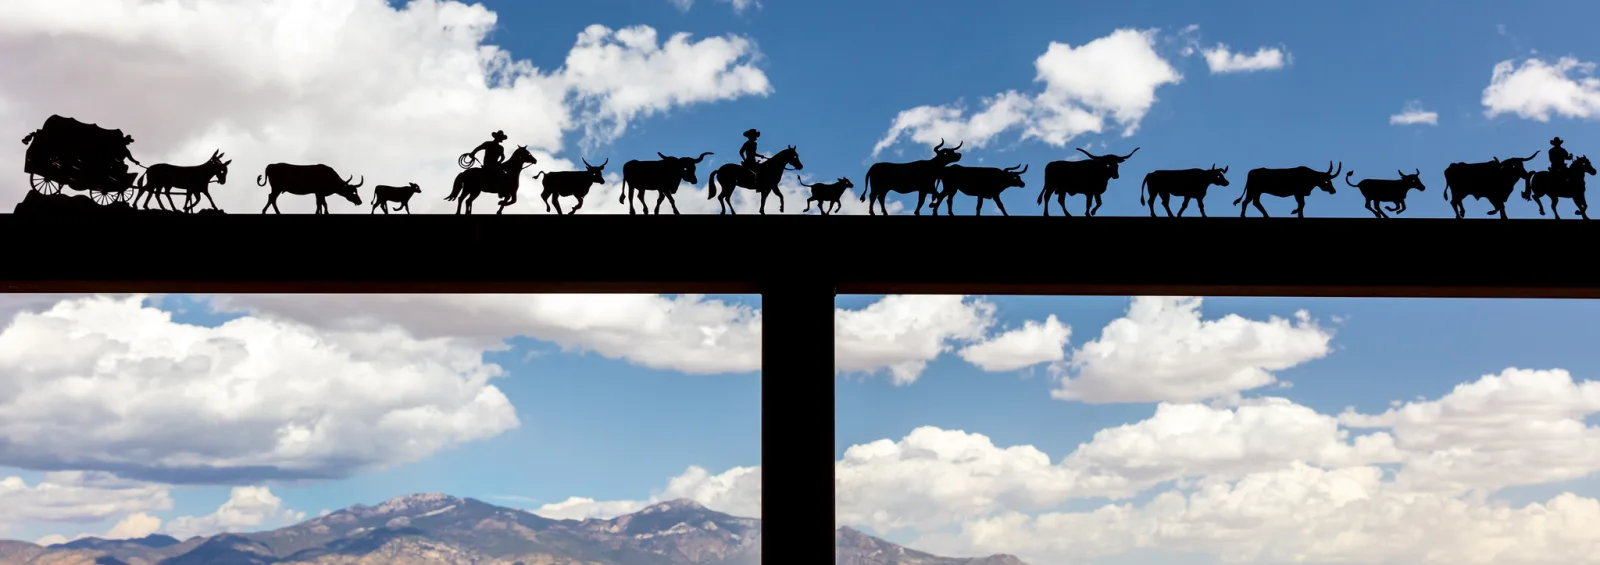
The metal cattle drive above is a lesson in small negative shapes. It is a single sheet of black, and you can count the animals only because of the slivers of sky between their legs, under their bellies and around the riders. Small gaps do a lot of work:
- The gap between an arm and a body, or between two legs in mid-stride, is what makes a figure read as a person and not a block. Close the gaps and the outline becomes a lump.
- The spaces between the branches of a bare tree describe the tree as much as the branches do.
- The gap between two people can become the subject of a picture, especially when it is narrow.
- Where two objects overlap, their shapes merge into one. A thin gap of background between them keeps both readable. Overlap on purpose suggests depth; space between shapes gives a calmer, flatter picture.
Negative shapes at the edges matter as well. A subject near an edge leaves a thin sliver of background between itself and the frame, which creates tension. A subject nearer the middle leaves larger, more even shapes around it and feels settled. Equal leftover shapes in the corners tend to make a picture static, and unequal ones give it energy.
Wondering how much empty room to leave around a shape? Negative space shows what emptiness does for an image and how to use it.
How viewpoint and distance change a shape
An object has no single shape. It has a different outline from every position, and choosing the position is choosing the shape.
- Which side you show. A plate seen from above is a circle; from the side it is a thin bar. A bicycle from the side is unmistakable; from the front it is a vertical line with handlebars. The cattle drive works because every animal is shown in profile, the side that explains a horse or a steer best. Before you shoot, walk around the subject and find the side that would still name it as a silhouette. For people and animals this is often the profile.
- Camera height. A low camera lifts the subject above the horizon so its outline sits against plain sky. A high camera sets it against the ground, where a shadow or a stretch of clean pavement can be the backdrop.
- Tilting the camera. Point the camera up at a building and its rectangle becomes a shape that narrows toward the top. Keep the camera level and the rectangle stays a rectangle.
- Distance, not focal length. Close to a subject, its near parts are much nearer the lens than its far parts and so look much larger: with the ears 50 cm from the lens, a nose 10 cm nearer is drawn about 25% larger relative to them (50 divided by 40), while with the ears 5 m away the same nose is only about 2% larger (500 divided by 490). Farther back, proportions even out and shapes look flatter. A wide lens only changes the outline because it lets you stand that close; a long lens only flattens because it makes you stand back. Perspective distortion explains this.
- Stacking. From far away with a long lens, objects at different distances appear closer in size and pile up against each other, so separate shapes join into bands and layers. This is lens compression, and the interactive tool on that page lets you step back with a longer lens and watch the background grow behind a subject that stays the same size.
- Frame corners with very wide lenses. Near the corners of an ultra-wide picture, round objects are stretched into ovals that point away from the center. Keep important circles and faces nearer the middle.
Counting the shapes that matter
Squint at a scene and most of it melts away. What is left is a handful of significant shapes, usually two to five, sometimes one. Those few masses decide how the picture is built, whatever the subject is. Thinking in terms of how many there are gives you a way to arrange them.
One shape. A single strong shape on a plain ground, like the tree in fog, is the simplest picture there is. The questions are where it sits and how much ground surrounds it. This is the territory of minimalist photography.
Two shapes. Two shapes set up a relationship, and you have two choices. Make them match, in size and tone and position either side of the middle, and you get symmetry: calm, formal, sometimes static. Or make them differ in tone, size or position, and the difference becomes the subject: a large dark mass and a small light one, a near shape and a far one.
Three shapes. Three shapes connect into an implied triangle, and the eye travels around it from one corner to the next. A person in the foreground, a boat behind them and an island across the frame will hold together this way, provided nothing else competes. A triangle with a flat base feels settled; a tilted, irregular one feels more active.
Many shapes. Beyond five or so, the eye stops counting and starts grouping. Shapes that repeat become a pattern, and the one shape that breaks the pattern becomes the subject.
Shapes also differ in visual weight. A large, dark or strongly colored shape pulls harder than a small, pale or dull one, and a shape near the edge of the frame pulls harder than the same shape near the middle. A small dark shape can balance a large pale one. Placing shapes so their weights balance gives a settled picture, and tipping the balance on purpose gives tension. Visual weight in photography sets out what makes a shape heavy.
Shape against line, form, texture and pattern
The elements of design overlap, and it helps to know where shape stops and its neighbors begin.
- Line. A line has length and direction. When a line closes on itself, or meets the frame edges, it encloses an area and makes a shape. Curves, horizons and edges are covered in photography composition: lines.
- Texture. Texture is the surface inside a shape. Low side light reveals it, as texture in photography explains. Heavy texture competes with outline, so decide which one the picture is about.
- Pattern. Pattern is a shape repeated. One window is a rectangle; two hundred windows are a pattern.
Want to see how lines carry the eye from one shape to the next? Leading lines covers the kinds of line and where to find them.
Four quick tests that a shape will read
- Squint. Half-close your eyes at the scene or the screen. Detail and texture fade and the scene reduces to a few masses of light and dark. Those masses are the shapes your picture will be made of. If they are muddled when you squint, they will be muddled in the photograph.
- Blur it. On the computer, blur a copy of the picture hard, or step back from the screen until it goes soft. If you can still tell what the subject is from its outline, the figure and ground work. If it dissolves into the background, they do not.
- Shrink it. Look at your pictures as thumbnails about the size of a postage stamp. The ones that still read at that size have strong shapes.
- Drain the color. Switch the camera’s display or a copy of the file to monochrome. Shapes that were separated only by hue will merge if their brightness is the same, and you will see it at once.
The last test points to a real choice. Bold flat color pushes a picture toward shape, because each area reads as a patch of hue. Black and white strips the hue and leaves tone, which pushes a picture toward light, shading and form, unless the tones themselves are bold and flat. Decide which you want before you convert.
Thinking of taking the color out? Black and white photography covers seeing in tone and converting so shapes stay separate.
Common mistakes with shape
- A subject that merges with its background. Dark on dark or light on light leaves no edge, even when the focus is perfect. Fix: move until the subject sits against the opposite tone.
- Shooting the least informative side. A head-on or end-on view hides the outline that identifies the thing. Fix: walk around it and choose the view that would still work as a silhouette.
- Closed gaps. Arms against the body, legs together, or two objects overlapping turn a clear figure into a lump. Fix: wait for the stride, ask for a small gap, or shift sideways until light shows between the shapes.
- Side light when you wanted shape. Shading and texture take over from the outline. Fix: turn so the light is behind the subject or behind you.
- Ignoring the shapes that are not objects. A bright window, a black doorway or a slab of shadow competes with the subject. Fix: count every strong mass of tone, not only the things, and crop or move to remove the ones that do not belong.
- Ignoring the leftover spaces. Awkward slivers at the edges pull the eye away. Fix: check the corners before you shoot, and either widen the gap or crop into the shape.
- Thinking shape means geometry. Looking only for circles and triangles misses most of the shapes in the world. Leaves, people, clouds and shadows are shapes too, and often the stronger ones.
Try this: the silhouette test
You need ten minutes, a camera or phone, and one object you can walk all the way around, outdoors on a sunny day or indoors beside a bright window: a chair, a bicycle, a watering can, a kettle or a houseplant.
- Place it so a bright background (sky, a window, a pale wall in sun) is behind it from at least one side.
- Make four silhouettes from four sides: front, back, side and three-quarters. Tap or meter on the bright background, or lower the exposure until the object goes dark. Keep the object about the same size in each frame.
- Make two more frames from the side you like best: one with the light behind you (flat front light) and one with the light to one side.
How to judge it. Look at the four silhouettes as thumbnails, small enough that two or three fit across your phone screen. For each, ask: could a stranger name the object from this outline alone? Show them to someone who did not see you shoot and ask them to guess. The side they name fastest is the object’s best shape. Then compare the last two frames: in the front-lit one, the object should read as a flat patch of color with a clear edge; in the side-lit one, as a rounded thing with shading. If the front-lit frame does not separate from its background, you have found the tone merger described above, and the fix is to move.
Frequently asked questions about shape
What is shape in photography?
Shape is a flat, two-dimensional area in a picture that stands out from its surroundings through a difference in tone, color or texture. It can be an object, a shadow, a patch of light or an empty space. It is one of the elements of design, alongside line, form, texture, pattern and color.
What is the difference between shape and form?
Shape is flat and has only height and width. Form has depth as well, and in a photograph that depth is suggested by shading. Backlight and flat front light show shape, while side light shows form.
Does focal length change the shape of things?
Not by itself. The distance from the camera to the subject sets the proportions of near and far parts; the focal length only decides how much of the scene you crop. A wide lens seems to distort because it lets you stand close, and a long lens seems to flatten because it makes you stand back.
How do you make a shape stand out in a photo?
Put it against a background of clearly different tone or color, choose the viewpoint with the most recognizable outline, and keep small gaps open between it and anything nearby. Use backlight or front light instead of side light, and remove other strong masses of tone that compete with it.
Why do some photos look busy even when everything is sharp?
Usually because there are too many significant shapes, or the main ones merge with each other or the background. Squint at the picture or view it as a thumbnail: if you cannot pick out two to five clear masses, simplify by moving, cropping or waiting for the light to change.
Is negative space a shape?
Yes. The area around and between subjects has edges formed by the subject and the frame, so it has a shape of its own. The gaps between legs, branches or people are often what make the main shapes readable.