Removing unwanted items from photos can be a tedious and time-consuming task. However, Adobe Photoshop makes it easy to automatically remove objects from photos. In this tutorial, we'll discuss the steps you need to take to automatically remove objects from photos in Adobe Photoshop. Let's get started!
Step 1: Open the Photo in Photoshop
The first step is to open the photo in Photoshop. To do this, simply open the Adobe Photoshop program and click on the "File" menu. Then, click "Open" and select the photo you want to work with. Once you have opened the photo, you should see it displayed in the main Photoshop window.
Step 2: Select the Object You Want to Remove
Now that the photo is open in Photoshop, you need to select the object you want to remove. To do this, use the selection tools in Photoshop. You can use the lasso, magic wand, or any other selection tool to select the object. Once you have selected the object, it should be highlighted in the photo.
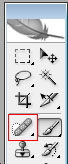
Step 3: Use the Content-Aware Fill Tool
Now that you have selected the object you want to remove, it's time to use the Content-Aware Fill tool. To use the tool, simply select it from the toolbar, then click and drag the mouse over the area where the object was. The Content-Aware Fill tool will automatically remove the object and fill in the area with the surrounding pixels.
Step 4: Adjust the Results
Once the object has been removed, you may need to make some adjustments to the results. To do this, use the "Edit" menu in Photoshop and select "Adjustments". This will bring up a panel of adjustment tools that you can use to tweak the results. You can adjust the color, contrast, brightness, and more to get the perfect result.
Step 5: Save the Photo
Once you are happy with the results, it's time to save the photo. To do this, simply click on the "File" menu and select "Save". Enter a name for the file, select a location to save it, and click "Save". Your photo should now be saved with the object removed.
Congratulations! You have now completed the steps to automatically remove objects from photos in Photoshop. By following the steps outlined in this tutorial, you should be able to quickly and easily remove unwanted objects from your photos.
Happy Editing!!!