Exposure is how much light reaches your camera’s sensor while a picture is being taken, and it decides how much detail the photo can hold in its bright and dark parts. Get it right and the thing you care about is clear and clean; get it wrong and highlights burn to blank white, or shadows sink into black and turn grainy when you brighten them.
Two settings control how much light gets in: the aperture (how wide the lens opens) and the shutter speed (how long it stays open). The light in the scene is the third ingredient, and the one you usually cannot change. ISO does not add any light. It decides how bright the camera makes the light it did collect. That difference sounds like a technicality, but it explains noise, why there is no single right setting, and what to do when light runs short.
A Picture of Exposure: Light Collecting Like Rain
Imagine the sensor as millions of tiny trays left out in the rain. The scene’s brightness is how hard it is raining. The aperture is how wide the opening above the trays is. The shutter speed is how long you leave the trays uncovered. Exposure is how much water each tray ends up holding.
Double the opening, or the time, and you collect twice the water. A cloud that halves the rain needs a wider opening or a longer wait to make up for it. Exposure is just brightness of the light times opening times time.
ISO is not in the picture yet, because it changes none of those things. Once the trays are covered, ISO is like the person reading them deciding how bright to print each level of water. Raise ISO and a quarter-full tray is printed as if it were half full. The photo looks brighter, but there is no more water in the trays. This is why a dark scene shot at high ISO looks rougher than a bright one: the roughness comes from the small amount of light, which ISO only makes visible.
Two things follow. First, if a tray overflows, detail is lost: that is a clipped highlight, recorded as flat white. Second, light arrives randomly, like raindrops, so a tray that caught only a few drops gives a noisy, uneven reading. More light means a cleaner picture. The quality of a photo’s shadows depends on how much light reached them, not on the ISO number.
What Each Setting Costs You
Each of the two light controls has a side effect on the picture, and ISO has its own. Choosing an exposure is really choosing which side effects you want.
| Setting | For a brighter picture | What it costs |
|---|---|---|
| Aperture | Open wider (smaller f-number, such as f/2.8 instead of f/8) | Shallower depth of field: less of the scene is sharp from front to back |
| Shutter speed | Leave it open longer (such as 1/30 instead of 1/500) | More motion blur from moving subjects and from your hands |
| ISO | Raise the number (such as 1600 instead of 100) | No extra light, so the picture shows the noise of a small exposure, and highlights clip sooner |
Read the ISO row carefully. High ISO pictures are noisier because you raised ISO after letting in less light. On most modern sensors, if you hold aperture and shutter speed fixed, raising ISO does not add noise; it can even slightly clean up the deepest shadows. What it does cost is highlight room: every stop of ISO brightening means highlights clip one stop sooner, which is why dynamic range shrinks as ISO rises. Sensors that behave this way are called ISO invariant.
Stops: The Unit You Count Light In
Light is counted in stops. One stop is a doubling or halving of light. Camera settings are spaced so each full step is one stop:
- Shutter speed: 1/1000, 1/500, 1/250, 1/125, 1/60, 1/30, 1/15. Each step to the right doubles the time, so it doubles the light.
- Aperture: f/1.4, f/2, f/2.8, f/4, f/5.6, f/8, f/11, f/16, f/22. Each step to the right halves the light. The f-number is the focal length divided by the opening’s diameter, and the light depends on the opening’s area, which goes with the diameter squared. So each step multiplies the f-number by the square root of 2, about 1.4.
- ISO: 100, 200, 400, 800, 1600, 3200, 6400. Each step doubles the brightness the camera gives the same light.
The f-number scale is the one that trips people up, because it is not linear. f/8 is not half the light of f/4. It is two stops down, so a quarter of the light. f/16 is four stops below f/4, a sixteenth. Count steps on the scale, never divide the numbers.
The marked numbers are rounded for easy reading (1/125 is really 1/128, f/11 is really 11.3), a difference too small to see. Most cameras also offer third-stop steps in between, such as 1/160 and 1/200. Thinking in stops lets you trade settings in your head: open the aperture one stop and use a shutter speed one stop faster, and the light reaching the sensor is unchanged.
Equivalent Exposures: Many Right Answers
Every row below lets exactly the same amount of light reach the sensor. At ISO 100, any of them suits a bright overcast day. What changes is how the picture looks.
| Aperture | Shutter speed | What the photo looks like |
|---|---|---|
| f/2.8 | 1/1000 | Blurred background, fast motion frozen |
| f/4 | 1/500 | Soft background, most motion frozen |
| f/5.6 | 1/250 | Moderate depth of field, everyday handheld speed |
| f/8 | 1/125 | Good depth of field for groups and street scenes |
| f/11 | 1/60 | Deep focus for landscapes, needs a steady hand |
| f/16 | 1/30 | Near to far sharp, but walking people will blur |
Each row closes the aperture one stop and doubles the time, so the two changes cancel. This is why there is no single “correct” exposure setting: you pick the row whose depth of field and motion suit the photo. When no row works, for example when you need both f/8 and 1/1000 in dim light, ISO is the last lever, and raising it from 100 to 400 gives you two more stops to spend.
Want to slide one setting and watch the others move to keep the same exposure? The equivalent exposure tool on the exposure triangle page does exactly that, with the depth of field and blur shown as you go.
How Much Light Is There? Exposure Value and Real Scenes
The light in the scene is the part of exposure most guides skip, and learning to judge it is what makes the settings easy. Photographers rate a scene’s brightness with the exposure value (EV). EV 0 is the light that needs f/1 for one second at ISO 100. Each step up the scale is one stop more light. The number for any combination of settings is:
EV = log2(f-number squared ÷ shutter time in seconds), minus log2(ISO ÷ 100)
In words: count how many times you would double 1 to reach (f-number × f-number ÷ seconds), then take off one for every doubling of ISO above 100. f/8 at 1/125 gives 64 × 125 = 8,000, which is about 2 to the 13th, so EV 13. The same scene shot at ISO 400 needs settings two stops darker, such as f/8 at 1/500.
Here is a ladder of real light, with a working ISO 100 setting for each rung. These are typical values for a scene of average tone; real scenes vary by a stop or so either way.
| EV at ISO 100 | Typical scene | One working setting at ISO 100 |
|---|---|---|
| 16 | Snow or light sand in full sun | f/16, 1/250 |
| 15 | Full sun, crisp shadows | f/16, 1/125 |
| 14 | Hazy sun, soft shadows | f/8, 1/250 |
| 13 | Bright overcast, no shadows | f/8, 1/125 |
| 12 | Heavy overcast, or open shade on a sunny day | f/5.6, 1/125 |
| 8 | Brightly lit city street at night, shop windows | f/2.8, 1/30 |
| 6 | Well lit room at home | f/2.8, 1/8 (or ISO 1600 at 1/125) |
| 2 | City skyline in deep twilight | f/8, 15 seconds |
| Below 0 | Landscape under a full moon | Seconds to minutes on a tripod, at a wide aperture |
Look at the gap. Full sun is about 13 stops, more than 8,000 times, brighter than a city skyline in deep twilight. Your eyes adjust so smoothly that indoors and outdoors seem only a little different, which is why camera settings feel mysterious until you know this ladder. The daylight rows follow the same pattern as the sunny 16 rule, give or take a stop.
The photos on this page sit on the same ladder. Here are their real settings turned into EV with the formula above:
| Photo on this page | Settings | EV at ISO 100 |
|---|---|---|
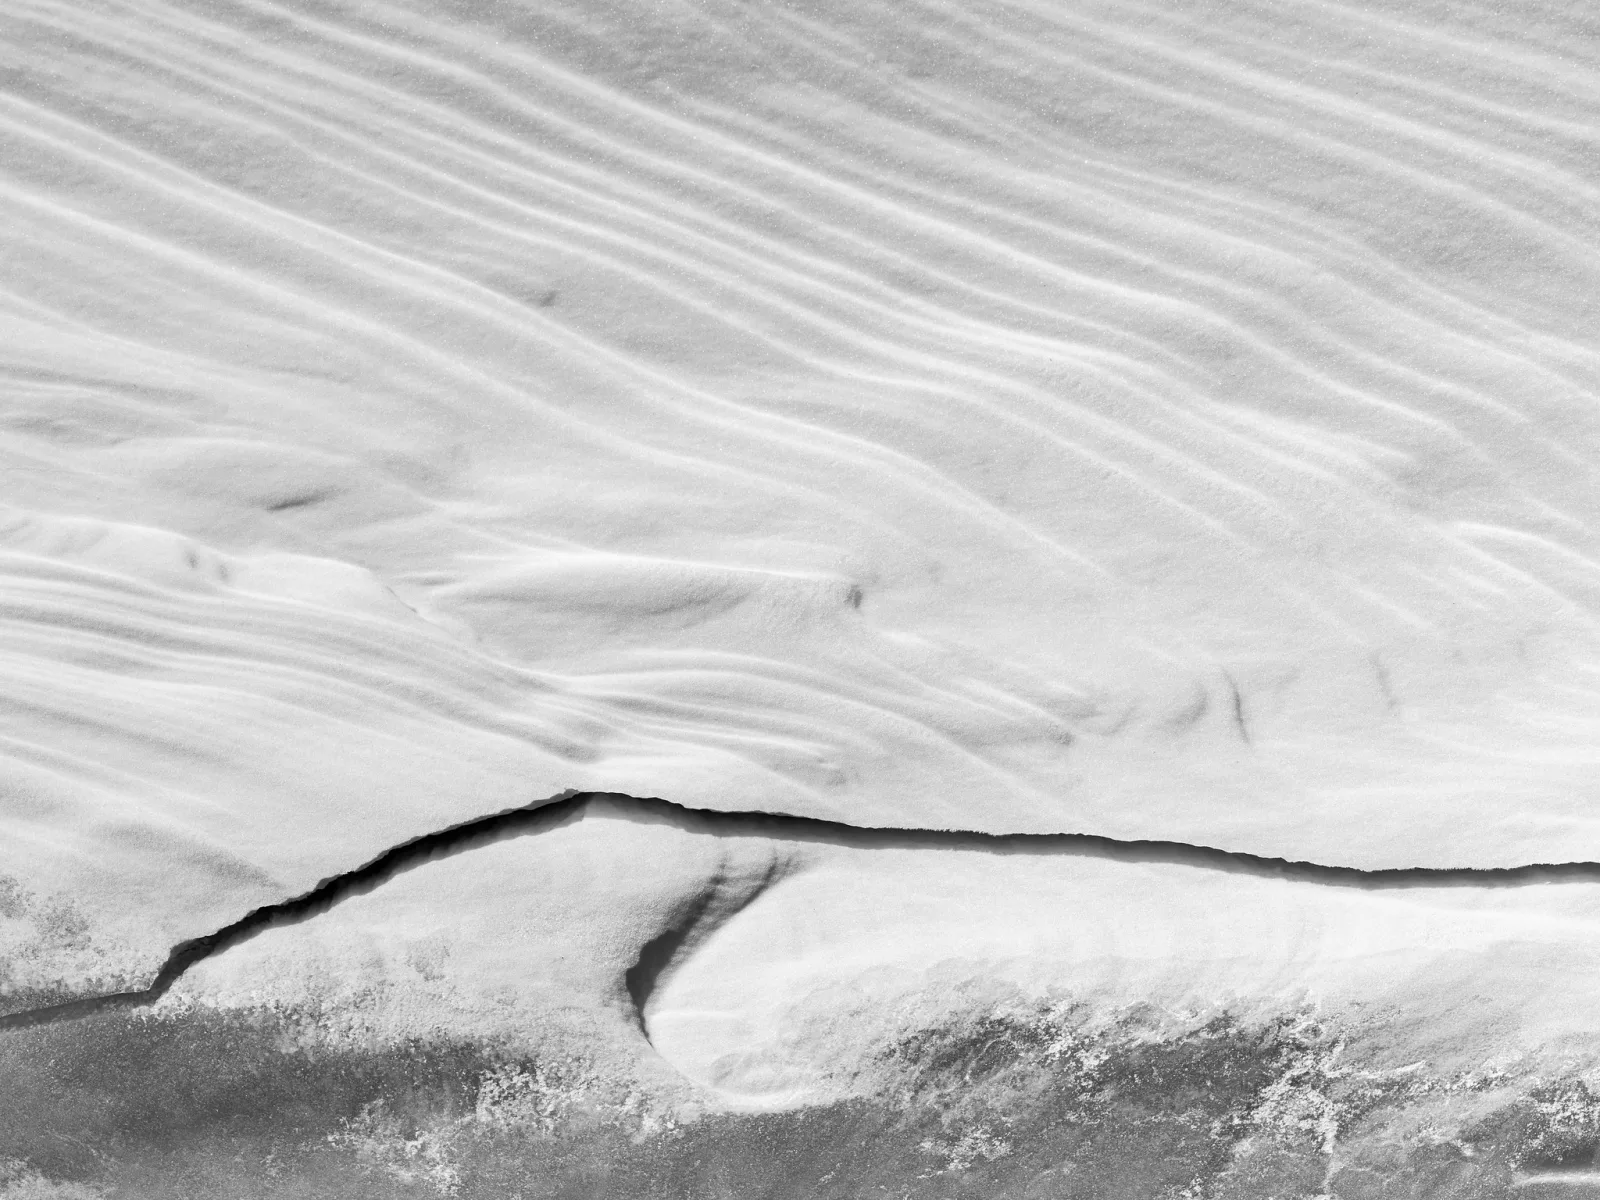
| Cracked snow and ice in sun | f/8, 1/2000, ISO 100 | About 17 |
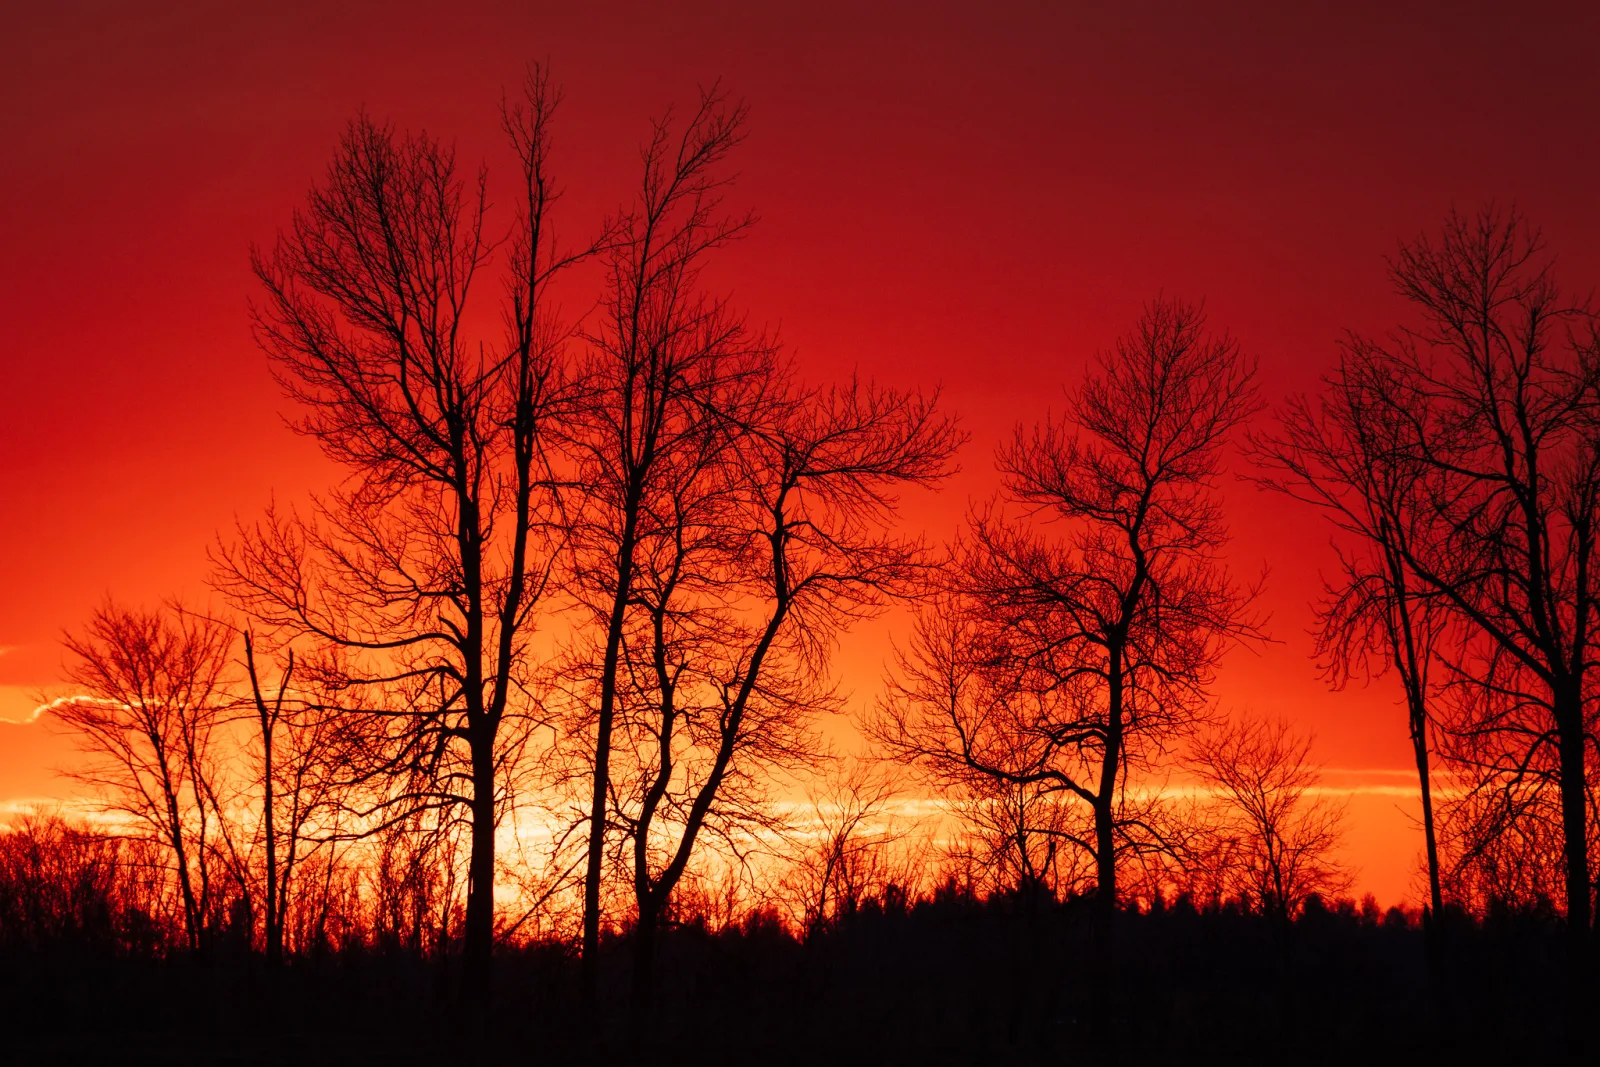
| Bare trees against a red sunset | f/8, 1/500, ISO 800 | About 12 |
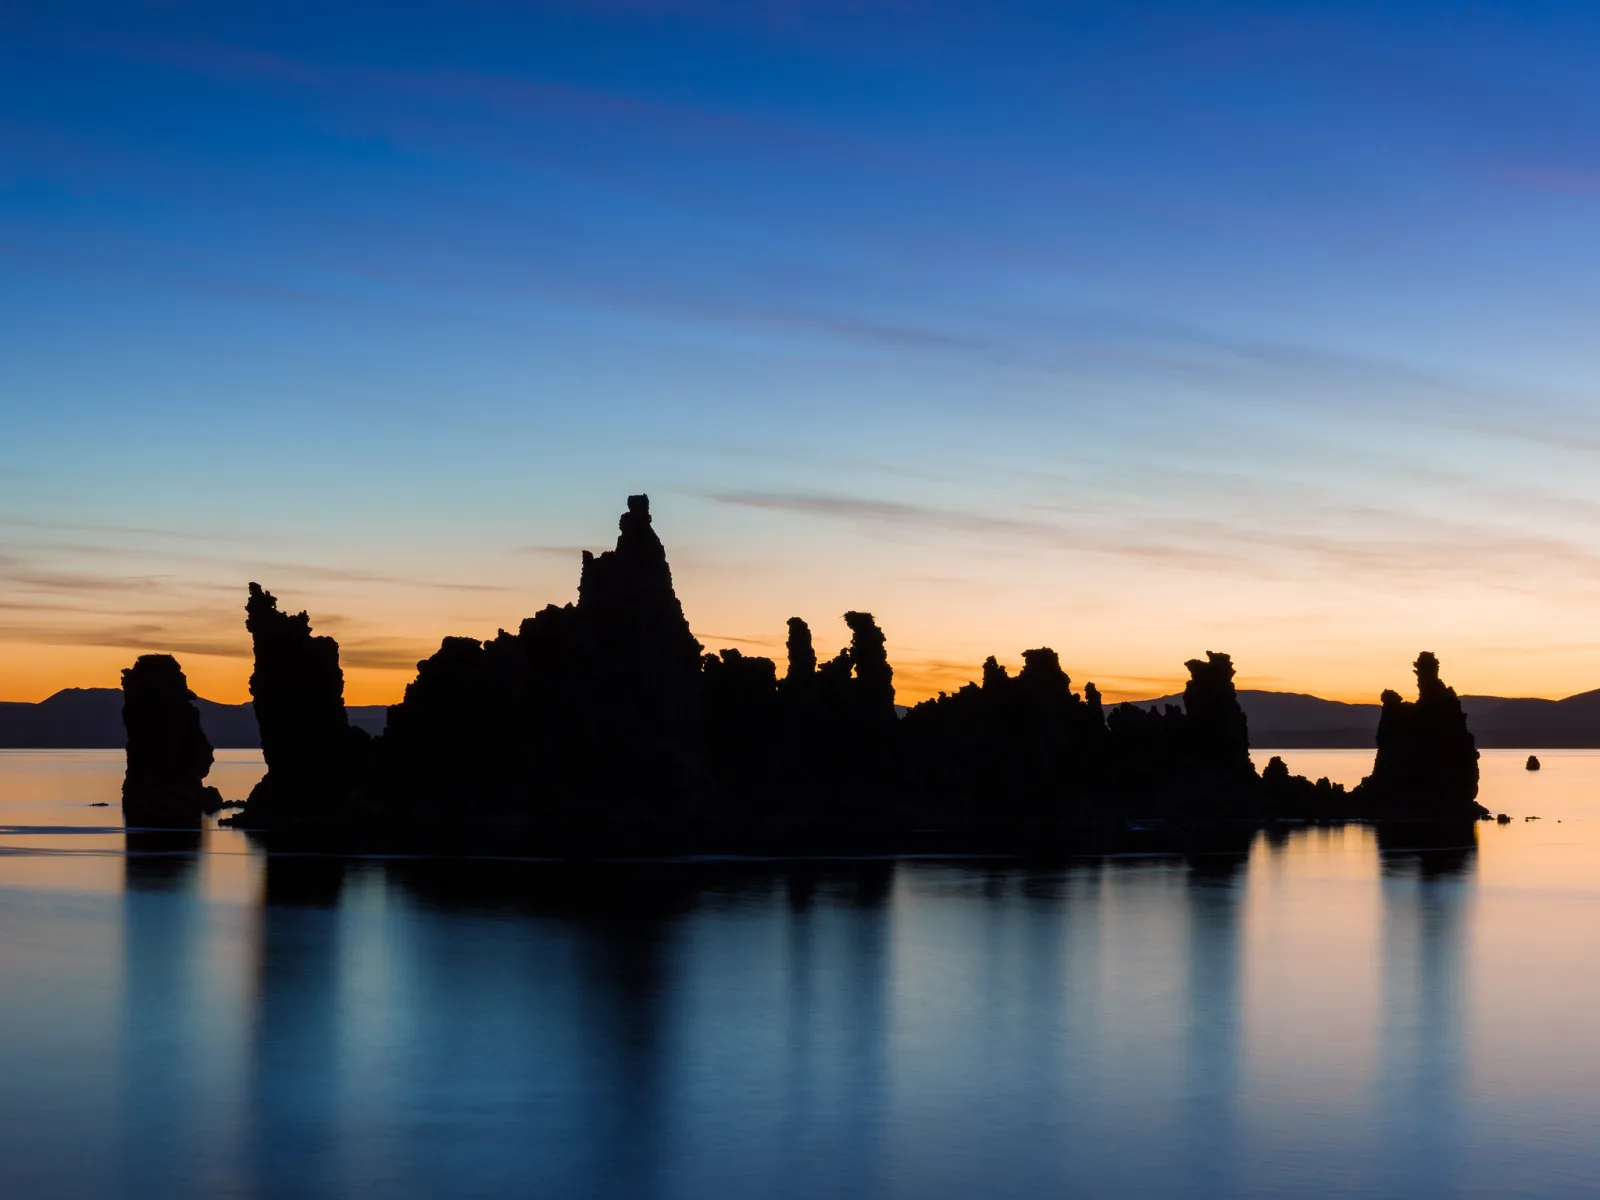
| Mono Lake at dawn (top of the page) | f/22, 13 seconds, ISO 100 | About 5 |
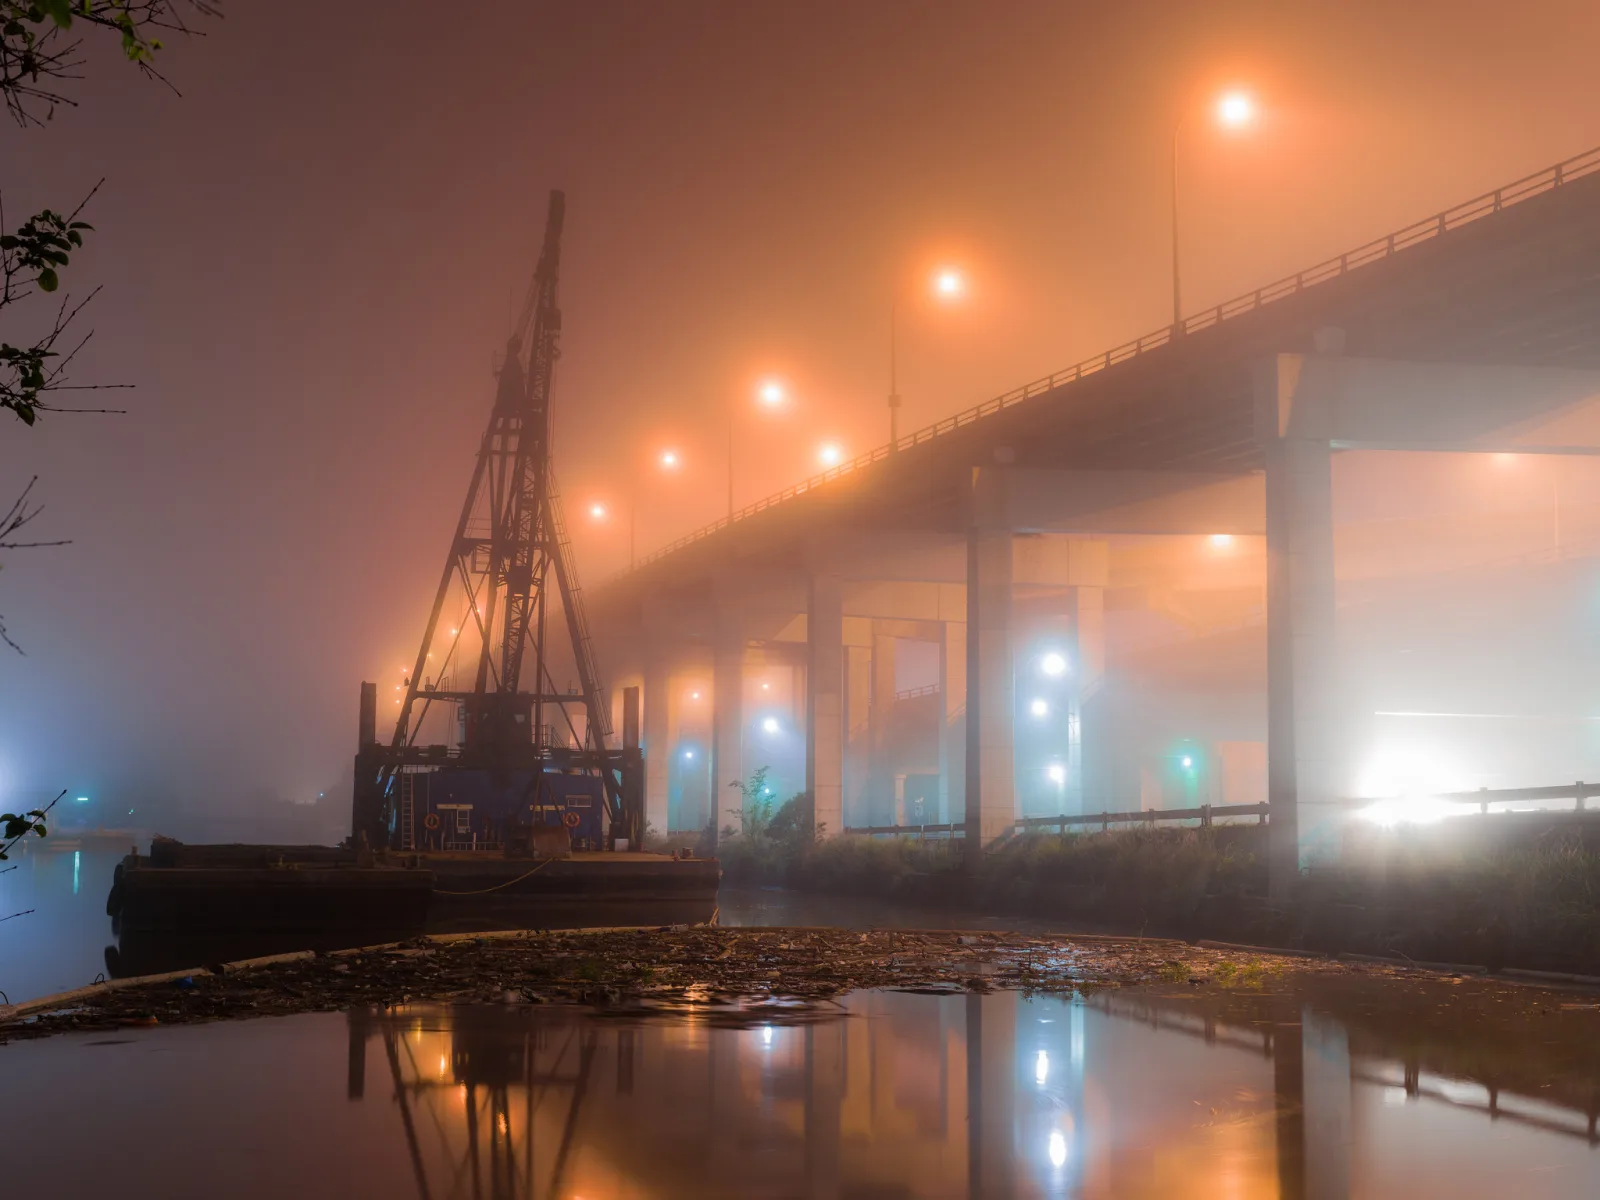
| Derrick barge under a bridge in night fog | f/11, 15 seconds, ISO 100 | About 3 |
Check one: the sunset trees. f/8 squared is 64, times 500 is 32,000, which is about 2 to the 15th. ISO 800 is three doublings above 100, so take off 3: EV 12. That is the same rung as open shade, and a sky close to a setting sun often sits about there. Once you can guess a scene’s EV within a stop or two, you can set a camera by hand and know when the meter is wrong.
Spend Light First, ISO Last
Because noise comes from too little light, the order you reach for the controls matters when light runs short:
- Open the aperture as wide as the depth of field you need allows.
- Slow the shutter as far as the subject and your hands allow. On a tripod with a still subject, that can be many seconds.
- Raise ISO for whatever brightness is still missing.
Each stop gained in steps 1 and 2 is real light, and makes the file cleaner. A stop gained in step 3 only brightens. The derrick in the fog above was made in about EV 3: f/11 squared is 121, divided by 15 seconds is about 8, which is 2 to the 3rd. At f/11 and ISO 100 that light needs 15 seconds, and that is what the camera used. On a tripod, with nothing in the frame that needed freezing, all of the light could come from time, and ISO stayed at its cleanest setting. A handheld shot of someone walking past, at f/2.8 and 1/125, would need about ISO 12,800 in the same light, and would look it.
Low ISO is not a virtue in itself. Raise ISO without guilt when the shutter speed or aperture you would otherwise need would ruin the picture. A sharp photo with some noise beats a clean, blurred one. Auto ISO with a sensible top limit does this sorting for you.
How Your Camera’s Meter Decides
The camera’s light meter measures the light bouncing off the scene through the lens. It cannot know what it is looking at. It assumes the scene averages out to a mid tone, middle gray, and suggests settings that will render it that way. For most scenes, which mix light and dark things, that is close to right. It goes wrong when the scene is not average:
- Bright scenes such as snow, beaches or a white wall come out too dark, because the meter pulls them down to gray.
- Dark scenes such as a black dog or a night street come out too bright, because the meter pushes them up to gray.
- Strong backlight fills the frame with bright sky, so the meter darkens everything and the subject in front goes too dark.
Bright snow like the photo above stays white only when you overrule the meter, which would otherwise pull it down to a dull gray. Point a meter at a sheet of white paper and at a black sweater in the same light, and it will suggest settings about four to five stops apart, turning both into the same gray. The light falling on them was identical. That is why a gray card or an incident light meter, which measures the light falling on the subject rather than the light coming off it, gives a steadier reading.
The metering mode decides which part of the frame the meter pays attention to. Evaluative (matrix) metering reads the whole frame in zones and compares it to patterns of typical scenes, and suits most work. Center-weighted favors the middle of the frame. Spot metering reads a small circle, so you can meter exactly the face or the patch of sky you care about and decide yourself how bright it should be.
Want to see the same scene metered three ways and watch the result change? The metering modes page has a tool built for that.
Setting Exposure in the Camera Modes
Aperture or Shutter Priority
- Choose the setting that matters most for this picture. In Aperture Priority (A or Av) you pick the aperture for depth of field. In Shutter Priority (S or Tv) you pick the shutter speed for motion. The camera sets the other one from its meter.
- Use your lowest ISO in good light, or Auto ISO with an upper limit you are happy with.
- Take a shot and check it. If it is too bright or dark, use exposure compensation: +1 makes the next shot a stop brighter, −1 a stop darker. For snow, start at +1 to +2.
Try it on a snowy scene: in Aperture, Shutter or Auto mode with Evaluative metering, dial in exposure compensation until the snow comes out white instead of gray.
Manual Mode
- Set the aperture for the depth of field you want.
- Set a shutter speed fast enough for the subject and for holding the camera steady. The hand-holding rule is a good starting guide.
- Adjust ISO, or shutter speed, until the meter scale reads where you judge the scene should sit: zero for an average scene, above zero for snow, below for a night street.
- Take a test shot, read the histogram, then adjust.
Manual mode earns its keep when the light is steady but the meter would be fooled, such as a performer under a spotlight, or when frames must match exactly, as in a panorama. One catch: if Auto ISO is switched on in Manual, the camera still changes ISO to hit the meter’s idea of correct, and on most cameras exposure compensation then works by shifting ISO. To hold a reading while you recompose in an automatic mode, use exposure lock. The differences between all the modes are set out in camera modes explained.
Want to try setting an exposure right now without a camera? The camera simulator gives you aperture, shutter speed, ISO and a light meter on real photographs.
How to Tell If the Exposure Is Right
The rear screen is a poor judge. It looks bright in a dark room and dim in sunshine, and its brightness setting is arbitrary. Use these instead.
- The histogram. A graph of how many pixels sit at each tone, from black on the left to white on the right. A spike pressed against the right wall means highlights are clipped; against the left wall, shadows are. The right shape depends on the scene: a snow scene should sit to the right, a night street to the left. A centered hill is not the goal.
- The highlight warning. Most cameras can flash areas that are pure white in playback, often called blinkies. If they flash on something that matters, such as a face or a white dress, reduce exposure.
- The color channels. A red flower or a deep blue sky can clip in one color while the overall histogram looks safe. If your camera shows a red, green and blue histogram, check the channel that matches your subject.
- Your subject. Zoom in on playback. The thing the photo is about should have detail and look the brightness you intended.
The histogram and blinkies are worked out from the JPEG preview the camera makes, even when you shoot RAW. A RAW file usually holds a little more highlight detail than the warning suggests, so a small flash of blinkies on a bright sky is often recoverable. Treat the warning as slightly cautious, not exact.
Overexposure loses highlight detail, and once a highlight is clipped to pure white nothing can bring it back. Underexposure keeps highlights safe but leaves shadows that turn noisy when you brighten them, because they caught too little light. The cleanest files come from giving the sensor as much light as you can without clipping anything that matters, a technique called expose to the right.
Which of these two is correctly exposed? Pick one, then look at the brightest parts of each the way the list above describes.
A well-exposed frame keeps detail in highlights and shadows so the eye reads the subject without strain. An overexposed frame blows the highlights to pure white and loses information that cannot be recovered.
Not sure what your histogram’s shape is telling you? The histogram guide has an interactive histogram you can push and pull until the shapes make sense.
When One Exposure Cannot Hold the Whole Scene
Sometimes no exposure keeps detail in both the brightest and darkest parts of a scene: a sunset sky behind a stand of trees, a bright window in a dark room. The scene has more contrast than the sensor’s dynamic range. A sensor holds roughly 12 to 14 stops at its base ISO by lab measures, fewer that look clean, and fewer again at high ISO; a JPEG keeps less than the RAW file. A sunlit scene with deep shade can span more than that.
Decide what must keep detail, and expose for it. In the sunset above, the color of the sky was the picture, so the trees went to black. That is a silhouette, and it is a fine answer when the shapes are strong. When both ends matter, you have four choices:
- Expose for the highlights and lift the shadows in editing, which works well with RAW files from a modern sensor.
- Add light to the shadows with a flash or a reflector, which shrinks the contrast before it reaches the camera.
- Darken a bright sky with a graduated ND filter.
- Take a bracket of exposures and blend them, as covered in what is HDR and exposure blending.
Is your scene too contrasty for one frame, and you want to see why? Dynamic range explained lets you set a scene’s contrast against a sensor’s range and watch what clips.
Correct Exposure Is a Creative Choice
“Correct” exposure means the photo looks the way you meant it to. Mono Lake at the top of this page is “underexposed” for the rocks on purpose; a light, airy portrait is often given a stop or more above what the meter suggests. Decide what the most important tone in the picture is, such as a face, the sky or a white dress, and expose so that tone looks right. Everything else falls into place around it.
Common Mistakes and Misconceptions About Exposure
- “ISO lets in more light.” It does not. It brightens the light you collected. Open up and slow down first; raise ISO for what is still missing.
- “High ISO causes noise.” Too little light causes noise. High ISO is usually the sign that light was short. Shooting at low ISO and brightening later gives the same or worse noise, not less.
- “f/8 is half the light of f/4.” It is a quarter, two stops. Count steps on the f-stop scale, never divide the numbers.
- Trusting the rear screen. Its brightness tells you little. Check the histogram and highlight warning.
- Letting the meter make snow gray, and night bright. Add +1 to +2 stops for bright scenes; subtract for dark ones.
- Aiming every histogram at the middle. The shape should match the scene. A snow scene sits right, a night scene sits left.
- Underexposing “to be safe”. It protects highlights but costs shadow noise. Expose as brightly as you can without clipping what matters.
- Blowing out skies to save shadows. Clipped highlights cannot be recovered. Protect them and brighten the shadows later.
- Letting exposure drift between frames that must match. For panoramas and sequences, set Manual mode with a fixed ISO.
Want to see exposure choices in real photos, mixed in with light, focus and composition, and test whether you can pick out which one did the work? Try the photo quiz: each round mixes eight of Duncan Rawlinson’s photos.
Try This: Fool Your Meter in 10 Minutes
You need a camera or phone that lets you see the exposure settings (a phone camera app with a manual or pro mode works), a sheet of white paper and something black and matte, such as a sweater, in the same even light.
- Fill the frame with the white paper, let the camera set the exposure, and take a shot. Note the settings it chose.
- Fill the frame with the black sweater, same light, and take a shot. Note the settings.
- Count the stops between the two settings using the scales above. Expect about four to five.
- Now set exposure compensation to +1.7 or +2 and reshoot the paper, then −1.7 or −2 and reshoot the sweater.
- Work out the EV of the paper shot with the formula, and find its rung on the ladder.
How to judge it: the first two photos should both look gray, with histograms bunched near the middle. That shows the meter turns everything to middle gray. The two compensated shots should look white and black, with the paper’s histogram pushed right and the sweater’s pushed left, and no blinkies on the paper. If the light really was the same, the two compensated shots should have settings within about half a stop of each other, because the right exposure depends on the light, not on the color of the thing.
Exposure FAQ
What are the best exposure settings?
There is no single best setting, because many combinations let in the same light. Choose the aperture for the depth of field you want, the shutter speed for the motion you want, and the lowest ISO that makes the exposure work without spoiling either. In bright sun, f/16 at 1/125 and ISO 100 is a reliable start.
What is the difference between exposure and brightness?
Exposure is the light the sensor actually received. Brightness is how light the final image looks, which ISO and editing both change. Brightening in editing, like raising ISO, adds no light, so it shows whatever noise the small exposure carried.
Is it better to underexpose or overexpose?
Neither by habit. Clipped highlights are gone for good, so protect what matters in the bright end; beyond that, more light gives cleaner shadows. With RAW, expose as brightly as you can without clipping important highlights.
Why are my photos too dark when the camera chose the settings?
Usually the scene was brighter than average, such as snow, a beach or a bright sky in the frame, and the meter pulled it toward gray. Add exposure compensation, or meter from your subject with spot metering. More causes are covered in why are my photos dark.
Is exposure the same as the exposure triangle?
Exposure is the result, the amount of light recorded. The exposure triangle is the working model of how aperture, shutter speed and ISO combine to give a picture its brightness, and what each one costs you. Strictly, only the first two change exposure; ISO changes how bright it is made to look.
What is a long exposure?
A long exposure uses a slow shutter speed, from a fraction of a second to several minutes, so moving things such as water, clouds or traffic blur while still things stay sharp. It needs a tripod, and in daylight an ND filter to cut the light. See long exposure photography.
Want to check how much of this has stuck? Try the exposure quiz, or the harder one on stops, ETTR and Manual mode.