Spirographs are a unique form of light painting where a mesmerizing patterns is being light painting into the sensor. It is kinda the adult version of this kids art game. Interestingly, Spirographs are really easy to create and only require a flashlight, a camera and a dark room. Jason D. Page just put together a [...]
Removing unwanted items from photos can be a tedious and time-consuming task. However, Adobe Photoshop makes it easy to automatically remove objects from photos. In this tutorial, we'll discuss the steps you need to take to automatically remove objects from photos in Adobe Photoshop. Let's get started!
Step 1: Open the Photo in Photoshop
The first step is to open the photo in Photoshop. To do this, simply open the Adobe Photoshop program and click on the "File" menu. Then, click "Open" and select the photo you want to work with. Once you have opened the photo, you should see it displayed in the main Photoshop window.
Step 2: Select the Object You Want to Remove
Now that the photo is open in Photoshop, you need to select the object you want to remove. To do this, use the selection tools in Photoshop. You can use the lasso, magic wand, or any other selection tool to select the object. Once you have selected the object, it should be highlighted in the photo.
Step 3: Use the Content-Aware Fill Tool
Now that you have selected the object you want to remove, it's time to use the Content-Aware Fill tool. To use the tool, simply select it from the toolbar, then click and drag the mouse over the area where the object was. The Content-Aware Fill tool will automatically remove the object and fill in the area with the surrounding pixels.
Step 4: Adjust the Results
Once the object has been removed, you may need to make some adjustments to the results. To do this, use the "Edit" menu in Photoshop and select "Adjustments". This will bring up a panel of adjustment tools that you can use to tweak the results. You can adjust the color, contrast, brightness, and more to get the perfect result.
Step 5: Save the Photo
Once you are happy with the results, it's time to save the photo. To do this, simply click on the "File" menu and select "Save". Enter a name for the file, select a location to save it, and click "Save". Your photo should now be saved with the object removed.
Congratulations! You have now completed the steps to automatically remove objects from photos in Photoshop. By following the steps outlined in this tutorial, you should be able to quickly and easily remove unwanted objects from your photos.
Sometimes learning photography can be a little dull and scientific. Apertures, f-stops and ISOs can get a little too technical and tedious sometimes. We've tried to make our online photography class fun and engaging but even with our class the details of learning photography can be a little dry sometimes. Given that, we're put together this post about fun things you can do with Photography if you're just getting started or if you're the next Cartier Brasson.
Be the party photographer.
Throwing a party? Or is your friend throwing a party? Sign yourself up as the 'professional' photographer for the night and document the evening. Just be careful about posting too much debauchery on Facebook et al. Take it kinda seriously, and tell everyone you're the "official" photographer. If you don't have a speedlite go out and get one. If you're a cheapskate buy one that can be returned if you must. The point is to have fun and get some good party shots.
Buy a lomo or a Holga.
The look these intentionally flaw laden cameras create is really fun. The fish eye lomos are especially fun. They have ridiculously wide angle lenses on them. So wide that they'll capture a person head to toe when the camera is just a few inches from their nose. Scan these photos and give them to your friends so they can use them on Facebook. Better yet, have prints made and make a collage of them on your wall.
Buy a polaroid camera.
Go ahead and buy yourself a polaroid camera and spend the day walking around with it. You only have a certain number of shots to take so make em count. Then post the good ones up in your house / apartment.
We'll be posting more of these "fun with photography" posts in the future. In the meantime let's lighten up a little as photographers sometimes. Remember to have fun and create great images at the same time!
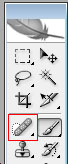
Cleaning up small and large skin blemishes in Photoshop is an incredibly easy process. It’s actually quite fun to do as well because you have complete control over how much you clean up the skin in the photograph. Unlike retouching the entire area of skin, cleaning up blemishes requires no Photoshop filters or layer masks. There is a great tool in Photoshop called the “spot healing brush” and it looks like this.
All you need to do is select this tool and use the “alt” key to select a sample of good skin. Ensure your brush size is set to just larger than the size of the blemishes. You can change your brush size by clicking on the drop down button in the upper left side of the screen.
Once you are ready to get rid of the small and large blemishes in the skin, simply start clicking away. The spot healing brush is great because unlike the stamp tool is blends in both the texture and color in a seamless fashion leaving virtually no sign of the blemishes in the first place.
Look at the image at the top of this blog post to see both the before and after pictures of the skin with blemishes and then without blemishes.
Here is a quick Photoshop tutorial on how to make bad skin look great. Retouching skin is not a simple task. You can easily overdo it and make the skin look unnaturally airbrushed and almost cartoonish. That being said, with some care and a few practice runs you'll be touching up skin in your photographs with Photoshop in no time.
Step 1:
Open your photograph in Photoshop
Step 2:
Right click on your background image in you layers window and click "duplicate layer". You'll now have a clone of your background. This is important for both masking your image and adding the right skin texture later on.
Step 3:
This is where you make most of the changes to your subjects skin. Make sure your second layer is active and go to your "filters' button at the top of the Photoshop window. Click "filters -- Blur -- Surface Blur". Ensure that "preview" function is activated so you can see the changes that you're making to the skin tone immediately. There are no ideal settings for this filter. simply play around until you feel comfortable with having cleaned up any sking blemishes in your subjects face or body.
Step 4:
You will have lost some detail in important areas such as the eyes of your subject as well as any areas with hair. This is easily fixable by ensuring your second layer is active and clicking on "layer -- layer mask -- reveal all" (found at the top of the Photoshop window). You need to use this mask to expose the textures in the eyes and the hair. To do this simply choose black as your foreground color and paint with the "brush tool" over the objects eyes and hair. The original texture of the image will become visible.
Step 5:
However, you'll probably notice that your image has a slightly plasticized look to the skin. Although the skin blemishes are fixed, the image now looks unnatural. In order to fix this you need to expose some of the background skin texture. To do this simply ensure your second layer is active and then use the "opacity" level in the layers window to expose some of the original skin texture. Usually a setting above 50% is desirable because it allows you to maintain the effects of the cleaned up skin while at the same time making the photograph look natural.
Spirographs are a unique form of light painting where a mesmerizing patterns is being light painting into the sensor. It is kinda the adult version of this kids art game. Interestingly, Spirographs are really easy to create and only require a flashlight, a camera and a dark room. Jason D. Page just put together a [...]