Every lens distorts reality to some degree. That statement might sound concerning, but once you understand how lens distortion works, you can correct it when it causes problems and use it creatively when it serves your vision. Lens distortion is a fundamental optical property that affects every photograph you take, whether you are shooting with a smartphone, a wide-angle zoom, or a high-end prime lens.
This guide explains the major types of lens distortion, shows you how to identify them in your images, teaches you how to correct them in post-processing, and reveals when distortion can actually make a photograph more powerful. Understanding distortion makes you a more informed photographer and gives you yet another variable to control in your creative process.
Barrel Distortion: The Wide-Angle Bulge
Barrel distortion causes straight lines near the edges of the frame to bow outward, as if the image were mapped onto the surface of a barrel. It is most pronounced in wide-angle lenses and zoom lenses at their widest focal length.
You can see barrel distortion most clearly when photographing subjects with obvious straight lines: buildings, doorways, bookshelves, or a brick wall. If the lines that should be perfectly straight appear to curve outward from the center, you are looking at barrel distortion.
The effect is strongest at the edges and corners of the frame. The center of the image is usually unaffected. This is why objects at the center of a wide-angle shot look normal while objects near the edges appear stretched or curved.
Barrel distortion is an inherent optical property. It comes from the way lens elements bend light, and wider-angle lenses need more extreme bending to capture their wide field of view. Some lenses are optically designed to minimize it, but very few wide-angle lenses eliminate it completely. Many modern lenses rely on software correction profiles rather than pure optical correction, which keeps the lens physically smaller and more affordable.
Pincushion Distortion: The Telephoto Pinch
Pincushion distortion is the opposite of barrel distortion. Straight lines near the edges bow inward, as if the image were being pinched at the corners. This type of distortion is most common in telephoto lenses and zoom lenses at their longest focal length.
Pincushion distortion is generally less obvious than barrel distortion because telephoto images tend to contain fewer straight lines near the frame edges. When photographing architecture, test charts, or any subject with prominent horizontal and vertical lines at longer focal lengths, however, the inward bowing becomes visible.
Many zoom lenses exhibit barrel distortion at the wide end and pincushion distortion at the telephoto end, with a relatively distortion-free zone somewhere in the middle of the zoom range. This is normal and expected behavior.
Perspective Distortion: The Misunderstood One
Perspective distortion is not actually a flaw in the lens. It is a result of camera-to-subject distance. But it is so commonly associated with certain focal lengths that it deserves a thorough explanation here.
When you photograph a face from very close range with a wide-angle lens, the nose appears disproportionately large compared to the ears, and the face looks unnaturally stretched. This is not barrel distortion. It is perspective distortion caused by the close shooting distance. The nose is physically much closer to the lens than the ears, and the wide angle of view exaggerates this distance relationship.
Conversely, when you photograph a face from farther away with a telephoto lens, the features appear flattened. The nose and ears seem to be on the same plane. This compression effect is also perspective distortion, caused by the greater shooting distance.
This is why portrait photographers typically use focal lengths between 85mm and 135mm. At these focal lengths, the natural shooting distance produces the most flattering perspective for human faces, with proportions that look neither exaggerated nor compressed.
The critical thing to understand is that perspective distortion is controlled by distance, not by the lens itself. If you stood in the same position and cropped a wide-angle shot to match the field of view of a telephoto shot, the perspective distortion would be identical. The lens does not cause the distortion. The shooting distance does.
How to Correct Lens Distortion
Most lens distortion is easily corrected in post-processing, and many cameras even correct it automatically in-camera for JPEG files.
Automatic lens profiles. Lightroom, Capture One, and most other photo editing software include distortion correction profiles for thousands of lenses. When you enable the lens correction profile (usually a single checkbox), the software automatically corrects barrel and pincushion distortion based on the specific lens and focal length recorded in the image’s EXIF data. This is the easiest and most accurate correction method.
Manual correction. If no automatic profile exists for your lens, you can correct distortion manually using a distortion slider. Move the slider until straight lines in your image appear truly straight. Use a grid overlay in your editing software to help judge when lines are properly aligned.
In-camera correction. Many modern cameras apply lens distortion correction automatically to JPEG files. This is especially common with mirrorless cameras, which often rely on software correction to keep native lenses compact. If you shoot in RAW, the correction data may be embedded in the file but is only applied when processed in compatible software.
Perspective correction. Converging vertical lines (when you tilt your camera upward to photograph a building, making it appear to lean backward) can be corrected using the perspective transform tools in Lightroom or Photoshop. The “guided upright” feature in Lightroom is particularly effective. Just draw two lines along what should be vertical, and the software straightens them.
Keep in mind that correcting distortion crops the image slightly. Barrel distortion correction stretches the edges, which means the corners get trimmed. This is usually minor, but for critical compositions, leave a little extra space around the edges when shooting to account for the crop.
Common Mistakes
Lens distortion is straightforward to understand but easy to mishandle in practice. Here are common mistakes to avoid.
- Confusing perspective distortion with lens distortion. These are different phenomena with different causes. A “stretched” nose in a close-up wide-angle portrait is perspective distortion (caused by distance), not barrel distortion (caused by optics). Applying a lens correction profile will not fix it. Only changing your shooting distance will.
- Correcting distortion when it is not needed. Not every image benefits from perfectly straight lines. In landscape photography, slight barrel distortion from a wide-angle lens is often invisible and irrelevant. Over-correcting can actually introduce new problems, like unnatural-looking straight lines in organic scenes. Correct distortion when it looks wrong, not as a blanket rule for every image.
- Forgetting to check the edges of the frame. Distortion is most visible at the edges and corners. When shooting architecture, interiors, or any subject with straight lines, pay special attention to what is happening at the frame borders. A slightly curved roofline or a bowed window frame can look sloppy if left uncorrected.
- Placing faces at the edges of wide-angle group shots. Wide-angle lenses stretch objects at the edges of the frame. When you photograph a group of people with a wide lens, the people on the far left and right will appear wider and distorted. Keep important subjects closer to the center of the frame when using wide-angle lenses, or correct for it in post.
- Ignoring distortion in real estate and architectural photography. These genres demand straight lines. Barrel distortion in real estate photos makes rooms look strange. Converging verticals make buildings look like they are falling over. Professional architectural photographers correct every line. If you shoot these genres, distortion correction is not optional.
Using Distortion Creatively
Distortion is not always a problem to be fixed. It can be a powerful creative tool when used intentionally.
Wide-angle perspective distortion, where close objects appear dramatically larger than distant ones, creates a powerful sense of depth and drama. Landscape photographers exploit this by placing foreground elements very close to a wide-angle lens, making rocks, flowers, or other objects loom large while the background recedes dramatically.
In street photography, the slight distortion of a 28mm or 35mm lens adds energy and an immersive quality. It makes the viewer feel like they are inside the scene rather than observing it from a distance.
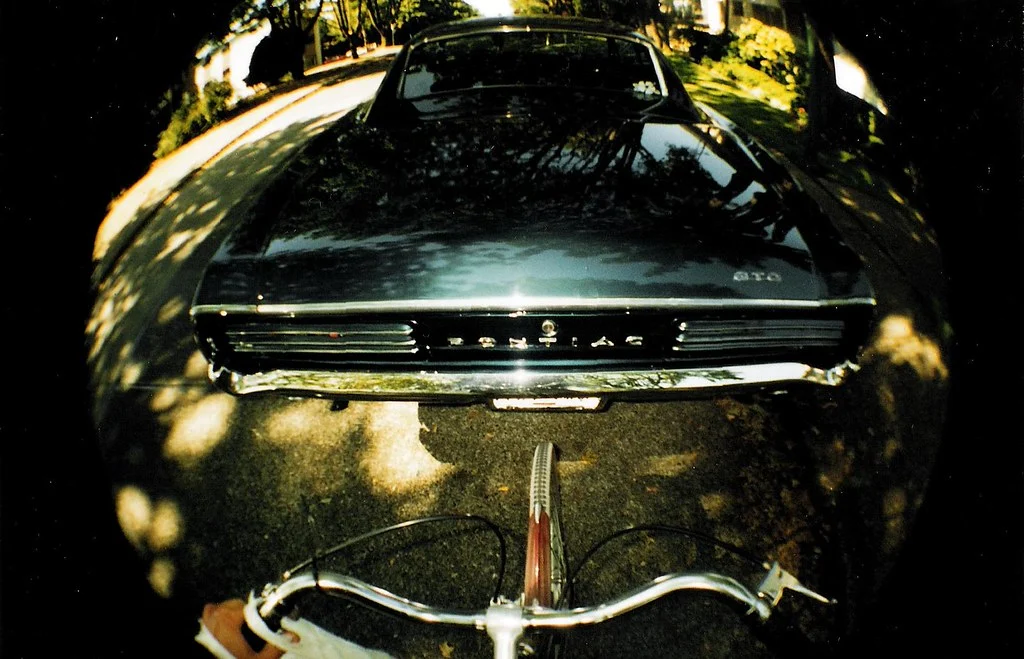
Fisheye lenses take barrel distortion to the extreme, curving all straight lines dramatically. While novelty can wear off quickly, fisheye lenses produce genuinely creative results in skateboarding photography, architectural interiors, and abstract compositions where the curved lines add to the visual interest.
Telephoto compression, which flattens depth and stacks distant objects together, creates its own kind of visual drama. A row of buildings shot with a long telephoto appears to be stacked on top of each other. Distant mountains seem to tower directly behind a nearby subject. This compression effect is a form of perspective distortion, and skilled photographers use it constantly to create images that feel dramatically different from what the naked eye sees.
Try This: Practical Exercises
These exercises will help you see, understand, and control distortion in your own photography.
Exercise 1: The Brick Wall Test. Photograph a flat wall with straight lines (a brick wall, a tiled floor, a bookshelf) at several different focal lengths. Zoom all the way wide, then zoom to mid-range, then zoom to full telephoto. Compare the images. You will see the barrel distortion at the wide end, the relatively clean middle, and any pincushion at the long end. Then open the images in your editing software and apply lens correction profiles. This makes the concept of optical distortion tangible and concrete.
Exercise 2: The Portrait Distance Test. Photograph a willing subject’s face from three distances: very close with a wide-angle lens (maintaining a head-and-shoulders framing), at a moderate distance with a normal lens, and from farther away with a telephoto lens (again maintaining the same framing). Compare how the face looks in each image. You will clearly see how shooting distance affects perspective and facial proportions. This exercise explains in a single comparison why focal length choice matters so much for portraits.
Exercise 3: Embrace the Distortion. Take a walk with your widest lens and intentionally create images that use distortion as a compositional element. Get very close to foreground objects. Shoot upward at tall buildings. Place subjects near the edges of the frame where stretching is most pronounced. Instead of fighting the distortion, make it the point of the photograph. This exercise teaches you to see distortion as a creative option rather than a technical problem.
Lens distortion is one of those topics that becomes much less intimidating once you understand the basics. Barrel and pincushion distortion are optical properties that are easily corrected in software. Perspective distortion is controlled by your shooting distance. And all types of distortion can be used creatively when you choose to embrace rather than eliminate them. Knowing when to correct and when to keep distortion is a mark of a photographer who truly understands their tools.