Wedding photography is one of the most rewarding and demanding genres in the craft. You are entrusted with capturing moments that cannot be recreated: the look on a groom’s face when the doors open, the trembling hands exchanging rings, the grandmother wiping a tear during the first dance. Every frame matters, every second counts, and there are no do-overs. This guide covers everything you need to photograph a wedding with confidence, from the way you prepare to the way you move through a ceremony without being seen.
Introduction to Wedding Photography
Wedding photography sits at the intersection of documentary journalism, portraiture, and event coverage. In a single day, you will shift between posed group portraits, candid moments of raw emotion, challenging mixed-light conditions, and fast-paced reception energy. The couple is trusting you to deliver a visual narrative of the most important day of their lives, and the pressure is real. Check out our couple photography for more details.
What separates a competent wedding photographer from an exceptional one is not just gear or technical skill. It is emotional intelligence, anticipation, and the ability to remain calm under pressure. The best wedding photographers read body language, predict what will happen next, and position themselves in the right spot before the moment unfolds. They become invisible observers who capture authentic emotion without interrupting it.
This guide covers essential techniques, camera settings for every phase of the wedding day, composition strategies, lighting solutions, common mistakes to avoid, and practical exercises you can use to sharpen your skills before you ever pick up a paid booking.
Essential Wedding Photography Techniques
1. Timeline Planning and Coordination
The difference between a stressed wedding photographer and a calm one is a solid timeline. Work with the couple to build a realistic schedule that includes buffer time for delays, travel between locations, and the inevitable family member who disappears for 15 minutes.
- Allow 60-90 minutes for couple portraits if they want multiple locations
- Schedule formal family photos immediately after the ceremony while everyone is still together
- Build in 30 minutes of padding because weddings never run on time
- Send the timeline to the wedding planner, DJ, and officiant so everyone is synchronized
- Create a detailed shot list and keep a printed copy in your pocket as a backup
2. Building a Must-Have Shot List
While documentary-style shooting captures the authentic moments, every couple expects certain shots. Missing the ring exchange or the first kiss is not artistic; it is a failure of preparation.
- Getting ready: Dress hanging, shoes, bouquet, makeup being applied, buttoning the dress, the first look from a parent or partner
- Ceremony: Processional, vow exchange, ring exchange, first kiss, recessional, crowd reactions
- Portraits: Couple alone, bridal party, immediate family combinations, full group
- Reception: Room details before guests arrive, first dance, parent dances, toasts, cake cutting, bouquet or garter toss, dance floor candids
- Exit: Sparkler exit, car departure, or final send-off moment
3. Anticipating Emotional Moments
The best wedding images are not lucky. They are anticipated. Watch body language, listen to speeches, and position yourself where the next emotional moment will happen. When the best man starts telling a story that is building toward the punchline, train your lens on the couple’s reaction, not the speaker. When the father is about to see the bride for the first time, be in position before the door opens.
4. Working with a Second Shooter
A second shooter captures what you physically cannot. While you photograph the bride walking down the aisle, they capture the groom’s reaction. While you shoot the couple cutting the cake, they photograph the guests’ faces. Coordinate in advance:
- Assign clear zones so one shooter owns the altar and couple while the other owns the crowd
- Avoid appearing in each other’s frames
- Use the same color profile and white balance for consistent editing
- Exchange memory cards at the end of the night so you never leave with only one copy
5. Shooting in Challenging Light
Venues rarely have photographer-friendly lighting. Dark churches with tungsten overhead fixtures, outdoor ceremonies in harsh midday sun, receptions lit entirely by string lights and candles. You need solutions for all of them.
- Dark venues: Push ISO, open the aperture, and use off-camera flash bounced into a corner to create natural-looking fill
- Harsh sun: Find open shade at the edge of a building or a large tree, use a diffuser overhead, or shoot into the sun for dramatic backlit flare
- Mixed lighting: Gel your flash to match the venue’s ambient color temperature so skin tones look natural
6. Staying Invisible
A great wedding photographer is felt but not seen. Use a long lens to capture intimate moments from a respectful distance. Wear dark, professional clothing that blends into the background. Move slowly and deliberately because quick movements draw the eye. During the ceremony, position yourself once and stay put; constantly moving is distracting for guests and the couple.
7. Backup and Data Safety
Before you leave the venue, back up every card to a portable hard drive. Some photographers carry a laptop specifically for this purpose. When you arrive home, create a second backup before you sleep. The 3-2-1 backup rule (three copies, two different media, one offsite) is not optional for wedding work. Always shoot with dual card slots recording simultaneously so that a corrupted card never means a lost wedding.
Camera Settings for Wedding Photography
Weddings move through radically different lighting conditions, from bright outdoor ceremonies to dim reception halls, sometimes within minutes. Mastering your settings for each scenario is what separates a competent wedding photographer from an exceptional one.
Ceremony Settings
The ceremony is the most pressure-filled part of the day. You cannot ask the officiant to pause, reposition the couple, or turn on more lights. You work with what you are given.
- Mode: Aperture Priority or Manual
- Aperture: f/2.8 to f/4, wide enough for low light yet narrow enough to keep both people in focus during the vow exchange
- ISO: Auto ISO with a ceiling of 6400-12800 depending on your camera’s noise performance
- Shutter Speed: Minimum 1/200s to freeze natural movement such as trembling hands, turning heads, and the toss of a bouquet
- Focus: Continuous AF with eye detection enabled. Single-point AF as a fallback for backlit situations where eye detect struggles
- White Balance: Kelvin preset matched to the venue light, or shoot RAW and correct in post. Avoid auto white balance if mixing ambient and stained-glass light
Reception Settings
Receptions are a mix of ambient mood lighting, DJ spotlights, and your own flash. The key is balancing ambient light with flash so the images feel like the room looked (warm, festive, alive) rather than the flat look of direct flash.
- Mode: Manual with bounce flash
- Aperture: f/2.8 to f/4
- ISO: 800-3200
- Shutter Speed: 1/60s to 1/200s. Slower speeds let in more ambient light, while faster speeds freeze motion on the dance floor
- Flash: TTL bounce off the ceiling for white ceilings, or direct with a diffuser. Drag the shutter to 1/30s for creative motion blur during the first dance
- Second curtain sync: Creates natural-looking motion trails behind moving subjects rather than in front of them
Portrait Settings
The couple’s portrait session, typically during golden hour or immediately after the ceremony, is your chance to create the hero images that will hang on their wall for decades.
- Mode: Manual or Aperture Priority
- Aperture: f/1.4 to f/2.8 for dreamy background blur, or f/4 to f/5.6 if you need both people tack-sharp
- ISO: 100-400 in good light
- Shutter Speed: 1/250s or faster to freeze wind-blown veils and hair
- Focal Length: 85mm to 135mm for the most flattering facial proportions and compressed backgrounds
- Use a reflector or off-camera flash to fill shadows under the brow and chin, especially in harsh midday light
Detail Shot Settings
- Aperture: f/2.8 to f/5.6 on a macro lens for ring shots, invitations, shoes, and floral details
- Tripod or flat surface: Stabilize for maximum sharpness at close focus distances
- Natural window light: Side-light details on a white surface for clean, editorial-style images
- Depth of field: Keep it shallow to isolate the ring or detail against a soft background, but ensure the critical element (like the diamond or text) is in focus
Composition Tips for Wedding Photography
- Rule of Thirds – Place the couple at an intersection point with their environment telling the story in the remaining two-thirds of the frame
- Leading Lines – Use aisles, archways, hedgerows, and pathways to draw the viewer’s eye straight to the couple
- Natural Framing – Shoot through doorways, windows, arches, or between bridesmaids to add depth and context
- Negative Space – Give the couple room in the frame, especially for wide environmental portraits where the venue tells the story
- Layering – Compose with foreground, subject, and background elements to create three-dimensional images. Flowers in the foreground, couple in the middle, venue in the background
- Golden Ratio – For formal portraits, place the couple along the spiral for a naturally pleasing composition
- Reflections – Look for windows, polished floors, puddles, and mirrors to create reflections that add depth and visual interest to your images
Lighting for Wedding Photography
Natural Light
The best wedding light is free. Schedule couple portraits during golden hour, the 60 minutes before sunset, when light is warm, directional, and impossibly flattering. If the timeline does not allow a golden hour session, look for open shade with reflected light from a nearby bright surface such as a white building, a sand beach, or a light-colored wall.
Flash Techniques
- Bounce flash – Angle your speedlight at a 45-degree angle off a white ceiling for soft, even light that looks like a large window overhead
- Off-camera flash for portraits – A single speedlight on a stand with a small softbox, positioned 45 degrees to the side and slightly above eye level, creates beautiful portrait light anywhere
- Rear curtain sync – For first dance shots, drag the shutter to 1/15s-1/30s with rear curtain sync to capture ambient room light with a sharp flash-frozen couple
- Flash gels – Match your flash to tungsten (CTO gel) or fluorescent (green gel) venue lighting so the color temperature is consistent across the frame
Video Light for Ceremonies
In venues where flash is prohibited during the ceremony, a small continuous LED panel on a cold shoe can provide just enough fill without being distracting. Keep it subtle at 10-20% power, diffused, and matched to the ambient color temperature.
Common Mistakes in Wedding Photography
- Not scouting the venue – Visit the ceremony and reception locations before the wedding day. Know where the light comes from, identify portrait spots, and find the power outlets for charging
- Overpacking gear – A 30-pound bag slows you down and causes fatigue. Carry what you need and leave the rest at your station
- Chimping – Constantly reviewing the LCD screen means you are missing moments happening right in front of you. Trust your settings and keep shooting
- Ignoring the guests – The couple’s family and friends are part of the story. Capture grandparents laughing, children dancing, and friends hugging because these images become more precious over time
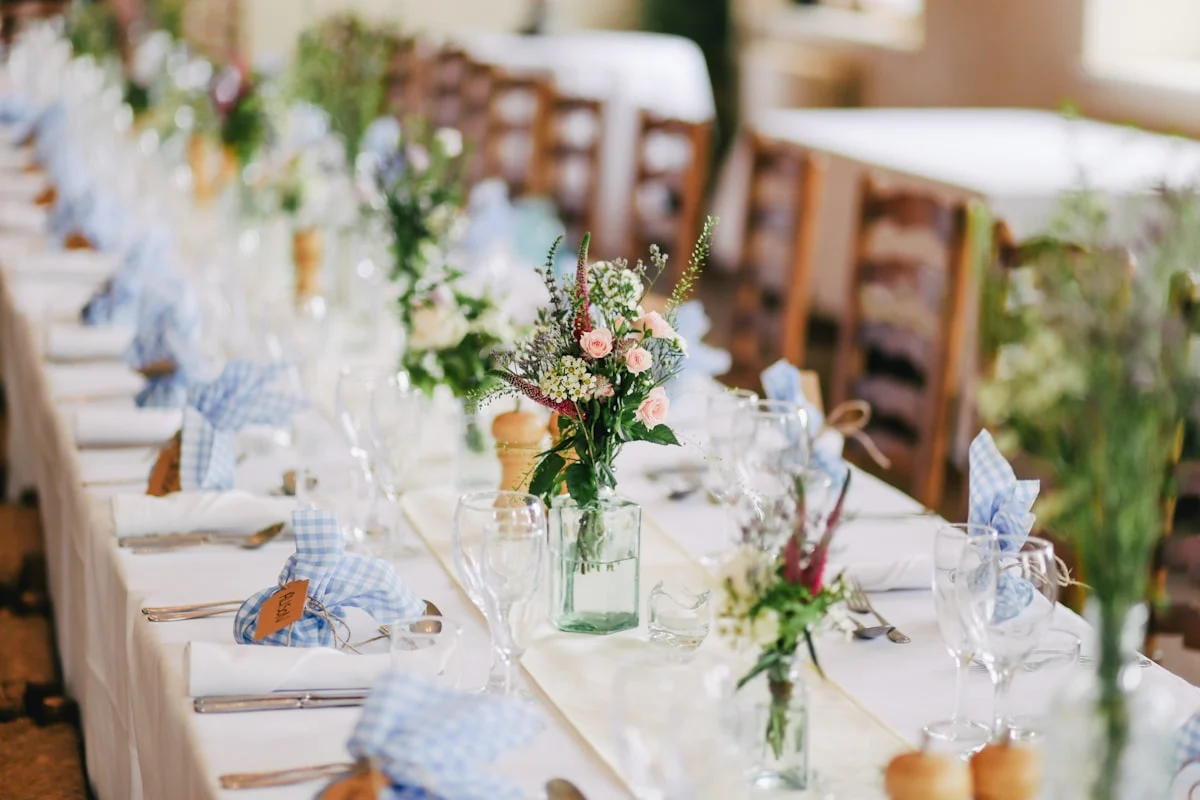
- Forgetting detail shots early – Photograph the rings, invitations, flowers, and table settings before the ceremony when everything is pristine. After guests arrive, details get moved, wrinkled, and stepped on
- No backup plan for weather – Have an indoor portrait location scouted for every outdoor wedding. Rain is not a disaster if you are prepared
- Delivering too many images – Curate ruthlessly. 400-600 polished images tell a stronger story than 2,000 mediocre ones. The couple hired you for your eye, not your trigger finger
Post-Processing Tips for Wedding Photography
- Consistent color grading – Apply the same color profile and white balance adjustments across all images from a scene so the gallery tells a cohesive visual story
- Skin tone correction – Use HSL adjustments to fine-tune orange and yellow hues so skin looks natural under mixed venue lighting
- Vibrance vs Saturation – Boost colors in landscapes and decor without making skin tones look sunburned
- Batch processing – Develop a preset-based workflow to efficiently handle the hundreds of images from a wedding day while maintaining consistency
- Delivery timeline – Communicate your turnaround time clearly. Most couples expect a preview within 1-2 weeks and the full gallery within 4-8 weeks
- Retouching hero images – For the images that will hang on walls, invest time in advanced retouching: removing exit signs, smoothing skin selectively, and compositing group shots where someone blinked
Try This: Practical Exercises
Exercise 1: Simulate a Wedding Timeline
Ask a friend or family member to model for you and run through an accelerated wedding timeline. Spend 15 minutes on “getting ready” shots, 15 minutes on a mock ceremony in your living room (practice silent shutter and positioning), and 15 minutes on portraits in different lighting. Time yourself switching settings between each phase.
Exercise 2: Master Low-Light Flash
Set up a dimly lit room with only one lamp and practice balancing ambient light with bounce flash. Experiment with dragging the shutter at 1/30s, 1/60s, and 1/125s to see how each setting changes the balance between the warm ambient glow and the flash-frozen subject.
Exercise 3: Speed Composition Drill
Go to a busy public event (a market, festival, or sporting event) and practice capturing candid moments quickly. Work on anticipating where the next interesting moment will happen, positioning yourself, and firing without hesitation. This builds the instincts you need during a real wedding ceremony.
Exercise 4: Detail Shot Still Life
Gather small objects (jewelry, watches, flowers, handwritten notes) and practice photographing them with window light. Focus on styling, depth of field control, and finding the best angle for each object. This directly translates to wedding detail shots of rings, invitations, and bouquets.
The Business Side of Wedding Photography
Wedding photography is as much a business as it is an art. The photographers who thrive long-term are the ones who treat it that way.
- Contracts – Every wedding needs a signed contract specifying deliverables, timeline, payment schedule, cancellation policy, and usage rights. No exceptions
- Pricing – Price based on the value you deliver, not the hours you work. Factor in pre-wedding consultation, the shoot day, post-processing time (often 30-60 hours per wedding), and delivery
- Client communication – Set expectations early and clearly. Respond to emails within 24 hours. Send a detailed questionnaire 4-6 weeks before the wedding covering shot requests, family combinations, and timeline preferences
- Portfolio building – If you are just starting out, offer to second-shoot for established photographers. Alternatively, organize styled shoots to create portfolio images without the pressure of a real wedding day
- Insurance – Carry liability insurance. Many venues require proof of insurance before allowing you on-site
Related Resources
- Understanding Exposure – Master the exposure triangle before you step into a venue
- Aperture – Learn to control depth of field for portraits and details
- White Balance – Handle mixed lighting with confidence
- Bokeh – Create beautiful background blur in your portraits
- Focal Length – Understand how lens choice shapes your images
- Metering Modes – Choose the right metering mode for each wedding scenario
- Focus Modes – Switch between single and continuous AF effectively
- Portrait Photography – Many portrait techniques translate directly to wedding couple sessions
- Night Photography – Low-light techniques for receptions and nighttime portraits
- Photography Glossary – Quick reference for any technical term
Related Genre Hubs: Portrait Photography | Landscape Photography | Street Photography | Night Photography
Further reading
Wedding clients especially benefit from a structured intake process: timeline-build, shot-list, family-portrait coordination. Our guide to photography client onboarding covers the wedding workflow specifically.