Macro photography reveals a world invisible to the casual observer: the compound eye of a dragonfly, the fractal pattern of frost on a leaf, the spiraling geometry of a seashell. By magnifying subjects to life-size or beyond, you transform the ordinary into the extraordinary. This guide covers the settings, techniques, and creative approaches you need to start exploring the hidden details all around you. Check out our crystal ball photography for more details.
Introduction to Macro Photography
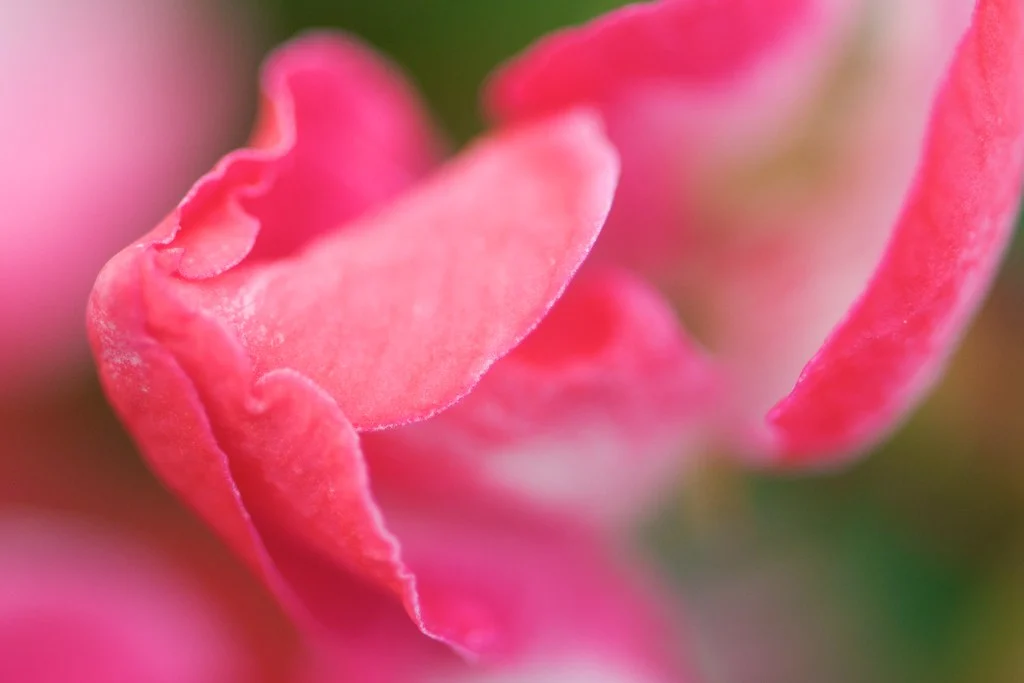
Macro photography is the art of extreme close-up photography, typically defined as capturing subjects at a 1:1 magnification ratio or greater. At this scale, a 10mm ladybug appears as a 10mm image on your camera sensor, filling the entire frame. The genre opens a door into a miniature world that the human eye simply cannot perceive on its own.
What makes macro photography both fascinating and challenging is the way it transforms familiar photographic rules. Depth of field shrinks to mere millimeters. Camera shake that would be invisible at normal distances becomes catastrophic at high magnification. Focusing becomes an exercise in body control rather than autofocus technology. And lighting takes on outsized importance because at close working distances, your own body and lens can cast shadows onto the subject.
The reward for mastering these challenges is access to a visual universe that most people have never seen. The iridescent scales on a butterfly wing, the crystalline structure of a snowflake, the delicate veins running through a translucent leaf: these are images that stop viewers in their tracks precisely because they reveal beauty that is always present but never noticed.
Essential Macro Photography Techniques
1. Focus Stacking
At 1:1 magnification, even f/16 yields a depth of field measured in millimeters. Focus stacking solves this by combining multiple frames, each focused at a slightly different distance, into a single image that is sharp from front to back.
- Mount the camera on a tripod with a focusing rail
- Start with focus on the nearest point of your subject
- Advance the rail in tiny increments (0.1-0.5mm per frame), capturing a frame at each position
- Merge the images in post-processing software that supports auto-blending layers or dedicated stacking tools
- For a typical insect, expect to take 20-60 individual frames to cover the full depth
2. Understanding Magnification Ratios
Magnification ratio describes the relationship between the subject’s real size and its size on the sensor.
- 1:1 (life-size) – A 10mm ladybug appears as a 10mm image on the sensor. This fills the frame on an APS-C camera
- 2:1 (twice life-size) – Achievable with extension tubes, teleconverters, or specialized macro lenses. Reveals details invisible to the naked eye
- 5:1 and beyond – Enters the realm of microphotography. Requires microscope objectives or extreme extension
- 1:2 (half life-size) – Many “macro” zoom lenses top out here. Suitable for flowers and larger subjects but insufficient for insects and tiny details
3. The Body-Rocking Technique
For handheld field macro, autofocus hunts wildly and is essentially useless at close working distances. The solution is manual focus combined with body movement. Set your lens to a fixed focus distance (usually minimum focus), then rock your entire body gently forward and backward. As the plane of focus sweeps across the subject, fire bursts of 3-5 frames. One of those frames will be critically sharp on the element that matters. This technique takes practice but is how the majority of field macro images are captured.
4. Working Distance and Subject Approach
Working distance is the gap between the front of your lens and the subject. A longer focal length macro lens provides more working distance at the same magnification, which is critical for skittish subjects.
- Move slowly and deliberately because insects are sensitive to movement and vibration
- Approach from an angle that keeps your shadow off the subject
- Early morning is the best time for insect macro because cold temperatures make them sluggish and cooperative
- Use the “belly crawl” technique for ground-level subjects: lie flat, brace your elbows, and breathe between shots
5. Controlling Backgrounds
A busy background ruins macro images faster than soft focus. At close distances, even objects a few inches behind the subject can become distracting blobs of competing color.
- Choose subjects with clean, distant backgrounds such as a flower at the edge of a garden bed with open sky behind it
- Use a wide aperture (f/2.8-f/4) for a single-frame approach with maximum background blur
- Carry a small piece of colored card (black, blue, or green) to place behind subjects for an instant clean background
- Position your flash to underexpose the background while properly exposing the subject
6. Water Drop Photography
Capturing water drops, whether splashing, refracting, or suspended on a surface, is one of the most popular and accessible macro projects you can try at home.
- Use a dropper or valve system for repeatable drops
- Backlight the drops with a colored flash or LED for vibrant, translucent color
- Set your shutter speed to flash sync speed and use a very low flash power (around 1/128 to 1/64) because the short flash duration (around 1/10,000s) freezes the splash
- Focus manually on the spot where the drop will land and shoot in burst mode
7. Texture and Abstract Macro
Not all macro photography requires a recognizable subject. Close-up abstracts of rust, peeling paint, tree bark, fabric weave, and mineral crystals create striking images that work as fine art or design elements.
- Look for patterns, color contrasts, and repeating structures
- Side-lighting emphasizes texture by creating shadows in surface irregularities
- Shoot in RAW and increase clarity and texture in post-processing for maximum detail
- Try photographing everyday objects at extreme magnification; the result is often unrecognizable and visually compelling
8. Budget Macro Techniques
You do not need an expensive dedicated macro lens to start exploring close-up photography. Several affordable tools let you experiment and learn before committing to specialized equipment.
- Extension tubes – Hollow spacers that fit between your camera body and any lens, reducing minimum focus distance. Because they contain no glass elements, there is no quality loss. A 25mm extension tube on a 50mm f/1.8 turns it into a capable macro lens
- Reverse lens technique – Mount a wide-angle lens backward using a reversing ring for extreme magnification. A reversed 28mm lens can achieve 2:1 or higher magnification at the cost of losing electronic aperture and autofocus control
- Close-up diopter filters – Screw-on filters that reduce minimum focus distance. Quality varies widely, so look for achromatic (two-element) diopters for sharp results
- Lens stacking – Attach a reversed wide-angle lens to the front of a telephoto lens for extreme magnification. This advanced technique requires adapters but can produce remarkable results at minimal cost
Camera Settings for Macro Photography
Macro photography flips many standard photography rules. Depth of field becomes razor-thin at close focus distances, making aperture and focus technique more critical than in any other genre.
Tripod Macro (Controlled Environment)
For flowers, still life, food details, and any subject that is not going to fly away, a tripod-based approach delivers the sharpest results.
- Aperture: f/8 to f/16. Stopped down for maximum depth of field. Beyond f/16, diffraction softens the image
- ISO: 100-200 for maximum image quality
- Shutter Speed: Whatever the light requires. With a tripod, you can shoot at 1/2s or slower without concern
- Focus: Manual focus with live view zoomed to 100% on the critical detail. Autofocus hunts at macro distances
- Electronic first curtain shutter: Eliminates vibration from the mirror slap, which is visible at high magnification
- Remote shutter release or 2-second timer: Prevents camera shake from pressing the shutter button
Handheld Macro (Field Work)
When photographing insects, spiders, or any mobile subject in the field, you sacrifice some sharpness for flexibility and speed.
- Aperture: f/5.6 to f/11, a compromise between depth of field and shutter speed
- ISO: 400-1600, depending on available light
- Shutter Speed: 1/250s minimum. At 1:1 magnification, even your heartbeat causes visible camera shake
- Focus: Set focus to a fixed distance and rock your body gently forward and backward to nail focus
- Burst mode: Shoot 3-5 frame bursts as you rock through the focus plane. One of those frames will be critically sharp
Flash Macro
Flash is arguably the most important macro tool after the lens itself. It provides enough light to stop down the aperture, freeze subject movement, and overpower distracting background light.
- Aperture: f/11 to f/16 for maximum depth of field
- ISO: 100-200
- Shutter Speed: Flash sync speed (typically 1/200s to 1/250s)
- Flash power: 1/8 to 1/32 power for fast recycling and short flash duration that freezes motion
- Flash position: Off-camera, 6-12 inches from the subject, angled 45 degrees from the lens axis. This creates directional light with shadows that reveal texture
Composition Tips for Macro Photography
- Rule of Thirds – Place the eye of an insect or the stamen of a flower at an intersection point for an engaging, off-center composition
- Negative Space – Let the subject breathe. A small insect in a field of soft green out-of-focus foliage is more powerful than the same insect crammed edge-to-edge
- Leading Lines – Use leaf veins, stems, and branches to guide the viewer’s eye toward the subject
- Eye-level perspective – Get down to the subject’s level. Shooting a mushroom from standing height looks like a snapshot; shooting it at ground level reveals its personality
- Golden Ratio – Natural subjects often follow the golden spiral (think nautilus shells, sunflower seeds, fern fronds). Compose to echo these natural patterns
- Diagonal lines – Position elongated subjects (caterpillars, twigs, stamens) along a diagonal for dynamic energy and movement
- Fill the frame – The magic of macro is in the details. If your subject does not occupy a commanding portion of the frame, move closer or increase magnification
Lighting for Macro Photography
Natural Light
Overcast days are ideal for macro. The cloud cover acts as a giant diffuser, eliminating harsh shadows and providing even, soft illumination. Direct sunlight creates specular highlights on reflective surfaces (insect wings, water drops, wet leaves) that blow out easily.
- Use a handheld diffuser or translucent umbrella above the subject in direct sun
- A small reflector below the subject fills shadows under petals and insect bodies
- Backlight through translucent subjects (leaves, petals, insect wings) to reveal internal structure and veining
Artificial Light
- Ring flash – Provides shadowless, even light ideal for documentation and scientific macro. Some photographers find it too flat for artistic work
- Twin flash – Two small flash heads mounted on either side of the lens. Adjust the ratio between them for directional light with modeling
- Off-camera speedlight with diffuser – The most versatile single-light macro setup. Position it high and to one side for natural-looking directional light
- Continuous LED – Useful for previewing how light falls before you shoot, and essential for macro video
- DIY diffusers – A piece of white tissue, a cut plastic milk jug, or a commercial macro diffuser cup can transform harsh flash into soft, wrap-around light at very close distances
Common Mistakes in Macro Photography
- Shooting in wind – A gentle breeze that is barely perceptible to you moves a flower stem several millimeters, enough to completely shift your focus plane at 1:1. Wait for calm moments, shoot in bursts, or use a plant clamp to stabilize stems
- Using too narrow an aperture – Beyond f/16 on most lenses, diffraction reduces sharpness. If you need more depth of field, use focus stacking instead of stopping down further
- Ignoring the background – A technically perfect macro of a butterfly is ruined by a bright white flower in the background that pulls the eye away from the subject
- Not getting close enough – The magic of macro is in the details you cannot see with your naked eye. If your subject does not fill at least a third of the frame, move closer
- Relying on autofocus – Autofocus hunts wildly at macro distances. Switch to manual focus, use live view zoomed to 100%, and move the camera or the focusing rail rather than twisting the focus ring
- Neglecting sensor dust – At f/16, every speck of dust on your sensor appears as a dark spot in the image. Clean your sensor before macro sessions
- Casting your own shadow – At close working distances, your body blocks light from reaching the subject. Be aware of where the light source is and position yourself so you do not shade your own scene
Post-Processing Tips for Macro Images
- Sharpening and clarity – Macro images thrive on fine detail. Apply careful sharpening and increase clarity or texture sliders to emphasize the intricate structures that make macro images compelling
- Focus stack merging – Combine your stacked frames into a single sharp composite using software that supports auto-blending layers
- Noise reduction – High-ISO handheld macro shots benefit from selective noise reduction in luminance and color channels. Reduce noise without destroying fine texture in the subject
- Clone and heal distracting elements – Remove sensor dust spots, distracting background specks, and minor blemishes that compete with the subject
- Cropping for impact – Macro images often benefit from a tighter crop in post, especially if you could not fill the frame in the field
- Color enhancement – Selectively boost specific color channels to bring out the natural vibrancy of your subject without making the overall image look oversaturated
Try This: Practical Exercises
Exercise 1: Kitchen Macro
You do not need to go outside to practice macro. Photograph everyday kitchen items at close range: the texture of a halved orange, sugar crystals on a spoon, the bubbles in a glass of sparkling water, the grain pattern on a wooden cutting board. Focus on controlling depth of field and finding compelling compositions in ordinary objects.
Exercise 2: Dew Drop Morning
On a dewy morning, head to your garden or a nearby park within the first hour after sunrise. Photograph water droplets on leaves, spider webs, and flower petals. Practice manual focus and the body-rocking technique. Pay attention to how the droplets refract the world behind them, creating tiny inverted landscapes inside each bead of water.
Exercise 3: Focus Stack a Coin
Place a coin on a table, mount your camera on a tripod with the lens pointed straight down, and practice focus stacking. Take 10-20 frames, advancing focus from the nearest edge of the coin to the farthest. Merge them in post-processing. This controlled exercise teaches you the mechanics of stacking before you attempt it on living, moving subjects.
Exercise 4: One Subject, Five Compositions
Find a single macro subject (a flower, a textured surface, a small object) and photograph it from five distinctly different angles and compositions. Shoot from above, from the side, from below, with tight cropping, and with negative space. This exercise develops your compositional instincts and shows you how dramatically perspective changes the feel of a macro image.
Exercise 5: Flash vs. Natural Light Comparison
Photograph the same subject twice: once using only natural light, and once using an off-camera flash with a diffuser. Compare the results side by side. Notice how flash changes the depth of field you can achieve (because it allows smaller apertures), how it affects background brightness, and how the quality of light differs between the two approaches. Understanding when to use each lighting method is fundamental to macro photography.
Related Resources
- Aperture – Understand how aperture controls depth of field at close focus distances
- Exposure – Master the exposure triangle for any lighting condition
- Depth of Field – The most critical concept in macro photography
- Bokeh – Shape your out-of-focus areas into smooth, pleasing backgrounds
- Shutter Speed – Understand how shutter speed affects sharpness at high magnification
- ISO – Balance image quality and exposure when shooting handheld macro
- Focal Length – How focal length affects working distance and compression in macro
- Composition – Apply composition principles at the macro scale
- How to Photograph Flowers – A natural companion to macro techniques
- Photography Glossary – Quick reference for any term you encounter
Related Genre Hubs: Portrait Photography | Landscape Photography | Street Photography | Night Photography | Wildlife Photography