What Is Depth of Field?
Depth of field is the zone of a photograph, measured from near to far, that looks acceptably sharp. It is never a hard edge. A lens focuses perfectly at exactly one distance; everything nearer or farther renders as a small blur circle instead of a point. When that blur circle is small enough that a viewer perceives it as a point, the area reads as “in focus.” Depth of field is the range over which that blur stays below the threshold of what the eye notices.
Four things set the size of that zone: aperture, focus distance, focal length, and how far you enlarge and view the final image (which determines the “acceptable” blur size, called the circle of confusion). Change any one of them and the zone changes, even if nothing else about the shot does.
Want the other challenges? The full camera simulator has all 21, across eight scenes.
Aperture: The Control Most Photographers Reach For First
A wide aperture (a low f-number such as f/1.8) lets the lens form a large cone of light converging on the focus point. Move off that exact point and the cone spreads into a large blur circle very quickly, so the zone of acceptable sharpness is thin. A narrow aperture (a high f-number such as f/16) uses a narrow cone, so the blur circle grows much more slowly with distance from the focus point, giving a deep zone of sharpness. This is the fastest lever to pull, which is why most photographers reach for it first.

Focus Distance: The Free Lever
Depth of field scales with how far you are from your subject. Move closer and the zone of sharpness compresses dramatically; back away and it expands, even at the same aperture and focal length. This is why macro photography at a few centimeters can have a depth of field measured in millimeters even at f/11, while a landscape at f/11 focused on a distant ridge can hold everything from a few meters out to infinity. Distance is a free depth-of-field control: you do not lose a stop of light or change your composition’s magnification relationship in the same way a focal length swap does, you just walk.
Focal Length: A Real Effect, Often Misattributed
Longer lenses do produce a shallower-looking depth of field at the same aperture and the same subject distance, and this is real: for a fixed f-number, a longer focal length has a physically larger aperture diameter (aperture diameter equals focal length divided by f-number), and a larger opening produces a faster-diverging blur cone. But if you reframe by moving farther back with a longer lens so the subject is the same size in the frame, most of that apparent difference disappears; what is left is smaller than photographers usually assume. What genuinely changes when you swap focal length without changing position is perspective compression, a separate effect covered on the focal length page, and it is easy to blame focal length for a depth-of-field change that mostly came from the change in framing distance.
Circle of Confusion: The Hidden Fourth Variable
The circle of confusion is the largest blur spot that still reads as a sharp point at normal viewing distance. It is not a fixed number: it depends on how large you print or display the image and how far the viewer stands from it, and in practice photographers use a standard value tied to sensor size, because a smaller sensor’s image gets enlarged more to reach the same final print size, which magnifies its blur circles more too. A full-frame sensor is typically calculated with a circle of confusion around 0.03mm; a smaller APS-C sensor uses a tighter figure, closer to 0.02mm, because its image needs more enlargement.
This is the real mechanism behind sensor-size depth-of-field comparisons, and it runs in two different directions depending on what you hold constant:
- Same focal length, same aperture, same distance: the larger sensor simply records a wider field of view (it is not cropping the lens’s image circle as tightly). Because its standard circle of confusion is larger, the same physical blur cone counts as “acceptably sharp” over a longer range on the larger sensor. Result: the larger sensor gives a wider view and a deeper depth of field from the identical lens setting.
- Same framing (same field of view): to match the wider sensor’s framing, you either use a longer focal length or move closer. A longer focal length at the same f-number has a larger absolute aperture diameter, which shrinks the depth of field faster than the larger circle-of-confusion allowance can compensate. Result: matched for framing, the larger sensor gives the shallower depth of field, which is the comparison most people mean when they say “full frame has thinner depth of field than a phone.”
Both statements are correct. They describe different scenarios. The confusion in most online arguments about sensor size and depth of field comes from switching between the two without saying so.
Hyperfocal Distance: Focus Here, Get Everything Sharp From Here to Infinity
For any given focal length and aperture, there is one focus distance, called the hyperfocal distance, beyond which everything out to infinity is acceptably sharp, while the near edge of the sharp zone sits at exactly half that distance. Focus any closer than the hyperfocal distance and you lose sharpness at infinity; focus at it or beyond and you are wasting depth of field you could have used nearer the camera.
The formula is: hyperfocal distance = (focal length² ÷ (f-number × circle of confusion)) + focal length, with all lengths in the same units (millimeters is easiest, since focal length and circle of confusion are usually given in mm).
Worked example: a 24mm lens at f/8 on a full-frame body (circle of confusion ≈ 0.03mm).
Hyperfocal distance = (24² ÷ (8 × 0.03)) + 24 = (576 ÷ 0.24) + 24 = 2,400mm + 24mm ≈ 2,424mm, or about 2.4 meters.
Focus the lens at 2.4 meters and everything from 1.2 meters (half the hyperfocal distance) out to infinity is acceptably sharp. This is the standard technique for landscape photography where you want maximum sharpness front to back: find the hyperfocal distance for your lens and aperture, focus there instead of at infinity, and you gain a full extra zone of near sharpness for free.
The “Focus One-Third In” Myth
A widely repeated rule of thumb says to focus about a third of the way into a scene. It is a rough approximation, not a rule, and it only holds up in a narrow band of shooting situations. The real relationship is that the near and far limits of the sharp zone depend on the hyperfocal distance and the actual focus distance: as you focus closer than the hyperfocal distance, the sharp zone shrinks and becomes more symmetric around the focus point; the classic 1:2 split (a third of the sharp zone in front of the focus point, two-thirds behind) only happens at one specific focus distance relative to the hyperfocal distance, not at every distance and not for every lens and aperture combination. Focus very close, in macro range, and the split moves toward roughly 50/50. Focus at the hyperfocal distance itself and everything behind the focus point runs to infinity, which is not a 1:2 ratio of anything finite. “One-third in” is a serviceable starting guess for a mid-distance scene at a moderate aperture; it is not physics, and leaning on it for landscape work will leave sharpness on the table compared to calculating or metering the actual hyperfocal distance.
Seeing the Difference: Shallow vs. Deep
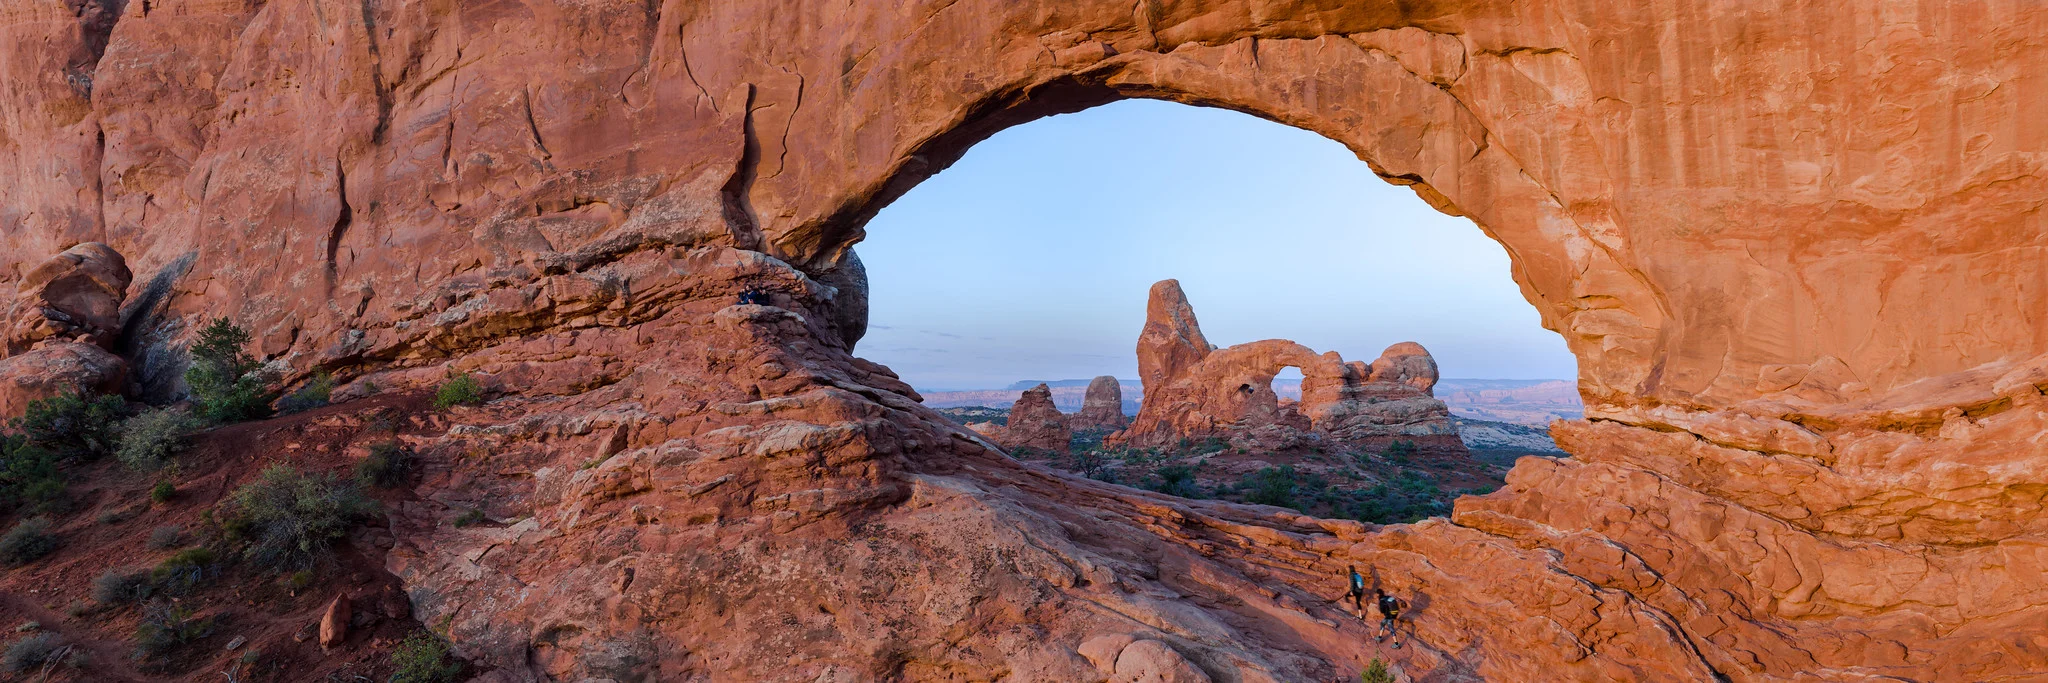
Compare the arch above with the slackline portrait higher up this page. Same principle, opposite goal: one photograph uses a wide aperture and a close subject to isolate a single plane, the other uses a narrow aperture and hyperfocal-style focusing to hold a whole scene together. Neither setting is “correct.” The choice depends on what you want the viewer’s eye to do.
A Simple Diagram
Common Mistakes
- Assuming a blurry background always means a “better” photo. Deep depth of field is the right choice whenever the story is the whole scene, not one subject: landscapes, group photos, architecture, anything where background context matters as much as the foreground.
- Blaming focal length for a perspective change that was actually caused by moving. Zooming from the same spot changes framing and apparent depth of field slightly; it does not change perspective. Perspective is set by where the camera physically stands, covered in full on the focal length page.
- Trusting “focus a third in” for landscape work and getting a soft foreground or a soft horizon. Use the hyperfocal distance instead, or focus-stack if the aperture needed for enough depth would introduce diffraction softening.
- Stopping down further and further, expecting endless extra sharpness. Past a certain f-number, diffraction (light bending as it passes the small aperture opening) softens the whole image faster than the deeper depth of field sharpens it. On most modern cameras that trade-off starts to bite by f/11 to f/16. See diffraction for the full explanation.
- Forgetting that depth of field is a viewing-distance-dependent illusion, not a hard physical boundary. A print viewed from across a room can look perfectly sharp where a 100% crop on a monitor reveals real blur. Neither view is wrong; they are using different circles of confusion.
Try This
Pick one static subject with a background that has visible detail, a bookshelf, a fence line, a row of trees. Keep the camera in the same spot and shoot the same frame four times: wide open, f/5.6, f/11, and f/16 (or your lens’s narrowest setting). Compare the four background blurs side by side. Then, without changing the aperture, take two more frames of the same subject from twice the distance and half the distance, keeping the subject roughly the same size in the frame by adjusting focal length. That second pair isolates what focal length and distance actually do to depth of field once framing is held constant, which is the comparison most online debates about “focal length and bokeh” get wrong.
Related
- Aperture: the setting depth of field responds to fastest.
- Focal Length: angle of view, compression, and how much of a page’s apparent depth of field change actually comes from distance.
- Circle of Confusion: the acceptable-blur threshold behind every depth of field number.
- Hyperfocal Distance: the calculator and full technique for maximum front-to-back sharpness.
- Bokeh: what the out-of-focus areas actually look like, beyond how large they are.
- Diffraction: why stopping down has a ceiling.
- Crop Factor: how sensor size changes the numbers in the equivalence section above.
- Fundamentals Lesson 3: Understanding and Choosing Lenses, which includes the in-browser camera simulator used above.