You do not need a UV filter for image quality on a digital camera. The sensor already has ultraviolet blocking built in, so the filter changes nothing you can see. Its only real job today is to be a replaceable sheet of glass in front of the lens. That is worth having in blowing sand, salt spray and other dirty conditions, and worth removing at night and whenever you shoot toward the sun, because it adds flare.
This guide gives the full answer: what UV filters did on film, why digital cameras do not need them, how much protection one really provides, what it costs optically, and a verdict for each kind of shooting. It also shows how to test your own filter and how to free one that is stuck. For the alternative form of protection, read the lens hood guide; for the optics of stray light in general, see lens flare.
What UV filters did on film
Ultraviolet light is invisible to the eye, but photographic film responds to it. The atmosphere scatters short wavelengths most strongly, so distant views contain a lot of scattered ultraviolet, especially at high altitude, over open water and in snow. Film recorded that extra exposure as a pale haze over the distance and, on colour film, a cold blue cast.
A UV filter absorbs ultraviolet and passes visible light almost untouched, so it cut the haze and the cast without changing exposure. The skylight filter, a close relative, adds a faint pink tint to warm the blue of open shade. Because both were nearly clear and cost no light, photographers left them on permanently, and the habit of a “protective” filter grew from there. If you shoot film in the mountains or at sea, a UV filter still does its original job.
Why digital sensors do not need UV blocking
A digital sensor sits behind a stack of thin filters fixed permanently in front of it. One layer in that stack cuts ultraviolet and infrared, because silicon would otherwise respond to both and spoil the colour. The way this stack fits into the camera is covered in how image sensors work. Modern lens glass and its coatings also absorb much of the ultraviolet before it reaches the camera at all.
The result is that a UV filter on a digital camera removes light that was never going to be recorded. Distant haze in a digital photo is visible light scattered by moisture and dust, and no clear filter removes that. A UV filter and a plain “clear” or “protector” filter are, for digital purposes, the same thing: a flat window. Choose between them on the quality of the glass and coatings, not on the label.
The protection argument, weighed honestly
Protection is the real question, and the answer depends on what you are protecting against.
Impact
This is the weakest part of the case. A filter is a thin disc of glass, far thinner and more fragile than the thick, curved front element behind it. In a knock that breaks the filter, the front element would often have survived untouched, so a shattered filter is not proof that the lens was saved. Broken filter glass can also scratch the element it was meant to protect, and a bent filter ring can jam in the lens threads.
What a filter does protect is the thread itself and the coating, from light scrapes and brushes against rock, zips and belt buckles. For real knocks, a rigid hood does more, because it keeps objects away from the glass altogether. It also helps to know that a small scratch on a front element has very little visible effect on pictures: it sits far out of focus and blocks a tiny fraction of the light.
Sand, dust and grit
Here the filter earns its place. Wind-driven sand pits glass and coatings, and wiping gritty glass grinds the particles across the surface. With a filter fitted, the surface taking that abuse is one you can replace. This is the standard advice for dunes and dry, windy places, as covered in desert photography.
Salt spray and rain
Sea spray dries into a film of salt crystals that smears when wiped dry and can scratch. A flat filter is easier to clean thoroughly than a curved, recessed front element: you can unscrew it, rinse it with fresh water, dry it and refit it. Near breaking waves you may be wiping every few minutes, which is exactly the repeated cleaning you would prefer not to inflict on the lens itself. The seascape guide covers the rest.
Cleaning wear and weather sealing
If you work where the front of the lens is touched constantly (children’s fingers, dogs’ noses, food, paint, mud), a filter lets you clean fast and firmly without worrying about the coating. One more practical point: the instructions for some weather-sealed lenses say the sealing is only complete with a filter fitted to the front. Check the manual for yours.
What a filter costs: flare, ghosts and contrast
Every filter adds two air-to-glass surfaces. Bare glass reflects about 4 percent of the light at each surface. A good multi-coating cuts that to a fraction of 1 percent, which is why coating quality matters more than anything else about a filter. Even so, the reflections never reach zero, and a filter has a property no lens element shares: it is perfectly flat and sits right at the front.

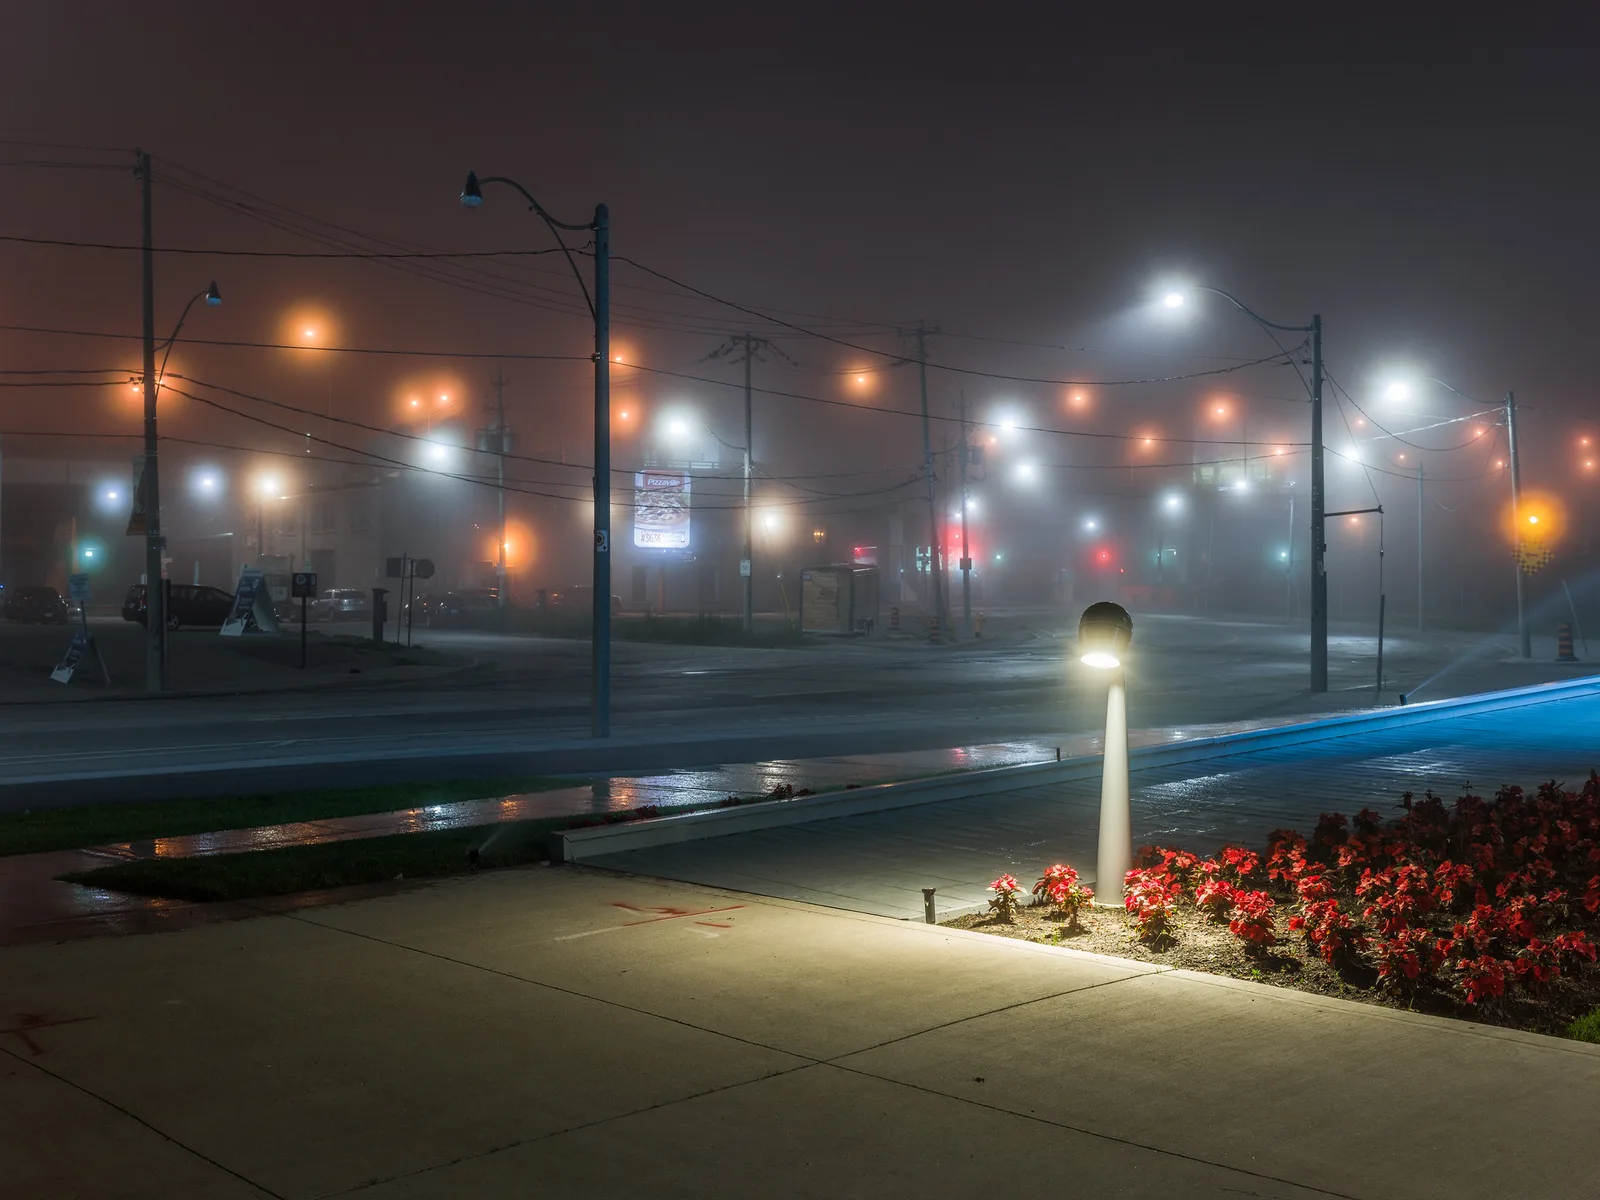
- Ghost images at night. Bright light reaches the sensor, a little of it reflects back out through the lens, bounces off the flat filter and returns to the sensor as a faint second image. The tell-tale sign of a filter ghost is its position: it appears on the opposite side of the frame centre from the real light, the same distance out. A street lamp in the upper left produces a dim copy in the lower right. Dark scenes with small, intense lights show this most clearly.
- Veiling flare into the sun. With the sun in or just outside the frame, light bouncing between the filter and the front element spreads a thin haze over the image. Shadows lift toward grey and contrast drops. A dirty or greasy filter makes this far worse.
- Slight contrast and sharpness loss. With a well-made, clean filter this is too small to see in ordinary light. With poor glass that is not truly flat, the loss shows up first on a telephoto lens, where a long focal length magnifies any error in the filter.
- Stacking and vignetting. Each filter ring stands a few millimetres proud of the lens. Stack a polariser or ND on top of a UV filter and an ultra-wide lens can see the rings as dark corners (see vignetting). The stack also doubles the reflecting surfaces. Always take the UV filter off before fitting a polarising filter or an ND filter.
Do you need a UV filter? A verdict by situation
| Situation | Filter on or off | Reason |
|---|---|---|
| Beach, breaking waves, boats | On | Salt spray needs frequent, thorough cleaning |
| Dunes, dusty tracks, windy dry ground | On | Blown grit pits glass and scratches when wiped |
| Rain, waterfalls, mud, colour-powder events | On | Easier to wipe a flat filter than a recessed element |
| Sparks, ash, welding, cooking fat | On | Hot or sticky particles mark coatings permanently |
| Young children, pets, crowds | On, or a hood | Fingers and noses, not optics, are the risk |
| Night streets, city lights, fireworks | Off | Ghost copies of every bright light |
| Sunrise, sunset, sun in the frame, backlit portraits | Off | Veiling flare and lost contrast |
| Stars and the Milky Way | Off | No hazard to guard against, and bright stars or horizon lights can ghost |
| Studio, indoor, everyday clean conditions | Off, with a hood | Nothing to protect against; the hood handles knocks |
| Using a polariser or ND filter | Off | Avoids stacking, vignetting and extra reflections |
| Colour film at altitude or at sea | On | The filter’s original purpose: less haze and blue cast |
Treat the filter as protective equipment that goes on when conditions are hostile and comes off when they are not, the way you would treat a rain cover. Keep it in a case in the bag so that both choices are quick.
Hood versus filter
The two are not rivals; they protect against different things. A hood keeps knocks, fingers and much of the rain away from the glass, and it improves the picture by shading the front element from stray light. A filter seals the front against fine particles and spray that drift past a hood, and it can only ever leave the picture the same or slightly worse.
So use the hood all the time, because it costs nothing optically, and add the filter when the air itself is carrying something you do not want on the lens. In spray or sand, use both: the hood shades the filter, which reduces the flare the filter would otherwise add.
How to test your filter for flare and sharpness
Ten minutes with a tripod tells you whether your own filter is costing you anything. The comparison is always the same frame with and without the filter.
The night ghost test
- After dark, find a single bright lamp against a dark background, such as a street light against the sky or a dark wall.
- Put the camera on a tripod and frame the lamp about halfway between the centre and one corner.
- Use manual exposure so both frames match. Expose so the surroundings are visible, which will overexpose the lamp itself.
- Shoot one frame with the filter and one without, changing nothing else.
- Look at the area diagonally opposite the lamp, the same distance from the centre. A soft spot or a small upside-down copy of the lamp that is present only in the filtered frame is a filter ghost.
The backlight test
In daylight, frame a dark subject (a tree trunk, a doorway in shadow) with the sun just outside the edge of the picture. Shoot with and without the filter at identical settings. Compare the darkest shadows on the histogram: if the left-hand end has moved to the right in the filtered frame, the filter is adding veiling flare.
The sharpness test
On a tripod, at the longest focal length you own, photograph something distant with fine detail, such as brickwork or lettering, with and without the filter. Refocus for each frame, use a remote release or the self-timer, and compare at 100 percent. A good filter shows no difference. If the filtered frame is softer, the glass is not flat enough and the filter should be retired. The fuller method is in how to test a lens.
Cleaning a filter and removing a stuck one
A dirty filter does more damage to a picture than a clean filter ever does, so if one is on the lens, clean it as carefully as the lens. Blow loose grit off first, brush away what remains, then wipe with a clean microfibre cloth and a drop of lens cleaning fluid, working from the centre outward. After salt spray, wipe first with a cloth dampened with fresh water to dissolve the salt, then dry. Clean both faces: the inner face collects a haze over time that is easy to miss. General kit care is covered in the camera gear maintenance guide.
Filters stick for three reasons: they were tightened too hard, the ring has been knocked slightly out of round, or grit or salt is in the threads. Work through these steps in order:
- Stop pinching. Squeezing the ring between finger and thumb at two points presses it into an oval, which makes it grip harder. Spread the pressure around the whole ring.
- Use your flat palm. Press your palm flat against the front of the filter ring and turn anticlockwise, as seen from the front, with light, even pressure.
- Add grip, not force. A wide rubber band around the ring, a rubber glove, or a rubber jar opener gives even friction all the way round.
- Use a flat rubber surface. Press the filter face down onto a rubber mat or the clean sole of a rubber shoe and turn the lens.
- Use a filter wrench. This is a plastic band clamp made for the job that grips the whole circumference. They are sold in pairs so that you can also separate two filters stuck to each other.
- If the ring is visibly dented, stop and take it to a repair shop. Forcing a bent ring can damage the lens threads.
If the glass has shattered, point the lens downward, lift out the loose pieces, and blow the remaining fragments away before you try to unscrew the ring, so that no shards are dragged across the front element. To prevent sticking in future, screw filters on until they just stop, never tight, and keep the threads clean.
Common mistakes
Leaving the filter on at night. Every street lamp and headlight gains a faint copy on the opposite side of the frame. Fix: take the filter off before any night or city-lights session.
Stacking a polariser or ND on top of it. The corners darken on wide lenses and reflections multiply. Fix: remove the UV filter first; one filter at a time.
Never cleaning it. A hazy, fingerprinted filter lowers contrast in every frame. Fix: clean both faces whenever you clean the lens.
Using the filter in place of a hood. A filter does nothing to block stray light and adds some of its own. Fix: fit the hood first and treat the filter as an extra for dirty conditions.
Tightening it hard so that it will not fall off. It will not fall off, and now it will not come off. Fix: finger-snug only.
Try this
Run the night ghost test this evening. Find one street lamp, set up the tripod, and make four frames: lamp in the upper left with the filter and without, then lamp in the lower right with and without. Open all four side by side at full size and look diagonally opposite the lamp each time. In 15 minutes you will know whether your filter produces ghosts, how bright they are, and where to look for them in real pictures.
Frequently asked questions
Does a UV filter affect image quality?
In ordinary front-lit daylight, a clean, well-coated filter makes no visible difference. With bright lights in a dark scene, or with the sun in or near the frame, it can add ghost images and a veil of flare. A cheap uncoated filter reflects roughly ten times as much light as a good one and shows these faults far sooner.
Is a clear protective filter the same as a UV filter?
On a digital camera, yes in practice. The sensor already blocks ultraviolet, so both act as a plain flat window. The quality of the glass and coatings is what separates one from another, not the name.
Will a UV filter protect my lens if I drop it?
Do not count on it. Filter glass is thin and breaks under knocks that a front element would shrug off, and broken filter glass can scratch the lens. A rigid lens hood and a lens cap protect far better against drops and bumps.
Should I leave a UV filter on all the time?
Only if you mostly shoot in dusty, sandy or salty places and rarely shoot at night or toward the sun. For most photographers it works better as an item that goes on when conditions demand it. If you do leave it on, remove it for night scenes and backlit shots, and keep it clean.
What size UV filter fits my lens?
The filter thread diameter is marked on the front or barrel of the lens, and often inside the lens cap, as a number in millimetres next to a circle with a line through it. That number is not the focal length. A lens marked 50 mm in focal length might take a 49, 52 or 58 mm filter.
Related guides
- Lens hood: the protection that also improves the picture.
- Lens flare: how ghosts and veiling flare form, and how to prevent or use them.
- Polarising filter: the filter that does change the picture, for skies and reflections.
- ND filter: cutting light for long exposures and wide apertures.
- Photography filters tutorial: colour filters and their effect on black and white tones.
- Night photography: the conditions where a front filter does the most harm.
- Camera gear maintenance: cleaning glass safely after sand, salt and rain.