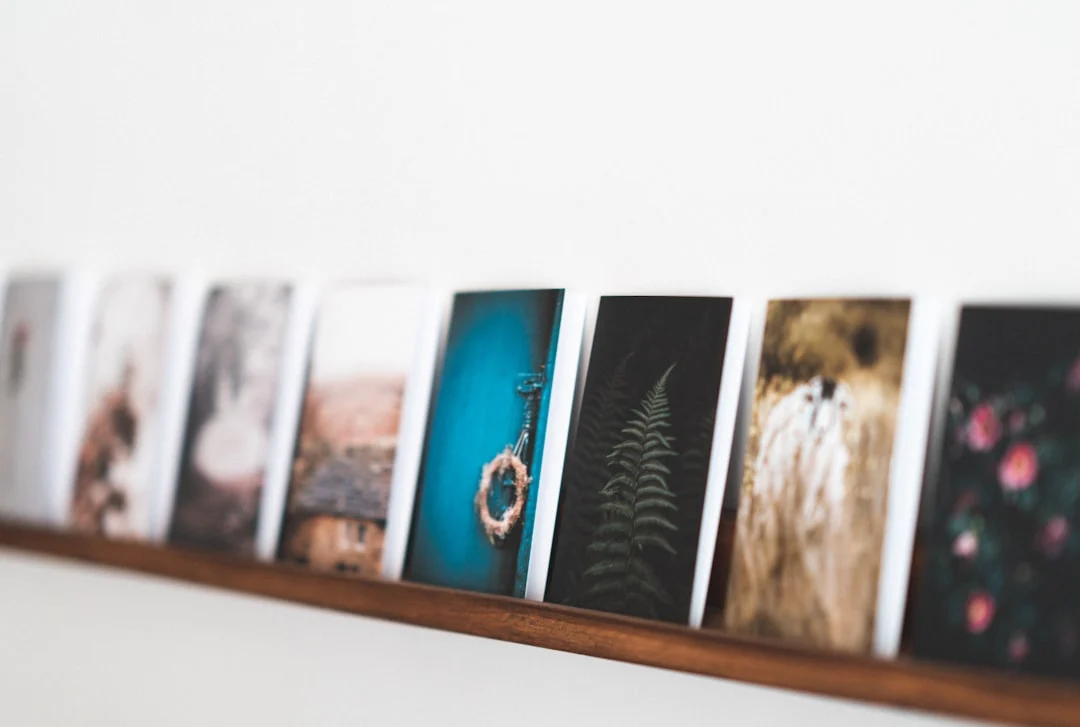
There is something deeply satisfying about seeing your photograph printed and hanging on a wall. A well-made print has a presence that screen viewing simply cannot match. But getting from a digital file to a beautiful print requires understanding several technical concepts, from resolution and color spaces to sharpening and paper selection. This guide walks through everything you need to know to prepare your photographs for print, whether you are ordering from an online lab, working with a local print shop, or printing at home.
Resolution: How Many Pixels Do You Need?
Resolution is the single most important technical factor in print quality. An image that looks beautiful on your monitor can print as a blurry, pixelated mess if it does not have enough pixels for the print size you want.
DPI vs. PPI: Clearing Up the Confusion
These two terms are often used interchangeably, but they refer to different things:
- PPI (Pixels Per Inch) describes the density of pixels in your digital image file. When you set an image to “300 PPI” in your editing software, you are defining how many of the image’s pixels should be mapped to each inch of the print.
- DPI (Dots Per Inch) describes the physical resolution of the printer. A printer operating at 1440 DPI places 1440 tiny dots of ink per inch on the paper. Printers use multiple dots of different colors to reproduce each pixel, so a printer’s DPI is always higher than the PPI of the file it is printing.
When preparing files for print, you work with PPI. The printer handles DPI on its own. When someone says “your file should be 300 DPI,” they almost always mean 300 PPI.
Resolution Requirements by Print Size
The standard recommendation for high-quality photographic prints is 300 PPI. This produces sharp, detailed prints where individual pixels are invisible to the naked eye at normal viewing distances. Here is what that means in practice:
- 4×6 inches: 1200 x 1800 pixels (2.2 megapixels)
- 8×10 inches: 2400 x 3000 pixels (7.2 megapixels)
- 11×14 inches: 3300 x 4200 pixels (13.9 megapixels)
- 16×20 inches: 4800 x 6000 pixels (28.8 megapixels)
- 20×30 inches: 6000 x 9000 pixels (54 megapixels)
- 24×36 inches: 7200 x 10800 pixels (77.8 megapixels)
Most modern cameras produce files well suited for prints up to 16×20 or even 20×30 inches. A 24-megapixel sensor produces images of roughly 6000 x 4000 pixels, which yields excellent quality at 16×20 and good quality at 20×30.
Viewing Distance Changes Everything
The 300 PPI guideline assumes the viewer is holding the print at arm’s length or closer. For larger prints viewed from farther away, you can get away with lower PPI because the eye cannot resolve fine detail at a distance.
- Small prints (up to 11×14): 300 PPI for optimal sharpness
- Medium prints (16×24): 200-300 PPI, typically viewed from 2-3 feet
- Large prints (24×36 and up): 150-200 PPI is often sufficient, as these are viewed from 4+ feet
- Wall murals and billboards: 72-100 PPI, viewed from much greater distances
This is why billboard-sized prints can look stunning from the street even though they would look terrible up close. Context matters as much as raw numbers.
Upscaling: When Your File Is Not Big Enough
If your image does not have enough pixels for the print size you want at 300 PPI, you have a few options. Modern AI-powered upscaling tools can enlarge images while adding convincing detail that did not exist in the original file. These tools have improved dramatically and can often produce acceptable results when enlarging by 2x or even 4x. Your RAW processing software may also have built-in super-resolution features that effectively double the pixel dimensions of an image.
Traditional resampling (bicubic interpolation) produces softer results than AI upscaling, but it works in a pinch for modest enlargements of 20-30%. Beyond that, softness becomes noticeable.
Color Spaces for Print
A color space defines the range of colors (gamut) that an image can contain. Choosing the right color space for your print workflow ensures that the colors you see on screen translate accurately to paper. For a deeper dive, see our guide on color management for photographers.
sRGB
sRGB is the smallest of the three common color spaces, but it is also the most universally supported. Most consumer monitors display sRGB, most web browsers assume sRGB, and most consumer print labs expect sRGB files. If you are ordering prints from an online lab or drugstore photo kiosk, sRGB is the safest choice. The colors you see on a calibrated sRGB monitor will closely match what the lab produces.
Adobe RGB
Adobe RGB has a wider gamut than sRGB, particularly in the cyan and green regions. This means it can represent more saturated greens, teals, and cyans that sRGB cannot. For landscape and nature photographers, these extra colors can make a visible difference in prints that include lush foliage, ocean water, or tropical scenes.
Professional print labs and high-quality inkjet printers can reproduce much of the Adobe RGB gamut. If you are working with a professional lab or printing at home on a wide-gamut printer, Adobe RGB preserves more color information for the printer to work with.
ProPhoto RGB
ProPhoto RGB has the widest gamut of the three, encompassing colors that no current monitor or printer can reproduce. It is best used as a working space during editing, particularly when processing RAW files, because it preserves the maximum amount of color data captured by the sensor. When you are ready to make a print, convert to Adobe RGB or sRGB depending on your output path.
Working in ProPhoto RGB requires 16-bit files to avoid banding artifacts. The wide gamut spreads color values across a larger range, and 8-bit files do not have enough tonal steps to represent smooth gradients in this space.
Which Color Space to Use When
- Editing RAW files: ProPhoto RGB (16-bit) to preserve maximum data
- Professional print lab: Adobe RGB, unless the lab specifies sRGB
- Consumer print lab or online ordering: sRGB
- Home printing on a wide-gamut printer: Adobe RGB or the printer’s specific profile
- Web delivery: sRGB, always
Soft Proofing: Previewing Your Print on Screen
Soft proofing is the process of simulating on your monitor how an image will look when printed on a specific paper with a specific printer. It is one of the most valuable tools in the print preparation workflow, and it is built into most professional photo editing applications.
When you enable soft proofing, your software applies the printer and paper’s ICC profile to the on-screen preview. This profile describes the color characteristics and limitations of the specific printer-paper combination. What you see changes, often in ways that surprise first-time users:
- Highly saturated colors may appear duller because the paper cannot reproduce them
- Deep blacks may lighten, especially on matte papers
- Bright whites may take on a slight color cast that reflects the paper’s actual tone
- Some colors may shift hue as the printer maps unprintable colors to the nearest printable ones
The purpose of soft proofing is to identify these issues before you spend money on a print. You can then make targeted adjustments to the image, boosting saturation in areas that will print flat, opening up shadows that will block up on paper, or adjusting specific color ranges to compensate for known shifts.
For soft proofing to be accurate, your monitor must be calibrated. An uncalibrated monitor renders colors inaccurately, which means the soft proof itself will be inaccurate. Monitor calibration is an essential investment for anyone serious about print quality.
Sharpening for Print
Sharpening for print is fundamentally different from sharpening for screen viewing. Prints require more aggressive sharpening than screens because the printing process itself introduces softness. Ink spreads slightly on paper, dots overlap, and the physical medium absorbs fine detail in ways that a backlit screen does not.
The Three-Stage Sharpening Workflow
Professional print workflows use a three-stage approach to sharpening:
- Capture sharpening. Applied during RAW processing to compensate for the inherent softness introduced by the camera’s sensor and anti-aliasing filter. This is subtle, corrective sharpening. Most RAW processors apply this automatically with sensible defaults.
- Creative sharpening. Applied selectively during editing to enhance specific areas of the image. You might sharpen eyes in a portrait, textures in a landscape, or fine details in an architectural shot. This is artistic, intentional sharpening applied with masks or local adjustments.
- Output sharpening. Applied as the final step before printing, calibrated for the specific output medium. Output sharpening for a glossy print at 300 PPI is different from output sharpening for a matte print at the same resolution. Most professional printing workflows include output sharpening tools that account for print size, paper type, and viewing distance.
Print Sharpening Guidelines
- Glossy papers hold fine detail well and need moderate output sharpening
- Matte papers absorb more ink and soften the image more, requiring stronger output sharpening
- Canvas prints have a heavy texture that obscures fine detail, so they need the most aggressive sharpening
- Small prints (viewed close) need more PPI-relative sharpening than large prints viewed from a distance
A well-sharpened print should look slightly over-sharpened on screen. If the image looks perfect at 100% zoom on your monitor, it will likely appear slightly soft in print. This takes practice to calibrate by eye, and making test prints is the fastest way to develop your intuition.
Paper Types and Their Characteristics
The paper you choose has an enormous impact on how your print looks and feels. Paper affects color rendition, contrast, detail, texture, and the overall emotional quality of the print.
Glossy
Glossy paper has a smooth, reflective surface that produces vibrant colors, deep blacks, and strong contrast. It is excellent for images with rich color saturation and fine detail. The downside is that glossy surfaces show reflections and fingerprints. Glossy prints look their best in controlled lighting and behind glass, where reflections can be managed.
Lustre (Semi-Gloss)
Lustre paper offers a middle ground between glossy and matte. It has a subtle texture that reduces reflections while maintaining strong color saturation and contrast. Lustre is the most popular choice for professional portrait and wedding photography because it resists fingerprints, reduces glare, and still delivers punchy, vibrant colors. Most professional labs offer lustre as their default paper.
Matte
Matte paper has a flat, non-reflective surface. It produces softer colors and lower contrast than glossy or lustre papers, but its texture gives prints an artistic, fine-art quality. Matte paper is excellent for black-and-white photography, moody landscapes, and images where you want a contemplative, gallery feel. It handles well, shows no fingerprints, and looks good without glass.
Fine Art and Cotton Rag
Fine art papers are typically made from cotton rather than wood pulp. They have a rich, tactile quality with subtle textures that add depth and dimension to prints. Cotton rag papers are acid-free and archival, meaning they resist yellowing and degradation over decades. They are the choice for gallery prints, limited editions, and any work intended to last. Fine art papers require specific printer profiles and careful handling, but the results can be stunning.
Baryta
Baryta paper mimics the look and feel of traditional darkroom fiber-based prints. It has a barium sulfate coating that produces exceptionally deep blacks, smooth tonal gradations, and a slight sheen without being truly glossy. Baryta is a favorite for black-and-white fine art prints and for photographers who appreciate the aesthetic of classic photographic printing.
Canvas, Metal, and Acrylic Prints
Not every print goes on paper. Alternative substrates offer different aesthetics and display options.
Canvas
Canvas prints wrap the image around a wooden stretcher frame, creating a gallery-style presentation that does not require framing. The canvas texture adds an artistic, painterly quality. Canvas prints are popular for large displays, family portraits, and home decor. They are durable and lightweight, making them easy to hang. The texture does obscure very fine detail, so canvas works best for images that rely on color, composition, and mood rather than pixel-level sharpness.
Metal (Aluminum)
Metal prints are produced by infusing dyes directly into a specially coated aluminum panel. The result is an image with extraordinary vibrancy, luminosity, and a modern, high-impact look. Colors appear to glow from within, and the metallic base adds depth and dimensionality. Metal prints are waterproof, scratch-resistant, and extremely durable. They are excellent for bold, colorful images, abstract work, and contemporary spaces. The trade-off is that metal prints have a distinct, modern aesthetic that does not suit every image or setting.
Acrylic (Face-Mounted)
Acrylic prints involve mounting a photographic print behind a sheet of crystal-clear acrylic (typically 1/8 to 1/4 inch thick). The acrylic acts as a lens, adding depth, saturation, and a luminous quality. Colors appear deeper and more vivid than on any paper print. Acrylic prints are heavy, expensive, and fragile compared to other options, but their visual impact is unmatched. They work beautifully for vibrant landscapes, underwater photography, and any image where maximum color intensity is the goal.
A Complete Print Preparation Workflow
Here is a step-by-step workflow for preparing a photo for print, incorporating everything covered above:
- Start with the best file. Work from your RAW file or the highest-quality master file available. For more on file formats, see our RAW vs. JPEG guide.
- Edit in a wide color space. Process your RAW file in ProPhoto RGB (16-bit) to preserve maximum color data during editing.
- Apply capture and creative sharpening. Handle these during the editing process, before preparing for output.
- Determine your print size and crop. Decide on the final dimensions and crop the image to the correct aspect ratio. A 4×6 print has a different aspect ratio than an 8×10, so plan accordingly.
- Resize to print dimensions. Set the image dimensions to your target print size at the appropriate PPI (typically 300 for most prints).
- Convert to the output color space. Convert to sRGB for consumer labs or Adobe RGB for professional labs and home printing, depending on your output path.
- Soft proof. Enable soft proofing with the appropriate ICC profile for your paper and printer. Identify and correct any color or tonal issues.
- Apply output sharpening. Add the final round of sharpening calibrated for your paper type and print size.
- Save the print-ready file. Save as a TIFF (for maximum quality) or high-quality JPEG (for lab uploads). Keep your original master file untouched.
- Order a test print. For important or large prints, order a small test print first to verify color, exposure, and sharpening before committing to the final size.
Common Print Preparation Mistakes
- Not calibrating your monitor. If your screen is too bright, too warm, or too saturated, your prints will not match what you see. Calibration is the foundation of predictable print output.
- Ignoring color space. Sending an Adobe RGB file to a lab that expects sRGB (or vice versa) results in inaccurate colors. Always match the file’s color space to the output path.
- Under-sharpening. What looks sharp on screen will appear softer in print. Learn to apply appropriate output sharpening for the specific print medium.
- Using JPEG for editing. Every time you save a JPEG, it recompresses and loses quality. Edit in a lossless format (TIFF or the native format of your editing software) and only export to JPEG as the final step for lab submission.
- Forgetting about aspect ratios. Different print sizes have different aspect ratios. A 2:3 image (the native ratio of most cameras) fills a 4×6 perfectly but needs cropping for an 8×10 (4:5 ratio). Plan your compositions with your intended print sizes in mind.
- Editing in 8-bit ProPhoto RGB. If you use ProPhoto RGB, work in 16-bit to avoid banding. The wide gamut requires the extra tonal steps.
Conclusion
Preparing photographs for print is a skill that rewards careful attention to detail. Understanding resolution, color spaces, soft proofing, sharpening, and paper selection puts you in control of the final result. The gap between a mediocre print and a stunning one often comes down to these preparation steps rather than the quality of the printer itself. Start with a good file, calibrate your monitor, soft proof before you print, and sharpen for the output medium. With practice, you will develop an intuitive sense for what each image needs to look its best on paper, canvas, metal, or acrylic.
For more on color management across your entire workflow, see our comprehensive guide to photography color management. And for a refresher on white balance, which is the starting point for accurate color in any output, check out our dedicated guide.
Frequently Asked Questions
What is the minimum resolution for a good print?
For prints viewed at arm’s length or closer, 300 PPI is the standard for excellent quality. You can go as low as 200 PPI for medium-sized prints and 150 PPI for very large prints that will be viewed from several feet away. Below 150 PPI, pixelation typically becomes visible regardless of viewing distance.
Should I let the print lab handle sharpening, or do it myself?
For the best results, apply your own output sharpening. You know the image, the intended print size, and the paper type better than an automated system. Most professional photographers disable any auto-sharpening at the lab and handle it entirely in their own workflow. If you are just starting out and unsure about sharpening for print, letting the lab’s auto-sharpening do its work is a reasonable starting point while you learn.
Do I need a wide-gamut monitor for print work?
A wide-gamut monitor that covers most of the Adobe RGB color space is a significant advantage for print preparation, especially if you work in Adobe RGB. It lets you see the broader range of colors that your printer can reproduce but that a standard sRGB monitor cannot display. However, a well-calibrated sRGB monitor still produces good results for most photographers, particularly if your prints go through consumer labs that work in sRGB. Calibration quality matters more than gamut coverage for most workflows.
Why do my prints look darker than they do on screen?
This is the most common print complaint, and it almost always comes down to monitor brightness. Most monitors are set far too bright for print work. A monitor calibrated to a luminance of 80-120 cd/m2 (candelas per square meter) more closely matches the reflective brightness of a print viewed in normal room lighting. If your monitor is at full brightness, your images will look bright on screen and dark in print. Calibrate your monitor’s brightness along with its color to solve this problem.