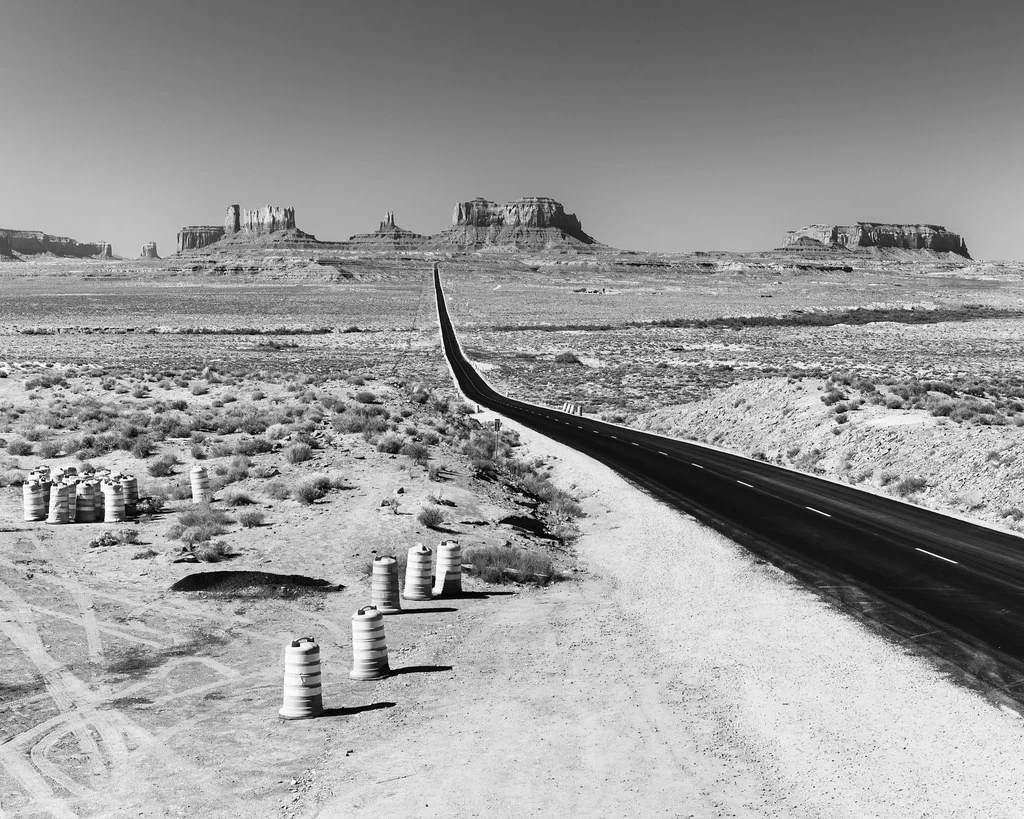
A leading line is a line in a photograph, such as a road, a fence, a river or a row of lights, that carries the viewer’s attention toward the subject or deeper into the scene. It matters because a viewer gives a photo a few seconds at most, and a good line spends those seconds on the thing you meant them to see instead of letting the eye wander.
The idea to hold on to is simple: a line is only leading if it leads somewhere. It needs a way in, usually near an edge of the frame, a direction, and something worth arriving at. The road above starts wide at the bottom of the frame, narrows as it runs away, and ends at the buttes on the horizon. Take the buttes away and the road is just a stripe.
What a leading line is, and what it is not
Every photo is full of lines: edges, horizons, shadows, the border between sky and ground. Most of them are just lines, which shape the mood and structure of a picture without pointing anywhere in particular. A line becomes a leading line when it does a job: it starts where the eye can pick it up, runs toward something, and stops at or near the subject.
Three questions sort the two quickly. Where does the line start? Lines that begin at or near an edge, especially the bottom edge or a bottom corner, give the eye an obvious way in. Where does it go? It should run into the scene or across it toward the subject, not off the side. What is at the end? A building, a person, a peak, a bright patch of sky, a vanishing point where the line itself disappears. If the answer to the last question is “nothing”, the line is decoration.
How eyes really move along a line
Many guides say the eye “glides” along a leading line from start to finish. It does not. Eyes move in quick jumps between short pauses, and they go first to faces, text, the brightest areas and the strongest contrast. What a line does is bias where the next jump lands. It gives the eye a direction to try, and it gives the brain strong cues about depth.
Eye-tracking research backs the practical rule rather than the gliding story. When viewers were shown the same leading-line photos with and without the subject at the end of the line, their eyes made fewer stops and fewer jumps, and they rated the photos as better looking and more directional when the subject was there. Another study found that viewers, experienced or not, do not follow a fixed “enter, travel, exit” path through a picture. The lesson for your camera: the line earns its place only when it delivers the eye to something.
See the difference side by side
Compare a frame built around a leading line with one of the same kind of scene without one, and notice where your eye goes first in each.
Lines in the scene (roads, rivers, railings, shadows, architecture) guide the viewer's eye toward the subject. Without them, the eye has no path through the frame.
Kinds of leading lines
Converging lines
Parallel lines running away from the camera, such as rails, the edges of a road, the walls of a corridor or a row of trees along an avenue, appear to narrow and meet. This is linear perspective, and it is one of the strongest depth cues a flat picture can have. Viewers read the narrowing at once as distance, so a long road looks long without a caption.
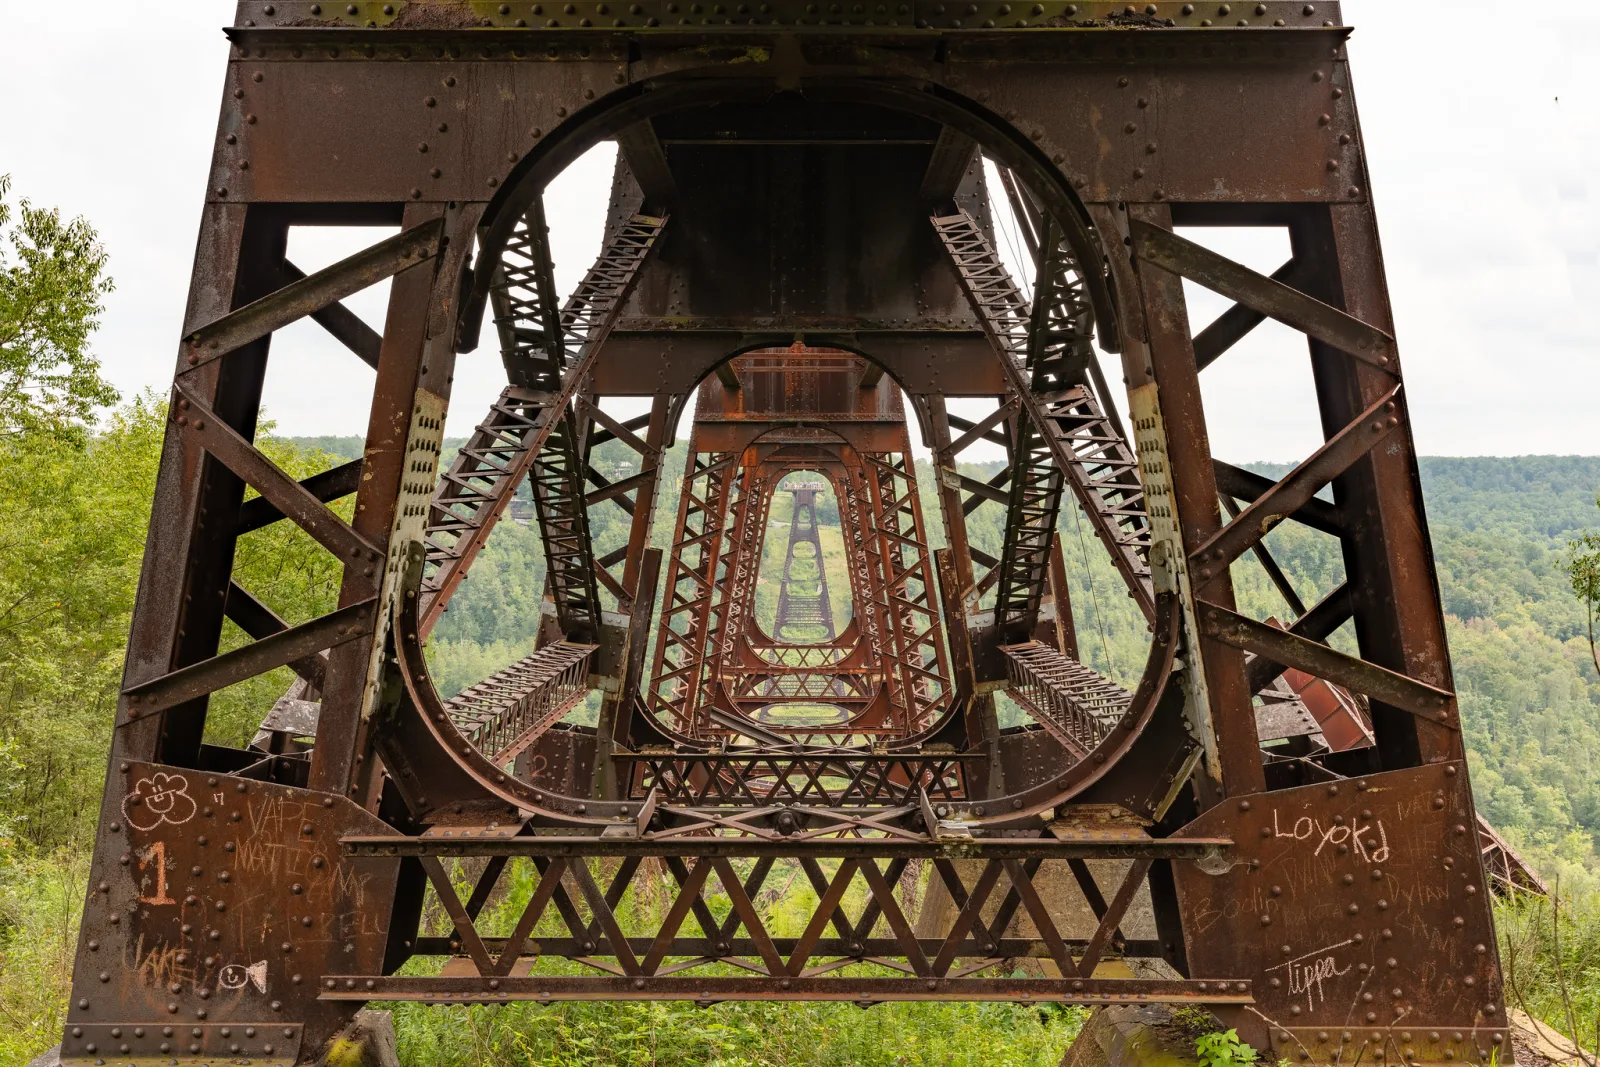
Repetition works the same way. The frames of the bridge above repeat at much the same real size, so each one looks smaller than the one before, and the eye reads the steps as a tunnel into the picture. Putting the subject right at the convergence point gives the strongest pull, and in a symmetrical scene like this one, centring is the right call. In a scene that is not symmetrical, a subject placed a little to one side of the point, with the lines approaching it from one direction, often feels less heavy. See symmetry in photography for when the centre works.
Curves and S-curves
A winding river, a path through a garden or a road over hills moves the eye in a gentler way than a straight line. Curves make the eye take longer to reach the far end, and they show more of the land along the way. An S-curve, which swings one way and then the other as it recedes, is especially useful because each bend becomes its own small step back in distance.
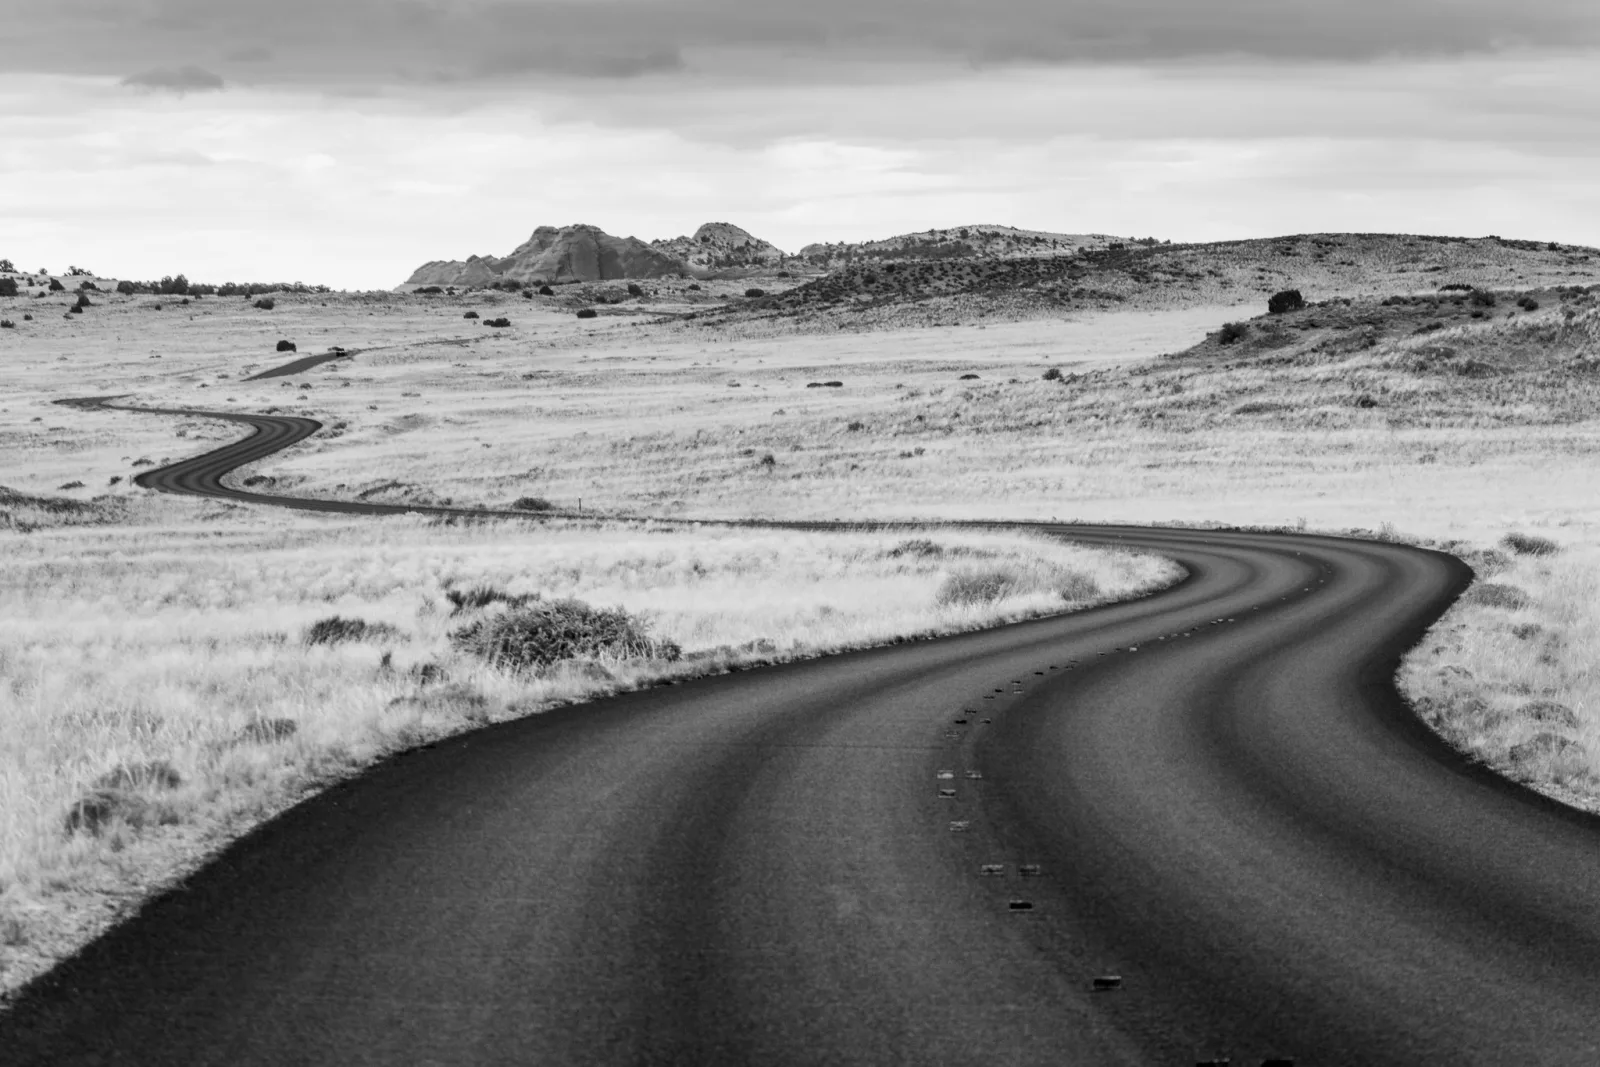
Look at where this road enters: across the bottom edge, at full width. It swings right, then back left, and each bend after that is smaller and paler, until the road is a thin thread carrying the eye back to the horizon near the buttes. It was shot at 140mm, which answers a common belief that leading lines need a wide-angle lens. More on why below.
Diagonals
A line that crosses the frame at an angle, such as a shoreline, a ridgeline or the wall of a narrow alley, cuts against the horizontal and vertical edges of the frame and pulls harder than a level line. A diagonal from a bottom corner is the classic way in. The common belief that a line rising from lower left to upper right feels “uphill” and the opposite “downhill” is a convention tied to reading direction, not a rule, so judge your own frame rather than the recipe.
Implied and interrupted lines
A line does not have to be a single object. Stepping stones, streetlights, a row of fence posts or a line of people in a queue form a path the eye completes on its own. So does a gaze or a pointing arm: viewers look where people in a photo are looking. A path that disappears behind a hill and reappears farther on still leads, and the gaps can give the eye small pauses along the way.
Lines made of light, shadow and colour
Some of the best lines are not objects at all. A shaft of light across a dark floor, long shadows near sunrise or sunset, a bright river through dark land, or a strip of colour all lead the eye because the eye goes to edges of strong contrast first.
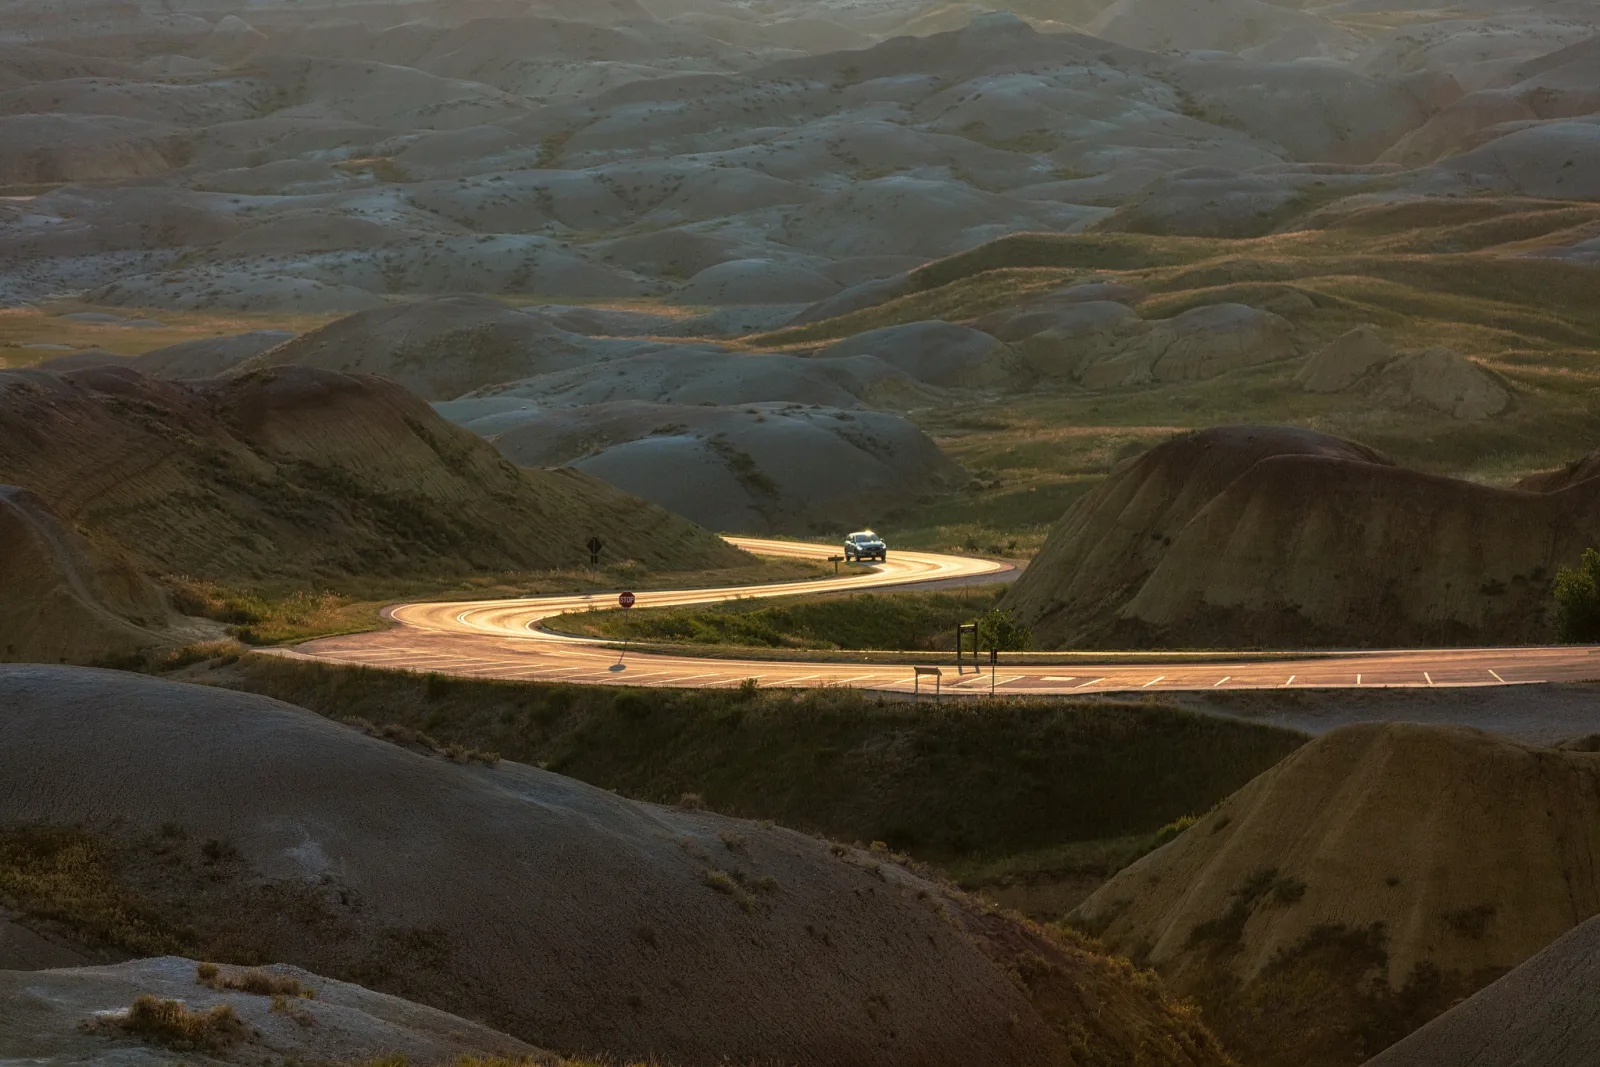
In this frame the road would barely show in flat light. The low sun lights the pavement while the hills around it sit in shade, so the road becomes a bright band that sweeps in from the right, doubles back in a hairpin, and runs to the vehicle. If a line in your scene is faint, wait for light that separates it, or put a subject of a contrasting colour or brightness at its end so the eye has a reason to arrive.
Find the line, then place it
Finding a line is the easy half. Most of the work is moving until it points where you want. A line points at your subject only from certain spots, and you find those spots with your feet, not your zoom.
- Find the subject first, then the line. Decide what the picture is of. Then look for anything that runs toward it: a path, an edge, a crack, a shadow, a curb.
- Walk the line. Stand on or beside it and move along it until, from where you stand, it runs toward the subject. Step left and right; a few steps can turn a line that misses the subject into one that hits it.
- Choose the entry. Bring the line in at the bottom edge or a bottom corner if you can. A line that starts mid-frame, touching no edge, gives the eye a weaker way in, though it can still work if it is strong enough.
- Choose your height. Lower the camera to make a line on the ground stretch from the bottom of the frame. Raise it to see how several lines relate, or to turn a winding road into a pattern.
- Check the end. Before you press the shutter, follow the line in the viewfinder to its end. If nothing is there, move, wait for something to arrive, or find another line.
Street photographers use the same loop in reverse: they find a strong line first, frame it, and wait for a person to walk into the spot it points to. In a portrait, a railing, a wall edge or the line of an arm can lead to the face in the same way.
Wondering where on the line the subject should sit? The rule of thirds has a grid you can lay over real photos to test placements, and visual weight explains why some subjects can hold the end of a strong line and others get lost.
What makes lines converge: your position, not your lens
This is the most common misunderstanding about leading lines. Many guides say a wide-angle lens “exaggerates” converging lines and a telephoto “flattens” them. The lens does not change the lines. How steeply a line narrows depends only on how far away each part of it is from the camera.
Here is why. The width a road takes up in the picture is its real width times the focal length, divided by its distance. Take a road 6 m wide and a full-frame sensor 36 mm wide, held level in landscape orientation:
| Distance to that part of the road | Width on the sensor at 24mm | Share of frame width at 24mm | Width on the sensor at 100mm | Share of frame width at 100mm |
|---|---|---|---|---|
| 5 m | 28.8 mm | 80% | 120 mm | 333% (far wider than the frame) |
| 10 m | 14.4 mm | 40% | 60 mm | 167% (wider than the frame) |
| 50 m | 2.9 mm | 8% | 12 mm | 33% |
| 100 m | 1.4 mm | 4% | 6 mm | 17% |
Read across a row and the 100mm lens makes everything 4.2 times bigger, which is 100 divided by 24. Read down a column and the road at 10 m is 10 times wider than the road at 100 m, with either lens. The rate at which the road narrows is the same. From one spot, the 100mm frame is simply the middle of the 24mm frame, about 24% of its width, enlarged.
What the wide lens does is let you include the near part of the line. At 100mm the road only fits the frame from about 16.7 m away (100 × 6 ÷ 36), so the nearest part you can show is already fairly distant and the road from there to 100 m only narrows about six times. At 24mm the whole road fits from 4 m away, so you can show it narrowing 25 times from 4 m to 100 m. That is why wide lenses and low, close positions go together for strong converging lines, and why the 140mm road above still converges well: its near bend was much closer than its far bend.
Want to see it move? The lens compression tool on lens compression lets you change focal length and distance separately, and shows that standing still and zooming only crops.
The same applies to vertical lines. The walls of a building converge toward the top of the frame because the camera is tilted up, not because you are standing below it. Keep the back of the camera vertical and the verticals stay parallel; tilt it and they lean together. Whether that lean helps depends on the picture: a slight lean looks like a mistake, a strong one looks deliberate. Perspective distortion covers both, and how to correct it.
Looking straight up or straight down
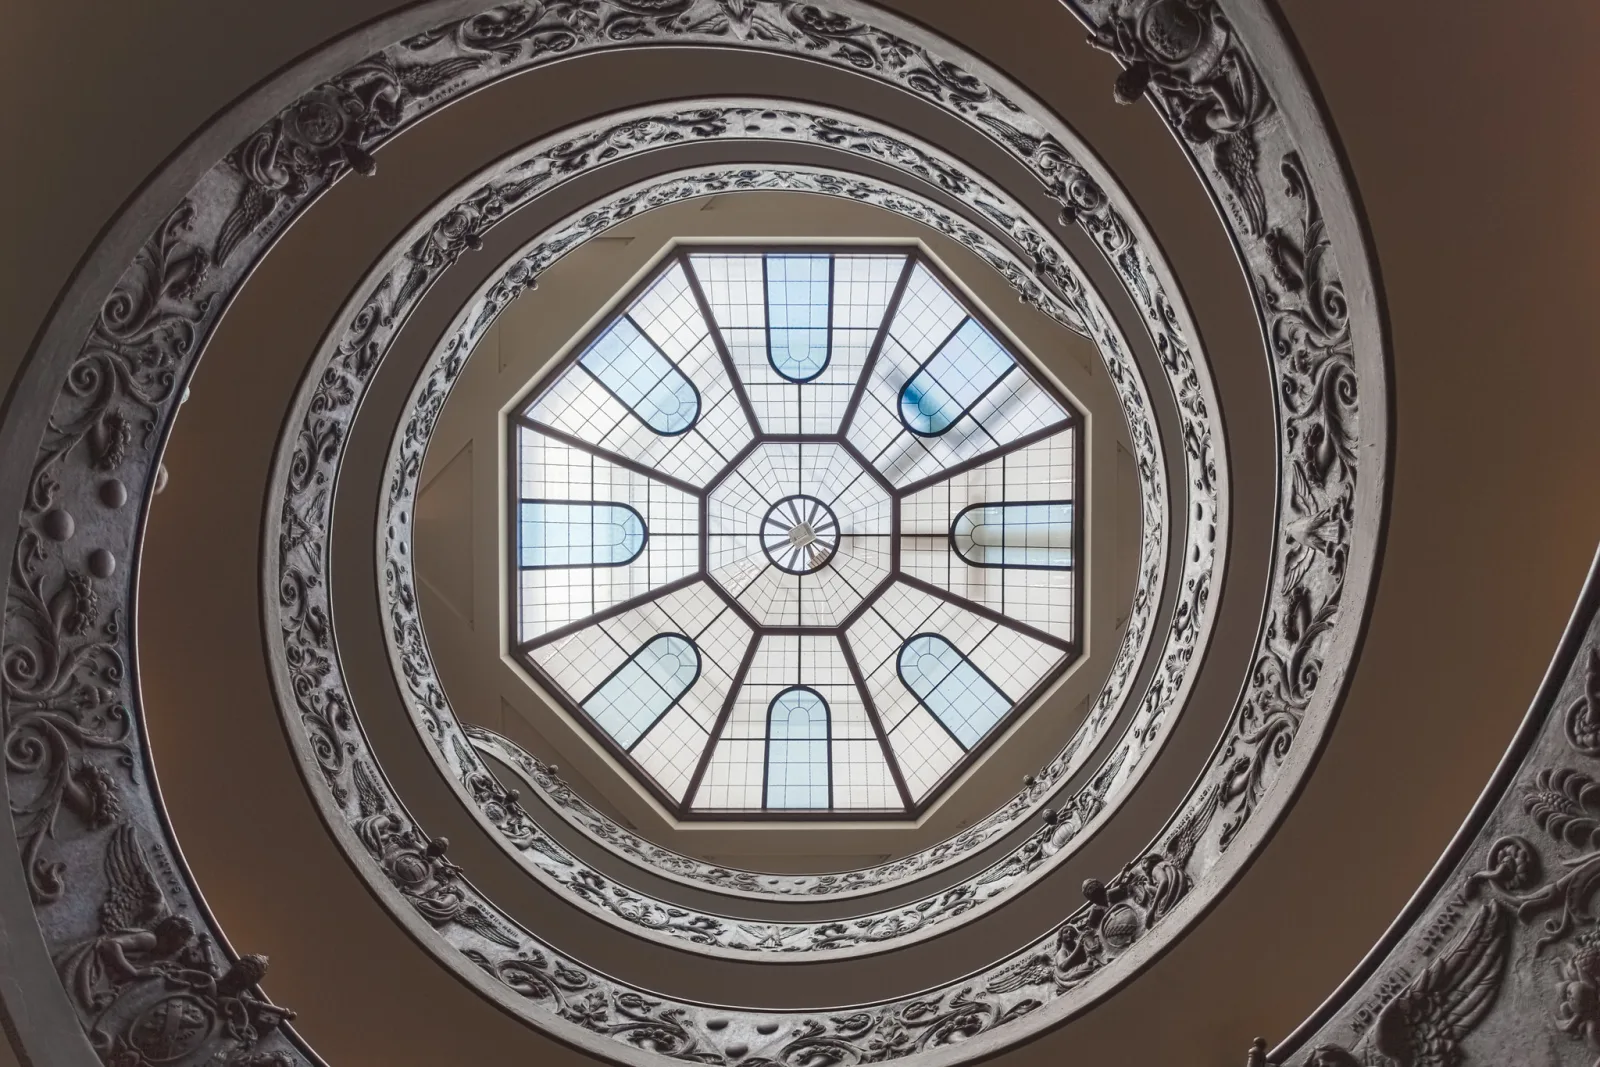
Point the camera straight up a stairwell or straight down from a balcony and the lines stop running into the distance and start running to a centre. The spiral railings above all lead to the skylight. Staircases, paving, the ribs of a vault and roads seen from a height become graphic guides this way. Staircase photography and aerial photography without a drone both work with this effect.
Lines that build depth from front to back
A line that starts at your feet and runs toward a far subject ties the near, middle and far parts of a scene together, which is what makes a flat picture feel deep. Often the start of the line is the most interesting thing in the foreground: the cracked edge of a pier, the stones at the near end of a path, the first fence post.
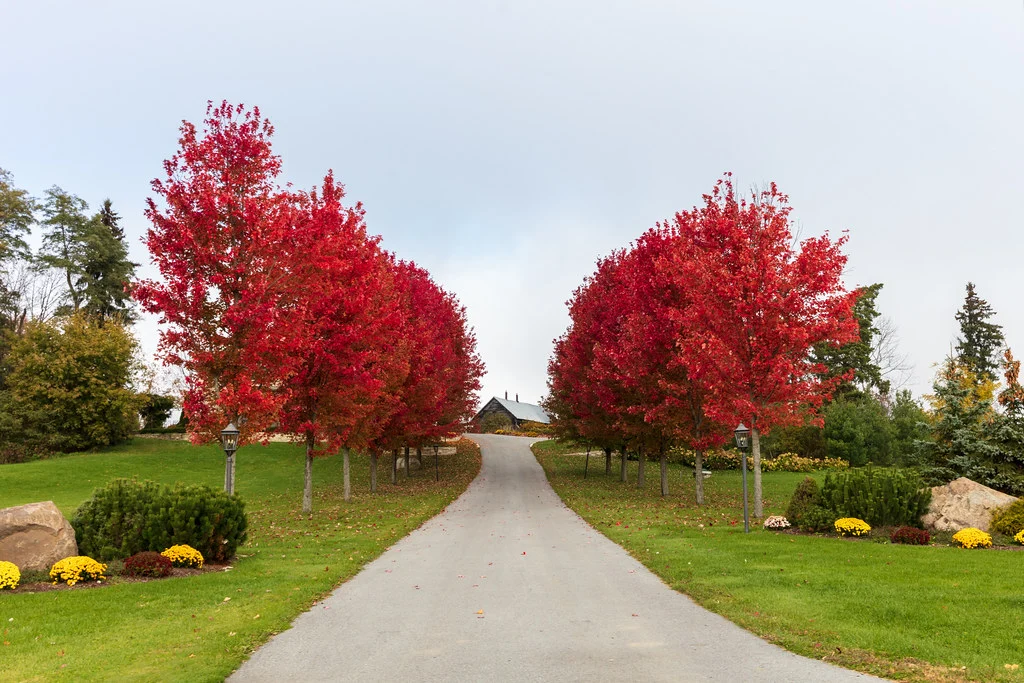
The recipe for this kind of frame is low, close and wide: put the camera near the start of the line, lower than eye level, with a lens wide enough to include both ends. Then make sure both ends are sharp enough. That usually means a small aperture, often around f/8 to f/16 depending on how close the near part is, with focus set about a third of the way into the scene or at the hyperfocal distance. The depth of field calculator will tell you how near you can go at a given aperture and still have the far end sharp.
Need more on building those layers? Foreground interest covers choosing and placing what sits at the near end of the line, and foreground, midground and background explains how the three planes work together.
Working with more than one line
Busy scenes offer many lines at once. They help when they agree and hurt when they do not.
- Lines that agree reinforce each other. A road flanked by rows of trees, or the two rails of a track, pull harder together than either would alone, because they all point to the same place.
- Lines that disagree split attention. Two strong lines running to different parts of the frame leave the eye bouncing between them. Pick the one that leads to your subject and move until the other one is weaker, hidden or pointing the same way.
- Lines that cross make a point. Where two lines meet, the eye stops. Put that crossing on the subject, or keep it out of empty areas where it will steal attention.
- Lines you did not choose still lead. Power lines, branches and the edges of signs steer the eye whether you meant them to or not. Use them or change your angle to lose them.
Lines also shape mood, though more by convention than by law. Level lines tend to read as calm, verticals as tall or formal, diagonals as active, smooth curves as relaxed and jagged lines as tense. These tendencies are worth knowing, but the subject and the light will usually decide the mood more than the shape of the line. A line that runs out of the frame is not always a mistake either: a road that runs off the edge can suggest a journey that continues. Just make it a choice.
Curious how lines fit with framing, balance and the rest? Photography composition sets leading lines beside the other techniques, and framing in photography shows how a line and a frame can work on the same subject.
Strengthening a line after the shot
Editing cannot create a line that is not there, but it can make a weak one clearer. A tighter crop can move where the line enters, so it starts at a corner instead of mid-edge, or remove a second line that competes with it. Dodging and burning, brightening the line slightly and darkening what is around it, makes the path easier to pick up. A light vignette keeps the eye from drifting off the edges. Keep all three subtle; when the edit shows, the viewer looks at the edit.
Common mistakes and misconceptions
- Treating any line as a leading line. A line that does not run toward anything is just a line. Check the end before you shoot.
- Believing the eye smoothly follows the line. Eyes jump to bright, sharp and contrasty areas and to faces. The line helps only if the subject at its end can hold attention.
- Thinking a wide-angle lens makes lines converge. Your position and distances do. The wide lens lets you include the near part of the line.
- Always putting the subject dead centre on the vanishing point. It gives a strong pull and suits symmetrical scenes, but in other scenes a placement slightly to one side often feels more natural.
- Looking only for roads and rails. Curves, broken lines, shadows, light, colour, rows of objects and gazes all lead. So do lines in portraits, interiors and street scenes, not only landscapes.
- Adding lines to add strength. More lines that disagree make a weaker picture. One dominant line, with others that point the same way, is stronger.
- Shooting from where you happened to stop. A line points at the subject only from certain spots. Walk the line and change your height until it does.
- A near end that is out of focus. In a low, close frame, a blurred foreground start breaks the line at the point where the eye picks it up. Check depth of field, or let the blur be deliberate.
Try this: one line, ten positions
Find a single line near you: a path, a curb, a fence, a hallway, the edge of a table. Put something at its far end if nothing is there, such as a cup, a bag or a friend standing still. Then spend ten minutes making ten frames of it, each from a different position:
- Standing, centred on the line.
- Standing, a few steps to the left, then to the right.
- Crouched, with the camera a hand’s width off the ground.
- From as high as you can safely get.
- Close to the near end with your widest focal length, then from farther back with your longest, framing the same far end.
- Two frames with the line entering from a bottom corner, one with it entering from the side.
To judge the results, look at each frame for two seconds, look away, and note where your eye landed first. The good frames are the ones where it landed on the subject or travelled there at once. Then compare the wide and long frames from step 5: the wide one should show more of the line close to you, and the long one should look like a crop of the far part. If the line runs past the subject in every frame, that is your answer too: the line works only from a narrow set of spots, and you have now found them.
Want more exercises like this one? How to see like a photographer has others that train you to notice lines, shapes and light before you raise the camera.
Want to check you can spot a leading line and tell it from the other composition tools? Try the composition quiz on the rule of thirds, leading lines and visual design.
Leading lines: questions learners ask
Do leading lines have to be straight?
No. Curves, S-curves, broken lines and implied lines made of separate objects all lead the eye. Straight lines tend to move the eye more directly, and curves tend to slow it and show more of the scene along the way.
Do I need a wide-angle lens for leading lines?
No. A wide lens makes it easier to include the start of a line close to you, which gives strong convergence and depth. A telephoto lens can show leading lines too, as long as the near and far parts of the line are at very different distances from you, as with a road winding across a valley.
Should the subject be exactly where the lines meet?
Putting it there gives the strongest pull and suits symmetrical scenes. In other scenes, placing the subject a little to one side, with the lines approaching it, often feels less obvious. Try both and compare them.
Can a portrait have leading lines?
Yes. A railing, a path, a wall edge or the line of an arm or shoulder can lead to the face, and the direction of a person’s gaze is itself a line viewers follow. Keep the line from passing behind the head or through the eyes, where it competes with the face.
What if the line leads out of the frame?
The eye tends to follow it out, which weakens a frame built around a subject. It can work on purpose, to suggest a road that goes on, but if it is not deliberate, move or crop so the line runs into the scene instead.