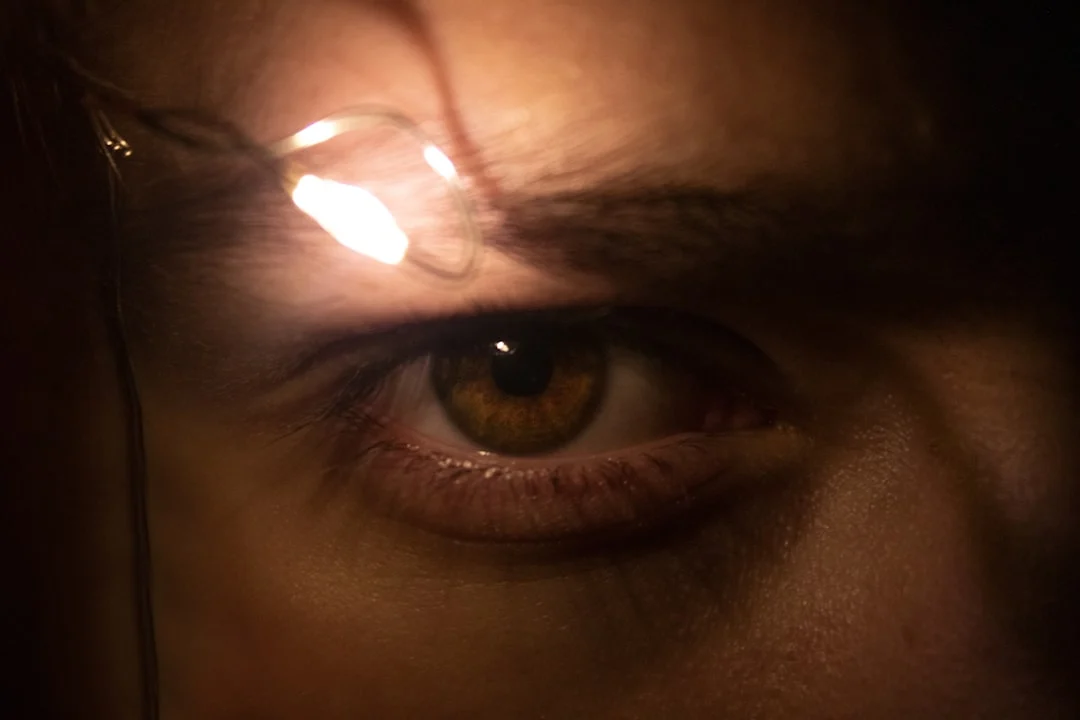
A catchlight is the reflection of a light source visible in a subject’s eyes. In portrait photography, catchlights bring life and dimension to eyes that would otherwise appear flat and lifeless. They are one of the subtle details that separate professional-looking portraits from snapshots. When you look at a compelling portrait, your eye is inevitably drawn to the subject’s eyes, and the bright spark of the catchlight within those eyes creates the sense of life, intelligence, and engagement that makes the portrait connect emotionally.
Why Catchlights Matter
Human eyes naturally look for catchlights when viewing faces. This is a deeply ingrained perceptual habit. Without catchlights, eyes appear dull and disconnected, even if the rest of the portrait is technically well-executed. The catchlight creates a sense of moisture, dimension, and vitality in the eye. It suggests that the eye is seeing, that there is awareness and presence behind it. Classical portrait painters understood this centuries before photography existed. Rembrandt, Vermeer, and other masters carefully placed white highlights in their subjects’ eyes to bring portraits to life. Photographers continue this tradition with deliberate light positioning.
The psychological impact of catchlights extends beyond mere technical quality. Portraits with strong catchlights feel more engaging, more alive, and more emotionally connected. Viewers respond to the catchlight unconsciously, perceiving the subject as more present and more approachable. Removing catchlights from a portrait in post-processing creates a startling difference: the subject suddenly appears lifeless, distant, or even menacing. This simple test demonstrates how much communicative power resides in a tiny spot of reflected light.
Anatomy of a Catchlight
A catchlight has three characteristics that reveal information about the lighting setup: shape, position, and number. Each characteristic tells the viewer something about how the image was lit, and each can be controlled to achieve different aesthetic effects.
Shape
The shape of a catchlight directly mirrors the shape of the light source. A softbox produces a rectangular or square catchlight. An umbrella creates a round one. A beauty dish produces a distinctive round catchlight with a darker center where the blocking plate sits. A window produces a large, natural-looking rectangular reflection, often with crossbar patterns from the window frame visible within it. Natural ambient light from an overcast sky creates soft, diffused catchlights without sharp edges. Ring lights produce a distinctive circular catchlight with a dark center where the camera lens sits, which has become an iconic look in beauty and social media photography.
The shape of the catchlight affects the perceived mood of the portrait. Round catchlights feel soft and natural. Rectangular catchlights feel clean and professional. The ring light catchlight feels modern and editorial. There is no universally “correct” catchlight shape, but consistency within a series of portraits matters. Mixing different catchlight shapes within a single shoot can look inconsistent and unintentional.
Position
Catchlight position in the eye reveals where the light source is positioned relative to the subject. Most portrait photographers aim for catchlights in the upper portion of the iris, roughly between the 10 o’clock and 2 o’clock positions. This mimics the natural appearance of overhead or angled light sources, which is what humans are accustomed to seeing. Light comes from above in most natural and artificial environments, so catchlights in the upper portion of the eye feel correct and natural to the viewer.
Catchlights at the bottom of the eye create an unnatural, unsettling look because humans rarely encounter light from below in natural settings. Think of the classic horror effect of holding a flashlight under your chin. The unnatural lighting direction creates bottom-positioned catchlights that trigger a subtle sense of wrongness in the viewer. This is why underlighting in portrait photography feels eerie and unsettling, and why portrait lighting is almost always positioned above or at the subject’s eye level rather than below.
Centered catchlights (from a light positioned directly in front of the subject) feel confrontational and intense. Off-center catchlights (from a light positioned to one side) feel more dynamic and dimensional. The catchlight position mirrors the key light position, so adjusting your light placement simultaneously adjusts both the shadow pattern on the face and the catchlight position in the eyes.
Number
Each light source in a portrait setup creates its own catchlight. A single key light produces one catchlight per eye. Adding a fill light creates a second, typically smaller and dimmer catchlight. A reflector below the face adds a third. Too many catchlights from too many light sources can look confusing and artificial. The conventional wisdom is that one or two catchlights per eye looks natural, while three or more can look busy and distracting. However, this is more guideline than rule, and some photographers successfully use multi-light setups that create multiple catchlights as part of a deliberate aesthetic choice.
Creating Effective Catchlights
The most important factor in creating good catchlights is the position of your main light relative to the subject’s face. Position the light above the subject’s eye level and slightly to one side. This places the catchlight in the natural upper portion of the iris while also creating the shadow patterns (Rembrandt, loop, or butterfly lighting) that sculpt the face dimensionally. The further the light is to the side, the further the catchlight moves from center. For direct, engaging portraits, keep the light relatively close to the camera axis so the catchlight falls near the center of the iris.
Light source size affects catchlight size. Larger light sources create larger, softer catchlights that fill more of the iris and produce a flattering, approachable look. A large softbox or a big window creates a substantial, luminous catchlight that brightens the entire eye. Smaller light sources create small, intense pinpoint catchlights that convey more energy and edge but illuminate less of the iris surface. For most portrait work, larger catchlights are preferred because they make the eyes appear brighter and more alive.
When shooting with natural light, face your subject toward the light source. Positioning the subject near a large window and facing them toward it creates a beautiful, natural catchlight that fills the eyes with soft, reflected light. Open shade under a tree or overhang with bright sky beyond creates catchlights from the reflected sky light. Even on overcast days, facing the subject toward the brightest part of the sky ensures visible catchlights that bring the eyes to life.
A small reflector positioned below the subject serves double duty. It bounces light upward to fill shadows under the chin and nose, and it creates a secondary catchlight in the lower portion of the eye that brightens the overall eye appearance. This technique is a staple of professional portrait and beauty photography because it requires minimal equipment and produces a polished, professional result.
Catchlights in Post-Processing
In Lightroom or Photoshop, you can enhance catchlights during retouching by painting a subtle dodge (brightening) over the existing catchlights with a small, soft brush. This amplifies the existing reflections without creating artificial-looking additions. Set the dodge tool to target highlights and use a low opacity (10 to 20 percent) for gradual, controllable brightening. A few careful passes can transform a dim catchlight into a sparkling, eye-catching highlight.
Some portrait retouchers also add a tiny amount of clarity or contrast to the iris to make the eyes pop overall. However, be cautious with heavy-handed eye enhancement. Over-brightened or artificially sharpened eyes are one of the most common signs of amateur portrait retouching. The goal is eyes that sparkle naturally, not eyes that glow unnaturally. If you can tell the eyes have been edited at normal viewing distance, you have gone too far.
Adding catchlights entirely in post-processing, where none existed in the original capture, is technically possible but produces results that experienced viewers often recognize as artificial. The reflections do not match the lighting environment, and the placement may not correspond to any plausible light source position. It is always better to create catchlights through proper light positioning during the shoot rather than attempting to fabricate them afterward. Post-processing should enhance existing catchlights, not manufacture them from nothing.
Catchlights for Different Subject Types
Different subjects and portrait styles call for different catchlight approaches. Formal corporate headshots benefit from clean, professional-looking rectangular catchlights from softboxes. Beauty and fashion portraits often use ring lights or large octaboxes for their distinctive, glamorous catchlight shapes. Environmental portraits that use natural light produce organic, irregular catchlights that feel authentic and documentary in nature. Children’s portraits benefit from large, bright catchlights that make their eyes sparkle and convey innocence and energy.
Pet and animal photography also benefits from attention to catchlights. Animals’ eyes respond to catchlights just as human eyes do, appearing more alive and expressive when a bright reflection is visible. Positioning a reflector or light source where the animal’s eyes can catch the reflection requires patience but dramatically improves the emotional impact of animal portraits. Dark-eyed animals in particular benefit from bright catchlights that add dimension and life to what might otherwise appear as featureless dark areas.
Reading Catchlights in Other Photographers’ Work
Studying catchlights in professional portraits teaches you about lighting setups without the photographer having to explain their technique. Look closely at the eyes in any well-lit portrait and you can identify the number of lights, the type of modifiers, and the approximate position of each light source. A rectangular catchlight in the upper right tells you a softbox was positioned to the left and above the camera axis. A round catchlight with a dark center reveals a beauty dish. Multiple small catchlights indicate several small light sources or a ring of bulbs. This reverse-engineering skill accelerates your lighting education and helps you recreate looks that inspire you.
Catchlights are a small detail with an enormous impact. Paying attention to them elevates your portrait photography from technically competent to emotionally engaging. The difference between a portrait with well-placed, bright catchlights and one without can be the difference between an image the viewer glances at and one they cannot look away from. This tiny reflection of light, no bigger than a few pixels in the final image, carries the weight of connection, life, and presence that makes portrait photography compelling.
Catchlights in Group Portraits
Group portraits present unique catchlight challenges because each subject is at a slightly different angle and distance relative to the light source. The person closest to and most directly facing the light will have the brightest, most prominent catchlights. People at the edges of the group or turned slightly away may have weaker catchlights or none at all. To ensure consistent catchlights across a group, use a large light source that covers the width of the group evenly. Position the light high enough that its reflection falls in the upper portion of everyone’s eyes regardless of their position in the group. A large softbox, a bank of windows, or a broad reflector provides more even coverage than a small point source. For outdoor group portraits, positioning everyone facing an open sky or a large reflective surface (like a light-colored building wall) ensures that environmental catchlights appear in everyone’s eyes consistently.
Catchlights with Eyeglasses
Subjects wearing glasses present a double challenge: you need catchlights in the eyes while avoiding unwanted reflections in the glass lenses. The key is positioning the light so it creates a catchlight at an angle where the reflection does not bounce directly back toward the camera through the glasses. Raising the light higher, positioning it slightly to the side, or asking the subject to tilt their glasses downward slightly by lowering their chin can eliminate glass reflections while maintaining eye catchlights. Some photographers ask subjects to use frames without lenses for the shoot, though this is not always practical. Anti-reflective coated lenses help significantly by reducing the intensity of reflections on the glass surface while allowing the catchlight in the eye behind the lens to remain visible. With patience and minor adjustments to light position and the subject’s head angle, it is almost always possible to achieve good catchlights even with heavily reflective eyewear.
Catchlights in Different Eye Colors
Eye color affects how catchlights appear in the final image. Light-colored eyes (blue, green, hazel) show catchlights more prominently because the bright reflection contrasts strongly against the lighter iris. Dark-colored eyes (brown, black) can absorb catchlights more, making them appear less pronounced. For subjects with very dark eyes, using a larger, brighter light source ensures that the catchlight is strong enough to register against the dark iris. In post-processing, slightly more aggressive dodging may be needed on dark eyes compared to light eyes to achieve the same level of catchlight visibility. The size of the catchlight relative to the iris also matters: a large catchlight that covers a significant portion of a dark iris brightens the entire eye area, making dark eyes appear more open and engaging even when the iris itself is very dark. This is another reason why large light sources are preferred for portrait photography. They produce catchlights large enough to make a visible impact on eyes of any color.
The Catchlight Checklist
Before pressing the shutter on any portrait, take a moment to check for catchlights. Look at your subject’s eyes in the viewfinder or on the LCD. Can you see a bright reflection in each eye? Is it in the upper portion of the iris? Is the shape clean and well-defined? If the catchlight is missing, adjust your light position, face the subject more toward the light, or add a reflector below. If the catchlight is in the wrong position, move your light. If the catchlight is too small, move the light closer or use a larger modifier. This brief pre-shot check takes only seconds but can prevent the disappointment of discovering lifeless eyes in an otherwise beautiful portrait during post-processing. Making the catchlight check a habitual part of your portrait workflow ensures that every portrait you capture has the spark of life in the subject’s eyes that makes the difference between a good photograph and a great one.
Catchlights in Outdoor Portraits
Outdoor natural light portraits present different catchlight conditions than studio work. On overcast days, the entire sky acts as a massive light source, producing soft, even catchlights that fill the eyes uniformly. These sky catchlights are large and gentle, creating a pleasant, natural look. On sunny days, direct sunlight creates bright but hard catchlights that may be too intense and cause the subject to squint. Moving into open shade, positioning the subject facing open sky beyond the shade boundary, produces the best outdoor catchlights: bright enough to be visible and lively, but soft enough to be flattering. Using a reflector to bounce light back into the subject’s eyes when they are in shade adds a controlled, supplementary catchlight that brightens the eyes beyond what the ambient light alone provides. Golden hour light produces warm-toned catchlights that complement the overall warmth of the lighting, creating a cohesive, natural look that is difficult to replicate artificially. The lower angle of golden hour sun means catchlights may appear lower in the eye than midday light, but the warm quality and directional character more than compensate for the slightly unconventional position. Developing sensitivity to how outdoor light conditions affect catchlights allows you to consistently produce portraits with sparkling, expressive eyes regardless of the shooting environment.
From the grand tradition of portrait painting through the golden age of film photography to today’s digital era, catchlights have remained one of the constants of compelling portraiture. They are the simplest possible lighting effect: a reflection of light in an eye. Yet they carry enormous communicative power, transforming flat, lifeless eyes into windows of expression and connection. Master the catchlight, and you master the single most important detail in portrait photography. No amount of perfect composition, beautiful lighting, or flawless retouching can compensate for eyes that lack this essential spark of life.