Golden hour is the most sought-after natural light in all of photography. It is the short window of time just after sunrise and just before sunset when the sun hangs low on the horizon, bathing everything in warm, directional, golden light. For more, see our sunset photography tips guide. Portraits glow. Landscapes come alive with long shadows and rich color. Even ordinary scenes look extraordinary. Professional photographers schedule entire shoots around golden hour because the quality of light during this period is unmatched by any other time of day, or any studio setup. This guide explains what golden hour is, when and how to find it, and how to make the most of this fleeting, magical light for every type of photography.
What Is Golden Hour?
Golden hour is the period shortly after sunrise and before sunset when the sun is low on the horizon and produces warm, soft, directional light. This light has a golden color temperature around 3000-4000K, creates long shadows, and wraps around subjects with a flattering quality that photographers prize above almost any other natural light.
Golden hour (also called magic hour) is the period of time shortly after sunrise and before sunset when the sun is between roughly 6 degrees below and 6 degrees above the horizon. During this window, sunlight travels through a much thicker layer of atmosphere than at midday. This extra atmosphere scatters the shorter blue and violet wavelengths of light, allowing the longer red, orange, and yellow wavelengths to dominate. The result is warm, golden-toned light that is softer, more diffused, and lower in contrast than the harsh midday sun.
The low angle of the sun during golden hour is equally important. Because the light comes from the side rather than overhead, it creates long, sculpting shadows that reveal texture, depth, and dimension in everything it touches, faces, landscapes, buildings, and natural features. This directional quality is what makes golden hour light so three-dimensional and visually rich compared to the flat, overhead light of midday.
The exact duration of golden hour varies depending on your latitude and the time of year. Near the equator, golden hour can be as short as 20-30 minutes because the sun rises and sets nearly vertically. At higher latitudes (further from the equator), the sun’s path is more angled, stretching golden hour to 45 minutes or even over an hour. In polar regions during certain seasons, the sun barely clears the horizon, and the entire day can feel like an extended golden hour.
When Does Golden Hour Happen?
Golden hour timing depends on your latitude, the time of year, and local geography. Near the equator it lasts roughly 20 to 30 minutes. At higher latitudes in summer, it can stretch to over an hour. Apps like PhotoPills, The Photographer’s Ephemeris, and Golden Hour One calculate exact times for any location and date.
Golden hour occurs twice each day: in the morning just after sunrise and in the evening just before sunset. The morning golden hour begins at sunrise and lasts roughly 30-60 minutes as the sun climbs. The evening golden hour starts roughly 30-60 minutes before sunset and ends at sunset. Many photographers prefer the evening golden hour because the light warms and intensifies as sunset approaches, reaching its most golden and dramatic quality in the final 15-20 minutes.
The morning golden hour has its own advantages. The light is often cleaner and the air clearer because heat haze has not built up. Morning mist, dew, and fog add atmospheric elements that disappear later in the day. Locations that are crowded in the evening are often deserted at dawn, giving you unobstructed access to popular shooting spots.
The exact timing shifts throughout the year as the days lengthen and shorten. In summer, sunset golden hour might start at 7:30pm. In winter, it might start at 3:30pm. You cannot rely on a fixed schedule, you need to check the actual sunrise and sunset times for your specific location and date.
Apps and Tools for Tracking Golden Hour
Precise timing is critical for golden hour photography because the window is short and the light changes rapidly. Several tools help you plan your shoots down to the minute.
Smartphone apps are the most convenient planning tools. Apps designed for photographers show exact sunrise and sunset times, golden hour and blue hour windows, and the sun’s position in the sky for any location and date. Check out our astro-landscape photography for more details. Many include augmented reality views that overlay the sun’s path onto your camera view, showing you exactly where the sun will be at any time. This lets you scout locations in advance and plan your composition around the anticipated light direction.
Weather apps and forecasts are equally important. The most spectacular golden hour light requires some clouds on the horizon, clear skies produce warm light but lack the dramatic cloud color that makes sunsets extraordinary. A thin layer of high clouds (cirrus or altocumulus) catches and reflects golden hour light across the sky. Heavy cloud cover blocks the sun entirely. Check both the general forecast and cloud cover predictions before planning a golden hour shoot.
Arrive at your location at least 20-30 minutes before the predicted golden hour window. This gives you time to set up, compose, and adjust as the light evolves. The quality of golden hour light changes visibly every few minutes, and the most dramatic moments pass quickly. Being ready before the light peaks is essential.
Backlit Portraits at Golden Hour
Backlighting your subject with the golden hour sun is the single most popular and effective portrait technique during this time. Position your subject between you and the low sun so that the sunlight streams from behind them toward your camera. This creates a warm, glowing rim of light around the subject’s hair and shoulders, the hallmark of a golden hour portrait.
The key challenge with backlighting is exposure. The bright sun behind the subject fools your camera’s meter into underexposing, which leaves the face too dark. There are several solutions. Use spot metering on the subject’s face so the camera exposes for the skin rather than the bright background. Alternatively, use exposure compensation (+1 to +2 stops) to override the meter and brighten the exposure. Manual mode gives you the most control, set your exposure for the subject’s face and let the background blow out slightly, which adds to the dreamy golden hour aesthetic.
A reflector positioned in front of the subject bounces golden sunlight back onto the face, filling in shadows and adding warm catchlights to the eyes. Gold reflectors amplify the warmth; white reflectors provide more neutral fill. Even without a reflector, natural bounce from light-colored ground surfaces (sand, concrete, dry grass) provides some fill.
For the strongest backlight glow, position the sun just behind your subject’s head so it peeks out at the edge. This creates a burst of warm light and a strong rim. If the sun is too high and visible in the frame, it will cause excessive flare and washed-out highlights. Use your subject’s body to partially block the sun, letting just a sliver of light wrap around the edges.
Landscape Photography at Golden Hour
Golden hour is the defining light for landscape photography. The low sun angle creates long shadows that reveal the texture and contours of terrain that looks flat and featureless at midday. Rolling hills, sand dunes, rock formations, plowed fields, and mountain ranges all come alive under raking golden hour light.
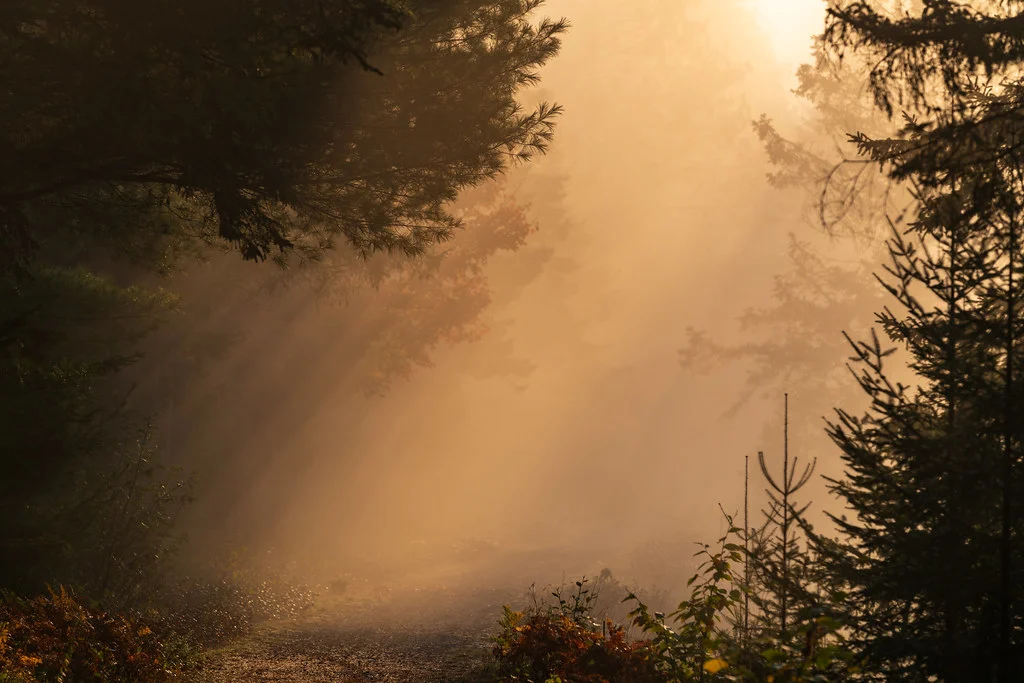
For landscapes, side light (sun at 90 degrees to your camera direction) typically produces the most dramatic results because it maximizes shadow length and depth. Front light (sun behind you, illuminating the scene directly) produces warm, evenly lit landscapes with saturated color but less dimension. Backlighting creates silhouettes and atmospheric effects like sun stars and light streaming through trees.
Composition matters more during golden hour because the directional light creates strong visual lines and shadow patterns that can either enhance or disrupt your image. Use the shadows as leading lines or compositional elements. Watch how the light rakes across foreground texture. Look for elements that catch the golden light, a patch of bright grass, a reflective surface, a building facade, and use them as focal points.
Shoot with a small aperture (f/8 to f/16) for maximum depth of field from foreground to background. A tripod is essential for the sharpest results, especially toward the end of golden hour when light levels drop. Bracketing your exposure, taking several shots at different exposures, gives you options for post-processing and ensures you capture detail in both the bright sky and the darker foreground.
Silhouettes at Golden Hour
Silhouettes are one of the simplest and most dramatic techniques for golden hour photography. A silhouette reduces your subject to a dark outline against a bright, colorful sky, creating bold, graphic images that convey mood and emotion through shape alone.
To create a silhouette, position your subject in front of the bright sky or low sun. Expose for the sky (meter off the bright background) so the subject goes completely dark. Use exposure compensation set to -1 or -2 stops to ensure the background is properly saturated and the subject is truly black. Manual mode gives you the most precise control.
Strong silhouettes depend on recognizable shapes. A person in profile with clear features, a tree with distinctive branches, a couple holding hands, or a cyclist on a ridge all read clearly as silhouettes. Overlapping subjects merge into an unreadable blob, separate elements so their outlines remain distinct. Pose portrait subjects in profile or with limbs separated from the body (hands on hips, arms extended) so the human form is clearly recognizable.
The most dramatic silhouettes come in the final minutes before sunset or the first minutes after sunrise, when the sky has the richest color. Look for interesting clouds, which add texture and drama to the background. A silhouette against a bland, hazy sky is far less compelling than one framed against a sky painted with orange, pink, and purple.
Rim Light and Edge Light
Rim light is one of the most beautiful effects produced by golden hour backlighting. When the low sun catches the edges of your subject, the outline of hair, the curve of shoulders, the contour of a face in profile, it creates a thin line of glowing brightness that separates the subject from the background. This luminous edge adds a professional, polished quality to portraits and gives subjects a three-dimensional quality that front-lit images lack.
To maximize rim light, position your subject so the sun is just behind and slightly to one side. The rim should glow along the edges facing the sun while the front of the subject is lit by ambient reflected light or fill from a reflector. The effect is strongest when the background is darker than the bright rim, a shaded area, deep green foliage, or a dark building behind the subject makes the rim pop dramatically.
Rim light works on any subject, not just people. Plants, flowers, animals, and textured objects like fences and webs all look stunning when backlit with golden hour rim light. Translucent subjects, leaves, petals, ears, fine hair, glow when lit from behind, a quality called transillumination that is unique to backlighting.
Lens Flare at Golden Hour
Lens flare, the streaks, circles, and haze caused by direct sunlight hitting the front element of your lens, is typically avoided in most photography. During golden hour, however, lens flare becomes a creative tool. Warm, golden flare adds an atmospheric, dreamlike quality to images that enhances the romantic mood of the light.
To create intentional lens flare, shoot toward the sun and let it partially enter the frame. Positioning the sun just at the edge of the frame, behind a subject’s head, or peeking through tree branches produces controlled flare. Removing your lens hood allows more light to hit the front element, increasing flare. Different lenses produce different flare patterns, prime lenses with fewer elements tend to produce cleaner, more defined flare, while zoom lenses with many elements create more complex flare patterns.
Use lens flare deliberately. A subtle warm haze adds atmosphere; excessive flare washes out your entire image and obscures the subject. Control the amount by adjusting the sun’s position relative to the frame edge, a small shift in your camera angle dramatically changes the intensity and shape of the flare. Review your shots on the LCD and adjust until the flare complements rather than overwhelms the image.
Camera Settings for Golden Hour
Start with a low ISO of 100-400, aperture based on your depth of field needs, and shutter speed to match. White balance set to daylight or shade preserves the warm tones. Shoot in RAW to retain maximum highlight and shadow detail, because the light changes rapidly and you may need to adjust exposure in post.
Golden hour light is beautiful but it changes rapidly and can be tricky to expose correctly, especially when shooting into the sun. These settings tips help you make the most of the window.
White balance: Auto white balance often neutralizes the warm golden tones that make golden hour special. Set your white balance to “Daylight” or “Cloudy” to preserve the warmth. Cloudy adds extra warmth beyond daylight, which some photographers prefer. If you shoot in RAW, you can adjust white balance freely in post-processing, but setting it warm in-camera lets you see the golden tones on your LCD while shooting, which helps with creative decisions in the moment.
Exposure: The bright sun in or near the frame confuses metering systems. For backlit subjects, use spot metering on the face or overexpose by +1 to +2 stops. For landscapes and silhouettes, meter the sky and let the foreground go dark. Bracketing is recommended, take shots at -1, 0, and +1 exposure compensation to guarantee you capture the right exposure for the conditions.
Aperture: For portraits, a wide aperture (f/1.8 to f/2.8) creates beautiful bokeh with golden, circular highlights from the backlighting. For landscapes, stop down to f/8 or f/11 for sharpness across the frame. To create a sun star effect (the sun rendered as a burst of pointed rays), use a very small aperture like f/16 or f/22.
ISO and shutter speed: At the start of golden hour, light is typically bright enough for low ISO settings (100-400). As sunset approaches, light drops quickly, be prepared to raise your ISO progressively. For handheld shooting, maintain a shutter speed fast enough to avoid camera shake (at least 1/focal length). A tripod becomes invaluable in the last minutes of golden hour when light is fading fast.
Golden Hour vs Blue Hour
Blue hour is the period of twilight just before sunrise and just after sunset, when the sun is below the horizon but still illuminating the sky with a cool, blue-violet light. It is the natural complement to golden hour and produces a completely different mood.
While golden hour is warm, directional, and high-energy, blue hour is cool, even, and contemplative. The light during blue hour is soft and ambient, there are no shadows because the light source (the glowing sky) is everywhere. This makes blue hour ideal for cityscapes, where artificial lights glow warmly against the deep blue sky. It is also excellent for moody landscape photography, seascapes with long exposures, and portraits with a contemporary, cinematic feel.
Blue hour is dimmer than golden hour, so you will need a wider aperture, higher ISO, or slower shutter speed to get proper exposure. A tripod is essential for landscape and cityscape work during blue hour. The duration of blue hour is similar to golden hour, roughly 20-40 minutes depending on latitude.
The most spectacular photographs often happen at the transition between golden hour and blue hour. In the minutes immediately surrounding sunset (or sunrise), the sky can display a full spectrum of warm and cool tones, orange near the horizon grading to pink, purple, and deep blue overhead. This brief transition period is worth every minute of patience and preparation.
Common Golden Hour Mistakes
- Arriving too late. Golden hour waits for no one. The best light is often in the first or last 15 minutes of the window. Arrive early, be set up and ready, and start shooting before the light peaks.
- Letting auto white balance kill the warmth. AWB is designed to neutralize color casts, which means it will cool down the very warmth that makes golden hour special. Override it with a Daylight or Cloudy preset, or shoot RAW and warm it in post.
- Only shooting sunsets. The minutes after sunset and before sunrise during blue hour are equally beautiful and far less photographed. Stay after the sun drops below the horizon and keep shooting the changing sky.
- Underexposing backlit subjects. The bright background behind your subject tricks the meter into darkening the image. Use spot metering, positive exposure compensation, or fill flash to properly expose the subject’s face in backlit situations.
- Ignoring the background. Golden hour makes everything look warm, but a cluttered or distracting background still ruins the image. Apply the same composition discipline at golden hour that you would at any other time.
- Not checking the forecast. A clear sky produces warm light but a bland background. Light clouds add texture and catch golden light beautifully. Heavy clouds block the sun entirely. Check cloud cover predictions before committing to a golden hour shoot.
Frequently Asked Questions
How long does golden hour last?
Golden hour typically lasts 30-60 minutes, depending on your latitude and the time of year. Near the equator, the sun rises and sets quickly, producing a shorter golden hour of 20-30 minutes. At higher latitudes (further north or south), the sun’s angle is shallower and golden hour can last an hour or more. In practical terms, plan for 30-45 minutes of prime shooting time and arrive early to be ready when the best light begins.
Is morning golden hour different from evening golden hour?
The quality of the light is very similar: both produce warm, directional, soft illumination. The main differences are atmospheric. Morning air tends to be clearer and cooler, often with mist, dew, and fog that add atmosphere. Evening air may contain more haze, dust, and warmth from the day’s heat, which can make evening golden hour slightly warmer and softer. Morning golden hour is also less crowded at popular locations. Many photographers prefer evening golden hour for the intensifying warmth as sunset approaches, while landscape photographers often favor morning for cleaner air and atmospheric effects.
What camera settings should I use for golden hour?
Set your white balance to Daylight or Cloudy to preserve the golden warmth. For portraits, use a wide aperture (f/1.8 to f/2.8) and spot meter on the face, adding +1 to +1.5 stops of exposure compensation for backlit subjects. For landscapes, use f/8 to f/11 for sharpness, a low ISO, and a tripod. Shoot in RAW for maximum flexibility in post-processing. As the light fades toward sunset, be prepared to raise ISO progressively to maintain adequate shutter speed.
Can I get golden hour light on an overcast day?
Not in the traditional sense. Thick cloud cover blocks direct sunlight, which eliminates the warm, directional quality of golden hour. However, if the clouds have gaps near the horizon, the low sun can break through just before sunset and produce a brief burst of golden light, sometimes even more dramatic than a clear-sky golden hour because the clouds catch and reflect the warm light across the entire sky. Partially cloudy skies near the horizon often produce the most spectacular golden hour conditions.
What is the difference between golden hour and magic hour?
In photography, golden hour and magic hour are used interchangeably, they refer to the same period of warm, low-angle light around sunrise and sunset. In filmmaking, “magic hour” sometimes refers specifically to the brief period right at sunset when the light is changing most rapidly, but in photography the terms are synonymous. Some photographers use “magic hour” to encompass both golden hour and blue hour together, referring to the entire transition period around sunrise and sunset.
Continue Learning
Golden hour is just one piece of the natural light puzzle. Expand your lighting knowledge with these related guides:
- Natural Light Photography Tips
- Photography Lighting: The Complete Guide
- How to Photograph Silhouettes
- Landscape Photography Guide
- Portrait Photography Guide
- White Balance Explained
- Understanding Exposure
- Photography Composition Techniques
See it side by side
Low-angle golden-hour light is warm, long-shadowed, and directional. Midday light is cool, short-shadowed, and strikes everything from above, flattening form.