Film photography is more than a throwback, it is a deliberate, rewarding way to make photographs that look and feel different from anything a digital sensor produces. For more, see our vintage photography look guide. Shooting on film forces you to slow down, think carefully about every frame, and engage with the physical process of creating an image. Whether you are drawn to the rich grain of black-and-white street photography or the creamy tones of a medium-format portrait, this guide walks you through everything you need to start shooting film with confidence. For more, see our cinematic photography guide.
Why Shoot Film
The most immediate reason photographers pick up a film camera is the aesthetic. Film renders highlights, shadows, and colors in a way that is extremely difficult to replicate in post-processing. Negative film, in particular, handles overexposure gracefully, rolling off highlights into smooth, luminous tones rather than clipping them to pure white. Each film stock has its own color palette and grain structure, characteristics that become part of your creative signature. For more, see our add film grain to digital photos guide.
Beyond the look, film imposes a discipline that sharpens your fundamentals. Check out our instant film photography for more details. With 24 or 36 exposures on a roll of 35mm, you cannot machine-gun the shutter and sort it out later. You learn to read light, compose in-camera, and commit to a moment before pressing the shutter. That intentionality transfers directly to your digital work too, photographers who spend time shooting film almost universally report becoming more deliberate with every camera they pick up.
There is also the tactile satisfaction. Loading a roll, advancing the film lever, hearing the mechanical shutter fire, these are sensory experiences that deepen your connection to the craft. And the anticipation of waiting for developed negatives, not knowing exactly what you captured, is a creative thrill that instant digital review simply cannot match.
Film Formats Explained
Film comes in several formats, each offering a different balance of convenience, image quality, and creative character. Understanding the main formats helps you choose the right system for the kind of work you want to do.
35mm (135 Film)
35mm is the most common and accessible film format. Each roll yields 24 or 36 exposures on a frame that measures 24 x 36 mm. The cameras are compact, affordable, and widely available on the used market. 35mm is ideal for street photography, travel, photojournalism, and everyday shooting. The smaller negative does show visible grain, which many photographers consider a feature, not a flaw, and it enlarges well up to about 11 x 14 inches before grain becomes dominant.
Medium Format (120 Film)
120 film produces a significantly larger negative than 35mm. Depending on the camera, you get frames in 6×4.5 cm, 6×6 cm, 6×7 cm, or even 6×9 cm. The bigger negative means finer grain, smoother tonal transitions, a shallower depth of field at equivalent framing, and the ability to make very large prints. Check out our cyanotype photography for more details. Medium format is the classic choice for portraiture, landscape photography, and fashion work. Cameras range from relatively portable models like the Mamiya 7 rangefinder to studio workhorses like the Hasselblad 500 series.
Large Format (4×5 and 8×10)
Large format cameras use individual sheets of film, 4×5 inches or 8×10 inches being the most common sizes. The enormous negative captures extraordinary detail and tonal range. These cameras also allow movements (tilt, shift, swing, rise, fall) that let you control the plane of focus and correct perspective distortion in-camera. Large format is primarily used for fine-art landscape photography, architectural work, and studio portraiture. It is the slowest, most deliberate way to shoot, often requiring a tripod, dark cloth, and careful metering for every single frame.
Choosing a Film Stock
Film stock selection is one of the most enjoyable aspects of analog photography. Each emulsion has a distinct personality. Here are five essential stocks that cover the widest range of shooting situations.
Kodak Portra 400
Portra 400 is the gold standard for portrait and wedding photography on film. It produces warm, natural skin tones with beautiful pastel highlights and low contrast. Its fine grain for a 400-speed film makes it versatile enough for everything from overcast outdoor portraits to interior available-light work. Portra is extremely forgiving of overexposure, you can rate it at 200 or even 100 and get even smoother, more saturated results.
Kodak Tri-X 400
Tri-X is arguably the most iconic black-and-white film ever made. Generations of photojournalists, street photographers, and documentary shooters have relied on its punchy mid-tone contrast, classic grain structure, and wide exposure latitude. It pushes well to 800 or 1600, making it adaptable to low-light situations. If you want the look that defined an era of photojournalism, Tri-X is it.
Kodak Ektar 100
Ektar 100 is the finest-grain color negative film available, producing hyper-saturated, vivid colors with exceptional sharpness. It excels at landscape and nature photography where you want punchy blues, deep greens, and intense reds. Its low ISO of 100 means it is best suited for bright daylight or tripod-based shooting. Skin tones can lean slightly red, so it is generally not the first choice for portraits.
Ilford HP5 Plus 400
HP5 Plus is Ilford’s versatile, do-everything black-and-white film. It has a slightly softer, more rounded grain structure than Tri-X and delivers smooth mid-tones with good shadow detail. Like Tri-X, it pushes well and handles a wide range of lighting conditions. HP5 is an excellent choice if you plan to develop your own black-and-white film at home, as it is very forgiving of development time variations.
CineStill 800T
CineStill 800T is motion picture film (Kodak Vision3 500T) that has been modified for still camera use. Balanced for tungsten lighting, it produces a distinctive cinematic look with halation, a soft red-orange glow around bright light sources like neon signs, streetlights, and candles. It is a specialized stock best suited for night photography, urban scenes, and any situation where you want a moody, film-noir atmosphere. The high 800 ISO makes it practical for handheld shooting after dark.
Camera Types for Film Photography
Film cameras come in several distinct designs, each with strengths that suit different styles of shooting.
SLR (Single-Lens Reflex): The SLR uses a mirror and prism to show you the exact view through the taking lens. This makes composition and focus intuitive, and the interchangeable lens system gives you enormous flexibility. Classic models include the Nikon FM2, Canon AE-1, Pentax K1000, and Minolta X-700. An SLR is the most practical starting point for most film photographers.
Rangefinder: Rangefinder cameras use a separate viewfinder window with a focusing patch that you align manually. They tend to be smaller and quieter than SLRs, and the viewfinder shows a wider field than the taking lens, which is useful for anticipating action entering the frame. The Leica M series is the most famous rangefinder system, though more affordable options like the Canonet QL17 and Yashica Electro 35 are excellent entry points.
TLR (Twin-Lens Reflex): TLR cameras have two lenses stacked vertically, one for viewing and one for exposing. You compose on a ground glass at waist level, which produces a calm, considered shooting experience. The Rolleiflex and Yashica Mat 124G are the best-known TLRs. These are medium-format cameras, so you get the benefit of a larger negative.
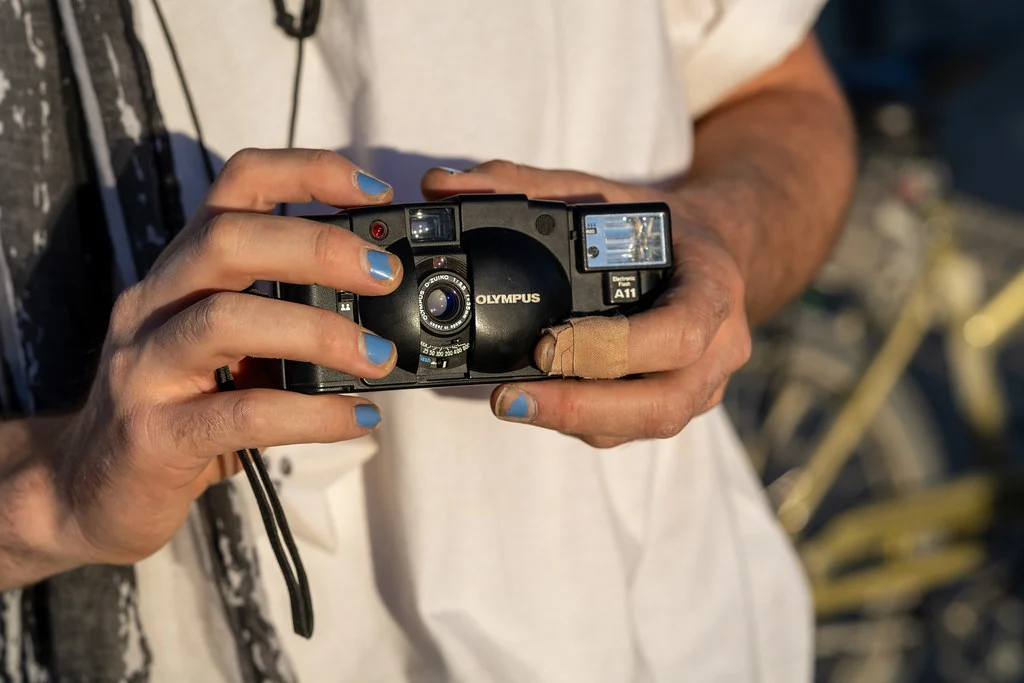
Point-and-Shoot: Compact film cameras with built-in lenses and automatic exposure. Some models, like the Contax T2, Olympus Stylus Epic (Mju II), and Ricoh GR1, have excellent optics and produce image quality that rivals larger cameras. They are ideal for casual everyday shooting and travel where size matters.
Loading and Handling Film
Proper film handling is essential to getting good results. Film is a physical, chemical medium, and it is more sensitive to mishandling than a memory card.
- Load in subdued light. You do not need total darkness to load 35mm or 120 film into a camera, but avoid direct sunlight. Turn away from the sun or step into shade. The film leader (the exposed tongue on a 35mm roll) is designed to protect the rest of the roll, but bright light can fog the first frame or two.
- Never open the camera back mid-roll. This will expose and ruin every frame that has been wound past the gate. If you are unsure whether a camera is loaded, check the rewind knob (on 35mm cameras), if it resists when you turn it gently, there is film inside.
- Keep film away from heat. Do not leave rolls in a hot car, a sunny window, or a checked bag on a tarmac. Heat shifts color balance and increases grain. Refrigerating unused film extends its life; just let it reach room temperature before loading to avoid condensation.
- Understand DX coding. Most 35mm cameras made after the early 1980s read the DX code, a pattern of conductive squares on the film canister, to automatically set the ISO. If your camera has DX coding, it will set the speed for you. If it does not (or if you want to push or pull the film), you will set the ISO manually.
- Rewind before opening. When you finish a roll of 35mm, rewind the film completely back into the canister before opening the camera back. Some cameras do this automatically; others require you to press a release button and crank the rewind lever.
Metering and Exposure on Film
Getting good exposure is the single most important technical skill in film photography. Unlike digital, you cannot check a histogram on the back of the camera (though you can learn about histograms to understand tonal distribution). You need to meter the scene and make deliberate choices before you press the shutter.
Start at Box Speed
Every roll of film has a rated ISO, the speed printed on the box. Set your camera or meter to that number and shoot. This is the manufacturer’s recommended setting for normal processing, and it is the safest starting point. Once you are comfortable, you can experiment with rating the film at a different speed (overexposing or underexposing intentionally) and adjusting development to compensate, a technique called pushing or pulling.
Expose for the Shadows
This is the most important exposure principle for negative film: when in doubt, give it more light, not less. Negative film (both color and black-and-white) has tremendous highlight latitude, it can absorb several stops of overexposure without losing detail. But underexposure kills shadow detail permanently, producing thin, grainy negatives with muddy dark tones. The classic advice is “expose for the shadows, develop for the highlights.” In practice, this means erring on the side of slight overexposure, half a stop to a full stop over your meter reading, especially in contrasty light.
Metering Methods
Your camera’s built-in meter is your primary tool. Learn how your camera’s metering modes work, whether it uses center-weighted, spot, or evaluative metering, and understand what the meter is actually measuring. Most built-in meters assume the scene averages out to a middle gray (18% reflectance). Scenes that are mostly dark (a black cat on a dark couch) or mostly bright (snow, white walls) will fool the meter, and you will need to compensate.
A handheld light meter gives you more control, especially for medium and large format work where cameras often lack built-in meters. Incident metering (measuring the light falling on the subject rather than the light reflected from it) is particularly reliable for consistent exposures. Smartphone light meter apps are surprisingly accurate and are a good alternative if you do not want to carry a separate device.
Bracketing
When you are unsure of the exposure, bracket. Shoot one frame at the metered value, one at +1 stop, and one at -1 stop. This uses three frames per scene, but it ensures you get at least one well-exposed negative. Bracketing is especially valuable with slide film (which has very narrow exposure latitude) and in tricky lighting conditions. As you gain experience reading light, you will bracket less, but it remains a useful safety net.
Understanding manual mode on your camera gives you full control over both aperture and shutter speed, which is the most precise way to manage exposure on film.
Developing Film
After you shoot a roll, the latent image on the film needs to be chemically developed before you can see your photographs. You have two main options: lab processing and home developing.
Lab Processing
Sending your film to a lab is the simplest path. Check out our pinhole photography for more details. Mail-order labs and local camera shops handle the chemistry, temperature control, and quality management for you. Most labs offer develop-only, develop-and-scan, or develop-and-print packages. Turnaround ranges from same-day at local labs to about a week for mail-order services.
Lab processing is the right choice if you want consistent results without investing in equipment, if you shoot color negative or slide film (which requires precise temperature control), or if you simply prefer to spend your time shooting rather than processing.
Home Developing
Developing film at home is more accessible than most people expect. Black-and-white is the easiest place to start, the chemicals are inexpensive, the process is tolerant of minor temperature variations, and you need only a few pieces of equipment: a developing tank with reels, a changing bag (for loading film in the dark), a thermometer, measuring graduates, and three chemicals (developer, stop bath, fixer).
The process itself takes about 15 to 20 minutes of active work per roll. You load the film onto a reel inside the changing bag, seal it in the tank, and then pour chemicals in and out according to timed steps. The satisfaction of pulling a developed strip of negatives out of the tank and holding it up to the light for the first time is one of the great pleasures of photography.
Processing Types
C-41: The standard process for color negative film (Portra, Ektar, Fuji Superia, etc.). C-41 requires chemicals held at a consistent 38 degrees Celsius (100.4 degrees Fahrenheit). Home C-41 kits are available and work well, but temperature control is critical.
E-6: The process for color reversal (slide) film such as Fuji Velvia and Provia. E-6 is more complex, with six or more chemical steps and very tight temperature tolerances. Most photographers send slide film to a lab.
Black-and-White: Most traditional B&W films use a simple three-bath process (developer, stop, fix) at room temperature or slightly above. Different developers produce different grain and contrast characteristics, giving you creative control over the final look of your negatives.
Scanning Negatives
Once your film is developed, you need to digitize the negatives if you want to share, print digitally, or edit your photographs on a computer. Scanning bridges the analog and digital worlds.
Flatbed Scanners
A flatbed scanner with a transparency unit (backlight in the lid) can scan both 35mm and medium-format film. Models like the Epson V600 and V850 are popular choices. Flatbed scanners are affordable and versatile, they handle multiple formats and you can scan several strips at once. Resolution is adequate for most purposes, though dedicated film scanners produce sharper results from 35mm negatives.
Dedicated Film Scanners
Dedicated 35mm scanners like the Plustek OpticFilm series use a narrow optical path optimized for small negatives, producing sharper scans with better dynamic range than a flatbed. They are slower (one frame at a time) but the quality difference is noticeable, especially if you plan to make large prints. For medium format, the Nikon Coolscan 9000 (now discontinued but available used) is considered one of the best dedicated scanners ever made.
DSLR Scanning (Camera Scanning)
An increasingly popular method is to photograph your negatives using a digital camera with a macro lens, a light table or tablet for backlighting, and a film holder to keep the negatives flat. This approach is fast, you can scan an entire roll in minutes, and the resolution of a modern digital sensor often exceeds what a flatbed can extract. Software like Negative Lab Pro (a Lightroom plugin) automates the color inversion and correction process. DSLR scanning has become the preferred method for many high-volume film shooters.
Film vs. Digital Photography
The film-versus-digital question is not a contest with a winner. Each medium has genuine strengths, and many serious photographers use both. Here is an honest comparison.
Where Film Excels
- Highlight handling: Negative film rolls off highlights gracefully, producing a natural, pleasing look in bright scenes that digital sensors struggle to match.
- Color character: Each film stock has a unique color palette baked in. Portra’s skin tones, Ektar’s saturation, Velvia’s punch, these looks are organic and consistent.
- Grain vs. noise: Film grain has an organic, textured quality that many photographers (and viewers) find more appealing than digital noise, which tends to look random and ugly.
- Intentionality: The limited frame count and lack of instant review force you to slow down and be more thoughtful about every exposure.
- Longevity: A properly stored negative can last over a century. Digital files depend on functioning storage media and software compatibility.
Where Digital Excels
- Instant feedback: Reviewing images on the spot lets you correct mistakes immediately and learn faster. The histogram is an invaluable exposure tool.
- Low-light performance: Modern digital sensors produce clean images at ISO 3200, 6400, and beyond, territory where film becomes extremely grainy.
- Cost per frame: After the initial camera investment, each digital photograph costs essentially nothing. Film has ongoing costs for rolls and processing.
- Speed and volume: Digital is essential for any work that demands high frame rates, fast turnaround, or large image counts, sports, events, commercial deadlines.
- Post-processing flexibility: RAW files contain enormous latitude for adjustment. Film scans are more limited, and the original exposure matters more.
The most productive way to think about film and digital is not which is better, but which is the right tool for a given project, mood, or creative goal. Many photographers shoot digital for paid work and film for personal projects, or vice versa. The two media complement each other well.
Frequently Asked Questions
How much does it cost to shoot a roll of film?
The total cost per roll includes the film itself, processing, and scanning. A roll of 35mm color negative film typically costs between $10 and $16 USD. Lab developing and scanning adds another $12 to $20 depending on the lab and scan resolution. So the all-in cost per roll ranges from roughly $22 to $36, which works out to about $0.60 to $1.50 per frame on a 24-exposure roll. Black-and-white film is slightly cheaper to buy, and developing at home reduces processing costs significantly. Medium-format film costs more per roll but delivers fewer, larger frames.
Is film still being manufactured?
Yes. Kodak, Ilford, Fujifilm, Foma, and several smaller companies continue to manufacture photographic film. Kodak has invested in expanding production capacity, and Ilford has stated its commitment to analog products. New film stocks and reissued classic emulsions appear periodically. While the product range is narrower than it was in the 1990s, the core films that photographers depend on, Portra, Tri-X, HP5, Ektar, and others, remain in production and widely available.
Can you fly with film?
You can, but with precautions. Carry-on X-ray machines at airport security are generally safe for film rated ISO 800 and below, the X-ray dose from a single pass is low enough that it will not produce visible fogging. However, the effects are cumulative: if you are taking multiple flights on a trip, the repeated scans add up. Film rated ISO 800 and above is more sensitive and should always be hand-inspected. In the United States, TSA is required to hand-inspect photographic film if you request it. Place your film in a clear plastic bag for easy inspection. Never put film in checked luggage, the CT scanners used for checked bags are significantly more powerful and will damage film of any speed in a single pass.
What is the best film for beginners?
For color, Kodak Portra 400 or Kodak Gold 200 are excellent starting points. Both are forgiving of exposure errors (especially overexposure), produce pleasing colors in a wide range of lighting, and are widely available. For black-and-white, Ilford HP5 Plus 400 is hard to beat, it is affordable, extremely versatile, pushes and pulls well, and is easy to develop at home. Start with one stock and shoot several rolls with it before switching. Getting to know a single film’s personality teaches you far more than sampling a different stock every roll.
Getting Started
Film photography does not require expensive gear or specialized knowledge to begin. Pick up an affordable SLR, a fully manual camera like the Pentax K1000 or a semi-automatic one like the Canon AE-1, load a roll of Kodak Gold or HP5, and start shooting. Set your camera to manual mode, pay attention to your exposure settings, and learn from every roll. Use a light meter app on your phone if your camera does not have a working meter.
Send your first few rolls to a reputable lab for developing and scanning. Study the results: compare your metering notes to the density and exposure of the negatives. Over time, you will develop an intuitive feel for how much light a scene needs and how different film stocks respond. That understanding is one of the most valuable skills in all of photography, and it makes you a better photographer regardless of what camera you eventually shoot with.