The Orton effect is an editing technique that gives photos a soft, dreamy glow while keeping the main details sharp. It works by blending a sharp version of a photo with a blurred, slightly brighter copy of itself. The blur spreads light softly around bright areas, and the sharp layer keeps edges readable. It suits landscapes, forests, flowers and golden light. Use it gently, with low opacity and moderate blur, so the photo glows rather than looking foggy, washed out or fake.
Have you ever seen a landscape photo that seems to glow from within, as if the light is gently spilling across the scene? There is a good chance the photographer used some version of the Orton effect. It is one of the oldest creative editing tricks in photography, and it is simple enough for a beginner to learn in an afternoon.
This guide explains what the Orton effect is, where it came from, why it works, how to create it step by step on a computer or phone, which photos suit it, and the common mistakes beginners make. There is a 10-minute exercise and an FAQ at the end.
What the Orton effect is
The Orton effect is named after Michael Orton, a Canadian landscape photographer who created it with film. He photographed the same scene twice on slide film: once sharp and slightly overexposed, and once out of focus and also overexposed. Then he sandwiched the two slides together. The result was a photo with sharp details surrounded by a soft, luminous glow, a little like a watercolour painting.
Digital editing makes the same idea far easier. Instead of two slides, you use two layers of the same photo: one sharp, one blurred. Blending them together creates that signature glow.
The look sits somewhere between a normal photo and a painting. It is not the same as simply blurring a photo, because the details stay sharp. It is also not the same as lowering clarity, although that can create a related softness. The Orton effect adds glow, especially around bright areas, while keeping the structure of the image intact.
Why it works
The Orton effect works because of how people see light. In real life, bright light seems to spill and bloom softly around its source, especially in haze, mist or warm evening light. Human eyes and memories often recall such scenes as softer and more glowing than a sharp camera records them.
Blending a blurred copy spreads bright tones gently into nearby darker areas, which recreates that soft bloom. Keeping a sharp layer underneath means edges, shapes and textures remain clear, so the photo does not look out of focus. The combination feels dreamy but still readable.
The effect also lifts the overall brightness and softens contrast a little, which adds to the gentle, romantic mood.
Think of it like looking at a sunny scene through a very slightly misty window, but with the shapes still clear. The light feels softer and warmer, the colors feel richer, and the whole scene seems calmer. That is the feeling most photographers are chasing when they reach for the Orton effect, and knowing the feeling you want makes it much easier to judge how much to use.
Photos that suit the Orton effect
- Forests and woodland, especially with light filtering through leaves.
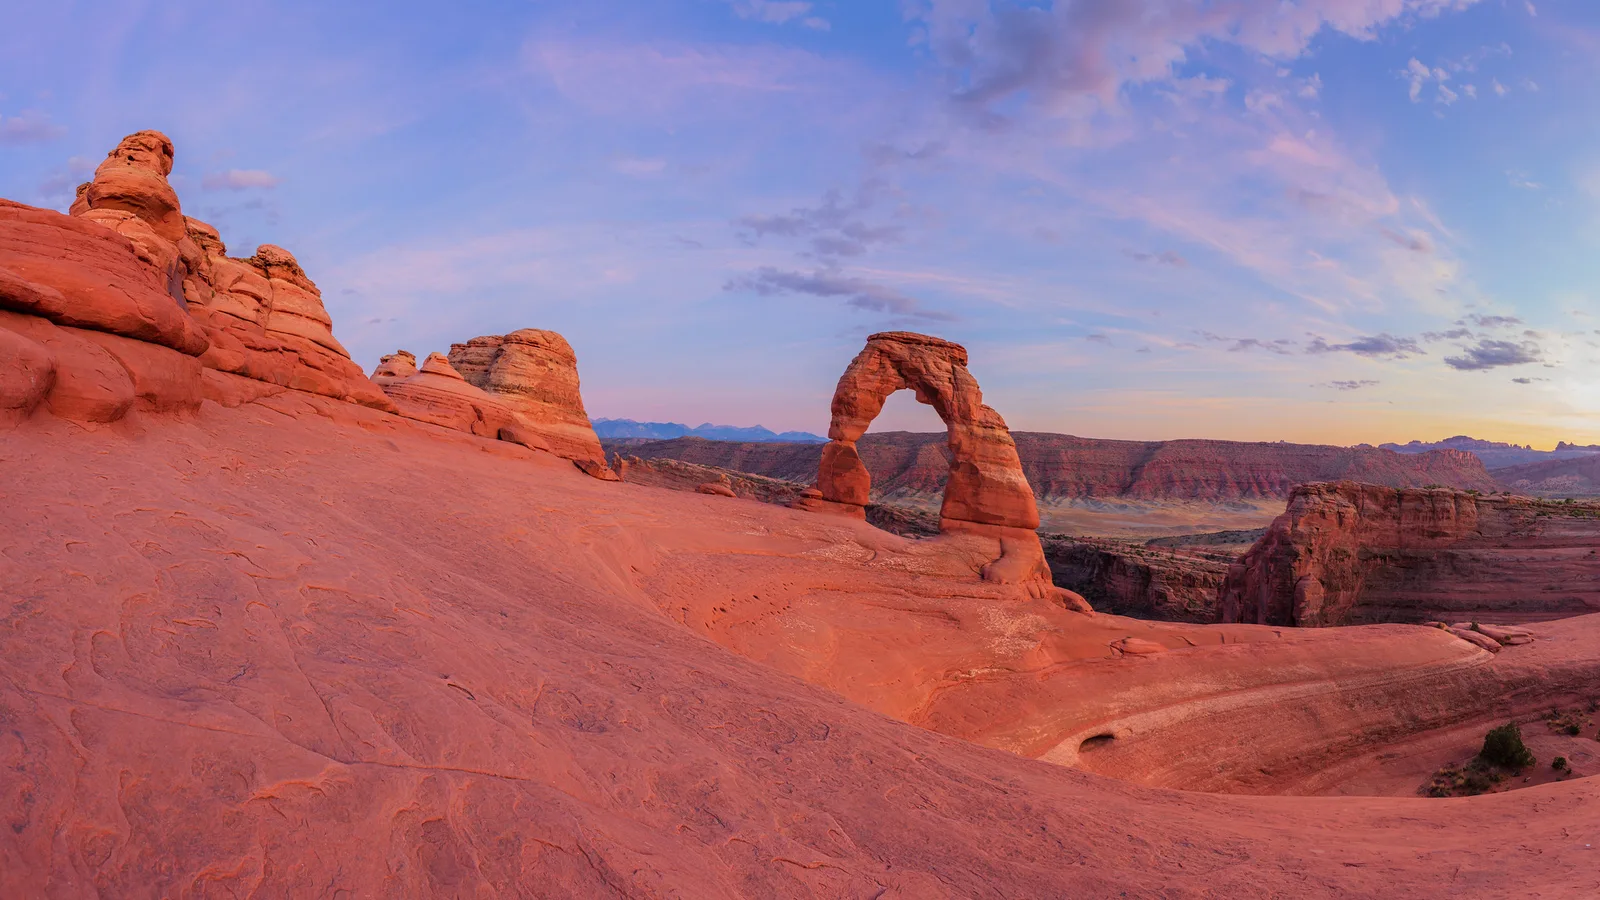
- Landscapes in golden light, like the glowing arch at the top of this page.
- Flowers and gardens, where softness suits delicate petals.
- Waterfalls and streams, where soft water and glowing light work together.
- Misty or hazy scenes, where the glow strengthens the atmosphere.
- Fantasy or fairytale moods, such as an old cottage, a winding path or a magical woodland.
Photos that usually do not suit it include gritty street scenes, sharp architecture with strong graphic lines, news and documentary photos, and product photos where accurate detail matters. The Orton effect changes reality noticeably, so it fits artistic and fine art work rather than documentary images. See fine art photography for more on that kind of work.
How to create the Orton effect with layers
This method works in any editor that supports layers and blend modes. If you are new to layers, the guide to layers and masks explains the basics. The steps below are the classic approach.
- Finish your basic edit first. Set brightness, color and contrast on the original photo, so you start from a good base.
- Duplicate the photo layer. You now have two identical layers.
- Brighten the top layer. Raise its brightness a little. Some photographers use a screen blend between two copies to do this, which brightens without harsh clipping.
- Blur the top layer. Apply a gaussian blur, which softens everything evenly. A moderate amount works for most photos. Larger photos need more blur than small ones.
- Change the blend mode of the blurred layer to multiply or overlay. Multiply deepens colors and darkens; overlay adds contrast and glow. Try both and see which suits the photo.
- Lower the opacity. Opacity controls how strongly the top layer shows. Lower it until the glow looks gentle. Many photos look best with a fairly low opacity.
- Mask if needed. Paint the effect away from areas that should stay crisp, like a person’s face or a key subject.
Because everything happens on separate layers, the original photo is untouched. You can adjust or delete the effect at any time. That is the idea behind non-destructive editing.
How to create a similar look without layers
Many simpler editors and phone apps do not support layers. You can still create an Orton-style glow.
- Lower clarity slightly, which softens midtones and adds a gentle haze.
- Raise exposure or shadows a little, to lift the overall brightness.
- Add a soft glow or bloom filter if your app has one. Many apps include glow, bloom or soft focus effects that imitate the Orton look.
- Use a local adjustment to lower clarity only on bright areas or the background, keeping the subject crisp. The mobile masking guide explains local adjustments on a phone.
- Warm the colors slightly, since the Orton effect is often associated with golden, glowing light.
These approaches are not identical to the layered method, but they get close, and they are quick to try.
Getting the strength right
The biggest challenge with the Orton effect is restraint. It is easy to fall in love with the glow and push it too far. A few guidelines help.
- Start low. Begin with low opacity and raise it slowly. Stop as soon as the photo glows, and then pull back a little.
- Match blur to photo size. A blur that looks right on a small image may be far too little on a large one, and the other way round. Adjust by eye.
- Watch the highlights. The effect brightens bright areas, which can turn skies white. Reduce exposure on the blurred layer, or mask the sky, if needed.
- Watch the shadows. Multiply blend can make shadows very dark and heavy. Lift them if they lose detail.
- Compare before and after often. If the after looks foggy, blurry or muddy, reduce the effect.
- View it the next day. Fresh eyes are the best judge of whether a creative effect has gone too far.
Orton effect and color
The Orton effect often deepens and enriches color, especially with multiply blend. Greens in a forest become lush, and golden light becomes warmer. That can be beautiful, but it can also push colors too far. After applying the effect, check saturation and reduce it slightly if colors look artificial.
The glow also pairs well with gentle color grading, such as warm highlights and cool shadows. The guide to color grading explains how to add color moods without overdoing them.
Orton effect on people
The Orton effect can flatter portraits, giving skin a soft glow and the scene a romantic feel. Use it carefully:
- Mask the effect away from the eyes so they stay sharp.
- Keep opacity especially low, because faces look strange when too soft.
- Watch skin color; multiply blend can make skin darker and more orange.
It suits gentle, romantic portraits and outdoor scenes in warm light better than crisp, formal headshots.
Shooting with the effect in mind
Editing works best when it enhances what is already in the photo. To get the most from the Orton effect, look for scenes with soft, glowing light when you shoot.
- Golden hour light near sunrise and sunset gives warm, low light that the effect enhances.
- Backlight through leaves, grass or mist creates glowing edges.
- Light haze or mist already softens a scene, and the effect builds on it.
- Good exposure matters. Avoid blowing out the brightest areas, because the effect will spread those bright patches further.
The guide to landscape photography has more on finding good light for landscape scenes.
Looking closely at the photos on this page
The sandstone arch at the top of this page already has the kind of light the Orton effect loves. Low evening sun paints the rock warm orange, and the sky behind is soft pastel blue and pink. A gentle Orton glow would make the warm rock seem to radiate light and soften the transition between rock and sky, giving the scene a dreamy feel. Too much would blur the arch’s crisp outline, which is the heart of the photo.
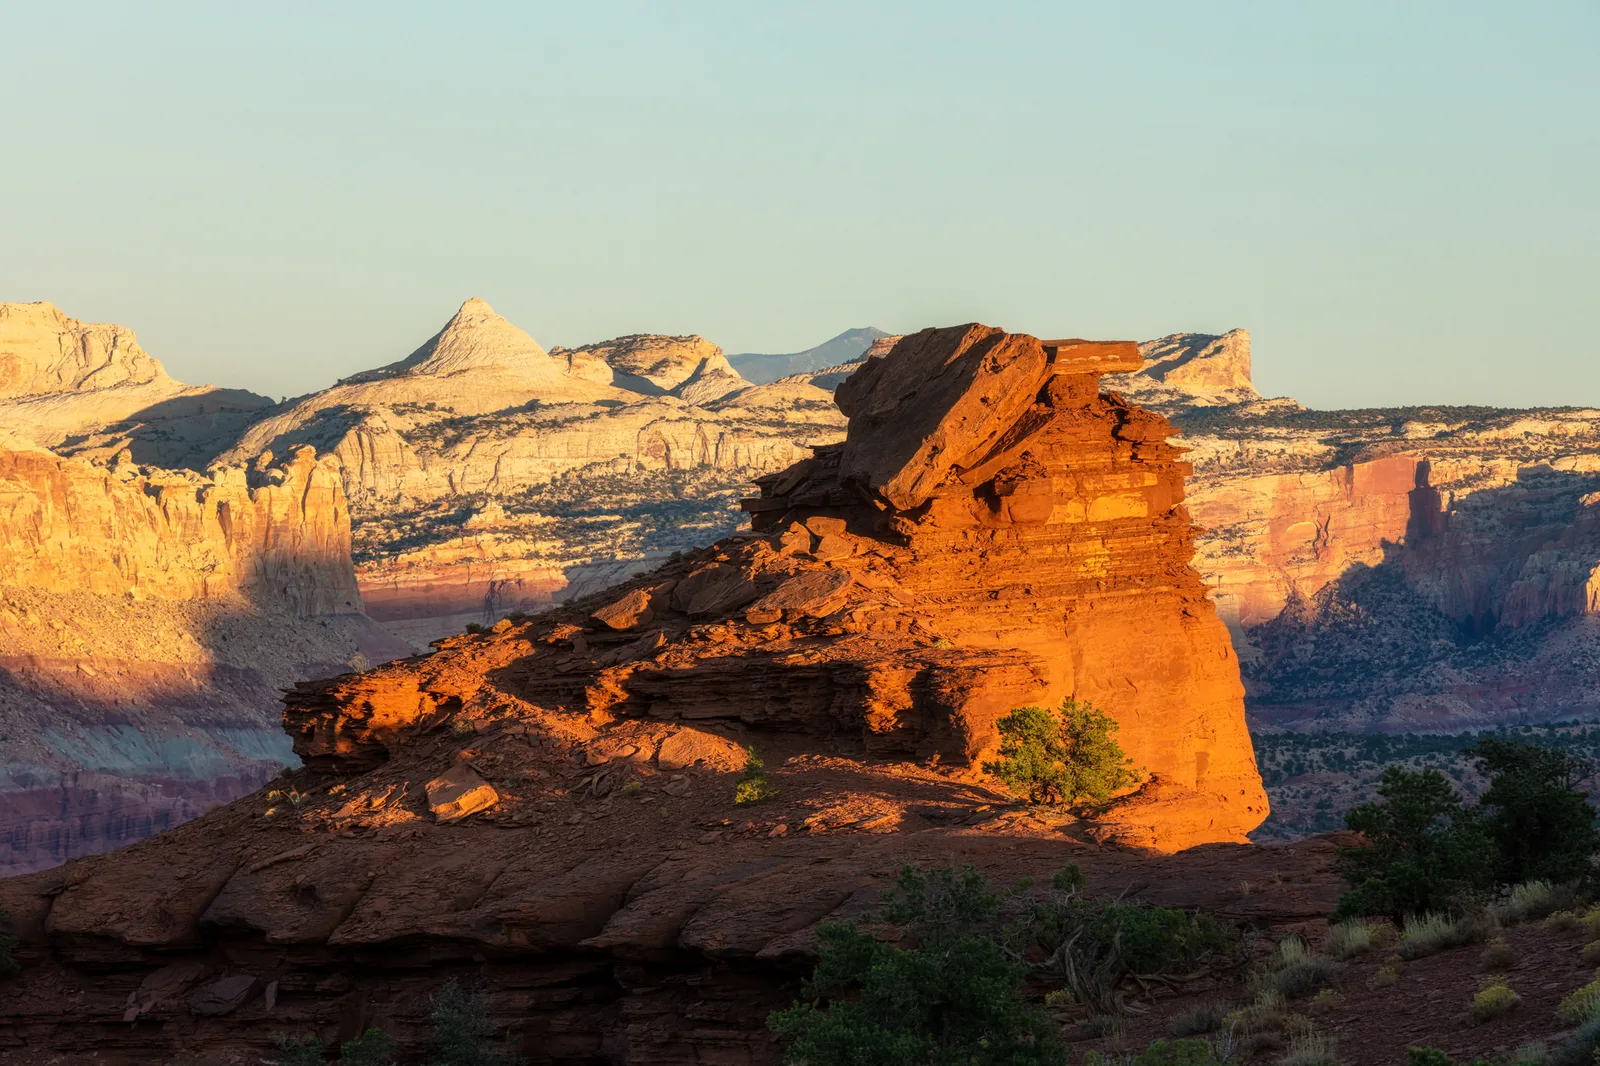
The glowing rock formation shows another good candidate. The sunlit rock is bright and golden against paler cliffs. A light glow could make that sunlit rock stand out even more. Because the main rock is the subject, a mask that keeps its edges sharp while letting the background glow softly would keep attention where it belongs.
Where the Orton effect fits among other soft looks
Several editing looks seem similar, and it helps to know the differences. A soft focus look blurs the whole photo slightly, including details. Halation, a film effect, creates a reddish glow around very bright highlights; the guide to halation explains it. Lowering clarity softens midtone contrast without adding brightness. Film grain adds texture rather than softness; see adding film grain. The Orton effect is unique because it combines a sharp image with a blurred, brighter glow, keeping detail while adding luminosity.
You can combine these looks, but each one adds strength. Combining several heavy effects usually looks overdone. Pick the one that best suits your photo and use it gently.
Saving the look so you can reuse it
Once you find an Orton setting you like, you may want to use it again. Many editors let you save layer steps as an action, or save slider settings as a preset. This saves time and helps your photos look consistent. Just remember that every photo is different. A preset is a starting point, not a final answer. After applying it, adjust opacity, blur and brightness to suit the new image.
Keep notes on what worked. For example, you might find that forest scenes look best with overlay blend and low opacity, while golden landscapes suit multiply blend with a little more blur. Over time, these notes become your own personal recipe book for the effect, and you will be able to judge the right strength much faster.
Using the effect with honesty
Creative edits like the Orton effect are a normal part of artistic photography, and many celebrated landscape photographers use some version of it. Still, it is worth being thoughtful about where you share such images. In contests and publications with rules about editing, check whether creative effects are allowed in each category. For documentary or news photos, it is best to avoid them entirely, because viewers expect those images to show what the scene really looked like.
For personal art, prints and social sharing, there is no right or wrong. The question is simply whether the glow supports the mood you want. If it does, enjoy it.
Common mistakes
- Too much opacity. The photo looks foggy and blurry. Lower opacity until the glow is subtle.
- Too much blur. Halos and ghostly outlines appear around edges. Reduce the blur amount.
- Blown-out skies. The effect brightens highlights. Mask the sky or reduce brightness on the blurred layer.
- Muddy shadows. Multiply blend can crush dark areas. Lift shadows or lower opacity.
- Oversaturated color. Check saturation after applying the effect.
- Using it on every photo. The look becomes repetitive. Save it for scenes that suit a dreamy mood.
- Soft eyes in portraits. Mask the effect away from eyes.
- Using it on documentary photos. It changes reality noticeably. Keep it for artistic work.
Try this: a 10-minute Orton glow
- Minute 1: Choose a landscape, forest or flower photo with soft or golden light.
- Minute 2: Make your basic edits: brightness, color and contrast.
- Minute 3 to 4: Duplicate the layer, brighten it slightly, and apply a moderate blur.
- Minute 5: Change the blend mode to multiply, then try overlay. Pick the one you prefer.
- Minute 6 to 7: Lower the opacity until the glow feels gentle.
- Minute 8: If your editor has no layers, try lowering clarity a little and adding a glow filter instead.
- Minute 9: Compare before and after. Check highlights, shadows and color.
- Minute 10: Save both versions and look again tomorrow. Does the glow still feel natural?
Frequently asked questions
What is the Orton effect in photography?
An editing technique that blends a sharp photo with a blurred, brighter copy to create a soft, dreamy glow while keeping details sharp.
Who invented the Orton effect?
Michael Orton, a Canadian landscape photographer, who originally created it by sandwiching a sharp and a blurred slide together.
Which blend mode should I use?
Multiply gives deeper, richer colors; overlay gives more contrast and glow. Try both and choose by eye.
Can I do the Orton effect on a phone?
Yes. Some apps support layers. Others offer glow or bloom filters, or you can lower clarity and lift brightness for a similar look.
Why does my Orton effect look blurry?
The opacity or blur is too high. Lower both until details look sharp again.
Which photos work best?
Forests, golden-light landscapes, flowers, waterfalls and misty scenes. It suits dreamy, artistic photos best.
Wondering how layers let you combine two versions of a photo? Read the guide to layers and masks.
Want to know how to soften or strengthen detail with a single slider? Try the guide to clarity and texture.