Most people freeze up in front of a camera. They feel awkward, they do not know what to do with their hands, and their smile looks forced. As the photographer, it is your job to guide them into natural, flattering poses, and to make it feel easy. Check out our senior portrait sessions for more details. This guide covers go-to poses for individuals, couples, and groups, plus practical tips for directing non-models so they look relaxed and authentic. Check out our couple photography for more details.
Posing Principles That Apply to Everyone
Before memorizing specific poses, internalize these universal principles. They make any pose look better regardless of body type, gender, or experience level.
- Shift the weight. Having a subject stand with equal weight on both feet looks stiff and static. Ask them to shift their weight onto one leg, the back leg, and let the other knee relax. This creates a natural S-curve through the body that is instantly more flattering and dynamic.
- Angle the body. A subject facing the camera straight-on looks wider and more rigid. Turning the shoulders 30–45 degrees to the camera slims the body and adds dimension. The face can still look toward the camera even with the body angled.
- Create space between arms and body. Arms pressed flat against the torso look wider and stiff. Bending elbows slightly, placing a hand on a hip, or holding an arm away from the body creates negative space that defines the waist and adds shape.
- Watch the chin. Pushing the chin slightly forward and down elongates the neck and defines the jawline. It feels unnatural to the subject but looks great on camera. The opposite, chin pulled back, creates the dreaded double-chin effect even on slim subjects.
- Give the hands something to do. Idle hands are the enemy of natural posing. Have subjects touch their hair, hold a jacket, rest hands in pockets (thumbs out looks more relaxed), or lightly hold an arm. Avoid flat, open palms facing the camera, show the side of the hand instead.
- Keep movement going. Static poses look stiff. Ask the subject to walk toward you, adjust their hair, laugh, or look away and then look back. Shoot during the movement for more natural, candid-feeling results.
Individual Portrait Poses
Standing Poses
- The lean: Have the subject lean against a wall, fence, or pillar with one shoulder touching the surface and the body angled toward the camera. Relaxed and effortless.
- The walk: Ask the subject to walk slowly toward you. Shoot in burst mode. The natural arm swing and leg movement create authentic, dynamic images.
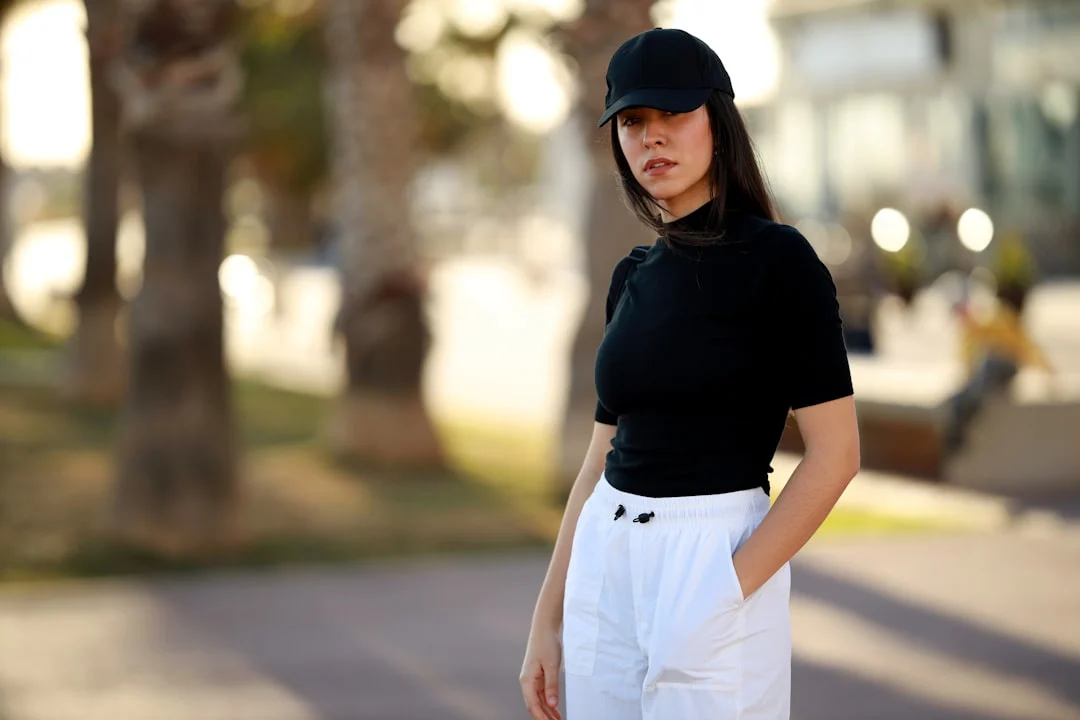
- Hands in pockets: One or both hands casually in jacket or pants pockets (thumbs hooked out). Body angled, weight on back foot. Universally flattering for all genders.
- The turn-and-look: Have the subject face away from you, then turn their head back toward the camera. The twist through the torso creates a dynamic line and the over-the-shoulder look feels confident and editorial.
- Arms crossed (carefully): Crossed arms can look defensive or closed off. To make it work, keep the shoulders relaxed and down, angle the body, and have the subject smile naturally. Works well for business and professional headshots.
Seated Poses
- The lean-forward: Sitting on a chair or bench, have the subject lean forward slightly, resting forearms on knees. This creates engagement and approachability. Works well for headshots and casual portraits.
- Cross-legged on the ground: Casual and relaxed. Have the subject lean forward slightly and rest hands on ankles or in the lap. Shoot from eye level or slightly above.
- Legs extended: Sitting with legs stretched out in front, leaning back on hands. Casual and relaxed. Works well on steps, grass, or a low wall.
- Perched on edge: Sitting on the edge of a chair, stool, or wall with legs together and angled to one side. This elongates the legs and creates a clean line. Popular in fashion and editorial portraiture.
Couple Poses
- Forehead to forehead: Partners face each other and gently touch foreheads with eyes closed. Intimate, emotional, and always beautiful. Works in any light.
- The embrace from behind: One partner stands behind the other and wraps their arms around the waist or chest. The front partner leans back slightly. Both can look at the camera or at each other.
- Walking together: Partners hold hands and walk toward the camera. Shoot in burst mode as they walk and talk naturally. This produces some of the most genuine couple photos.
- The whisper: One partner leans in to whisper something in the other’s ear. The listener’s natural reaction, a smile, a laugh, captures real emotion. Tell them to actually say something funny.
- The dip: One partner dips the other back slightly while holding their lower back. Dramatic, romantic, and a crowd-pleaser. Make sure both are comfortable with the position before committing.
- Sitting close: Seated on steps, a bench, or the ground with shoulders touching and bodies angled toward each other. Heads can lean together or one partner can rest their head on the other’s shoulder.
Group Poses
- Stagger the heights. Having everyone stand in a straight line at the same height looks like a police lineup. Create visual interest by varying heights, have some people sit, others stand, others lean. Use steps, benches, or natural terrain to create layers.
- Tighten the group. People naturally stand too far apart in group photos, which creates gaps and awkward empty space. Ask everyone to squeeze in close, shoulders touching. It feels uncomfortably close in person but looks perfect on camera.
- The V formation: Place the tallest people in the center-back and angle shorter people outward and forward on both sides, forming a loose V. Creates depth and naturally draws the eye to the center.
- Action and interaction: For casual group photos, ask the group to walk toward you, share a joke, or do something together. Natural interaction beats stiff posing every time. Shoot in burst mode.
- Use narrow aperture. For groups, use f/5.6 to f/8 to ensure everyone is in focus. If shooting a large group with multiple rows, ensure adequate depth of field, f/8 or smaller. Focus on a person in the second row.
Directing Non-Models: Communication Tips
Your subjects are not professional models, they are regular people who feel uncomfortable being photographed. How you communicate makes the difference between stiff, awkward photos and natural, relaxed ones.
- Show, do not just tell. Demonstrate the pose yourself rather than giving verbal-only instructions. People understand positions they can see far better than ones described in words. It also breaks the tension and usually gets a laugh.
- Give micro-adjustments. Instead of “pose naturally” (which is paralyzing), give small, specific directions: “drop your left shoulder just a bit,” “turn your chin slightly right,” “tilt your head toward me.” Small cues are easier to follow and build confidence.
- Keep talking. Fill dead air with conversation, compliments, and encouragement. “That looks great,” “perfect, hold that,” “you’re doing amazing.” Constant positive feedback keeps the subject’s energy up and their expression natural.
- Use prompts instead of directions. Instead of “smile,” try “think about your favorite vacation” or “tell me something your partner does that makes you laugh.” Prompts produce genuine emotions that posed expressions cannot replicate.
- Start easy. Begin with simple poses that do not require much effort (standing, leaning, walking). Build to more involved poses as the subject warms up. The first 5 minutes are always the most awkward, your best shots come later.
- Let them see a good shot early. Show the subject a strong image on the camera’s LCD within the first few minutes. Seeing themselves look good melts anxiety and builds trust for the rest of the session.
Common Posing Mistakes
- Shooting from below chin level. Unless it is intentional, shooting upward emphasizes nostrils and the underside of the chin. Position your camera at or slightly above eye level for the most flattering angle.
- Stiff, locked joints. Arms and legs that are perfectly straight look rigid. Every visible joint should have a slight bend, elbows, wrists, knees, ankles.
- Flat feet, flat body. Feet side by side, body square to the camera. Always angle something, the body, the feet, the shoulders.
- Awkward cropping. Never crop at a joint (knees, elbows, ankles, wrists, neck). Crop between joints for a natural look. A mid-thigh or mid-forearm crop looks deliberate; a crop at the knee looks like a mistake.
- Ignoring the background. The best pose in the world is ruined by a distracting background. Check behind the subject before shooting, watch for poles, signs, and bright objects that draw the eye away.
Continue Learning
Great posing is only part of the portrait equation. Strengthen your portrait photography with these related guides:
- Photography Composition Guide
- Aperture and Depth of Field
- Depth of Field Explained
- How Focal Length Affects Portraits
- What Is Bokeh?
- Photography Lighting Guide
Related Reading
- Best Portrait Lenses, Find the ideal lens to complement your posing with beautiful background blur
- Photography Lighting Guide, Pair flattering poses with flattering light for the best portraits
- Depth of Field Explained, Control background blur to make your posed subjects stand out