Senior portrait photography is one of the most rewarding and profitable niches in the portrait world. Every year, millions of high school students want photos that capture who they are at this pivotal moment in their lives. These are not yearbook photos taken under fluorescent lights with a generic backdrop. Senior portraits are personal, creative, and intentional. They reflect the personality, interests, and style of each individual teen. For photographers, this niche offers consistent seasonal demand, strong word-of-mouth referral potential, and the creative freedom to produce images that both teens and their families will treasure for decades. This guide covers everything you need to know to plan, shoot, edit, and build a business around senior portrait photography.
What Senior Portraits Are and Why They Matter
Senior portraits are professional photographs taken during a student’s junior or senior year of high school. They serve a dual purpose. First, they provide a polished image for the school yearbook. Second, and more importantly, they give families a set of high-quality images that mark the transition from adolescence to adulthood. For many families, this is the last formal portrait session before their child leaves home for college, trade school, the military, or the workforce.
The best senior portraits feel authentic and alive. They capture a real person at a specific moment in time, not a stiff pose in front of a painted canvas. Parents see their child growing up. Teens see themselves as they want to be seen. Grandparents frame these photos on their walls. That emotional weight is what makes families willing to invest in quality. From a business perspective, the market renews every year as a new class enters the pipeline, teens naturally share photos on social media (generating organic exposure for your work), and the creative variety keeps the work interesting.
Planning and Consultation: Working With Teens and Parents
The consultation is where you set the foundation for a great session. With senior portraits, you have two clients: the teen and their parents. Both need to feel heard, but their priorities often differ. The teen wants to look cool. The parents want to see their child looking polished and grown-up. Your job is to deliver images that satisfy both.
Start with a pre-session consultation, either in person, over video call, or by phone. Learn about the senior: what they enjoy outside of school, whether they play sports, make art, play music, or have other hobbies. Ask about their personal style and whether there are specific locations that are meaningful to them. Also cover the practical details: how many outfit changes you include (two to four is standard), session duration (90 minutes to two hours is typical), delivery timeline, and how ordering prints or products works. For deeper guidance on managing these conversations, see our client management guide.
Involve the parents in the consultation but direct most creative conversation toward the teen. Teens relax more during the session when they feel the shoot reflects their personality. That said, reassure parents they will see a range of images, including more traditional options they can frame and share with extended family.
Location Scouting for Senior Portraits
Location choice has a massive impact on the look and feel of senior portraits. The right location adds context, texture, and visual interest without competing with the subject. Build a catalog of locations in your area and know how each one looks at different times of day. Scout locations before you bring a client there, visiting during the same time window you would schedule a session to observe the light, foot traffic, and overall feel.
Great location categories include urban environments with textured walls, alleys, murals, and architectural details. Open fields, meadows, and tree-lined paths work beautifully for a natural look. Waterfronts, bridges, and lakeshores offer reflections and depth. Sports facilities, dance studios, and music rooms connect to the teen’s interests. Plan for at least two or three distinct looks within a single session to keep the gallery visually diverse.
At each location, pay attention to composition opportunities. Look for leading lines in sidewalks, fences, and railroads. Look for frames within frames using doorways, arches, and overhanging branches. Apply the rule of thirds to place the teen off-center for more dynamic images. Always have a backup plan for weather. Covered parking garages, building overhangs, and indoor spaces with large windows all work when rain moves in.
Outfit Planning and Multiple Looks
Wardrobe is one of the most common sources of anxiety for teens and parents before a senior session. Offering clear guidance on what to wear removes that stress and results in better images. Send a detailed wardrobe guide as part of your pre-session communication.
Recommend that seniors bring three to four outfits that represent different sides of their personality. A typical combination might include a casual everyday outfit (jeans and a nice top or jacket), a dressier option (a blazer, dress, or button-down), something that reflects their personality or hobby (a letterman jacket, dance outfit, or band t-shirt), and a more relaxed or athletic look. Variety in outfits gives the final gallery range and ensures there are images that work for everything from yearbook submissions to wall prints to social media.
Advise teens to avoid logos, busy patterns, and neon colors. Solid colors and simple patterns photograph best and keep the focus on the face and expression. Earth tones, deep jewel tones, muted blues, and classic neutrals look great in almost any setting. Fit matters more than brand. Clothes should fit well, and wrinkled clothing should be avoided since it shows in photos and is tedious to fix in post-production. Long sleeves and layers photograph well and give you options to add or remove pieces for visual variety without a full outfit change.
For hair and makeup, many teens prefer to do their own. If you have relationships with local makeup professionals, offer that as an add-on service. Advise teens to schedule a trial run before the session so there are no surprises on the day.
Posing Teens: Natural, Relaxed, and Confident
Posing teenagers is different from posing adults. Teens are often self-conscious, unsure of how to stand, and hyper-aware of how they look. Stiff, formal posing feels unnatural to them and produces images that look dated. The goal is to make the teen feel comfortable enough that their real personality comes through. For a comprehensive foundation, review the portrait posing guide, then adapt those principles for the senior portrait context.
Start with movement rather than static poses. Ask the teen to walk toward you, turn and look back over their shoulder, or shift their weight from one foot to the other. Movement keeps the body loose and produces images that feel candid even though they are directed. Shoot in burst mode during transitions because the in-between moments often look more natural than the “held” pose.
Give specific, small directions rather than vague instructions. “Look down at your shoes and then look up at me slowly” produces a more genuine expression than “smile naturally.” “Put your hand in your back pocket and lean on your left hip” is clearer and easier to follow than “relax.” Teens respond well to clear direction because it removes the guesswork that makes them anxious.
Keep the energy conversational. Talk to the teen throughout the session. Ask about their plans after graduation, their favorite music, a funny thing that happened recently. Genuine laughter and authentic expressions come from real conversation, not from saying “say cheese.” When you get a genuine laugh, keep shooting. Those are often the best images of the entire session.
For standing poses, have the teen shift weight onto one leg and angle the body slightly away from the camera. Leaning against a wall, fence, or tree adds a casual feel. Hands in pockets (thumbs out), crossing arms loosely, or holding a jacket over the shoulder all give the hands something to do. For seated poses, stairs, benches, and the ground all work well. Have the teen lean forward slightly for engagement. Mix close-up portraits (tight headshot with shallow depth of field and soft bokeh) with wider environmental shots that include the surroundings and tell more of a story.
Incorporating Props, Hobbies, and Personal Interests
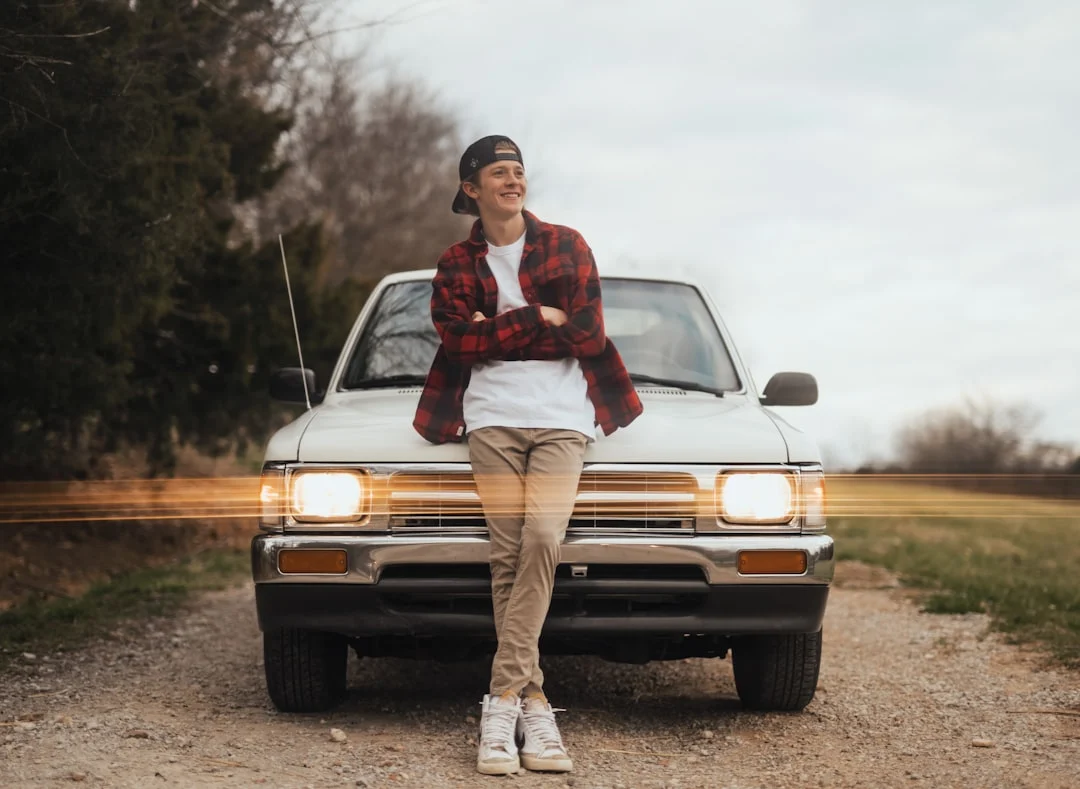
Props and hobbies are what make senior portraits personal. A generic portrait in a field is fine, but a portrait of a lacrosse player in full gear on their home field, or a musician with their instrument in a moody downtown alley, tells a story. These images become the ones that families love most because they capture something true about who their teen is.
During the consultation, identify the interests and activities that matter most to the teen. Common categories include team sports (bring the jersey, equipment, or letter jacket), individual athletics (dance shoes, martial arts belt, track spikes), music (instruments, headphones), art (sketch pad, camera, paintbrushes), academic interests (books, lab coat, chess board), vehicles (a beloved car or truck), and pets (dogs are the most popular, but horses, cats, and other animals all work).
The key is that the teen should interact with the prop, not just hold it. A guitarist should actually play. A basketball player should dribble or shoot. A dancer should move. Action and interaction look natural. Stiffly holding an object in front of the body looks forced. Be selective. One or two meaningful props create a personal touch. Bringing every trophy and instrument turns the session into a cluttered mess.
Pets deserve a special mention because they are both wonderful and unpredictable. If a teen wants to include their dog, schedule the pet portion early in the session while the animal still has energy and attention. Have a handler (usually a parent) nearby to wrangle the pet between shots. Use treats and toys to direct the animal’s attention. Accept that some shots will not work and be ready to move on. The candid, imperfect moments with a pet often end up being the most charming images in the gallery.
Lighting for Senior Portraits
Lighting is the single most important technical factor in portrait quality. Great light makes average locations look stunning, while bad light makes even the best location fall flat. For senior portraits, natural light is king, and golden hour is the crown jewel.
Golden Hour: Your Most Powerful Tool
Golden hour, the period roughly 60 to 90 minutes before sunset, produces the most universally flattering light for portraits. The sun sits low on the horizon, casting warm, directional light that wraps around the subject and creates soft, dimensional shadows. Skin tones glow. Colors are rich and saturated. The quality of this light is so forgiving that it makes technical execution almost effortless.
Schedule your senior sessions so the most important shooting happens during golden hour. If the session is 90 minutes, plan to arrive about an hour before sunset so you have time for outfit changes and location transitions while still capturing the majority of your images in the best light. The last 20 to 30 minutes before sunset are the most dramatic, so save your hero shots for that window.
Backlight is one of the most popular golden hour techniques. Position the teen with the sun behind them and expose for their face. The sun creates a warm rim light around the hair and shoulders, producing a luminous, dreamy quality. You will need to overexpose slightly to keep the face properly lit while the background blows out into soft, warm tones. Side light during golden hour is equally powerful, carving out facial structure as Rembrandt and loop lighting patterns happen almost automatically with low-angle sun. For more on working with available light, see our guide on natural light photography.
Open Shade
When the sun is still high, look for open shade: the shaded area just inside the edge of a building, tree canopy, or other structure where the subject is protected from direct sun but receives soft, even light from the open sky. Face the teen toward the open sky (not into deeper shade) for beautiful catchlights and gentle directional light. Watch for color casts from nearby surfaces. Green foliage overhead can tint skin green, and red brick walls can push warmth onto the shadow side of the face.
Overcast Days
Cloud cover acts as a giant softbox, diffusing the sun and eliminating harsh shadows. Overcast days are excellent for senior portraits because the light is soft and even everywhere. You are not limited to shade or golden hour. You can shoot at midday in an open field and still get flattering results. The tradeoff is that the light lacks the warmth and drama of golden hour, so you may want to add warmth in post-processing or choose locations with naturally warm tones (brick, autumn foliage, warm-colored buildings) to compensate.
Using Flash and Off-Camera Lighting
While natural light is the foundation of most senior portrait work, flash and off-camera flash give you creative options and solve problems that natural light alone cannot. A single speedlight or strobe with a modifier can fill shadows on a bright day, add a pop of light to the subject’s eyes, or create dramatic portraits after the sun has set.
For the simplest setup, position a single speedlight on a stand with a shoot-through umbrella at 45 degrees to the subject. Set it to manual power and adjust until the light blends with the ambient. For more dramatic results, overpower the ambient by increasing flash power and closing down your aperture, which darkens the background while keeping the subject bright. This works especially well at sunset. For more on building lighting setups, review our lighting guide.
Camera Settings for Senior Portraits
Senior portrait camera settings are straightforward once you understand the goals: sharp focus on the eyes, pleasing background blur, accurate skin tones, and proper exposure.
Aperture
Shoot wide open or close to it for individual portraits. An aperture of f/1.4 to f/2.8 produces the creamy background blur that gives senior portraits their polished, professional look. At f/1.4 or f/1.8, the depth of field is extremely thin, so you need to nail focus on the eyes. By f/2.8, you have slightly more margin for error while still achieving strong subject-background separation. For full-body shots where you want more of the scene in focus, f/3.5 to f/4 is a good balance. For group shots with multiple subjects, stop down to f/4 to f/5.6 to keep everyone sharp.
Shutter Speed and ISO
Keep the shutter speed at 1/200 or faster to freeze subject movement. For walking or moving teens, bump it to 1/500 or faster. Do not go below 1/125 for stationary subjects. Start at your camera’s base ISO (typically 100 or 200) and increase only as needed. Modern cameras handle high ISO well, and shooting at ISO 800 to 3200 during low-light golden hour sessions produces clean files on current-generation bodies.
Focus
Use eye-detection autofocus if your camera supports it. It is the most useful autofocus feature for portrait work. If your camera lacks eye-AF, use a single focus point, place it on the nearest eye, lock focus, and recompose if needed. At wide apertures, the plane of focus is razor-thin, so an image sharp on the ear but soft on the eye is a miss.
Lens Choice
The classic focal length range for senior portraits is 85mm to 135mm on a full-frame camera (or equivalent on crop sensor). An 85mm f/1.4 or f/1.8 is the workhorse lens, producing flattering proportions and beautiful bokeh. A 70-200mm f/2.8 zoom gives flexibility to move from tight headshots to wider environmental shots without changing lenses. For environmental portraits, a 35mm or 50mm works well, though wider lenses can distort facial features at close distances.
Shooting Mode and White Balance
Shoot in aperture priority or full manual. Aperture priority is efficient when lighting changes frequently during an outdoor session. Always shoot RAW for full control over white balance and exposure in post-processing. Set white balance to auto or daylight outdoors and correct precisely in editing.
Session Flow and Timing
A well-planned session flow keeps the energy high, uses the available light efficiently, and ensures you capture enough variety for a strong gallery. Here is a proven structure for a 90-minute to two-hour senior session.
Arrive 15 to 20 minutes early to scout your first shooting spot and check the light. When the teen arrives, spend five to ten minutes connecting. Chat casually, review the plan, and start with the outfit they feel most comfortable in (usually their casual look). Begin with simple, low-pressure poses: walking, hands in pockets, leaning against a wall. These warm-up shots ease the teen in and often produce usable images. Move through the first location for 20 to 25 minutes, then transition to an outfit change.
Keep outfit changes quick (three to five minutes). Have the teen change in a car, restroom, or designated area while you move to your next spot. At the second location, the teen is usually more relaxed, so try creative poses, incorporate props, and experiment with angles. Spend another 20 to 25 minutes here.
Save your best location and most important outfit for golden hour. This is when the light is most flattering, the teen is fully warmed up, and the images will have the most impact. Push for your strongest compositions and most expressive moments. End the session by showing the teen a few strong images on the back of the camera. This builds confidence and generates the enthusiasm they will share with friends.
Editing Style for Senior Portraits
Editing is where the final look and feel of your senior portraits comes together. Your editing style is a significant part of your brand identity. Consistency matters. Families hire you because they saw images on your website or social media and loved the look. Your delivered gallery should match that look.
Start with global adjustments. In Lightroom or your editing software of choice, set the white balance, exposure, contrast, and tone curve to establish the overall mood. Warm tones are the most popular aesthetic in current senior portrait photography. Slightly lifted shadows, warm highlights, and rich but not oversaturated colors create a timeless, inviting look. For an introduction to the fundamentals, see our photo editing guide for beginners.
Color grading is the next layer. Many senior portrait photographers add warmth to the highlights and cool tones (teal, blue, or green) to the shadows. This creates a complementary color contrast that adds visual richness to the image. Experiment with split toning to find a palette that feels like your signature. Develop a set of base presets that reflect your style, then fine-tune each image individually.
Skin retouching should be subtle and respectful. Remove temporary blemishes (pimples, scratches, bruises) because those are not permanent features. Be careful with smoothing techniques. Overly processed skin looks plastic and unnatural. The goal is to make the teen look like the best version of themselves. Eye enhancement is also impactful. A subtle increase in clarity and brightness on the iris adds life to the portrait without being obvious.
Batch editing is essential for efficiency. A senior session typically produces 200 to 400 raw images. After culling to 50 to 80 selects, apply your base preset, sync settings across similar lighting conditions, then fine-tune each image individually. A consistent workflow lets you deliver a cohesive gallery without spending excessive hours in post-production.
Building a Senior Portrait Business
Senior portraits can be a highly profitable niche if you approach it as a business, not just a creative outlet. The recurring annual demand, the social media visibility of teen clients, and the emotional value parents place on these images create a strong foundation for a sustainable photography business. For a broader look at the fundamentals, our guide to starting a photography business covers the essentials.
Pricing and Packages
Structure your senior portrait pricing around session fees and print or digital packages. A common model includes a session fee that covers the shoot itself and a set number of edited digital images, with additional images, prints, albums, and products available as add-ons. Alternatively, you can separate the session fee from the images entirely and sell the digitals and prints through a post-session ordering appointment. Both models work. Choose the one that fits your market and your workflow.
Research what other senior portrait photographers in your area charge to position yourself competitively. Pricing varies significantly by market, but your prices should reflect the quality of your work, the experience you provide, and the time you invest in each session. Do not race to the bottom on price. Budget clients who choose you solely because you are the cheapest option are rarely the clients who value your work, refer their friends, or order products. For detailed strategies on setting your rates, see our photography pricing guide.
Marketing to Teens and Parents
Teens discover photographers through social media feeds, stories, and posts shared by friends. Your social presence needs to be active and visually consistent. Post session highlights and final images regularly. When one senior tags you, their entire peer group sees it. Parents, on the other hand, research photographers on websites, compare portfolios, and read reviews. Make sure your website clearly explains your process, shows a range of work, and includes testimonials.
Senior rep programs are one of the most effective marketing strategies in this niche. Select a handful of juniors each year to be your “senior reps.” Give them a free or discounted session early in the season in exchange for promoting your work to their classmates. Reps share images on social media and refer friends, creating a word-of-mouth engine that drives bookings from their school and social circle.
Contracts and Model Releases
Every session needs a signed contract and a model release form. Because your clients are minors, the parent or legal guardian must sign both. The contract covers session details, payment terms, cancellation policy, and usage rights. The model release grants permission to use images for marketing and your portfolio. Without it, you cannot legally use the images to promote your business.
Seasonality and Scheduling
Senior portrait season varies by region, but the busiest period is typically late spring through early fall. Many families book sessions in the summer between junior and senior year so the images are ready for yearbook deadlines in the fall. Some schools have specific submission deadlines, so ask during the consultation.
Market your senior portrait services starting in January or February to capture early planners. Run your rep program in the spring so those images are ready to post over the summer when the bulk of families are making decisions. By the time peak season arrives, your portfolio should be refreshed with current work and your reps should be actively promoting.
Common Mistakes in Senior Portrait Photography
Even experienced portrait photographers make avoidable mistakes when they first start shooting senior sessions. Being aware of these pitfalls saves you time, frustration, and potentially lost clients.
- Shooting at the wrong time of day. Scheduling a session at noon in direct overhead sun produces harsh shadows under the eyes and nose, squinting, and unflattering contrast. Always schedule outdoor sessions for golden hour or find open shade if shooting earlier in the day.
- Over-directing the teen. Controlling every micro-movement and expression kills the teen’s natural energy and produces stiff, uncomfortable images. Guide, but leave room for spontaneity. Some of the best images come from the moments between directed poses.
- Ignoring the background. A beautiful portrait is ruined by a distracting background. Check behind the teen before every shot. Watch for trash cans, parking signs, power lines, bright spots, and other distracting elements. Adjust your angle, move the subject, or use a wider aperture to blur the distraction out.
- Delivering too many images. A gallery of 300 unculled images overwhelms the client and dilutes the impact of your best work. Curate aggressively. Deliver 40 to 80 strong, edited images rather than every frame from the session. Quality over quantity builds your reputation.
- Inconsistent editing. Mixing warm-toned and cool-toned edits, or alternating between heavy and light editing within the same gallery, looks unprofessional. Apply a consistent look to every image in the gallery.
- Not communicating with the parent. The teen is your creative collaborator, but the parent is usually the one paying. Keep parents informed, respond promptly to their questions, and make sure they feel included in the process. Ignoring the parent creates friction that can lead to complaints or lost referrals.
- Forgetting yearbook requirements. Many schools have specific requirements for yearbook photos: white or neutral background, certain crop, no heavy editing, color or black-and-white only. Ask about these requirements during the consultation and deliver a yearbook-compliant image alongside your creative work.
- Skipping the contract. Even if the family is a friend or referral, always use a contract. It protects you, sets expectations, and prevents misunderstandings about deliverables, timelines, and usage rights.
Try This: Practical Exercises
Practice is the fastest way to improve your senior portrait skills. These exercises are designed to build specific abilities that directly translate to better sessions.
- Golden hour backlight drill. Practice backlit portraits during the last hour before sunset. Experiment with the sun directly behind versus slightly to one side. Practice nailing exposure on the face while the background blows out. Shoot 50 images and review which angles produce the most flattering results. See our golden hour guide for technique details.
- Movement posing exercise. Give your subject continuous actions: walk toward the camera, twirl, look over their shoulder, sit down slowly. Shoot in burst mode and review the results. The most natural frames are almost always mid-movement, not at the start or end.
- Location scout three new spots. Visit three locations you have never shot at before during golden hour. Take five test shots at each from different angles and identify the best background, light direction, and foreground elements. Add these to your location catalog with notes.
- One-light portrait session. Set up a single off-camera flash with a shoot-through umbrella and practice portraits after sunset. Start with the flash matching ambient, then gradually increase power while closing your aperture to darken the background. This teaches you to use flash creatively.
- Edit for consistency. Take 20 images from a recent session and edit them to a single, cohesive look. Create a base preset, apply it to every image, then fine-tune individually. View all 20 in a grid. They should look like they belong together.
- Practice the consultation conversation. Role-play a pre-session consultation with a friend acting as the teen and another as the parent. Practice asking about interests and style preferences while building rapport. Record yourself and listen back for areas to improve.
Frequently Asked Questions
When should seniors schedule their portrait session?
The ideal time is the summer between junior and senior year. This gives you and the family plenty of time before fall yearbook submission deadlines. Many families book even earlier, during the spring of junior year, to secure their preferred date and photographer. If a student waits until senior year, sessions can feel rushed and popular photographers may already be booked.
How long does a senior portrait session typically last?
Most sessions run 90 minutes to two hours, allowing time for two to four outfit changes, multiple locations, and enough variety for a strong gallery. Shorter sessions (60 minutes) work for single-location shoots. Longer sessions (two to three hours) accommodate more elaborate setups or special requests like pet integration.
How many final images should I deliver?
A typical senior portrait gallery contains 40 to 80 fully edited images. This gives the family a strong variety of poses, outfits, and locations without overwhelming them with too many similar shots. Some photographers deliver more, some fewer. The key is quality. Every image in the gallery should be one you are proud to put your name on. Padding the gallery with filler shots weakens the overall impact.
Do I need a studio for senior portraits?
No. The vast majority of senior portrait sessions are shot on location, which is part of the appeal. Outdoor and urban locations provide variety, visual interest, and the personalized feel that teens and families want. A studio can be useful for controlled headshot-style images (see our headshot photography guide) or for creating specific artistic looks, but it is not a requirement. Many highly successful senior portrait photographers never use a studio at all.
What if the teen is extremely shy or nervous?
Start slow and prioritize connection over photography for the first ten minutes. Keep your camera down and just chat. When you start shooting, begin with easy poses that do not require much expression (walking away, looking down, candid movement). Show them a strong image early to build confidence. Most shy teens open up significantly once they see they actually look good.
Should I offer both digital files and prints?
Yes. Digital files are expected by nearly every client and are essential for social media sharing. Prints, albums, and wall art generate significant additional revenue. Many families want large prints but will not think to order them unless you present the option. An in-person or virtual ordering session where you show images on a large screen is the most effective way to drive print sales.
How do I handle yearbook photo requirements?
Ask about yearbook requirements during the consultation. Many schools require a head-and-shoulders crop against a white, gray, or neutral background. Some have specific size and file format requirements. Plan for this shot during the session, even if it takes only a few minutes. A simple, well-lit headshot against a clean background satisfies the school while the rest of your session focuses on the creative, personalized images that make your work stand out.
Continue Learning
Senior portrait photography sits at the intersection of portrait technique, business strategy, and personal connection. These related guides will help you strengthen the individual skills that make your senior portrait work exceptional:
- Portrait Photography Guide
- Portrait Posing Guide
- Portrait Lighting Patterns
- Golden Hour Photography
- Natural Light Photography
- Photography Lighting
- Understanding Bokeh
- Depth of Field Explained
- Photography Pricing Guide
- How to Start a Photography Business
- Client Management Guide
- Headshot Photography Guide