The first showing happens online. Buyers scroll through listing photos and decide within seconds whether a property is worth visiting in person. Poor photos mean fewer showings, longer time on market, and often lower offers. Professional real estate photography pays for itself, but when hiring a photographer is not an option, you can produce strong results yourself.
Real estate photography has specific technical demands that differ from other genres. Wide angles, straight vertical lines, balanced interior lighting, and accurate color representation all matter. This guide walks through the complete process, from preparing the space to delivering final images.
A basic understanding of Exposure Triangle and Photography Lighting will help you get the most from these techniques. If you are new to photography, reviewing those fundamentals first will make this guide more practical.
Preparing the Space Before You Shoot
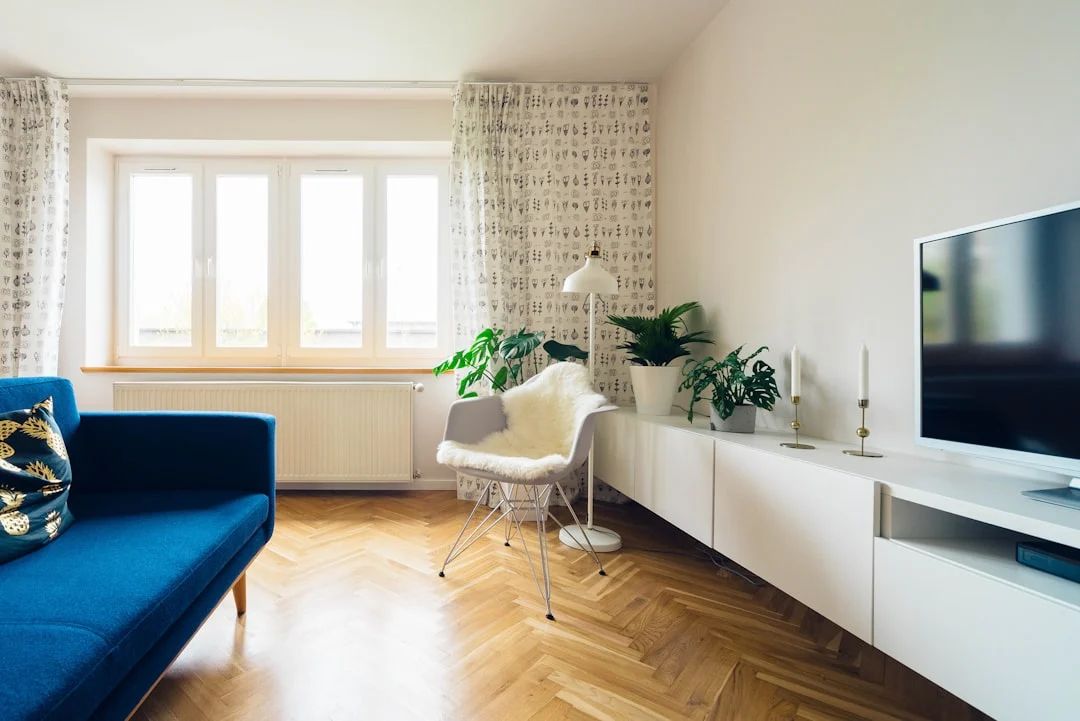
Preparation is half the work in real estate photography. No amount of camera skill can fix a cluttered, poorly staged room. Spend at least as much time preparing each room as you spend photographing it.
- Declutter: Remove personal items, excess furniture, countertop appliances, and anything that makes the space feel smaller. Less is more.
- Clean: Wipe down all surfaces, clean windows, vacuum or sweep floors. Dust and smudges are far more visible in photos than in person.
- Turn on every light: Every lamp, overhead fixture, and under-cabinet light should be on. Mixed lighting is challenging but dark corners are worse.
- Open blinds and curtains: Let natural light flood in. Close only if the view outside is unattractive.
- Remove vehicles from the driveway: For exterior shots, clear the driveway and any visible trash bins.
- Set the stage: Make beds, fluff pillows, add a vase of flowers on the dining table, fold towels neatly in bathrooms. Small touches add warmth.
- Hide cords and cables: Visible power strips and tangled cords are distracting. Tuck them behind furniture or remove them temporarily.
Why a Wide Angle Lens is Essential
Interior spaces require a wide Focal Length to capture entire rooms in a single frame. A lens in the 16-24mm range on a full-frame camera (or 10-16mm on a crop sensor) is standard for real estate work. This field of view shows the spatial relationships between walls, furniture, and features that buyers need to evaluate.
Be careful not to go too wide. Ultra-wide angles (below 14mm full-frame equivalent) distort rooms, making them appear larger than reality. This creates a negative surprise when buyers visit and the rooms feel smaller than the photos promised. Misrepresentation, even unintentional, erodes trust.
If you are using a smartphone, most have an ultra-wide camera option that works well for real estate. Check your phone’s settings to use the widest lens available. Be mindful of Chromatic Aberration and distortion at the extreme edges, which are common in phone ultra-wide lenses.
Tripod Setup and Keeping Lines Level
A tripod is non-negotiable for real estate photography. It ensures consistent camera height, perfectly level horizons, and sharp images in the low-light conditions typical of interiors. Set your tripod to chest height (approximately 4 to 5 feet) for most rooms. This is roughly the height at which a person experiences a room while standing.
Level the camera using the built-in electronic level (most cameras have one in the viewfinder or on the LCD) or a small bubble level on the hot shoe. Tilted images make rooms look unsettling and require cropping in post-processing, which loses pixels and composition.
Shoot from doorways and corners. These positions show the maximum amount of the room in a single frame. Stand in the doorway and shoot inward, or position the tripod in a corner and aim diagonally across the room. Avoid placing the camera in the center of the room, which often produces flat, uninteresting compositions.
Managing Interior Lighting Challenges
Interior photography presents the most challenging lighting scenario in real estate work. Windows are extremely bright, interior walls and furnishings are relatively dark, and your camera’s Dynamic Range often cannot capture both simultaneously in a single exposure.
Window pull is the term for blown-out windows that appear as white rectangles while the interior is properly exposed. To combat this, shoot during overcast conditions when the difference between interior and exterior brightness is minimized. Learning about Metering Modes helps you understand how your camera evaluates these challenging scenes.
Mixed lighting creates color cast problems. Daylight through windows is blue-cool, tungsten bulbs are yellow-warm, and fluorescent lights are often green-tinged. White Balance settings can compensate for one light type but not three simultaneously. The practical solution is to replace bulbs with daylight-balanced LEDs or correct color casts selectively in editing.
HDR Photography for Real Estate
High Dynamic Range (Hdr Photography Guide) photography is the most common solution for the interior-exterior brightness problem. HDR combines multiple exposures of the same scene, capturing detail in both the dark interior and the bright windows.
Set your camera to bracket mode, taking three to five exposures: one properly exposed, one or two underexposed (for window detail), and one or two overexposed (for shadow detail). Use a tripod and a remote shutter release to ensure the frames align perfectly.
Merge the brackets in editing software and tone-map the result carefully. The goal is a natural-looking image where everything is visible, not an over-processed HDR look with halos and unnatural tones. Subtle HDR that looks like a single, perfectly exposed photograph is the standard in professional real estate photography.
Exterior Photography: Curb Appeal
The exterior hero shot is often the first image a buyer sees. Shoot during Golden Hour Photography when warm light rakes across the facade, bringing out texture and dimension. Morning or late afternoon light (depending on which direction the home faces) is almost always more flattering than midday sun.
Twilight (dusk) shots with interior lights glowing are premium images that make any property look inviting. Shoot 15 to 25 minutes after sunset, when the sky retains deep blue color and the house lights create warmth. This requires a tripod and a longer exposure, but the results are dramatic.
Frame the home with landscaping when possible. Foreground trees, flower beds, or a manicured lawn add depth and context. Apply the Rule Of Thirds to place the home slightly off-center for a more natural composition.
Vertical Lines and Perspective Correction
Vertical lines must be vertical in real estate photography. Door frames, window edges, and wall corners that lean or converge make a property look unstable and unprofessional. This is the most common technical error in DIY real estate images.
Keep the camera perfectly level to avoid converging verticals. If you tilt the camera up to include a ceiling or down to include a floor, the vertical lines will lean. Instead, raise or lower the tripod to change what the frame includes, keeping the camera level throughout.
When some tilt is unavoidable (shooting a tall building’s exterior, for example), correct the perspective in post-processing. Photoshop For Photographers and Lightroom both have lens correction and transform tools that straighten vertical lines with a few clicks.
Editing Real Estate Photos
Real estate editing should be corrective, not creative. The goal is to present the property accurately while showing it in its best light. Start with Photo Editing For Beginners adjustments: correct white balance, adjust exposure, and straighten the image.
Brighten shadows to reveal detail in dark corners. Reduce highlights to recover window detail. Add a small amount of clarity to enhance architectural details and textures. Correct lens distortion to straighten barrel curving at the edges of wide-angle shots.
Remove temporary distractions in post-processing: power cords, trash bins, for-sale signs (if your brokerage permits), and personal items you missed during staging. Clone or heal tool in any photo editor handles these cleanups. Do not remove permanent features like utility poles, neighboring houses, or architectural flaws, as this crosses into misrepresentation.
Floor Plan Photos and Virtual Tours
Floor plan photos show the spatial layout in a way that standard photos cannot. While professional floor plans require measurement tools or specialized cameras, you can create a basic room-by-room walkthrough with consistent framing that helps buyers understand the flow of the home.
For virtual tours, several smartphone apps stitch together a series of photos into a 360-degree walkable experience. Position the phone on a tripod in the center of each room and capture the panorama following the app’s instructions. These tours have become expected on listings and help out-of-town buyers evaluate properties remotely.
If investing in a dedicated 360-degree camera, the quality improvement over phone-based tours is significant. These cameras capture the entire room in one shot and produce smoother, more immersive tours. The investment makes sense for agents who shoot multiple listings.
Common Mistakes in Real Estate Photography
- Shooting without staging: Clutter, personal items, and mess make rooms look smaller and less appealing.
- Tilted camera: Leaning vertical lines are the hallmark of amateur real estate photography. Always level the camera.
- Wrong time of day for exteriors: Harsh midday sun creates deep shadows and blown-out highlights. Shoot at golden hour or twilight.
- Missing key rooms: Every room should be photographed. Buyers become suspicious when rooms are absent from the listing.
- Over-processing HDR: Halos, oversaturated colors, and unnatural tones make listings look artificial. Keep HDR subtle.
- Reflections in mirrors and glass: Check for photographer reflections, flash reflections, and tripod visibility in mirrors, TVs, and windows.
Try This: Real Estate Photography Exercises
- Practice in your home: Stage and photograph every room in your own house. This builds skills without the pressure of a client deadline.
- Bracket everything: Take three-exposure brackets of an interior scene and merge them in editing. Compare the HDR result to a single exposure.
- Corner vs. doorway: Photograph the same room from a corner and from the doorway. Compare which composition shows the space better.
- Golden hour exterior: Photograph your home’s exterior at midday and again at golden hour. The difference demonstrates why timing matters.
- Perspective correction: Take a tilted photo of a building on purpose, then correct it in editing. See how much you can straighten before the image degrades.
Frequently Asked Questions
What camera do I need for real estate photography?
Any camera with a wide-angle lens option works. A mirrorless or DSLR with a 16-35mm zoom lens is ideal. Smartphones with ultra-wide cameras can produce acceptable results for lower-budget listings. The tripod and proper technique matter more than the camera body.
How many photos should a listing have?
Most real estate platforms allow 25 to 50 images. Aim for 25 to 35 quality images covering every room, exterior angles, key features (fireplace, pool, updated kitchen), and any views. Quality over quantity always wins.
Should I use flash for interior shots?
Bounce flash (pointing the flash at the ceiling) can fill dark rooms effectively. Direct flash creates harsh shadows and should be avoided. However, HDR bracketing with natural and existing light is the more common approach. See our Flash Photography guide for bounce flash techniques.
How do I handle small rooms?
Use the widest angle available without going ultra-wide enough to distort proportions. Shoot from the doorway looking in. Remove excess furniture if possible. Vertical framing (portrait orientation) sometimes works better than horizontal for narrow spaces.
How long should a real estate photo shoot take?
Plan 30 minutes of staging and preparation time, then 60 to 90 minutes of shooting for a typical three-bedroom home. Editing takes an additional one to two hours. With practice, these times decrease significantly.