Every camera offers dozens, hundreds, or even thousands of autofocus points spread across the viewfinder. Most photographers leave their camera on automatic focus point selection, which means the camera decides what to focus on. Sometimes it gets it right. Often it does not, locking onto the nearest object, a background detail, or the wrong eye in a portrait.
Taking control of your focus points is one of the simplest changes you can make that will immediately improve the sharpness and intentionality of your images. Once you understand the different focus area modes and when to use each one, you will stop fighting your camera and start directing it.
This guide covers every major focus area mode, when to use each one, and how to configure your Autofocus system for different shooting scenarios. Combined with the right Focus Modes (single vs. continuous AF), focus point selection gives you precise control over where sharpness falls in every image.
Focus Area Modes Explained
Single-Point AF
Single-point AF uses one focus point that you position manually. The camera focuses exclusively on whatever is under that point. This is the most precise focus mode available and gives you maximum control over where the camera focuses.
Use single-point AF when: your subject is stationary or slow-moving, you need precise focus placement (like focusing on the near eye in a portrait), or the scene has foreground elements that might confuse the AF system. This mode works beautifully for Portrait Photography, still life, macro, and controlled shooting situations.
Zone/Group AF
Zone AF uses a cluster of focus points within a defined area. The camera focuses on the closest or most prominent subject within that zone. This provides a safety margin around your selected area while still giving you control over the general focus region.
Use zone AF when: your subject is moving within a predictable area (a speaker at a podium, a child playing in a yard), you need more margin for error than single-point provides, or the subject is too small or fast to keep a single point on consistently.
Wide/Tracking AF
Wide-area or tracking AF uses the entire focus area (or a large portion of it) and the camera’s AI-powered subject recognition to identify, select, and track subjects automatically. Modern implementations can recognize and track eyes, faces, animals, birds, vehicles, and other subject types across the entire frame.
Use wide/tracking AF when: your subject is moving unpredictably (sports, wildlife, children running), you need to concentrate on composition and timing rather than focus point placement, or your camera has strong AI-based subject detection. This mode has improved dramatically in recent years and is now reliable enough for professional work on many camera systems.
Eye AF
Eye AF is a specialized tracking mode that detects and focuses on the subject’s eye. It can work on human eyes, animal eyes, or both, depending on the camera. When it works, eye AF produces consistently sharp portraits with the critical focus exactly where it belongs: on the eye closest to the camera.
Use eye AF for: portraits, event photography, street photography with people, pet photography, and any situation where a person or animal is the primary subject. Most modern mirrorless cameras offer excellent eye AF. If your camera has it, eye AF should be your default for photographing people.
Focus and Recompose Technique
Focus and recompose is a traditional technique where you place your single focus point on the subject, half-press the shutter to lock focus, then move the camera to recompose the frame before pressing the shutter fully. This technique was essential when cameras had limited focus points concentrated in the center of the viewfinder.
The technique still works but has a significant limitation: when you move the camera to recompose, the focus distance changes slightly because the camera-to-subject distance shifts along the arc of your movement. At wide apertures with shallow Depth Of Field (f/1.4, f/1.8), this shift can move the focus plane off the subject. At f/4 and smaller apertures, the deeper depth of field makes the error negligible.
Modern cameras with focus points covering most of the frame have largely made focus-and-recompose unnecessary. If your camera can place a focus point near the edge of the frame, use that instead of recomposing.
The Connection to Back Button Focus
Back Button Focus separates the autofocus activation from the shutter button. Instead of half-pressing the shutter to focus, you press a button on the back of the camera with your thumb. This separation is powerful for focus point control because:
- You can focus once and recompose without the camera refocusing when you press the shutter.
- You can instantly switch between single-shot and continuous focusing behavior without changing camera settings.
- You can pre-focus on a spot and wait for a subject to arrive (useful for street photography and wildlife).
Back button focus works with any focus area mode. Combined with single-point AF, it gives you the most precise manual control possible. Combined with tracking AF, it lets you start and stop tracking at will.
Focus Point Selection by Genre
Portraits
For Portrait Photography, focus must be on the eye closest to the camera. Period. If the eyes are not sharp, the portrait fails regardless of everything else. Use eye AF if your camera supports it. If not, use single-point AF positioned directly on the near eye. At apertures wider than f/2, the depth of field may be so thin that the far eye is noticeably soft even when the near eye is sharp. This is normal and often desirable.
Landscapes
For Landscape Photography, you typically want maximum depth of field from foreground to background. Use single-point AF focused approximately one-third into the scene. Alternatively, use hyperfocal distance focusing: focus at the hyperfocal distance for your aperture and focal length, which maximizes the zone of acceptable sharpness from a near point to infinity. Our Depth Of Field Calculator can help you determine the exact distance.
Sports and Action
Action photography demands continuous autofocus with zone or wide/tracking AF. Place the zone on the area where your subject will be (the near side of the soccer pitch, the approach path of the runner). The camera’s tracking system follows the subject within that zone. For predictable paths (track and field, swimming lanes), zone AF is sufficient. For unpredictable movement (basketball, soccer, wildlife), wide-area tracking with subject recognition performs best.
Street Photography
For Street Photography, speed matters more than precision. Many street photographers use zone AF or wide AF for quick, reactive shooting. An alternative technique is zone focusing (pre-focusing manually to a set distance and shooting at f/8 or f/11 to ensure a deep depth of field that covers a range of distances). This eliminates autofocus delay entirely and lets you shoot the instant a moment appears.
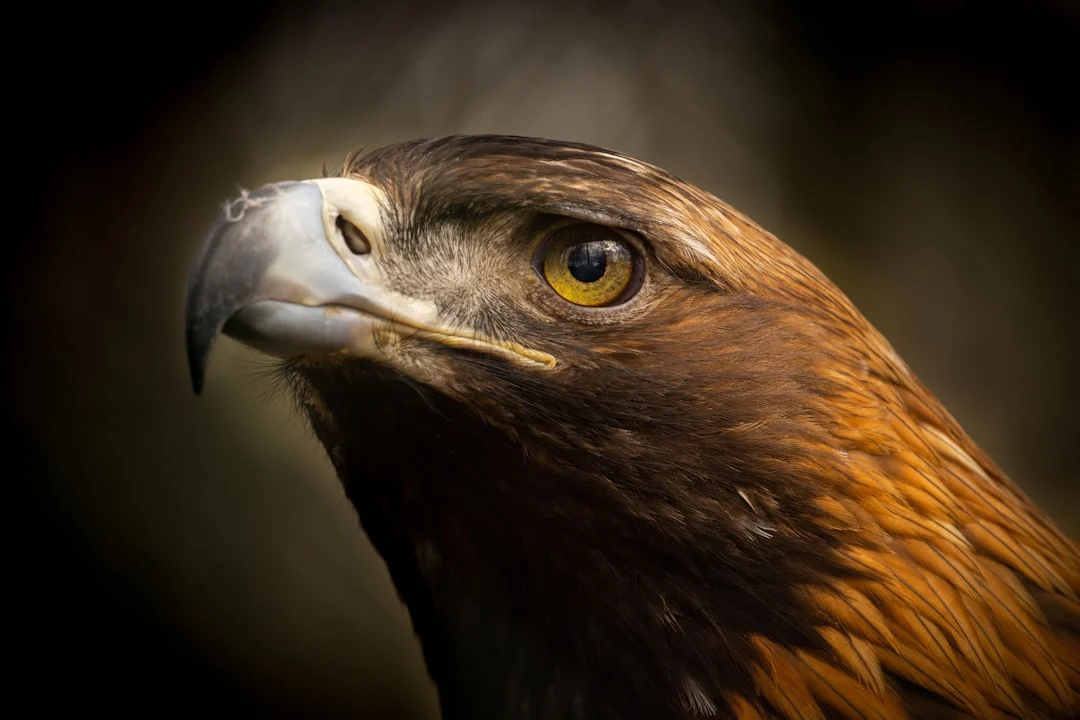
Wildlife
Wildlife Photography demands fast, continuous autofocus tracking. Use the widest tracking mode your camera offers combined with animal/eye detection if available. For birds in flight, wide-area tracking is essential because the bird’s position in the frame changes rapidly. For stationary wildlife, single-point AF aimed at the eye provides maximum precision.
Macro Photography
In Macro Photography, depth of field is extremely shallow, and precise focus placement is critical. Use single-point AF positioned exactly on the most important detail (the insect’s eye, the stamen of a flower). At extreme magnifications, even single-point AF may not be precise enough, and manual focus becomes the preferred method. Consider Focus Stacking for scenes that require more depth of field than a single exposure can provide.
Common Focus Errors and How to Fix Them
Focus on the Background Instead of the Subject
This happens when the camera’s automatic focus point selection picks the background because it has more contrast. Fix: Switch to single-point or zone AF and position the focus area on your subject manually.
Focus on the Wrong Part of the Subject
The camera locks onto the nose instead of the eye, or the shoulder instead of the face. Fix: Use a smaller focus area (single point) and position it precisely. Enable eye AF if available.
Soft Images Despite Apparent Focus Lock
The camera confirms focus, but the image is soft. Common causes: focus-and-recompose error at wide apertures, camera or subject movement after focus lock, or front/back focus miscalibration. Fix: Use a focus point near the subject instead of recomposing. Check your shutter speed is adequate. If consistently off, investigate AF fine-tuning in your camera menu.
Focus Hunting in Low Light
The camera’s AF motor searches back and forth without locking focus. This happens in dim conditions where the AF sensor cannot find enough contrast. Fix: Use the camera’s AF assist light if available. Switch to single-point AF (smaller areas focus better in low light). Focus on an edge or area of contrast near your subject. As a last resort, switch to manual focus.
When to Use Manual Focus Instead
There are situations where no autofocus point selection will give you the precision you need. In extreme Macro Photography, the depth of field is measured in fractions of a millimeter, and the most precise autofocus systems cannot consistently nail focus at this scale. For astrophotography, focusing on stars at infinity requires manual focus with live view magnification. In very low contrast scenes (fog, snow, white walls), autofocus may hunt endlessly. Recognizing when to switch to manual focus is part of mastering your focus system.
Common Mistakes
- Leaving the camera on automatic focus point selection. The camera does not know what your subject is. Take control by selecting your own focus area.
- Using the wrong focus area mode for the situation. Single-point AF for birds in flight will frustrate you. Wide-area tracking for macro will focus on the wrong thing. Match the mode to the situation.
- Not verifying focus after shooting. Zoom in to 100% on your LCD to confirm that critical focus is where you intended. Do this frequently, especially when shooting at wide apertures.
- Using the center point for everything. Many photographers use only the center focus point and recompose. Modern cameras have focus points across the entire frame. Use them to place focus where your subject actually is.
- Confusing focus mode with focus area. Focus mode (single vs. continuous) determines how the camera focuses. Focus area (single point, zone, tracking) determines where it focuses. You need to set both correctly. See our Focus Modes guide for mode selection.
- Fighting a focus system that is working correctly. If your camera consistently focuses on the wrong subject, the issue is your focus area setting, not the camera. Change the focus area mode before blaming the hardware.
Try This
- Focus area comparison. Photograph the same moving subject (a person walking, a pet) using single-point, zone, and wide-area tracking AF. Compare the hit rate (percentage of sharp images) for each mode.
- Eye AF portrait session. If your camera has eye AF, use it exclusively for a portrait session. Afterwards, zoom in to 100% on every image and check whether focus is consistently on the near eye.
- Zone focusing exercise. Set your lens to manual focus, choose f/8, and pre-focus to about 8 feet. Walk around a busy area and shoot without using autofocus at all. This teaches you to estimate distances and work with depth of field.
- Low-light focus drill. Practice focusing in a dimly lit room. Try single-point AF on high-contrast edges. Try wider zones. Determine what your camera can reliably focus on in challenging conditions.
- Focus point speed drill. Without looking at the camera, practice moving your focus point to different positions in the viewfinder using the joystick or directional pad. Speed matters in real shooting situations.
Adapting Focus Strategy to Your Camera
Not all autofocus systems are equal, and the best focus strategy depends partly on your specific camera. Higher-end cameras offer more focus point coverage, faster processing, and more reliable tracking algorithms. Entry-level cameras may have fewer points, slower tracking, and less sophisticated subject detection.
If your camera has excellent eye detection and subject tracking (common in recent mirrorless models), lean heavily on these AI-driven modes. They save time and deliver consistent results that would be difficult to match manually. If your camera has an older or simpler AF system, single-point AF gives you the most control and reliability. Zone AF serves as a practical middle ground on cameras where tracking is unreliable.
Regardless of your camera, invest time in learning its specific AF configuration. Read the manual section on autofocus. Experiment with every focus area mode in controlled conditions. Practice switching between modes quickly. The time you spend learning your camera’s focus system pays dividends every time you shoot. A photographer who fully understands their AF system produces consistently sharper images than one shooting with a superior camera they have not bothered to configure properly.
Frequently Asked Questions
How many focus points do I actually need?
You do not need thousands of focus points. What matters is coverage (how much of the frame the points cover) and the quality of the AF system’s tracking algorithm. A camera with 200 well-distributed, accurate focus points is better than one with 5,000 unreliable ones. For more on how focus systems work, see our Autofocus guide.
Should I use single-point AF or let the camera choose?
For static or slowly moving subjects, single-point AF gives you the most control. For fast-moving or unpredictable subjects, letting the camera track with zone or wide-area AF is more reliable. The key is matching the mode to the situation rather than using one mode for everything.
What is the best focus point for portraits?
The closest eye to the camera. Always. If your camera has eye AF, use it. If not, use a single focus point positioned directly on the nearest eye. This is the single most impactful focus technique for portrait photography.
Why does my camera focus on the wrong thing?
In most cases, the camera is focusing on what you told it to, but your focus area setting is too broad. Switch to a smaller focus area (single point or small zone) and position it on your intended subject. If you are using automatic focus area selection, the camera is making its best guess, and guesses are often wrong.
Can I move focus points while shooting?
Yes. Most cameras let you move the active focus point using a joystick, directional pad, or touchscreen while looking through the viewfinder. Practice moving focus points quickly. This is a critical skill for event, portrait, and street photography where subject position changes from frame to frame.
What is back button focus and should I use it?
Back Button Focus separates focus activation from the shutter button. Many photographers prefer it because it gives more control over when the camera focuses. It is particularly useful for focus-and-recompose technique and for switching between single and continuous AF behavior on the fly. Try it for a week before deciding whether it suits your workflow.
Continue Learning
Deepen your understanding of focus and camera control:
- Autofocus: Understand how autofocus systems work
- Focus Modes: Choose between single-shot and continuous AF
- Back Button Focus: Separate focus from the shutter button
- Depth Of Field: Understand how depth of field affects your focus decisions
- Focus Stacking: Combine multiple focus points for extreme depth of field
- Depth Of Field Calculator: Calculate exact depth of field for your settings
- Portrait Photography: Apply focus techniques to portrait work
- Wildlife Photography: Apply focus techniques to wildlife photography