Children see the world differently than adults. They notice details we walk past, find wonder in the ordinary, and approach creativity without self-consciousness. Photography gives kids a way to capture what they see and share their unique perspective with others. It also builds patience, observation skills, and confidence in ways that few other activities can match.
Whether your child is five or fifteen, photography can become a meaningful creative outlet. You do not need expensive equipment to get started. A basic point-and-shoot camera, an old smartphone, or even a disposable film camera will work perfectly. What matters most is encouraging curiosity and letting children explore at their own pace.
This guide covers age-appropriate techniques, fun projects, and practical advice for parents and educators who want to introduce young photographers to the craft. The goal is to keep photography playful while gently building real skills that will serve them for years.
Choosing the Right Camera for a Child’s Age
The best camera for a child is one they can hold comfortably, operate without frustration, and not be afraid to use. Rugged, drop-resistant cameras designed for children work well for ages 3 to 7. These cameras typically have large buttons, simplified menus, and durable construction that survives the inevitable tumbles.
Children between 8 and 12 can usually handle a basic point-and-shoot or a parent’s older smartphone. At this age, they start to appreciate having more control over their images. A camera with a simple auto mode removes the technical barrier while they focus on what to photograph and how to frame it. Learning about Photography Composition becomes natural at this stage.
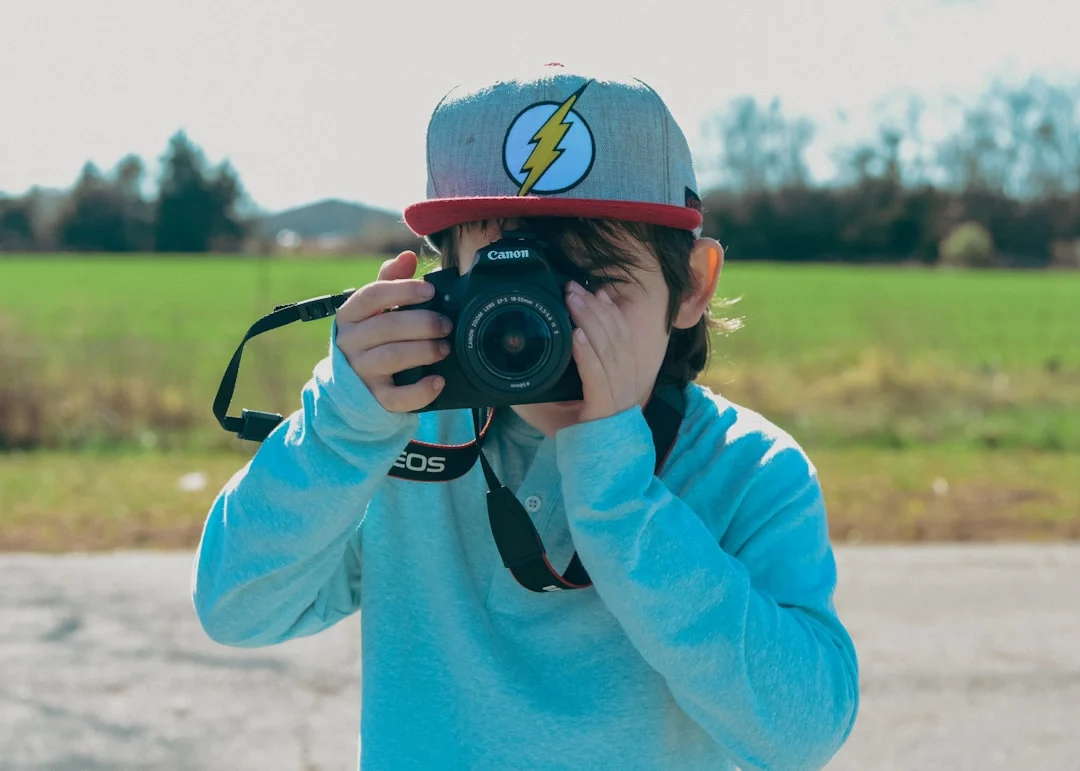
Teenagers who show genuine interest may be ready for an entry-level interchangeable lens camera. This opens up concepts like Aperture, Shutter Speed, and Focal Length. However, do not rush this step. Many professional photographers shot with simple cameras well into adulthood, and the fundamentals matter far more than the gear.
| Age Range | Recommended Camera Type | Key Features to Look For |
|---|---|---|
| 3 to 5 | Kid-specific digital camera | Rubber grip, large viewfinder, no small parts |
| 6 to 8 | Rugged point-and-shoot | Drop-proof, simple controls, built-in flash |
| 9 to 12 | Basic point-and-shoot or smartphone | Zoom, review screen, basic settings |
| 13+ | Entry-level mirrorless or DSLR | Auto and manual modes, interchangeable lenses |
Camera Settings That Work for Young Photographers
Keep settings simple. For younger children, full auto mode is perfect. The camera handles exposure, focus, and white balance so the child can concentrate entirely on choosing subjects and composing their shots. Removing technical complexity lets creativity come first.
As kids grow more interested, introduce one concept at a time. Exposure Triangle can wait until they ask why some photos are too bright or too dark. Start by explaining that the camera needs enough light to make a good picture, and show them how to face toward the light or move to a brighter spot.
Older kids who want more control can start with aperture priority or shutter priority mode. Show them how Depth Of Field changes the background blur, or how a fast Shutter Speed can freeze a pet in mid-jump. These hands-on discoveries stick far better than technical lectures.
Teaching Composition Through Games
Composition is arguably the most important photographic skill, and children can learn it through games long before they know the formal terms. The key is turning observation into a playful challenge rather than a classroom lesson.
Start with the Rule Of Thirds by using a simple game. Have the child imagine a tic-tac-toe grid over their viewfinder and try to place the most interesting thing where the lines cross. Call it the ‘X marks the spot’ game. Once they get comfortable with off-center subjects, they have internalized one of photography’s most powerful composition tools.
- The Frame Game: Find natural frames like doorways, windows, or tree branches to shoot through. This teaches Photography Composition intuitively.
- Leading Lines Hunt: Challenge kids to find roads, fences, rivers, or paths that pull the eye into the picture. This introduces Leading Lines naturally.
- Color Match: Pick a color at the start of a walk and photograph everything in that color. This builds awareness of color and visual patterns.
- Close-Up Challenge: Get as close as the camera allows and photograph textures, patterns, and tiny details. This introduces the idea behind Macro Photography.
- High and Low: Take the same subject from above, below, and eye level. Compare the results to see how angle changes everything.
Photography Scavenger Hunts
Scavenger hunts give children a clear purpose every time they pick up the camera. Instead of wandering without direction, they have a list of things to find and photograph. This structure actually increases creativity because kids have to figure out how to interpret each prompt.
Create a list of 10 to 20 items tailored to your location. For a backyard hunt, you might include something fuzzy, something round, something that makes noise, something smaller than your thumb, and something that changes with the seasons. For a park outing, add items like reflections in water, animal tracks, three different leaf shapes, and something that does not belong.
Make the hunt collaborative rather than competitive. When kids share their findings, they see that everyone interpreted the same prompts differently. A five-year-old’s version of ‘something beautiful’ teaches as much about perspective as any photography class.
Nature Walks with Cameras
Nature provides an endlessly changing studio for young photographers. Every season brings new subjects: spring flowers, summer insects, autumn leaves, winter frost patterns. Walking slowly through a natural environment with a camera teaches children to observe their surroundings with fresh attention.
Encourage kids to photograph at Golden Hour Photography when the warm light makes everything glow. Early morning and late afternoon walks also tend to reveal more wildlife activity. Bring a magnifying glass alongside the camera so children can study subjects before photographing them.
Set a simple challenge for each walk. One week, photograph only things that are green. The next week, focus on patterns and textures. Another week, try to tell the story of a single tree from roots to canopy. These constraints spark creativity far more effectively than unlimited freedom.
Storytelling Through Photos
Photography is a storytelling medium, and children are natural storytellers. Encourage them to think about their photos as chapters in a story. What happened before this moment? What might happen next? This simple shift transforms snapshots into narratives.
A fun project is the ‘Day in the Life’ series. Have the child document their entire day from breakfast to bedtime, choosing 10 to 15 key moments. When they lay the images out in order, they have created a visual diary. This teaches sequencing, selection, and the idea that not every photo needs to be a standalone masterpiece.
Another storytelling exercise is the three-photo story. Give the child a beginning, middle, and end structure. They photograph a setup (a ball on the ground), an action (someone kicking it), and a result (the ball in the air). This teaches visual narrative in its simplest form.
Safety and Supervision
Photography takes children’s attention away from their surroundings. A child looking through a viewfinder is not watching for traffic, uneven ground, or water hazards. Supervise young photographers closely, especially in unfamiliar environments or near roads and water.
Teach children to be aware of their surroundings before raising the camera. Establish a rule: stop walking, check your footing, then take the photo. This prevents trips, falls, and wandering into unsafe areas while focused on a subject.
Online sharing requires special attention. If children want to share their work, use family accounts with privacy settings that limit who can see and comment on images. Never include identifying information like school names, addresses, or full names in photo captions or metadata.
Building Confidence Without Directing
The fastest way to kill a child’s interest in photography is to constantly correct them. Resist the urge to say ‘hold it this way’ or ‘that’s not a good subject.’ Instead, ask questions. ‘What caught your eye about that?’ and ‘What do you like best about this photo?’ encourage reflection without judgment.
Celebrate effort over perfection. A blurry photo of a leaping dog might be technically flawed, but if the child is excited about capturing that moment, that enthusiasm matters more than sharpness. Technical skills develop with practice. Passion has to be nurtured.
Create a dedicated space to display their work. Print their favorite photos and hang them on the refrigerator, make a photo wall in their room, or create a small album they can show visitors. Physical prints make photography feel real and valued in a way that digital files on a screen cannot.
Simple and Fun Editing for Kids
Editing does not need to mean complex software. Start with the basics: cropping to remove distractions, straightening tilted horizons, and adjusting brightness. These three skills cover most of what any photographer needs. For a broader introduction to post-processing, see our guide to Photo Editing For Beginners.
Free apps with simple sliders work best for young editors. Let them experiment with filters and effects. Yes, most results will be over-processed, but that experimentation teaches cause and effect. They learn that too much contrast makes things look harsh and too much saturation makes colors unnatural. These lessons are more memorable when discovered firsthand.
For older kids interested in deeper editing, introduce them to Lightroom For Beginners. The adjustment sliders are intuitive, and the before/after comparison helps them see the impact of each change. Keep editing sessions short, around 15 to 20 minutes, to prevent fatigue and maintain the sense that editing enhances photos rather than replacing the joy of taking them.
Sharing and Printing Their Work
Children thrive on recognition. Printing photos gives their work a physical presence that feels more significant than a file on a screen. Our guide to Preparing Photos For Print covers the technical details, but for kids, the process can be simple: pick your favorites, send them to a print service, and display them proudly.
Photo books make excellent projects. At the end of a vacation, a school year, or a season of photo walks, help the child select their best 20 to 30 images and arrange them in a printed book. This teaches curation, a skill that separates good photographers from prolific ones.
If sharing online, consider a family blog or private gallery where relatives can view and comment. Positive feedback from grandparents and family friends builds confidence without the risks of public social media platforms.
Common Mistakes When Teaching Kids Photography
- Over-correcting: Constantly fixing their grip, composition, or subject choice makes photography feel like homework rather than play.
- Starting with expensive gear: A child who is afraid of breaking an expensive camera will not experiment freely. Start cheap.
- Forcing long sessions: Young children have short attention spans. Fifteen to thirty minutes is often enough. Let them stop when they want to.
- Comparing their work to adults: Never hold a child’s photos up against professional work. Compare their new photos to their older ones to show growth.
- Neglecting to print: Leaving every photo as a digital file means the work feels disposable. Print and display their best images.
- Ignoring their interests: If a child wants to photograph bugs instead of sunsets, follow their lead. Interest drives learning.
Try This: Starter Projects for Young Photographers
- Alphabet Hunt: Photograph things that look like letters of the alphabet. Find all 26 in your neighborhood.
- Shadow Safari: Spend an afternoon photographing only shadows. Notice how they change as the sun moves.
- My Favorite Things: Document 10 favorite possessions, treats, or places. This creates a personal time capsule.
- Weather Watch: Photograph the same view from your window every day for a week. Compare how weather changes the scene.
- Upside Down Day: Lie on the ground and photograph everything from below. Trees, furniture, and pets all look different from this angle.
Frequently Asked Questions
What age can a child start learning photography?
Children as young as three can use kid-specific cameras with large buttons and simple operation. At this age, the goal is exploration, not technique. By age six or seven, most children can understand basic concepts like framing and getting close to subjects. Formal technique learning usually works best from age 10 onward.
Should I let my child use my phone or camera?
If you are comfortable with the risk, yes. Children learn faster with better tools. Add a protective case, use a wrist strap, and set clear ground rules about where and how they can use it. Alternatively, an older or refurbished phone or camera gives them quality without the anxiety of damage to your primary device.
How do I keep my child interested in photography long-term?
Follow their interests rather than imposing your own. Print and display their work. Explore new locations together. Introduce new challenges gradually. If interest fades, let it rest. Photography will still be there when curiosity returns.
Is photography screen time?
Taking photos is an active, creative, physical activity that happens in the real world. It requires observation, movement, and decision-making. Reviewing and editing photos on a screen is screen time, but it is purposeful and creative. Most experts distinguish between passive consumption and active creation when evaluating screen time.
Should I enroll my child in a photography class?
Classes work well for children who thrive in structured learning environments and enjoy group activities. Look for classes designed specifically for the child’s age range. Many community centers, art museums, and nature centers offer youth photography programs that combine photography with outdoor exploration.
What subjects work best for kids to photograph?
Pets, nature, family members, food, toys, and their own rooms are all excellent starting points. Children photograph best when they have a personal connection to the subject. Let them choose what interests them rather than assigning specific subjects.