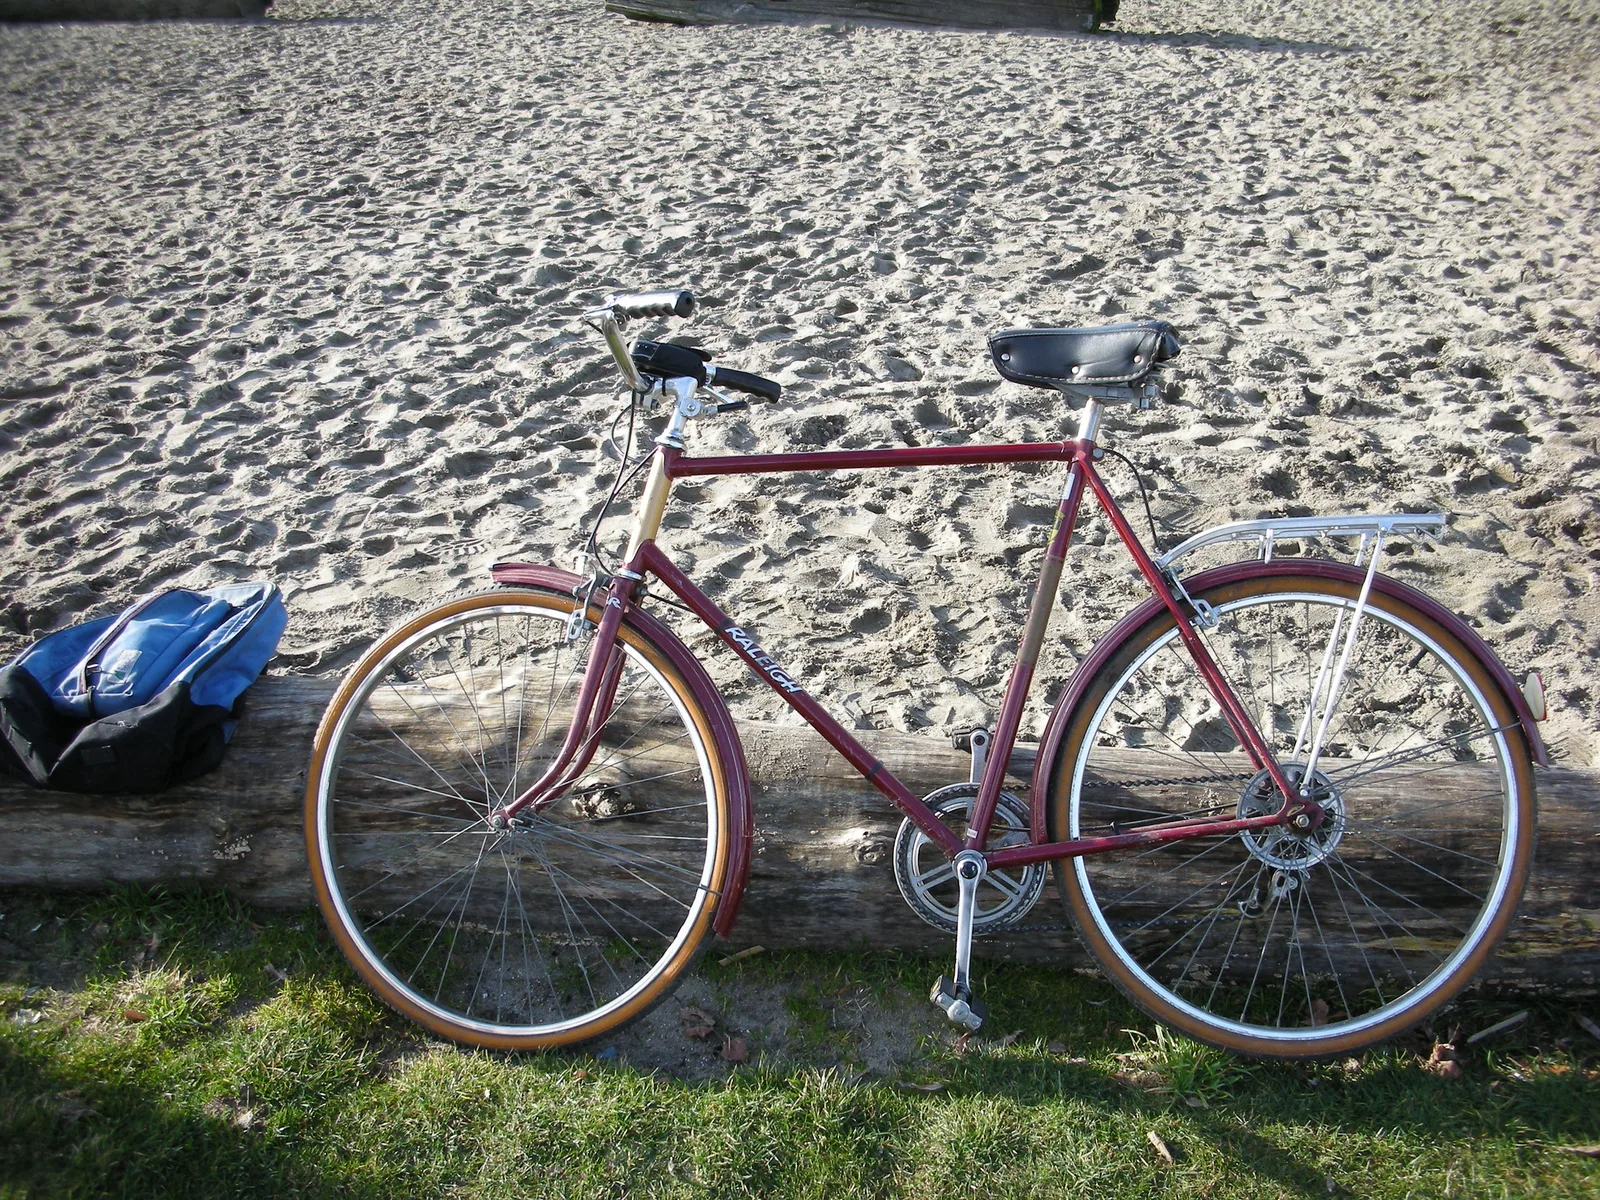
Bicycles are one of the most charming and versatile subjects you can photograph. A bike leaning against a wall, a row of bikes outside a station, a cyclist racing down a hill or a lone rider on a country lane all tell different stories. Bikes are simple, beautiful machines with elegant circles, lines and shadows, and they are part of everyday life in towns and cities around the world. Wherever you go, there is likely a bicycle nearby waiting to be photographed.
This guide covers why bicycles make great subjects, photographing parked bikes, bike details, shadows and shapes, cyclists in motion, panning, bikes in the city, bikes on trails and country roads, telling stories with bikes, settings, phones and editing. For everyday scenes in town, see the guide to street photography, and for following movement with the camera, see the guide to panning photography.
Why bicycles make great subjects
Bicycles bring together design, motion and everyday life.
- Beautiful shapes. Two circles joined by a triangle frame make one of the most recognizable shapes there is.
- Everywhere. Bikes are found in cities, villages, campuses, parks and beaches, so you never run out of subjects.
- Character. A rusty old bike with a basket, a sleek racing bike and a colorful cruiser each say something different about their owner.
- Motion. Cyclists give great chances to practice freezing and blurring movement.
- Story. A bike can suggest freedom, childhood, commuting, travel or adventure, often without a person in the frame.
Bicycles are also easy to practice with. Parked bikes stay still while you try different angles and light, and cyclists pass regularly in most towns, giving many chances to practice action. A short walk with a camera almost always turns up a few bikes worth photographing.
Photographing parked bikes
A parked bike is a patient subject. Take time to find the best angle and light.
- Side view. A straight side view shows the full shape of the bike, with both wheels as clean circles. This is the classic bike portrait.
- Three quarter view. Stepping a little to the front or back adds depth and shows the handlebars and seat.
- Low angle. Crouch down to wheel height for a more dramatic view.
- With its setting. Show the bike against a colorful wall, a doorway, a fence, a café or a beach to tell where it lives.
Look for bikes that match their surroundings, such as a red bike against a red door, or bikes that contrast with them, such as a bright bike against a gray wall. A plain background keeps attention on the bike, while a busy one tells more of a story. A single bike against a large empty wall makes a simple, minimalist picture with plenty of breathing room.
Groups and rows of bikes
Bike racks and rows of parked bikes make great pictures of pattern and repetition. Line them up so the wheels repeat across the frame, or shoot from one end so the row stretches into the distance. A single bike that stands out, such as one bright color among dark bikes, breaks the pattern and gives the eye a place to land. Stations, campuses and city squares often have long rows of bikes, especially in towns where cycling is popular.
Bike details
Get closer, and bikes reveal a world of small details.
- Wheels and spokes. Spokes make radiating lines, and a close view of a hub looks like a star.
- Chains and gears. Shiny or oily, they show the mechanics of the bike.
- Bells, baskets and lights. Small accessories add character and color.
- Seats and handlebars. Worn leather, tape and grips show age and use.
- Rust and paint. Faded paint, rust and stickers tell the story of an old bike.
Use a wide aperture to blur the background and focus on one detail. Side light brings out the texture of rust, leather and rubber. A set of detail pictures alongside one wide view makes a lovely portrait of a single bike.
Shadows and shapes
Bicycles cast wonderful shadows. Low sun, early or late in the day, stretches the shadow of a bike into long, elegant shapes on the ground or a wall.
- Bike and shadow together. Show both the bike and its shadow for a playful double image.
- Shadow alone. Photograph only the shadow for a mysterious, graphic picture.
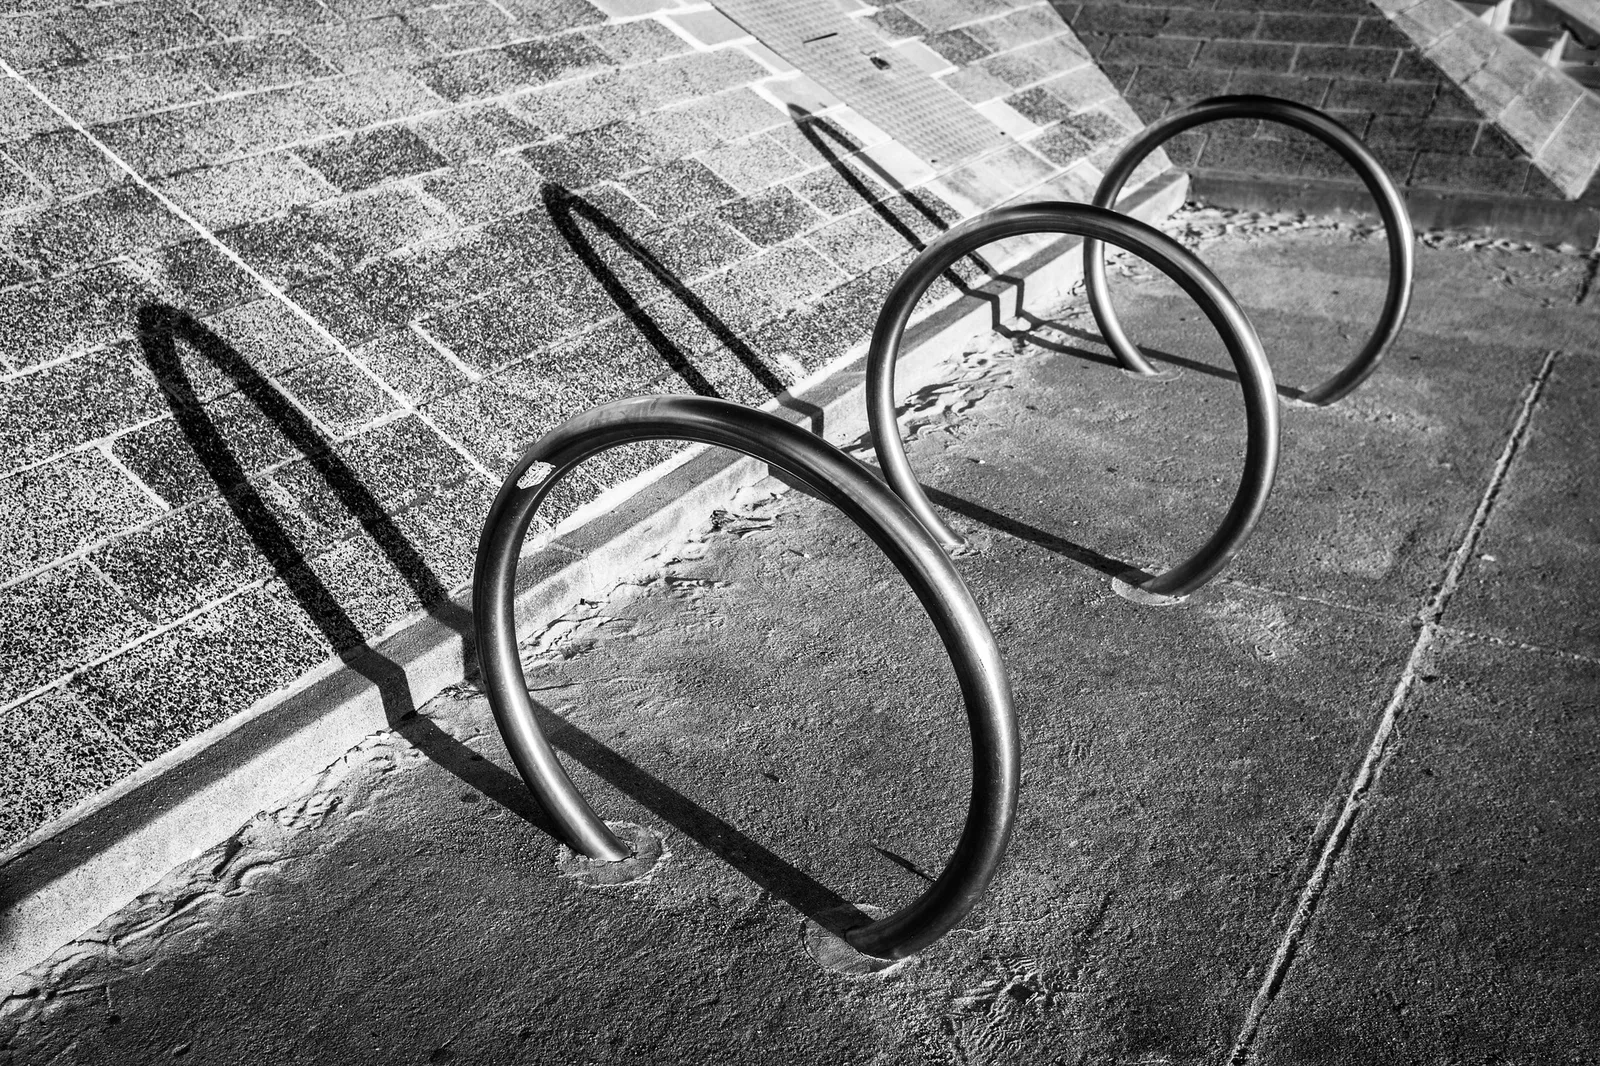
- Racks and railings. Bike racks cast looping or repeating shadows that make strong abstract patterns.
- Riders. A cyclist’s shadow racing alongside on the road adds motion and fun.
Black and white often suits shadow pictures, since it removes color and lets shape and line take over. Try standing above the shadow and pointing the camera almost straight down for a clean, flat graphic view. Look for clean, plain surfaces such as pavement, sand or a light wall so the shadow stands out clearly.
Want to make more of shadows? The guide to shadow photography shows how to find and use shadows as subjects.
Cyclists in motion
Moving cyclists bring energy to pictures. You can freeze them sharply or let them blur to show speed.
- Freeze the action. Use a fast shutter speed, such as 1/500 or faster, to freeze motion and show the rider sharp.
- Show speed. Use a slower shutter speed, such as 1/30, to let the rider blur a little against a sharp background.
- Prefocus. Focus on a spot on the road where the rider will pass, and press the shutter as they arrive.
- Use burst mode. Take a quick series to catch the best position of legs and wheels.
Riders look best when they are moving into the frame, with space in front of them to ride into. Wait for a rider to enter a pool of light, pass a colorful wall or ride beneath a line of trees. Patience pays off: choose a good background and let the cyclists come to you.
Panning with cyclists
Panning is one of the best ways to show a cyclist’s speed. Follow the rider with the camera as they pass, using a slower shutter speed, so the rider stays fairly sharp while the background streaks into lines.
- Stand beside a road or path with a clear view.
- Set a shutter speed of about 1/30 to 1/60.
- Start following the rider before they reach you, keeping them in the same spot in the frame.
- Press the shutter as they pass, and keep moving smoothly afterward.
Expect many misses at first. Panning takes practice, and even experienced photographers keep only a few frames from each pass. A background with color and light, such as shop windows or trees, makes the streaks more striking.
Ready to practice following movement? The guide to panning photography walks through the technique step by step.
Bikes in the city
Cities are full of cycling life. Commuters weave through traffic, delivery riders race past and bikes lean against every railing.
- Bike lanes. Painted lanes and symbols make strong lines and graphic shapes.
- Commuters. Riders in the rain, at dawn or at rush hour show everyday city life.
- Bike sharing stations. Rows of matching bikes make neat patterns.
- Night. Bike lights make streaks in long exposures, and riders pass glowing shop windows.
Look for interesting frames, such as a rider passing an archway, a mural or a café. City cycling is often fast, so be ready with the camera set and the focus prepared.
Bikes in rain and snow
Bad weather makes some of the most atmospheric bike pictures. Rain turns streets into mirrors, so riders and their lights reflect in puddles, and umbrellas and rain jackets add color. Snow piles up on saddles and baskets of parked bikes, making quiet, wintry still lifes. Riders pushing through falling snow with lights glowing tell a story of determination. Protect your camera with a simple cover or a plastic bag, and wipe the lens often. Falling rain and snow show best against a dark background, lit from the side or behind by streetlights.
Bikes on trails and country roads
Out of town, bikes take on a sense of freedom and adventure.
- Country lanes. A lone rider on a winding road through fields shows peace and open space.
- Mountain trails. Riders on rocky paths, through forests or down steep slopes bring drama and action.
- Bike touring. Loaded bikes with bags and gear suggest long journeys and travel.
- Scale. A small rider in a big landscape shows the scale of the scene.
Use leading lines, such as a road or path, to lead toward the rider. Shoot at golden hour for warm light and long shadows, and place the rider using the rule of thirds, with space to ride into.
Photographing your own rides
If you ride yourself, a small camera or phone in a secure pocket lets you capture your own adventures. Stop safely before taking pictures, and never photograph while riding in traffic. Pictures of your bike resting at a viewpoint, by a lake or outside a café tell the story of the ride. A self timer or a friend lets you appear in the scene, riding past or resting with the view.
Photographing friends who ride
Friends and family who ride make willing subjects. Ask them to ride past the same spot several times while you try different settings, angles and backgrounds. Have them ride toward you, past you and away from you, and try freezing, blurring and panning each time. Between passes, take relaxed portraits of them with their bike, leaning on the handlebars or resting at a viewpoint. A rider who knows the plan can repeat the move until you get it right, which is the easiest way to learn action photography.
Telling stories with bikes
Bikes can carry stories and feelings beyond the bike itself.
- Nostalgia. An old bike with a basket and flowers suggests a simpler time.
- Abandonment. A rusty, locked bike missing a wheel suggests time passing.
- Everyday life. A bike outside a bakery, a school or a home shows daily routines.
- Seasons. Bikes in snow, under falling leaves or among spring blossoms show the year changing.
Return to the same bike or spot through the seasons for a lovely series. Pairing two bike pictures side by side, such as a new bike and an old one, makes a simple and effective story.
Settings for bicycle photography
- Parked bikes. Use f/5.6 to f/8 for sharp bikes, or f/2.8 for details with a soft background.
- Frozen action. Use 1/500 or faster.
- Panning. Use 1/30 to 1/60, following the rider.
- Focus. Use continuous focus for moving riders, or prefocus on a spot.
- Mode. Shutter priority mode is handy for action, and aperture priority mode works well for parked bikes and details.
Using a phone
A phone is great for bike pictures. Use portrait mode for details, burst mode for passing riders and a low angle near the ground for parked bikes. Tap to focus and lock exposure on the bike before shooting.
Editing bike photos
Keep edits clean. Straighten lines, crop to strengthen shapes and adjust contrast to make the frame of the bike stand out. Black and white suits shadows, racks and old bikes, while bright, vivid color suits cruisers and city scenes. Remove small distractions, such as stray litter, but keep the honest character of the scene.
Curious about black and white for bikes and shadows? The guide to black and white photography explains how to see in tones and shapes.
Common mistakes
- Cutting off wheels. Leave space around the bike so both wheels are complete.
- Odd angles that distort. Wide lenses close up can stretch the bike. Step back and zoom in for natural shapes.
- Cluttered backgrounds. Bikes are thin and busy, so a messy background hides them. Choose plain walls or open sky.
- Riders leaving the frame. Leave space in front of moving riders.
- Too slow a shutter. Without panning, slow speeds blur everything. Use a fast speed or pan.
- Harsh midday light. Overhead sun flattens bikes and hides shadows. Look for shade or wait for lower light.
- Unsafe positions. Never stand in a bike lane or road. Stay on the side, out of the way.
Try this: a 10-minute bike portrait
Find one parked bike, and take five different pictures in ten minutes.
- A straight side view showing the whole bike.
- A low three quarter view from wheel height.
- A close detail, such as a bell, seat or chain.
- A picture of its shadow, if the sun is out.
- A wider view showing the bike in its setting.
Compare the five pictures and choose your favorite. This simple exercise trains you to look at one subject from many sides. Repeat it with a very different bike, such as an old cruiser after a sleek road bike, and notice how the best angle changes with the character of the bike.
Frequently asked questions
What is the best angle for photographing a bike?
A straight side view shows the classic shape best, with both wheels as clean circles.
How do I photograph a cyclist moving fast?
Use a fast shutter speed and burst mode to freeze them, or pan at a slower speed to show speed.
What shutter speed should I use for panning cyclists?
Start around 1/30 to 1/60, and adjust based on the rider’s speed and your results.
Is it okay to photograph other people’s bikes?
Generally, photographing parked bikes in public places is fine. Be respectful, and do not move or touch them.
How do I make a bike stand out?
Use a plain or contrasting background, good light and a clean side view.
What time of day is best for bike pictures?
Early morning and late afternoon, when low sun gives warm light and long shadows of wheels and frames.
How do I photograph bikes while traveling?
Look for local bikes outside markets, homes and cafés. They often say a lot about daily life in a place and make lovely travel pictures.
For terms such as panning, shutter priority, prefocus and burst mode, see the photography glossary.