Shadow photography treats the cast shadow as the subject rather than a side effect of the light. The best shadows come from a hard, small light source, like direct sun or a bare street light, placed low enough to stretch them across a clean surface. Expose for the brightly lit ground and let the shadows fall to near black, then compose around the shape of the shadow itself: stretched, repeated, distorted by the surface it lands on, or seen from directly above.
What makes a shadow worth photographing
Most shadows go unnoticed because they are soft, short, or falling on a busy surface. A shadow becomes a subject when three things line up:
- A hard light source, so the edges are crisp and the shape is readable.
- The right angle, so the shadow is long enough, or distorted enough, to be interesting.
- A clean surface to land on: pavement, sand, snow, a plain wall, a lawn. A shadow falling across clutter disappears into it.
Shadows work as subjects because they are pure shape. They strip away color, texture and identity, leaving an outline the viewer must interpret. A shadow of a person is anyone. A shadow of a bicycle is every bicycle. That anonymity is why shadow photographs often feel more graphic and more mysterious than photographs of the objects themselves. The relationship between light direction and the shadows it creates is covered in direction of light; this page is about using the shadows themselves.
Hard sources make hard shadows
The sharpness of a shadow edge depends on how large the light source looks from the object casting the shadow. A small source lights the object from essentially one direction, so the edge is crisp. A large source, like an overcast sky or a big window, lights it from many directions at once and the shadow blurs or disappears. The full explanation is in the qualities of light.
The sun is tiny in the sky, about half a degree across, which is why clear-day sunlight is the classic shadow light. Even so, sun shadows are not perfectly sharp. The soft fringe at the edge (the penumbra) grows with the distance between the object and the surface the shadow lands on, by roughly 1 centimeter for every meter. That has practical consequences:
- The shadow of your foot on the pavement is razor sharp.
- The shadow of your head, whose light travels two or three meters from head to ground in low sun, has a soft fringe two or three centimeters wide.
- The shadow of a treetop thirty meters away is noticeably soft, around thirty centimeters of blur.
So for the crispest shapes, look for objects close to the surface they shadow: railings on a sidewalk, a bicycle on a wall, leaves against a sunlit fence. Thin haze and high cloud enlarge the effective size of the sun and soften everything; on a fully overcast day there are no cast shadows to photograph at all.
Artificial light follows the same rule. A bare bulb, a street light or a small flash gives hard shadows. The same light through a lampshade or a softbox gives soft ones.
When shadows are longest: sun angle, time, season and latitude
Shadow length is simple geometry. On level ground, a shadow’s length equals the object’s height divided by the tangent of the sun’s elevation angle:
| Sun elevation | Shadow length (times the object’s height) | Shadow of a 1.8 m person |
|---|---|---|
| 60 degrees | 0.6 | about 1 m |
| 45 degrees | 1.0 | 1.8 m |
| 30 degrees | 1.7 | about 3 m |
| 20 degrees | 2.7 | about 5 m |
| 10 degrees | 5.7 | about 10 m |
| 5 degrees | 11.4 | about 21 m |
The table shows why the last hour before sunset and the first hour after sunrise are so good for shadows: below about 15 degrees, shadow length grows very quickly. It also shows why midday shadows in summer are short, dark blobs under people’s feet.
The sun’s height depends on three things you can plan around:
- Time of day. The sun is lowest near sunrise and sunset and highest around solar noon.
- Season. The noon sun is much lower in winter. At 45 degrees latitude, it reaches about 68 degrees at the summer solstice but only about 22 degrees at the winter solstice, so a winter noon gives shadows as long as a summer evening.
- Latitude. The farther you are from the equator, the lower the sun stays. At 60 degrees latitude the winter noon sun is below 7 degrees, which means long shadows all day. Near the equator the noon sun can be almost straight overhead, and shadows nearly vanish at midday.
A sun-position planning app shows the sun’s elevation and direction for any place and time, so you can know in advance when a wall will be raked by light or which way a shadow will fall. The same low sun is also the warm light of golden hour, which makes long shadows and warm color arrive together.
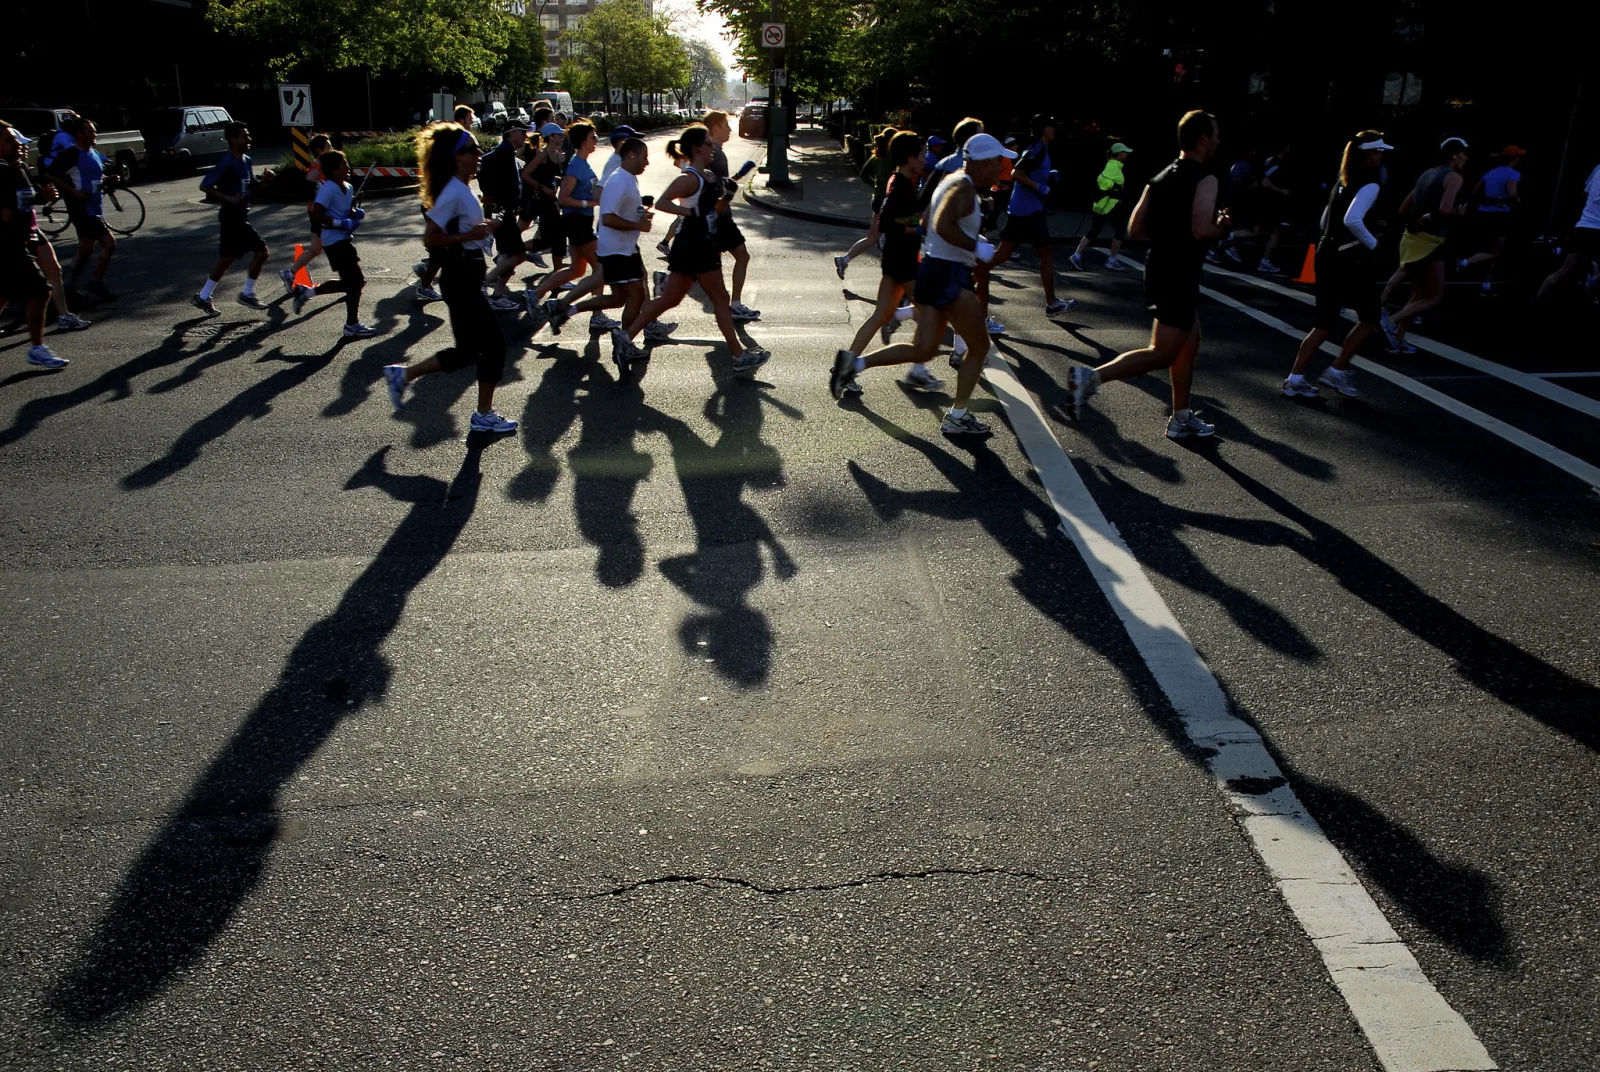
Direction matters as much as length. Shoot toward the sun, as here, and shadows run toward you, stretching down the frame and filling the foreground. Shoot with the sun to one side and shadows run across the frame, which is best for showing their full profile. Shoot with the sun behind you and the shadows fall away from you, and your own shadow joins the picture.
Exposing for shadow shapes
The key exposure decision is to expose for the lit surface and let the shadows go dark. You are not trying to see into the shadow. You want it as a solid shape, and the sunlit ground around it gives the shape its edge.
In direct sun, the lit surface and the shadow can easily be several stops apart. If you expose so that the shadow shows detail, the lit ground blows out and the shape loses its edge. Methods that work:
- Spot meter the lit ground. A spot meter reading from sunlit asphalt or grass will place it near middle grey, which is about right for those surfaces. For bright surfaces like pale concrete, sand or snow, add about one to two stops so they stay bright rather than grey.
- Use exposure compensation. When a big dark shadow fills much of the frame, an average or evaluative meter tries to brighten it and overexposes the lit areas. Dial in one to two stops of negative exposure compensation and check the result.
- Start from sunny 16. In clear, direct sun, f/16 at a shutter speed of about 1/ISO exposes sunlit surfaces well. The sunny 16 rule gives you a reliable baseline that ignores the dark shadow completely.
- Check the histogram. You want the lit areas well up to the right without clipping, and a large mass on the left for the shadows. A shadow that is almost black is fine; that is the point.
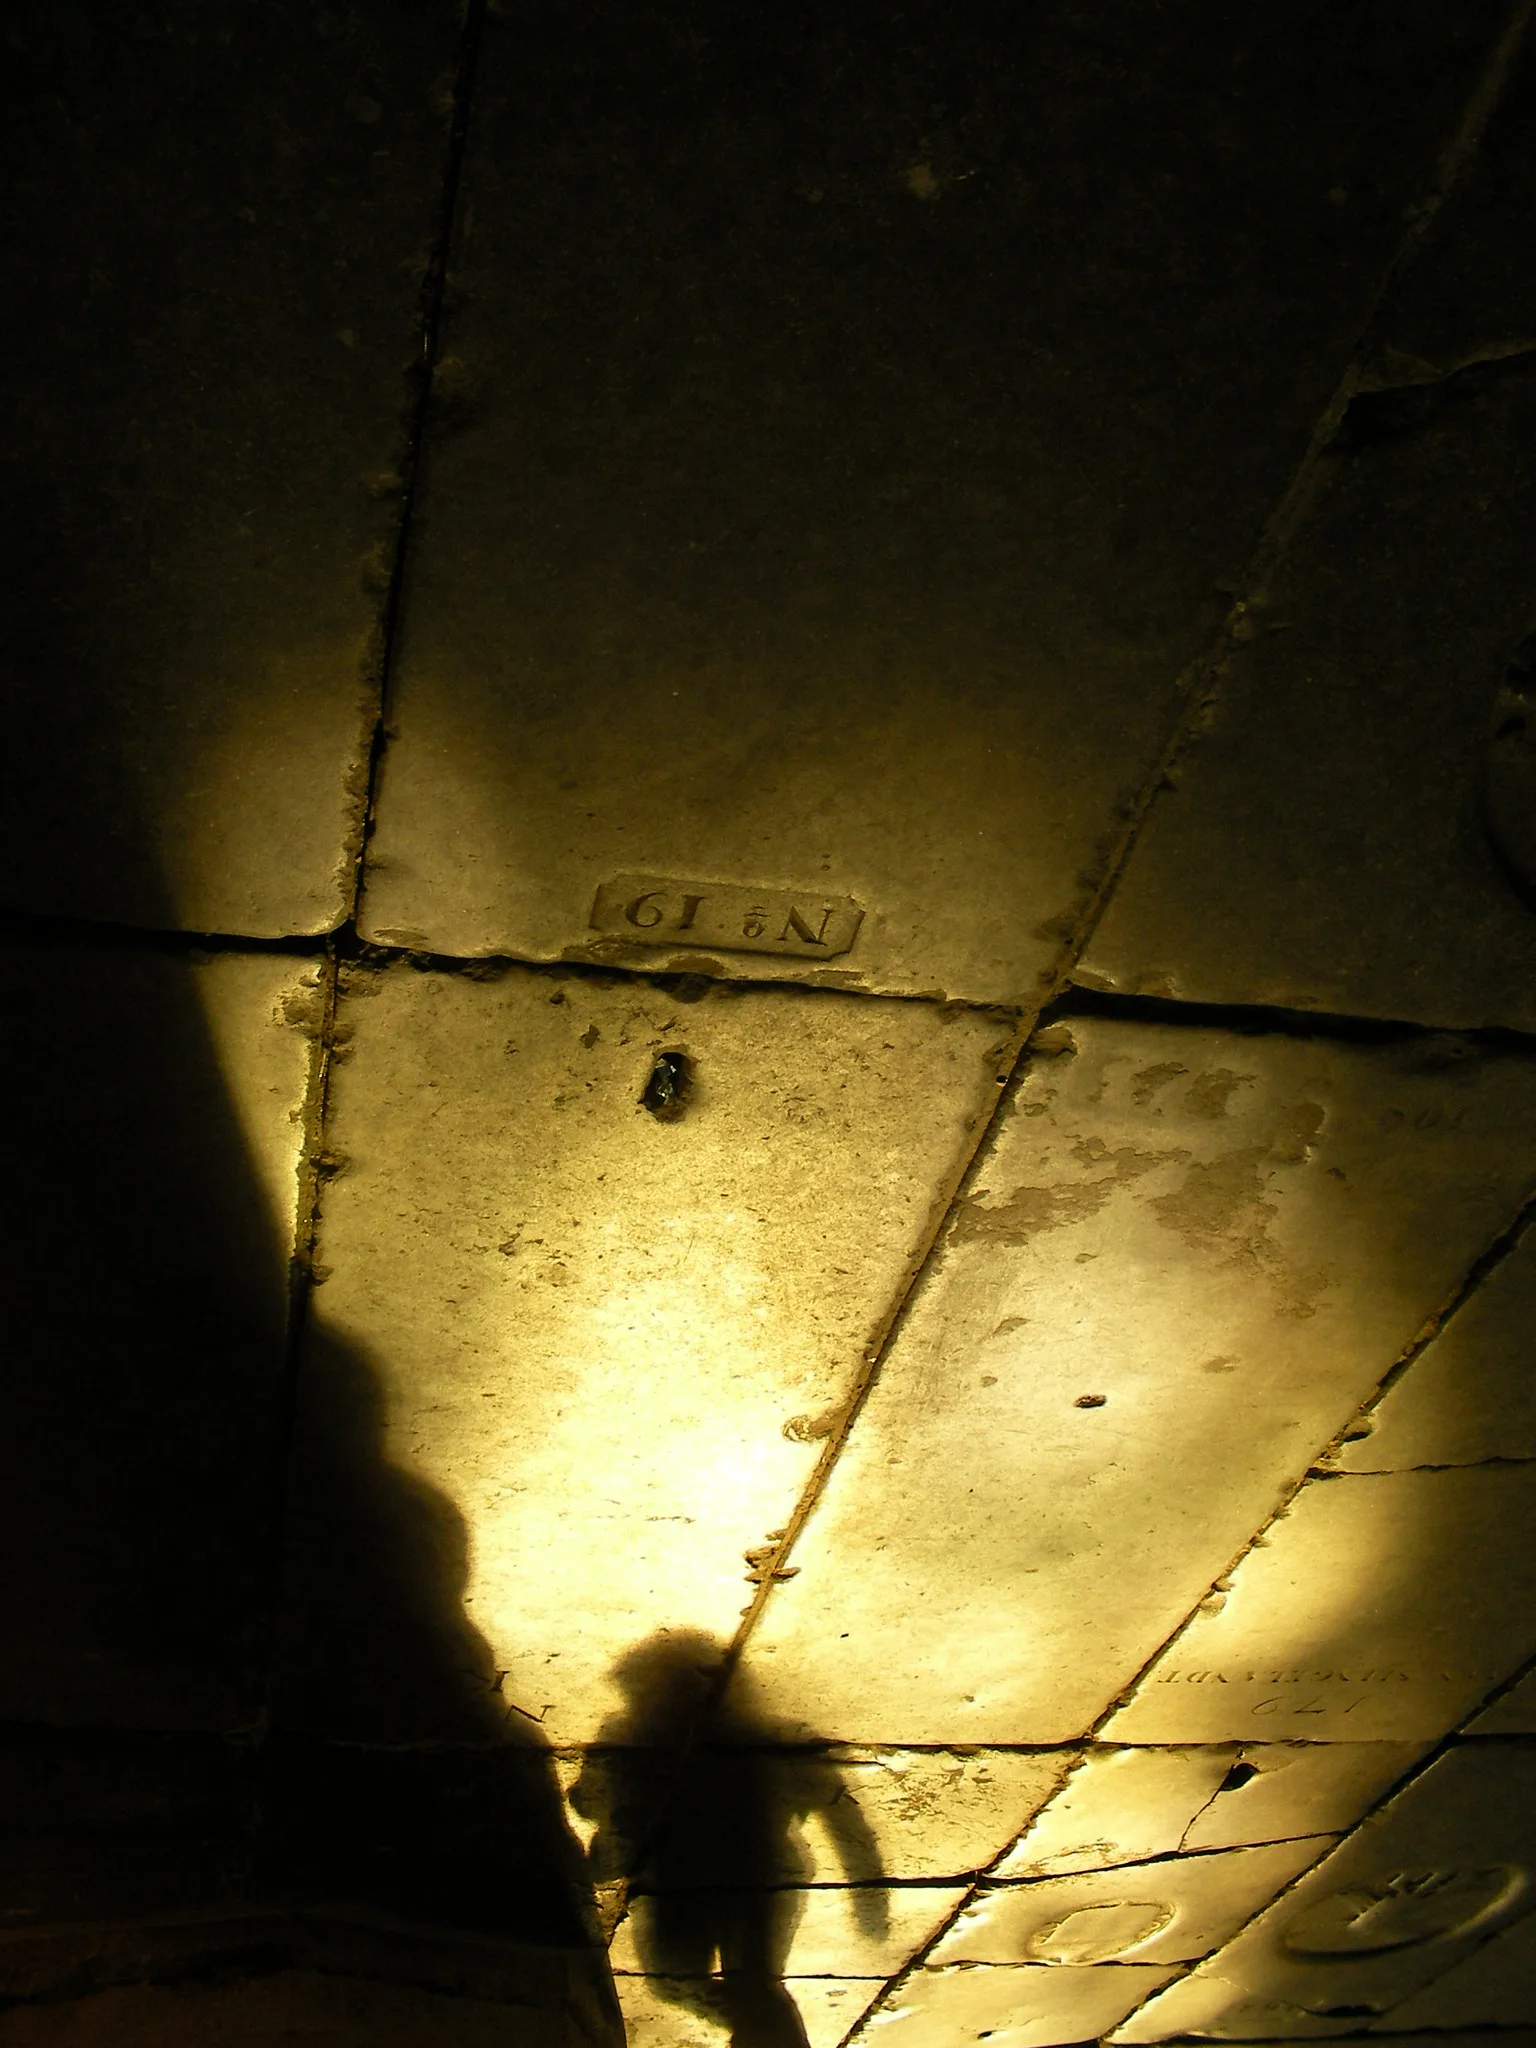
A side effect worth knowing: in daylight, shadows are lit only by the blue sky, so any detail left in them turns cool and bluish. With the lit ground exposed correctly, that blue is usually a feature, a cool shape on a warm ground. If you want neutral shadows instead, you will need to correct it with a local white balance adjustment, or convert the image to black and white.
Composing with shadows
Show the shadow alone, or with its owner
The first choice is whether the object that casts the shadow appears in the frame. Shadow alone makes a puzzle: the viewer reconstructs the object from its outline. Shadow and owner together make a relationship: the shadow can echo the object, exaggerate it, or seem to act independently of it. Both work, but decide deliberately. A frame that includes half the object and half the shadow usually reads as indecisive.
Use distortion
Shadows only match their objects when light strikes a flat surface at right angles. Low sun stretches them into giants. A shadow falling across steps breaks into a zigzag. A shadow landing on a curved wall bends. A shadow that climbs from the ground onto a wall appears to fold at the corner. These distortions are one of the most interesting things about shadows, so look for surfaces that transform the shape: stairs, corrugated metal, sand ripples, the corner where pavement meets wall.
Look for repetition
Railings, fence posts, columns, benches, window grilles and rows of trees all cast repeating shadows, and a repeated shadow is often stronger than the repeated objects, because it is simpler and higher in contrast. A single break in the rhythm, a person walking through the shadow of a railing, gives the pattern a focal point. The idea of a pattern with one variation is explored further in pattern and repetition.
Use your own shadow, or keep it out
With the sun behind you, your shadow will fall into the frame, pointing toward your subject. By accident it is a distraction; on purpose it is a self-portrait, and one of the few ways to put yourself in a photograph without turning the camera around. When you do include it, make it clear and whole, not a head cut off at the bottom edge. When you do not want it, step so the sun is off to one side, or lower the camera so the shadow falls below the frame.
Go overhead
Looking straight down changes everything. From above, people become small round tops of heads and objects lose their recognizable profile, but their shadows keep the full silhouette. In overhead views the shadow often carries more information than the object itself. You do not need a drone: a balcony, a bridge, a parking structure or a staircase gives you a high enough view of a sidewalk, a plaza or a beach. Elevated perspectives cover more places to find that viewpoint.
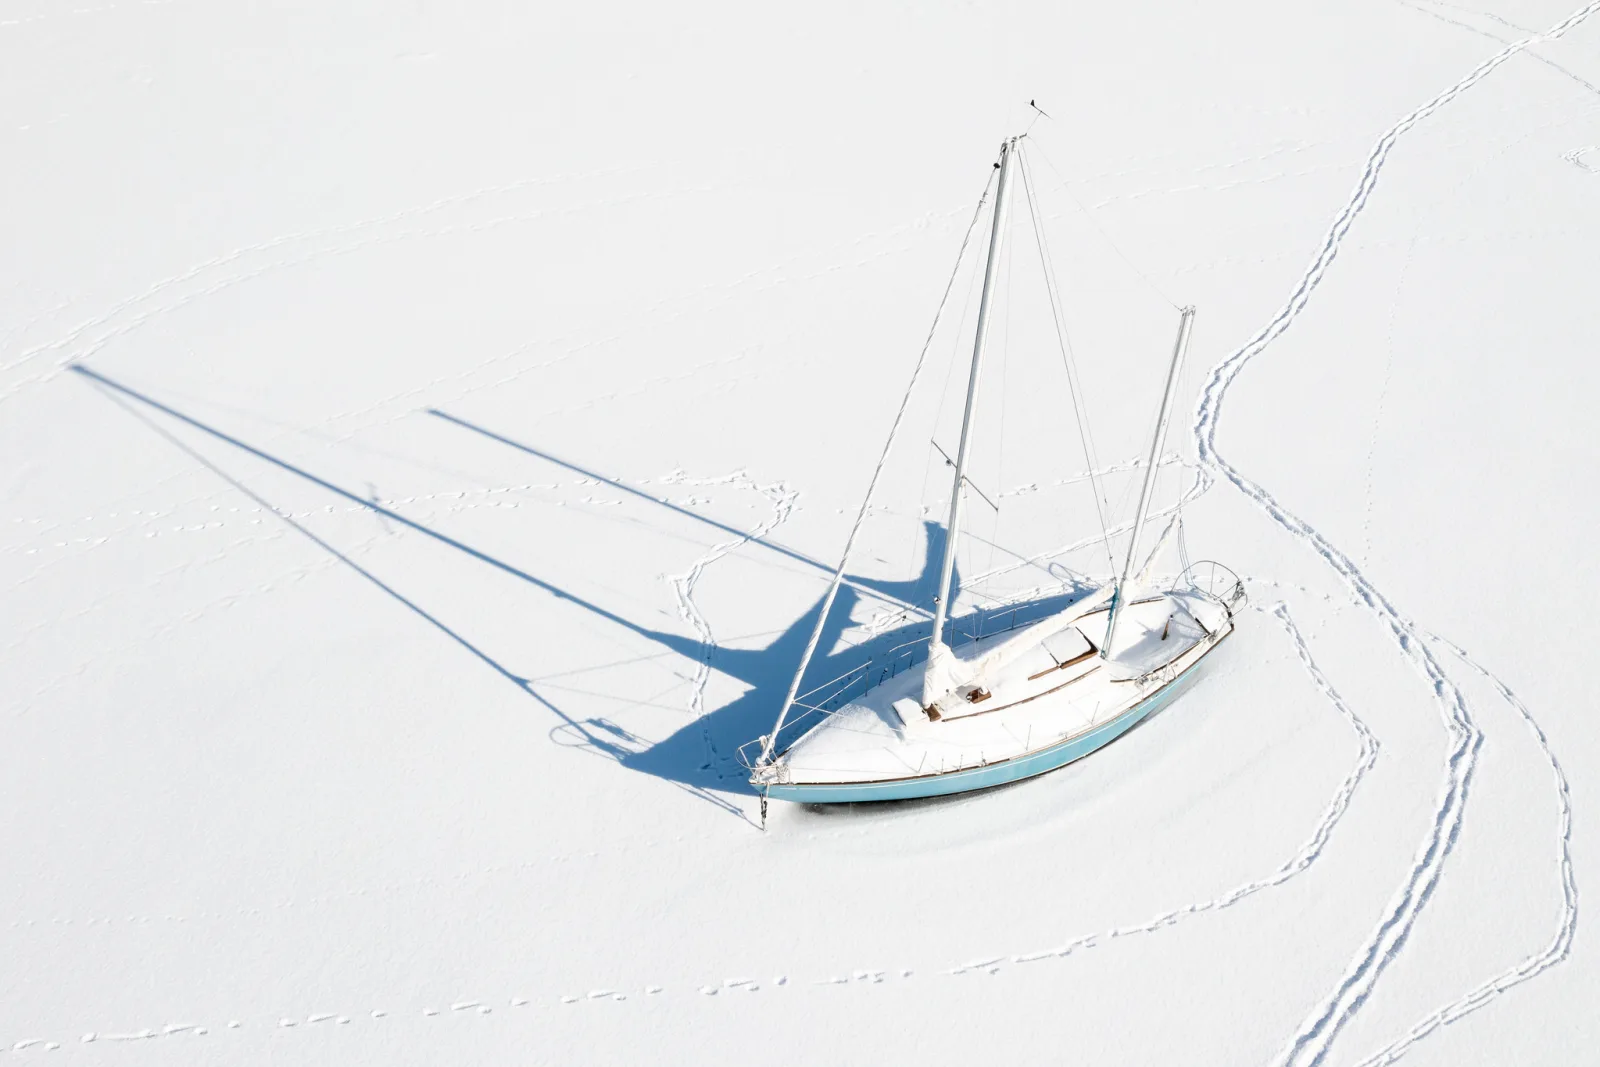
The sailboat shows why snow and pale sand are ideal shadow surfaces: they are bright, smooth and nearly featureless, so even thin lines of shadow read at full strength. The masts themselves are hard to see from above; their shadows are unmistakable.
Shadows after dark: street lights and other small sources
Night gives you a different kind of shadow. Street lights, shop signs, headlights and lamps are small, hard sources, and they sit close to the scene instead of 150 million kilometers away. That changes the geometry:
- Shadows radiate outward from the light instead of running parallel as sun shadows do.
- Shadow length changes as a person moves. Standing under a street light, their shadow is a short pool at their feet. As they walk away, it grows longer and longer, until it stretches far down the sidewalk. Wait for the moment the shadow is the length you want.
- Multiple lights make multiple shadows. A person between two street lights casts two shadows in opposite directions, often of different lengths and colors if the lights differ. It is one of the most distinctive night effects.
- Close sources enlarge shadows. A figure near a light, casting a shadow on a wall behind them, throws a huge shadow. Moving closer to the light makes the shadow bigger and softer at the edges; moving closer to the wall makes it smaller and sharper.
Expose for the pool of light and let the rest go black, exactly as in daylight. You will usually need a higher ISO and a wide aperture to keep a handheld shutter speed, and the mixed colors of different lamps are part of the character. The broader techniques for working at night on the street are in night street photography.
Shadows in black and white
Shadow photographs are already mostly tone: a bright surface and a dark shape. Color often adds little, and sometimes distracts, with the blue cast in the shadows or a clash between warm light and cool shade. Converting to black and white removes those distractions and leaves the graphic core of the image.
In the conversion, push the lit surface bright and the shadow deep, and check that the shadow shape is still clean at the edges. If a surface is a single color, like red brick or green grass, you can brighten that color in the conversion to strengthen the contrast with the shadow. A crisp shadow on a bright, even ground is one of the rare scenes where very high contrast almost always helps.
For deliberately dark, dramatic images where shadow fills most of the frame and a small area is lit, see chiaroscuro. Where the object itself becomes the dark shape against a bright background, rather than its cast shadow, that is a silhouette.
Common mistakes
- Exposing for the shadow. The lit ground blows out and the shape loses its edge. Fix: expose for the sunlit surface and let the shadow go dark.
- Shooting shadows on busy surfaces. Gravel, patterned tiles and leaf litter break up the shape. Fix: look for plain pavement, sand, snow, walls and lawns.
- Going out at midday in summer. Shadows are short blobs under objects. Fix: go in the first or last two hours of sun, or in winter.
- Waiting for a hazy sun. Thin cloud softens edges. Fix: shoot on clear days, and use objects close to their surfaces for the crispest outlines.
- An accidental self-portrait. Your own shadow creeps into the bottom of the frame. Fix: change your angle to the sun, or include your shadow whole and on purpose.
- Half object, half shadow. Neither reads as the subject. Fix: choose shadow alone, or shadow and owner clearly together.
Try this
On the next clear day, go out in the hour before sunset with one goal: twenty minutes of shadows, no objects. Find a plain surface, a sidewalk, a parking lot or a lawn, near something that casts an interesting shadow (a railing, a bicycle, a tree, a friend).
- Set your exposure on the lit ground and dial in about one stop of negative exposure compensation if the frame is mostly shadow.
- Make one photograph with the sun behind you, one with it to your side, and one shooting toward it. Watch how the shadow’s direction and length change.
- Find a shadow that falls across steps, a curb or a corner, and photograph the distortion.
- Photograph your own shadow deliberately, whole and clean.
- Find a high point, even a flight of stairs, and shoot a shadow from above.
Convert the best three to black and white. Compare how much the shadows alone communicate about the objects that cast them.
Frequently asked questions
What is the best time of day for shadow photography?
The first and last two hours of direct sun, when the sun is below about 30 degrees and shadows are at least about 1.7 times the height of their objects. In winter, and at higher latitudes, the sun stays low enough for long shadows much of the day.
Why are my shadows blue?
Areas in shadow on a clear day are lit only by blue skylight, not direct sun, so they record with a cool cast. You can leave it for contrast, correct it locally, or convert to black and white.
Can I photograph shadows on a cloudy day?
Not cast shadows. An overcast sky is a huge, soft light source, so objects cast almost no shadow. Broken cloud is workable: wait for gaps when the sun comes through clearly.
Do I need a special lens for shadow photography?
No. A wide lens exaggerates long shadows stretching toward the camera, and a longer lens isolates a single shadow shape on a wall, but any lens works. The light and the surface matter far more than the gear.
Related guides
- Direction of Light: how the light’s angle decides where shadows fall.
- The Qualities of Light: why small sources make hard shadows.
- Shooting in Harsh Daylight: turning hard midday light into an advantage.
- Silhouettes: when the object itself becomes the dark shape.
- Golden Hour Photography: the low, warm sun that makes the longest shadows.
- Black and White Photography: converting and toning graphic, high-contrast images.
- Night Street Photography: working with street lights and pools of light.