Cinematic photography is the art of making still images feel like frames pulled from a movie. When a photograph is described as cinematic, it usually means the image has a sense of narrative, a distinctive color palette, dramatic lighting, and a compositional style borrowed from the language of film. It is one of the most aspirational aesthetic goals in modern photography because movies have trained our eyes to associate certain visual qualities with storytelling, emotion, and production value. Learning to create cinematic images will transform the way you approach every photograph, from the way you see light to how you frame your subjects.
This guide covers the core principles that make photographs feel cinematic: color grading, aspect ratios, depth of field, lighting techniques, and compositional framing borrowed from cinema. Each section includes practical techniques you can apply immediately, whether you are shooting portraits, street scenes, landscapes, or personal projects.
What Makes a Photo Look Cinematic
Before getting into specific techniques, it is worth defining what cinematic actually means in the context of still photography. The term gets used loosely, but there are specific, identifiable qualities that separate a cinematic image from an ordinary one.
Intentional color palette. Movies are color-graded by professionals who spend weeks refining every scene’s palette. Cinematic photographs similarly use deliberate, controlled color rather than whatever the camera captures by default. The colors serve a mood or narrative purpose.
Shallow depth of field. Movies shot on large sensors and fast lenses feature beautiful background separation. This shallow depth of field isolates subjects from their environments and creates the creamy bokeh that our eyes associate with high-production-value filmmaking.
Dramatic or motivated lighting. In cinema, every light source is intentional. Cinematic photographs exhibit the same quality, where the light appears to come from a logical source within the scene and creates a clear interplay of highlights and shadows. Flat, even lighting rarely feels cinematic.
Widescreen aspect ratio. The 2.39:1 or 16:9 aspect ratio immediately signals “cinema” to our brains. These wider formats change how we read an image, creating a horizontal emphasis that feels panoramic and storytelling-oriented.
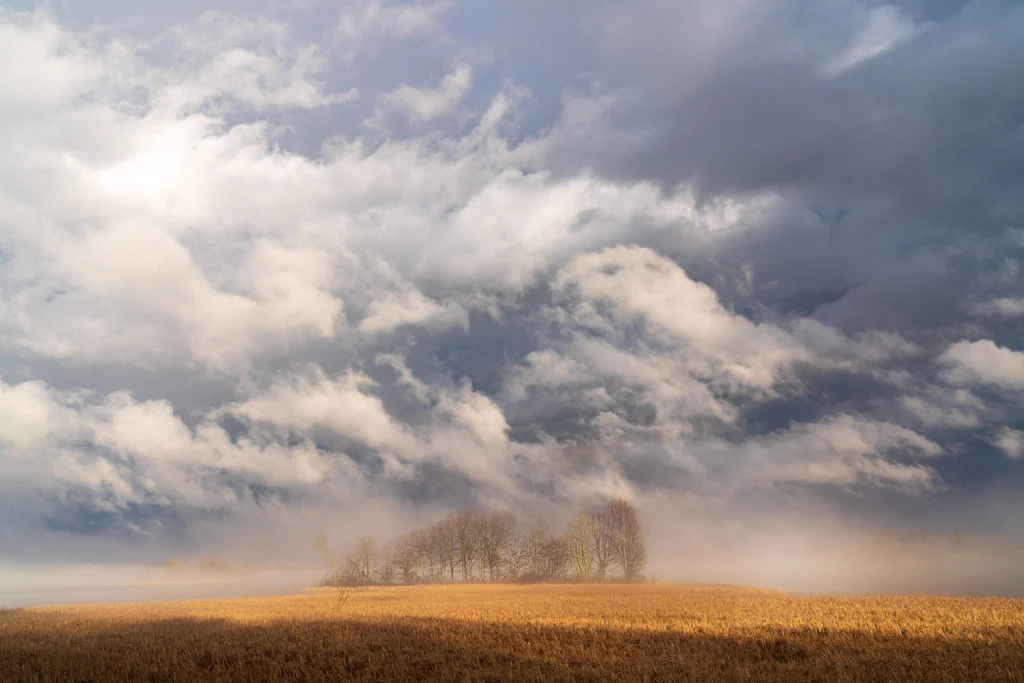
Sense of narrative. Perhaps the most important quality. A cinematic photograph implies that something just happened, is happening, or is about to happen. There is a sense of a larger story beyond the frame. The viewer fills in the narrative, and that engagement is what makes cinematic images so compelling.
Cinematic Color Grading
Color is the single most powerful tool for creating a cinematic feel in your photographs. The specific color palette you choose determines the emotional register of the image and whether it reads as cinematic or simply well-edited.
Teal and Orange: The Hollywood Standard
The teal and orange color palette has dominated Hollywood blockbusters for decades, and there is solid color theory behind its popularity. Teal and orange sit on opposite sides of the color wheel, making them complementary colors that create maximum visual contrast when placed together. Human skin tones fall in the warm orange range, so pushing shadows and backgrounds toward teal creates natural separation between subjects and their environments.
To achieve this look in Lightroom, start with the Color Grading panel. Add teal (a blue-green hue at around 200 degrees) to the shadows with a saturation of 20 to 40. Add warm orange (around 30 to 40 degrees) to the highlights with a similar saturation. In the HSL panel, shift blue and aqua hues toward teal, and shift orange and yellow hues to reinforce the warm tones. Reduce the saturation of greens, which compete with the teal-orange palette, and increase the saturation of oranges slightly.
The key to making teal and orange look sophisticated rather than garish is restraint. Blockbuster movies apply this palette to every scene with heavy-handed precision, but for photography, a subtler version is usually more effective. The teal and orange should feel like a natural characteristic of the light, not an obvious filter.
Desaturated and Moody
Many of the most visually striking films use a desaturated palette rather than bold, vivid colors. Think of the muted greens and grays of a war film, or the cool, drained tones of a psychological thriller. This approach creates mood through what is absent, pulling color out of the image to create tension, melancholy, or gravitas.
Start by reducing overall saturation by 20 to 35 points. Then selectively adjust individual color channels in the HSL panel. Desaturate greens and yellows heavily (they become muted earth tones), reduce the saturation of blues and cyans, but preserve some warmth in skin tones by keeping orange saturation closer to its original level. Shift the overall white balance slightly cool for a somber mood, or slightly warm for a dusty, arid feel.
Add a slight green or blue tint to the mid-tones using the Color Grading panel. Many desaturated cinematic looks have a subtle undertone color that gives the image a cohesive feel. Crush the blacks slightly by lifting the bottom of the tone curve, and pull down the highlights to compress the overall tonal range. The result should feel like a muted, atmospheric world where color exists but does not demand attention.
Warm Film Emulation
Many indie films and dramas use a warm, amber-toned palette that references the look of specific film stocks shot under tungsten or golden-hour lighting. This approach feels intimate, nostalgic, and human. It works beautifully for portraits, interior scenes, and any image where you want the viewer to feel warmth and emotional connection.
Push the white balance warm by 500 to 1500 Kelvin beyond neutral. Add amber or golden tones to the highlights and warm brown tones to the shadows. Reduce the saturation of cool colors (blues, cyans, purples) while preserving or slightly boosting warm colors. Apply a gentle S-curve for moderate contrast, and add a subtle film grain to complete the analog cinema quality. This palette pairs exceptionally well with golden hour or window-lit scenes.
Cool Monochromatic
For a different flavor of cinematic, consider a cool monochromatic palette built around blues, grays, and silver tones. This look is common in thrillers, science fiction, and noir-inspired cinematography. It creates a sense of isolation, coldness, or clinical detachment.
Shift white balance cool by 500 to 1000 Kelvin below neutral. Desaturate all warm colors heavily while preserving blues and cyans. Add a steel blue tint to the shadows and a silver or pale blue to the highlights. Increase contrast moderately. This palette works best for urban environments, night scenes, and images with artificial lighting.
Aspect Ratios and Letterboxing
Nothing signals “cinema” more immediately than a widescreen aspect ratio. The standard 3:2 aspect ratio of most digital cameras is associated with still photography, while wider formats are associated with motion pictures. Changing your crop ratio is one of the simplest and most effective ways to give your images a cinematic feel.
Common Cinematic Aspect Ratios
16:9 (1.78:1) is the standard widescreen television and streaming format. It is wider than the 3:2 photo standard but narrower than theatrical widescreen. This is a good starting point for cinematic crops because it feels noticeably wider without being so extreme that it limits composition options.
2.39:1 (sometimes called 2.40:1 or Scope) is the anamorphic widescreen format used in most Hollywood blockbusters and prestige films. This ultra-wide crop dramatically changes the feel of an image, creating a sweeping, panoramic quality. It works best for landscapes, establishing shots, and images where horizontal elements dominate the composition.
2.76:1 (Ultra Panavision) is an extremely wide format used in a small number of epic films. It is challenging to use effectively in still photography because the format is so horizontally dominant that vertical elements get lost, but it can create stunning results for the right subject matter.
1.85:1 is the standard theatrical widescreen format, slightly wider than 16:9. It is a subtle crop from 3:2 that does not feel dramatically different but adds just enough width to shift the image toward a cinematic register.
Adding Letterbox Bars
Some photographers add black letterbox bars to the top and bottom of their images rather than actually cropping. This preserves the full image while adding the visual shorthand of a widescreen format. To add letterbox bars in Photoshop, increase the canvas size vertically, centered, with a black fill. The bar height should match your target aspect ratio relative to the image width. For 2.39:1 bars on a 16:9 image, calculate the bar height as (image width / 2.39 subtracted from image height) divided by 2, and add that amount of black to the top and bottom.
Be aware that letterboxing is controversial among some photographers who view it as a gimmick. The crop-based approach (actually shooting or cropping to the wider format) is generally considered more legitimate because you are working within the constraints of the format rather than simply pasting bars over a standard image. If you choose to letterbox, ensure your composition works within the visible area, not just the full uncropped frame.
Depth of Field for Cinematic Images
Shallow depth of field is one of the defining characteristics of cinematic imagery. When you watch a movie, the background behind the actors is almost always softly blurred, drawing your eye to the subject and creating a sense of three-dimensional depth in a two-dimensional frame. Replicating this in still photography requires understanding a few key principles.
Achieving Maximum Background Separation
Three factors control depth of field: aperture, focal length, and the distance between your subject and the background. To maximize background blur, use the widest aperture your lens allows (f/1.4, f/1.8, or f/2.8), shoot at a longer focal length (85mm to 200mm rather than wide-angle), and position your subject far from the background. If you can only control one of these factors, increasing the distance between subject and background is usually the most effective.
Cinema typically uses focal lengths between 35mm and 85mm (in full-frame equivalent) for narrative scenes, with 50mm and 85mm being the most common for dialogue and character shots. These focal lengths provide a natural perspective that does not distort faces or compress backgrounds too dramatically. If you want your stills to match the cinematic look, shooting in this focal range with a wide aperture will produce the most film-like depth of field.
The Quality of Bokeh
Not all background blur is created equal. The quality of bokeh (the aesthetic character of out-of-focus areas) varies significantly between lenses. Cinematic lenses produce smooth, creamy bokeh with soft-edged circles and gentle transitions from sharp to unsharp. Lenses with busy, distracting bokeh that shows hard edges, onion rings, or swirly patterns can undermine the cinematic feel even at wide apertures.
Lenses with more aperture blades (9 or more) produce rounder, more pleasing bokeh circles. Prime lenses generally produce better bokeh than zooms at equivalent apertures. And wider apertures (f/1.4 to f/2) produce more pronounced bokeh than moderate apertures (f/4 to f/5.6). If cinematic imagery is important to your work, invest in at least one fast prime lens with excellent bokeh characteristics.
Lighting for Cinematic Photography
In filmmaking, lighting is everything. Cinematographers spend hours setting up lights for a single scene, sculpting the light to create mood, direct attention, and support the emotional tone of the story. You can apply the same principles to still photography, whether using natural light or artificial sources.
Motivated Lighting
The concept of “motivated” lighting means that every light source in the scene appears to come from a logical origin, like a window, a lamp, a streetlight, or the sun. Even when cinematographers add artificial lights to a scene, they position and shape them to look like they are coming from a visible or plausible source. This makes the lighting feel natural and immersive rather than artificially imposed.
In your photography, look for existing light sources and work with them rather than against them. Position your subject near a window and let the directional light create natural shadows across their face. Use a single strong light source to create dramatic side-lighting. If you add an artificial light, place it where a practical light source (like a lamp or overhead fixture) could logically exist. The goal is lighting that feels organic to the scene.
The Power of Shadow
Cinematic lighting is defined as much by shadow as by light. Flat, even illumination that eliminates all shadows looks like a snapshot or a corporate headshot, not a frame from a movie. Cinematic images allow shadows to exist, using them to create depth, mystery, and visual interest. The interplay between light and shadow, known as chiaroscuro in the art world, is a fundamental building block of cinematic visual style.
Do not be afraid to let parts of your image fall into darkness. A face half-lit by a window with the other half in shadow is far more cinematic than a face evenly lit from all directions. When editing, resist the temptation to lift all shadows to recover detail. In cinematic imagery, dark shadows are not a problem to solve. They are a compositional element to embrace.
Color Temperature and Contrast
Cinematic lighting frequently uses color temperature contrast, where different light sources in the same scene have different color temperatures. A classic example is warm tungsten interior light from a lamp contrasting with cool blue daylight coming through a window. This creates visual richness and depth that single-temperature lighting cannot match.
To use color temperature contrast in your photography, mix light sources intentionally. Photograph a subject lit by warm candlelight or a table lamp near a window with cool daylight. Or use the warm glow of golden hour sun on your subject against a cool blue sky in the background. Do not try to correct these mixed temperatures to be uniform. The contrast between warm and cool is what creates the cinematic quality.
Cinematic Framing and Composition
Cinematographers use specific framing techniques to guide the viewer’s eye and convey narrative information. Many of these translate directly to still photography composition.
Lead Room and Negative Space
In cinema, characters are typically given “lead room” or “nose room,” meaning there is more space in the frame in the direction they are facing or moving than behind them. This creates a sense of forward motion and narrative direction. In still photography, apply the same principle by placing your subject off-center with more space ahead of their gaze. This creates visual tension and implies that something exists beyond the frame in the direction they are looking.
Negative space, the empty areas of the frame, is used more aggressively in cinematic composition than in typical photography. A small figure in a vast landscape, a face in the lower third of the frame with empty space above, or a subject surrounded by darkness all feel inherently cinematic because they suggest a world larger than the frame contains.
Framing Within Frames
Cinematographers love to frame subjects through doorways, windows, arches, and other structural elements. This technique creates layers of depth, directs the viewer’s eye toward the subject, and adds visual complexity. In still photography, actively look for natural frames: doorways, windows, gaps between buildings, tree branches, tunnels, arches, and any structural element that creates a frame within the photograph’s frame. Position your subject within the inner frame and the image immediately takes on a more cinematic quality.
Foreground Elements
Another cinematic technique is placing out-of-focus elements in the foreground of the frame. Shooting through leaves, past a blurred shoulder, through a rain-streaked window, or past any semi-transparent foreground element creates layers of depth that make the image feel three-dimensional. This is how cinematographers create the sensation of the camera being present in the scene rather than observing from outside. In your photography, actively seek foreground elements to shoot through. Even a slightly out-of-focus hand, plant, or surface near the lens can add a cinematic layered quality to an otherwise straightforward composition.
Symmetry and Leading Lines
Many iconic cinematic compositions use symmetry or strong leading lines to create visual impact. Director Wes Anderson is famous for dead-center symmetrical framing, while countless films use roads, corridors, and architectural lines to draw the eye deep into the frame. Look for opportunities to use both techniques. Perfectly symmetrical compositions feel deliberate and controlled (cinematic qualities), while leading lines that converge at a vanishing point create depth and invite the viewer into the scene.
Post-Processing Workflow for Cinematic Images
With the shooting techniques covered, here is a complete post-processing workflow for turning your photographs into cinematic images.
Step 1: Set the crop. Decide on your aspect ratio and crop first, before any tonal or color adjustments. Your composition choices should be made within the cinematic frame, not adapted from a standard 3:2 crop after editing. Use 16:9 for a versatile cinematic crop or 2.39:1 for maximum widescreen impact.
Step 2: Base exposure. Set overall exposure, highlights, and shadows to create the tonal foundation. For most cinematic looks, allow shadows to be darker than your instinct suggests. Do not recover every shadow detail. Pull highlights down to avoid any pure white clipping, as cinematic images rarely have blown highlights.
Step 3: Tone curve. Apply a gentle lift to the very bottom of the curve for faded blacks if desired. Add a subtle S-curve for controlled contrast. Many cinematic looks feature moderately lifted shadows and slightly compressed highlights for a refined tonal range.
Step 4: Color grading. Apply your chosen cinematic palette, whether teal and orange, desaturated moody, warm film, or cool monochromatic. Use the Color Grading panel for shadow and highlight tints, and the HSL panel for targeted color adjustments. Work gently. The best cinematic color grades are subtle enough that you feel them rather than see them.
Step 5: HSL refinements. Fine-tune individual color channels. Shift blues toward teal, desaturate distracting colors, and adjust the luminance of colors to control how bright or dark different elements appear. Pay special attention to skin tones if people are in the frame, as skin should look natural even within a heavily graded palette.
Step 6: Vignetting. Add a subtle to moderate vignette to draw focus toward the center of the frame. Cinematic vignettes are typically gentler than dramatic portrait vignettes. Aim for a soft, gradual darkening at the edges, around -25 to -40 in Lightroom’s Effects panel.
Step 7: Grain. Add a light grain to break up the digital perfection and add analog character. Cinematic grain should be subtle, just enough to add texture without being a prominent visual element. Amount 15 to 25 with a size of 25 to 35 works for most cinematic looks.
Step 8: Sharpening. Apply moderate sharpening. Cinematic images typically avoid the hyper-sharp look of modern digital photography. Keep sharpening conservative (Amount 40 to 60 in Lightroom, with masking to protect smooth areas) for a look that is crisp but not aggressively sharp.
Common Mistakes in Cinematic Photography
Over-grading the colors. The most common mistake is pushing the color grade so far that the image looks alien rather than cinematic. Real movies are graded by professionals who understand that the grade should serve the story, not overpower it. If your color adjustments are the first thing a viewer notices, you have gone too far. Scale back until the grade feels like a natural quality of the light rather than an applied effect.
Letterboxing without composition. Adding black bars to a standard photo does not make it cinematic. The composition within the widescreen frame needs to work. Subjects should be placed thoughtfully within the wider format, with attention to how the horizontal space is used. If you crop to 2.39:1 and your subject sits in the center with empty space on both sides, you have a poorly composed widescreen image, not a cinematic one.
Ignoring lighting quality. Color grading cannot rescue flat, uninteresting light. The foundation of cinematic imagery is dramatic, directional, or atmospheric lighting. Before reaching for the editing tools, invest time in finding or creating better light. A well-lit image with minimal grading will always look more cinematic than a poorly lit image with heavy post-processing.
Forcing the cinematic look on every image. Not every photograph needs to or should look cinematic. Some subjects are better served by a bright, clean, high-contrast edit. The cinematic approach works best when it serves the subject matter and mood. Save it for images with genuine narrative potential, atmospheric lighting, or subjects that benefit from a moody, story-driven treatment.
Neglecting the story element. A technically perfect cinematic grade on a photograph with no narrative content feels hollow. The most compelling cinematic images imply a story: a figure walking into fog, a hand reaching for something off-frame, a chair beside a window casting long shadows. Before worrying about color grading, ask yourself what story your image tells. If the answer is “none,” the cinematic treatment may not be the right choice.
Over-blurring the background. Shallow depth of field is cinematic, but artificially blurring backgrounds in post-processing rarely looks natural. The blur pattern, edge transitions, and depth mapping of software-generated blur do not match the smooth, optical bokeh of a real lens. If you want shallow depth of field, achieve it in-camera with a wide aperture and appropriate subject-to-background distance.
Try This: Cinematic Photography Exercises
Exercise 1: The Color Palette Study. Choose three of your favorite films and take a screenshot from a visually striking scene in each one. Analyze the color palette: what colors dominate? Where are the warm tones and cool tones? How saturated or desaturated is the image? Then attempt to recreate each palette on one of your own photographs using only the Color Grading and HSL panels. This teaches you to see and replicate specific cinematic color relationships.
Exercise 2: The Widescreen Challenge. Spend an entire shooting session composing exclusively for a 2.39:1 aspect ratio. Use tape on your LCD screen or set a custom crop overlay in your camera if available. This forces you to think about horizontal composition, lead room, negative space, and how to use the extreme width of the cinematic format. Review the results and compare them to your usual 3:2 compositions.
Exercise 3: One Light Cinematic Portrait. Set up a single light source (a window, a desk lamp, or a single flash/strobe) and photograph a subject from multiple angles. Move the light and the subject relative to each other to create different shadow patterns. Edit each version with a cinematic color grade and compare the results. This exercise demonstrates how profoundly lighting direction affects the cinematic quality of an image.
Exercise 4: Frame Within a Frame. Go out with your camera and find at least ten natural frames to shoot through: doorways, windows, arches, gaps between objects, tunnels, or any structure that creates a frame within your photograph. Place a subject within each inner frame and evaluate which combinations work best. This builds your eye for the layered depth that defines cinematic composition.
Exercise 5: The Narrative Still. Create five photographs where each one tells an implied story. Before shooting, write one sentence describing the story. Then compose, light, and edit the image to convey that narrative without words. Show the finished images to someone who has not read your descriptions and ask them what story they see. This is the ultimate cinematic photography exercise because it develops the storytelling instinct that separates cinematic images from merely well-graded ones.
Frequently Asked Questions
Do I need an expensive camera to shoot cinematic photos?
No. While a full-frame camera with fast lenses makes it easier to achieve shallow depth of field and clean high-ISO performance, cinematic photography is primarily about lighting, color grading, and composition. These elements are independent of camera body. A crop-sensor camera with a fast 35mm or 50mm prime lens can produce beautifully cinematic images. Focus your investment on one or two quality prime lenses with wide maximum apertures rather than an expensive camera body.
What is the best focal length for cinematic photography?
The 35mm and 85mm focal lengths (full-frame equivalent) are the workhorses of cinematic imagery. The 35mm lens gives you a natural, slightly wide perspective that works for environmental portraits and establishing shots, similar to how many dialogue scenes are filmed. The 85mm lens provides beautiful compression and background separation for tighter character-focused compositions. If you can only own one lens for cinematic work, a 50mm f/1.4 or f/1.8 is the most versatile compromise.
How do I add letterbox bars to my photos?
The preferred method is to crop your image to the desired widescreen ratio in your editing software (Lightroom, Photoshop, or any application with custom crop ratios). In Lightroom, enter a custom aspect ratio in the crop tool. For 2.39:1, enter 2.39 and 1. For 16:9, many crop tools include this as a preset option. If you specifically want to add black bars rather than cropping, increase the canvas size in Photoshop with a black fill. But actual cropping is more widely respected as a compositional choice.
Can I achieve a cinematic look with natural light only?
Absolutely. Many cinematographers prefer natural light, and some of the most cinematic films ever made used primarily available light. The key is finding and shaping natural light with intention. Shoot during golden hour for warm, directional light. Use window light for indoor scenes with beautiful shadow gradients. Shoot on overcast days for soft, diffused light that wraps around subjects. Fog, rain, and atmospheric conditions add cinematic drama naturally. The best natural-light cinematic photographers develop a deep awareness of how light quality changes throughout the day and use that knowledge to shoot at the optimal moment.
Is cinematic photography just color grading, or is there more to it?
Color grading is only one component. Genuine cinematic photography combines intentional color, dramatic lighting, appropriate depth of field, considered framing and composition, and a sense of narrative or story. An image with a cinematic color grade but flat lighting and careless composition will not feel cinematic. The most effective approach is to prioritize lighting and composition during the shoot, then use color grading as the finishing touch that ties everything together.
How do I develop my own cinematic style rather than copying movie looks?
Start by studying films you admire and understanding what makes their visual style distinctive. Then experiment with applying those principles to your own work, adapting them to your subjects and your vision. Over time, you will naturally gravitate toward certain color palettes, lighting approaches, and compositional preferences. Your cinematic style will emerge from the intersection of what you find visually compelling in cinema and what feels authentic to your own photographic voice. The goal is not to replicate any single film’s look, but to develop a personal visual language informed by the principles of cinematic storytelling.
Should I shoot in RAW for cinematic photography?
Yes, always. Cinematic photography involves significant color grading and tonal manipulation in post-processing. RAW files contain far more color and tonal data than JPEGs, giving you the latitude to push color grades, recover highlights, and sculpt shadows without degrading image quality. Shooting in RAW is particularly important for cinematic work because the color grading process requires pulling colors and tones in directions that compressed JPEG files handle poorly. The difference in color grading flexibility between RAW and JPEG is enormous.