Cyanotype is one of the oldest photographic processes still practiced today. Invented in 1842 by Sir John Herschel, it uses iron-based chemistry and sunlight to produce images in rich, deep Prussian blue. The process is remarkably simple: mix two chemicals, coat paper, place a negative or object on top, expose in sunlight, and rinse in water. No darkroom required. No expensive equipment. Just chemistry and light. The result is a one-of-a-kind handmade print with a color palette that ranges from delicate sky blue to deep midnight navy. Cyanotype connects you to the earliest days of photography while remaining a vibrant, accessible art form. If you are already familiar with Film Photography or have explored Black And White Photography Guide, cyanotype is a natural next step into the world of handmade prints.
A Brief History of Cyanotype
Sir John Herschel discovered the cyanotype process while experimenting with iron salts and their sensitivity to light. He published his findings in 1842, just three years after the announcement of the daguerreotype. Herschel saw the process as a way to copy notes and diagrams, and indeed the term “blueprint” comes from the cyanotype process. Architectural and engineering firms used cyanotype printing to reproduce technical drawings well into the 20th century.
The first person to use cyanotype for photographic purposes was Anna Atkins, a British botanist and photographer. Between 1843 and 1853, Atkins created detailed cyanotype contact prints of algae, ferns, and other plant specimens by placing them directly on coated paper. Her book “Photographs of British Algae: Cyanotype Impressions” is widely considered the first book illustrated with photographic images. Atkins demonstrated that cyanotype was not just a copying method but a genuine photographic and artistic medium.
The Chemistry Behind Cyanotype
Cyanotype requires only two chemicals, both of which are iron-based compounds. When mixed together and exposed to ultraviolet light, they undergo a photochemical reaction that produces an insoluble blue pigment called Prussian blue (ferric ferrocyanide).
The Two Solutions
- Solution A: Ferric ammonium citrate (green form), 25 grams dissolved in 100ml distilled water
- Solution B: Potassium ferricyanide, 10 grams dissolved in 100ml distilled water
Each solution should be mixed separately and stored in brown glass bottles away from light. They remain usable for several months when stored properly. The solutions themselves are not light-sensitive. They only become light-sensitive when mixed together and coated on paper.
To create the sensitizer, mix equal parts of Solution A and Solution B immediately before use. The mixed solution is bright yellow-green. Apply it to paper within about an hour of mixing for best results.
Safety Precautions
Cyanotype chemistry is among the safest in alternative photography, but basic precautions are still important. Wear nitrile gloves when handling the sensitizer. Avoid ingesting any chemicals. Work in a well-ventilated area. Keep chemicals away from children and pets. The sensitizer will stain skin, clothes, and surfaces a deep blue that fades slowly over days. Wear old clothes or an apron.
Despite its name, potassium ferricyanide is not dangerously toxic under normal conditions. It does not release cyanide gas at room temperature. However, never mix it with strong acids, which could liberate hydrogen cyanide. Treat it with the same care you would give any laboratory chemical. Dispose of used solutions according to local regulations.
Coating Paper
The paper you choose significantly affects the final print. Watercolor paper works best because its fibers absorb the sensitizer well and hold up to water processing. Choose a heavy weight (140 lb / 300 gsm or heavier) cold-pressed or hot-pressed paper. Hot-pressed paper has a smoother surface and produces finer detail. Cold-pressed paper has a textured surface that adds a handmade quality to the print.
Work under dim incandescent light or in a room without direct sunlight. Mix equal parts Solution A and Solution B in a small container. Using a wide foam brush or a Japanese hake brush, apply the sensitizer in smooth, even strokes across the paper. Work quickly to get even coverage without puddling. Apply in one direction, then crosshatch by brushing perpendicular to your first strokes.
Let the coated paper dry completely in the dark. A dark closet or a drawer works. Drying takes 30 minutes to an hour depending on humidity. The paper is ready when it feels dry to the touch and has an even yellow-green color. You can use a hair dryer on a cool setting to speed drying, but avoid heat, which can partially expose the sensitizer.
Creating Negatives for Contact Printing
Cyanotype is a contact printing process. The negative (or object) sits directly on the coated paper during exposure. The print is the same size as the negative. This means you need a negative as large as the print you want to make.
Digital Negatives
The most practical approach for most photographers is creating digital negatives. Start with a digital image (or a scanned film image). In Photoshop For Photographers or another image editor, convert the image to grayscale, invert it to a negative, and flip it horizontally (mirror). Print this negative onto transparent inkjet film (OHP transparency film) or onto special digital negative film. The inkjet ink serves as the density that blocks UV light during exposure.
The key challenge is getting the density range of the digital negative to match the exposure range of the cyanotype process. Cyanotype has a relatively long tonal scale, so you may need to adjust the contrast curve of your negative. Many practitioners create custom adjustment curves through test strips. Print a step wedge, expose and develop it, and adjust your curve until you get a full range of tones from white to deep blue.
Photogram Objects
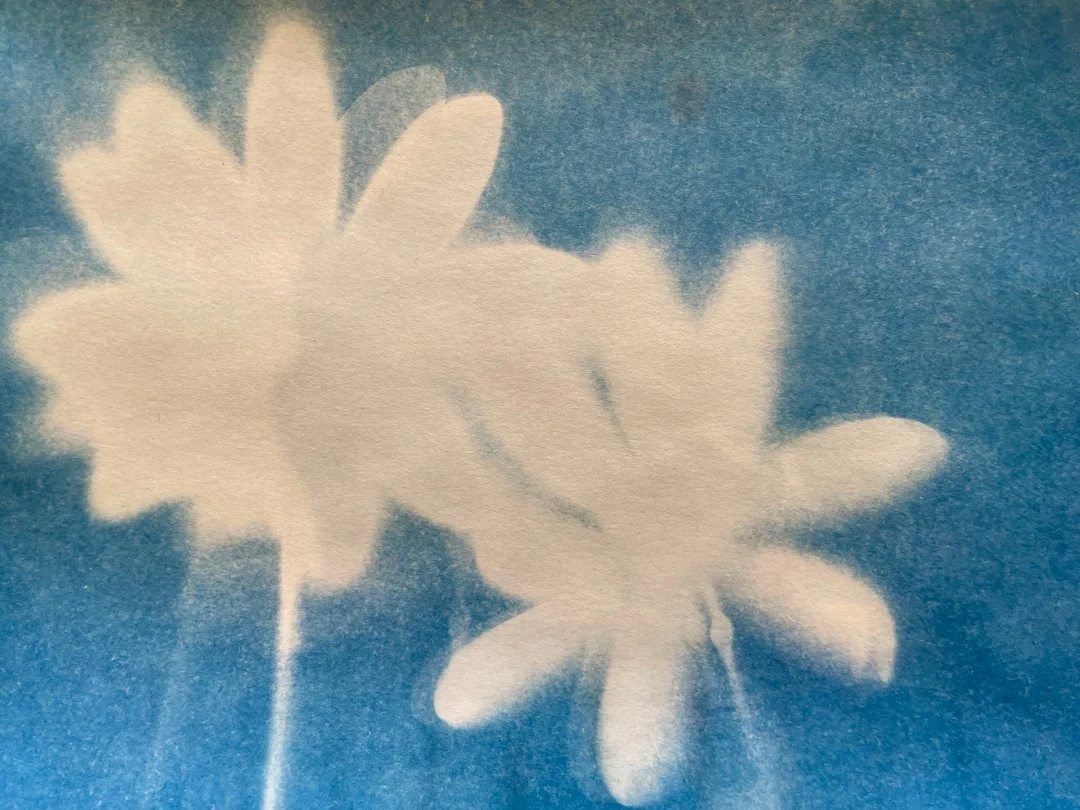
You can also create cyanotypes without any negative at all. Place objects directly on the coated paper: leaves, flowers, feathers, lace, tools, keys, or anything with an interesting silhouette or translucency. This is exactly what Anna Atkins did with her botanical specimens. The objects block the light, leaving white silhouettes against the blue background. Translucent objects create beautiful intermediate tones. This is a wonderful way to explore Photography Composition principles with physical objects, experimenting with Negative Space, balance, and arrangement.
Exposing in Sunlight
Place your coated paper in a contact printing frame (a frame with glass and a backing board that clamps the negative tightly against the paper) or simply sandwich the negative and paper under a sheet of glass. Expose in direct sunlight. Cyanotype is sensitive to ultraviolet light, so direct sun works best. UV-rich conditions (high altitude, clear sky, midday) shorten exposure times. Overcast skies still work but require longer exposures.
Exposure times vary enormously depending on the UV intensity, the density of your negative, and the strength of your sensitizer. In bright summer sun, exposure may take 5 to 15 minutes. On a cloudy day or in winter, 20 to 45 minutes or longer. The concept of Exposure Triangle does not directly apply here (there is no aperture or shutter speed to adjust), but understanding how light intensity and time relate to exposure helps you predict results. You can also expose under a UV lamp or a UV light box for consistent, weather-independent results.
During exposure, the sensitized areas change from yellow-green to a grayish-blue or silver-gray. The unexposed areas (under the dark parts of the negative) remain yellow-green. When the exposed areas have darkened noticeably and you see good contrast between exposed and unexposed areas, the print is ready for development.
A test strip is essential when starting out. Cut a coated sheet into strips, cover all but the first strip, and expose for 2 minutes. Then uncover the next strip and expose for another 2 minutes. Continue until all strips are exposed. After development, the strip with the best tonal range shows your ideal exposure time.
Developing and Washing
Development is the simplest step of all: running water. Remove the print from the contact frame and rinse it face-down under gently running tap water. The unexposed yellow-green sensitizer washes away, revealing the blue image beneath. Wash for about 5 minutes, gently moving the print, until the water runs clear and no more yellow color washes off.
The print will look lighter and less intense immediately after washing. This is normal. As the print dries, the blue deepens and intensifies significantly. A print that looks pale and washed out when wet will often dry to a rich, satisfying blue. This “dry-down” effect is one of the pleasant surprises of cyanotype printing. Full color development continues over 24 hours, so judge your final results the next day.
For maximum blue density, add a very small amount of hydrogen peroxide (3% drugstore variety) to the final wash water, or briefly dip the washed print in a dilute hydrogen peroxide bath. This oxidizes the Prussian blue pigment to its maximum intensity. The effect is immediate and dramatic.
Toning Cyanotypes
While the classic Prussian blue is beautiful, cyanotypes can be toned to other colors. Toning involves partially or fully bleaching the blue image and then redeveloping it in a toning bath. This opens up a surprising range of color possibilities, similar to how Color Grading Photography transforms the mood of digital images. The principle is the same: shifting color to serve your artistic vision.
Tea Toning
The most popular alternative tone. Brew a strong batch of black tea (several tea bags in a small amount of water). Soak the fully developed and dried cyanotype in the tea for 10 to 30 minutes. The tannins in the tea react with the iron in the print, shifting the color from blue toward warm brown, sepia, or purple-brown depending on the tea strength and soaking time. Some photographers partially bleach the print first in a dilute washing soda solution to create a split-tone effect with blue shadows and warm highlights.
Other Toning Methods
- Coffee: Similar to tea but often gives a warmer, more yellow-brown tone
- Wine: Red wine produces purplish tones. White wine gives more subtle shifts.
- Tannic acid: A more controlled version of tea toning
- Washing soda bleach: Soak in dilute sodium carbonate to partially bleach the image, then re-wash. Creates lighter, more ethereal tones.
- Ammonia: Brief exposure to ammonia fumes can lighten and shift the color. Use with caution and ventilation.
Creative Applications
Cyanotype works on far more surfaces than just paper. You can coat fabric (cotton, silk, linen), wood, ceramic bisqueware, leather, eggshells, and many other natural materials. The key requirement is that the surface absorbs the sensitizer and can withstand a water wash.
- Print on cotton fabric and sew into pillows, tote bags, or wall hangings
- Coat watercolor paper and combine cyanotype with painting, drawing, or collage
- Create layered prints by exposing multiple negatives on the same sheet, similar to Double Exposure Photography effects
- Print botanical specimens directly (like Anna Atkins) for elegant wall art
- Coat wooden panels for rustic, archival display pieces suitable for Preparing Photos For Print
Multi-Layer and Advanced Techniques
Once you have mastered the basic cyanotype workflow, multi-layer printing opens up more creative control. You can coat, expose, develop, dry, re-coat, and expose again on the same sheet of paper. Each layer deepens the blue and adds new image information. This allows you to combine a photographic negative with a photogram element, or overlay two different photographs on the same print. The cumulative layering produces richer, deeper blues than a single exposure can achieve.
Another advanced technique is bleaching back a fully developed cyanotype using a dilute solution of washing soda (sodium carbonate). The bleach removes blue from the highlights and midtones first, leaving the deep shadows relatively untouched. This can create a more open, airy look with bright whites and reduced midtone density. You can also selectively bleach portions of the print using a small brush, creating hand-altered highlights in specific areas. After bleaching, the print can be re-exposed and re-developed to add new image content in the bleached areas.
Wet cyanotype is a variation where you expose the print while the sensitizer is still damp or partially dry. The wet chemistry produces a different reaction than dry chemistry, creating softer, more diffused tones with a slightly different blue character. Some practitioners intentionally sprinkle water, salt, or other substances on the wet sensitizer before exposure to create organic, unpredictable textures and patterns in the final print.
Displaying and Selling Cyanotype Prints
Cyanotype prints display beautifully when matted and framed behind glass. Use acid-free matboard to prevent chemical interaction with the print over time. UV-filtering glass adds an extra layer of protection, though well-made cyanotypes are quite lightfast. Avoid displaying cyanotypes in strongly alkaline environments (near fresh concrete or plaster) as alkaline conditions can bleach the Prussian blue pigment over time.
Handmade cyanotype prints sell well at art fairs, in galleries, and through online platforms. The handmade nature and unique blue color palette make them instantly recognizable and appealing. Price your work based on the time, materials, and artistic value, not just the cost of the chemistry and paper. A well-crafted, beautifully presented cyanotype is a fine art object that commands prices accordingly. Consider Sell Photography Online platforms as well as local galleries and craft markets.
Common Mistakes
- Uneven coating: Puddles and streaks show in the final print. Use a quality brush and work quickly with even strokes.
- Exposing before the paper is dry: Wet or damp sensitizer produces muddy, low-contrast prints. Wait until the paper is completely dry.
- Over-exposure: The image loses highlight detail and becomes a flat, dark blue. Use test strips to find the right time.
- Under-exposure: The print looks pale and washed out even after drying. Extend your exposure time.
- Washing too aggressively: Rubbing or spraying with high-pressure water can damage the image surface. Use gentle, flowing water.
- Judging the print wet: Wet cyanotypes look much lighter than they will when dry. Wait 24 hours before evaluating.
- Ignoring UV conditions: Cyanotype responds to UV light, not visible light. A bright but UV-poor environment (like behind glass) gives poor results.
Try This
- Collect several interesting botanical specimens (ferns, leaves with intricate edges, flowers). Create photograms on cyanotype-coated watercolor paper. Frame the best one.
- Make a digital negative from one of your strongest Black And White Photography Guide images. Print it as a cyanotype and compare the two versions.
- Coat a piece of cotton fabric with cyanotype sensitizer. Create a large photogram or contact print. After developing, wash the fabric gently and let it air dry.
- Experiment with tea toning. Make two identical cyanotype prints. Tone one with strong black tea for 30 minutes. Compare the two side by side.
Frequently Asked Questions
Is cyanotype chemistry safe?
Cyanotype is one of the safest alternative processes. The chemicals are iron-based, not silver-based, and are relatively low in toxicity. Wear gloves to avoid staining, work in a ventilated space, and never mix the chemicals with acids. The biggest practical risk is blue stains on your clothes and surfaces, which are persistent but not dangerous.
How long do cyanotype prints last?
Properly made cyanotype prints are remarkably archival. Anna Atkins’s prints from the 1840s are still in excellent condition in museum collections. The Prussian blue pigment is stable and lightfast when fully developed and washed. Avoid prolonged exposure to strong alkaline conditions, which can bleach the image. Frame behind UV-filtering glass for display and follow proper Color Management Photography practices if you scan your prints for digital archiving.
Can I print cyanotypes indoors?
Yes. A UV light source (a UV light box, a bank of UV fluorescent tubes, or a UV LED panel) allows you to print year-round regardless of weather. Indoor UV exposure is more consistent and repeatable than sunlight. Exposure times vary by light source but are typically 5 to 20 minutes.
What paper should I use?
Heavyweight watercolor paper (140 lb / 300 gsm or more) is the standard choice. Arches Platine, Fabriano Artistico, and Canson Montval are all popular options. Avoid papers with optical brighteners (whitening agents), which can react with the chemistry and cause uneven toning. Natural white or cream papers work best.
Can I combine cyanotype with other processes?
Yes. Cyanotype can be combined with Photo Editing For Beginners techniques. Many artists layer cyanotype with gum bichromate, van Dyke brown, or other alternative processes. You can also paint, draw, or apply watercolor over a dried cyanotype print. The blue base creates a striking foundation for mixed-media work.
Do I need to size the paper first?
Most quality watercolor papers work well without additional sizing. If you find the sensitizer soaking too deeply into the paper (producing a very faint image), you can pre-size the paper with a thin gelatin solution. Soak gelatin sheets in cold water, dissolve in warm water, brush onto the paper, and let it dry before coating with sensitizer.