Double exposure photography is one of the most striking creative techniques available to photographers. Check out our levitation photography for more details. By combining two separate images into a single frame, you can produce surreal, layered photographs that tell stories no single exposure ever could. A face filled with a forest canopy, a silhouette bursting with city lights, a portrait dissolving into ocean waves, these are the images that stop viewers mid-scroll and linger in memory. The technique has roots in the earliest days of film photography, but it remains just as powerful and relevant whether you shoot analog or digital.
This guide covers every method for creating double exposures, from the original in-camera film technique to modern digital workflows in Photoshop, along with the composition principles and subject combinations that separate compelling double exposures from muddy, confusing overlays.
What Is Double Exposure Photography
A double exposure is a photograph created by superimposing two separate exposures onto a single frame. The resulting image blends elements from both scenes, producing a layered composite where details from one exposure appear within or alongside details from the other. The effect can range from subtle and ethereal to bold and graphic, depending on the subjects chosen and how the exposures interact.
The technique originated as a darkroom and film camera process. Photographers would expose a frame of film, then expose the same frame a second time without advancing to the next one. The two images would merge directly on the emulsion, with the interaction between light and dark areas determining how the blend looked. Accidental double exposures, caused by forgetting to advance the film, sometimes produced hauntingly beautiful results, which inspired photographers to pursue the technique intentionally.
Today, double exposures can be created three ways: on film using the original in-camera method, using the multiple exposure mode built into many digital cameras, or through layer-based compositing in post-processing software like Photoshop. Each approach has its own character. Film double exposures have an organic unpredictability. In-camera digital exposures offer a controlled preview with the spontaneity of shooting live. Photoshop composites give you the most precision, allowing you to fine-tune every aspect of the blend after the fact.
Double Exposure on Film Cameras
The original double exposure technique is beautifully simple in concept: expose a frame, then expose the same frame again. On a film camera, this means firing the shutter, and then, instead of advancing the film to the next frame, cocking the shutter mechanism without moving the film, and firing again on the same piece of emulsion.
Some film cameras have a dedicated multiple exposure lever or switch that disengages the film advance from the shutter cocking mechanism. Cameras like the Nikon FM2, Canon AE-1 Program, and many medium-format bodies (Hasselblad, Mamiya, Bronica) make this straightforward. On cameras without a dedicated control, you can often achieve the same result by holding the rewind button while advancing the film lever, this cocks the shutter without moving the film. The technique varies by camera model, so consult your camera’s manual for the specific procedure.
The critical principle to understand with film double exposures is how light accumulates on the emulsion. Film records light additively: bright areas of the first exposure will be heavily exposed on the negative, leaving little room for the second exposure to register. Dark areas of the first exposure, however, remain relatively unexposed, and those are the areas where the second image will appear most clearly. This means that the dark regions of your first shot become the “windows” through which the second image shows through.
This is why silhouettes work so well as the first exposure in a double exposure sequence. A dark figure against a bright sky creates a perfectly defined container: the bright background is already fully exposed (so nothing from the second shot will show there), while the dark silhouette is essentially blank film waiting to be filled with whatever you expose next, trees, buildings, textures, clouds.
For exposure compensation on film, a common approach is to underexpose each individual frame by one stop. Since you are layering two exposures on top of each other, the combined light roughly equals a single correct exposure. If you shoot both frames at full exposure, the result will be overexposed. Some photographers prefer to expose the first frame normally and underexpose the second by one to two stops, giving priority to the primary subject. Experimentation is part of the process, film’s generous highlight latitude means slightly overexposed double exposures often still look beautiful. Check out our prism photography for more details.
In-Camera Digital Double Exposure
Most modern DSLR and mirrorless cameras include a multiple exposure mode that automates the double exposure process and gives you a live preview of the blend as you compose the second shot. This is a significant advantage over film, where you are working blind on the second exposure.
On Canon cameras, look for Multiple Exposure in the shooting menu (red camera icon). On Nikon bodies, the setting is under the Photo Shooting Menu as Multiple Exposure. Fujifilm cameras offer it in the Drive settings. Sony cameras historically lack a native multiple exposure mode, though some models support it through downloadable apps or firmware updates, many Sony shooters achieve the effect through Photoshop instead.
When you enable multiple exposure mode, you typically choose the number of exposures to combine (two is standard for a classic double exposure) and a blending mode. The two most common blending options are:
- Additive: The exposures are stacked directly on top of each other, just like film. Light accumulates, so you need to underexpose each frame (usually by one stop for two exposures) to avoid blowing out the highlights. This produces the most film-like result.
- Average: The camera automatically balances the overall exposure by averaging the brightness of the combined frames. This is easier to work with because you can shoot each frame at normal exposure settings and the camera prevents the final image from being overexposed. The trade-off is slightly lower contrast compared to the additive method.
The workflow for in-camera digital double exposure follows the same creative logic as film. Shoot your primary subject first, ideally a silhouette or a subject against a bright, clean background. After the first frame, the camera will show you a semi-transparent overlay of that image in the viewfinder or on the rear screen. You then compose your second shot (texture, landscape, pattern) while watching how it interacts with the first in real time. This live preview lets you position elements precisely, placing a tree line within a profile, or aligning a cityscape inside a figure’s outline.
Some cameras also let you select a previously captured RAW file as the first exposure, which means you can shoot portraits in one session and blend them with textures or landscapes from your archive later. This feature effectively gives you Photoshop-level flexibility while keeping the process entirely in-camera.
Creating Double Exposures in Photoshop
Photoshop gives you the most control over every aspect of a double exposure. You can try unlimited combinations, fine-tune the blend with pixel-level precision, and undo anything that does not work. If you want guaranteed, repeatable results, or if your camera lacks a multiple exposure mode, this is the method to learn.
Here is a step-by-step approach to creating a classic double exposure in Photoshop:
Step 1: Choose your two images. Select a primary subject image, typically a portrait or a strong silhouette, and a secondary texture or scene image. The primary subject should have a clear, well-defined shape. The secondary image should be rich in texture, pattern, or fine detail (think tree branches, flower petals, city lights, ocean ripples, cloud formations).
Step 2: Open the primary image and prepare it. Open your portrait or silhouette in Photoshop. If the subject is not already against a clean white or light background, consider selecting the subject and placing it on a white layer. The cleaner the background, the more seamlessly the second image will appear to fill the subject’s shape. Increase the contrast slightly so the subject’s outline is well defined.
Step 3: Place the second image as a new layer. Drag or paste your texture or landscape image into the document as a new layer above the portrait. Resize and position it so the most interesting details overlap with the subject. Use Free Transform (Ctrl/Cmd+T) to scale and rotate as needed.
Step 4: Set the blend mode to Screen. With the texture layer selected, change its blend mode from Normal to Screen. The Screen blend mode makes dark pixels transparent and light pixels visible, this is exactly how a film double exposure works. Dark areas of the texture layer will disappear, and the texture’s lighter details will appear within the dark areas of the portrait beneath. This is the single most important step and instantly produces the classic double exposure look.
Step 5: Refine with opacity and masks. Reduce the texture layer’s opacity to control how strongly the second image shows through. Values between 60% and 85% often work well. For more selective control, add a layer mask to the texture layer and paint with a soft black brush to hide the effect in areas where you want the portrait to remain clean, typically the eyes, lips, and key facial features. This selective masking is what elevates a Photoshop double exposure from a simple overlay to a polished, intentional composition.
Step 6: Experiment with Multiply. While Screen is the standard blend mode for double exposures, try Multiply as well. Multiply does the opposite of Screen: it makes light pixels transparent and keeps dark pixels. This produces a moodier, darker result where the texture appears in the highlights rather than the shadows. Some images work better with Multiply, particularly when both source photos are relatively bright.
For fine-tuning, adjustment layers (Curves, Levels, Hue/Saturation) applied above both layers let you unify the tonal range and color palette of the final composite. Converting the portrait to black and white while keeping the texture in color (or vice versa) can produce especially striking results.
Best Subject Combinations for Double Exposures
The magic of a double exposure depends almost entirely on pairing the right subjects. The fundamental principle is simple: combine a subject with a strong, recognizable shape with a subject rich in texture, pattern, or fine detail. The shape provides the structure; the texture fills it with visual interest. Here are the combinations that consistently produce the most compelling results.
Portraits and nature. This is the classic double exposure combination, and it endures because it works so well. A human profile or silhouette filled with tree branches, autumn leaves, flower petals, or rolling clouds creates imagery that feels both personal and elemental. The organic textures of nature seem to become part of the person, suggesting a connection between the human subject and the natural world. Trees are particularly effective because their branching structure creates complex, web-like patterns that fill a silhouette beautifully without overwhelming the portrait’s features.
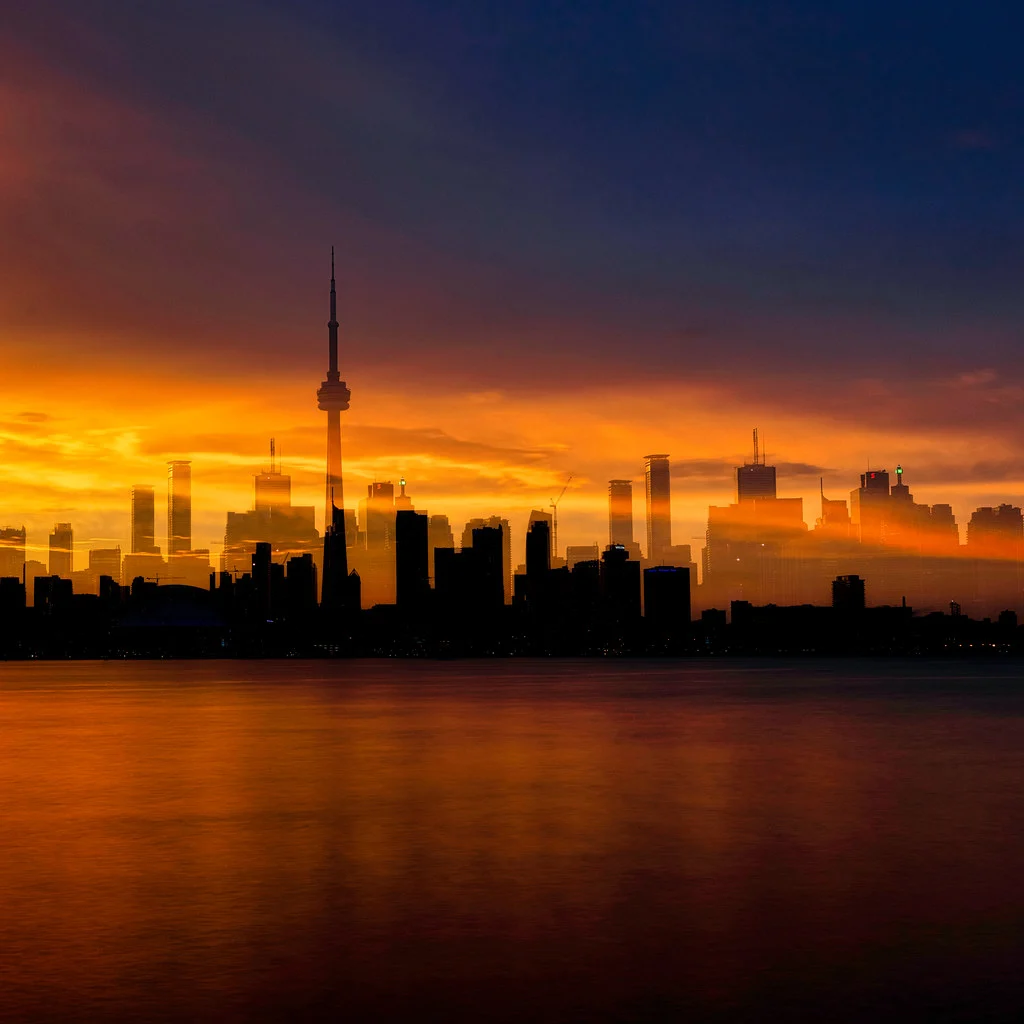
Silhouettes and cityscapes. A strong silhouette filled with urban architecture, night lights, or street scenes creates a powerful sense of identity and place. The geometric lines of buildings and the scattered points of city lights contrast dynamically with the organic curves of a human form. This combination works well for editorial and conceptual work, especially when exploring themes of urban life, identity, or the relationship between people and their environments.
Architecture and organic textures. Blending the rigid geometry of buildings, bridges, or structural details with flowing organic textures, water, foliage, clouds, fabric, creates a fascinating tension between the man-made and the natural. This combination lends itself to abstract photography, where the double exposure dissolves the literal identity of both subjects into something new and ambiguous.
Close-up textures and wider scenes. Pairing a macro or close-up texture (cracked paint, woven fabric, water droplets, tree bark) with a wider landscape or scene creates depth and visual intrigue. The texture acts as a filter through which the viewer sees the broader image, adding tactile quality to a scene that might otherwise feel flat.
The combinations that fail are usually those where both images have similar levels of detail and contrast competing for attention, with no clear visual hierarchy. One image should be the “container” (strong shape, clear outline) and the other should be the “filler” (texture, pattern, detail). When both try to be both, the result is visual chaos.
Composition and Exposure Tips
Double exposure photography follows its own set of composition rules that are distinct from single-frame photography. Understanding these principles is the difference between a striking double exposure and a confusing muddle of overlapping elements.
Shoot the primary subject against a bright or white background. This is the most important technical tip for double exposures. A bright background behind your primary subject (whether shooting on film or digitally) ensures that the background area is fully exposed, which means the second image will not show through there. Only the darker areas, the subject itself, will act as a canvas for the second exposure. For portraits, position your subject against a bright sky, a white wall, or a window with diffused light. This creates a clean “container” with well-defined edges.
Slightly overexpose the portrait, slightly underexpose the texture. When shooting the two frames separately (whether in-camera or for Photoshop compositing), overexposing the portrait by about half a stop to a full stop ensures the background blows out to pure white, cleanly separating the subject. Underexposing the texture or landscape by about half a stop keeps its details rich and prevents the combined image from becoming washed out. This exposure imbalance is what gives double exposures their distinctive tonal quality.
High contrast subjects work best. Both the primary subject and the fill image benefit from strong contrast. A dark silhouette against a bright sky has maximum contrast, making it an ideal primary subject. A texture with a wide range of tones, bright highlights and deep shadows, will create a more complex and interesting blend than a flat, evenly-lit image. If you are shooting specifically for a double exposure, push your lighting toward high contrast rather than flat and even.
Think about placement before you shoot. When composing the first exposure, anticipate where the second image’s key elements will fall. If you are shooting a portrait in profile facing left, the nose, forehead, and chin create interesting contour areas. Plan which part of your texture or landscape will align with those features. Many photographers sketch rough compositions before shooting, noting where they want branches to emerge from a profile or where city lights should cluster within a silhouette.
Leave intentional negative space. Do not fill every inch of the frame. Allowing areas of clean white or dark space gives the viewer’s eye places to rest and makes the areas of overlap more impactful. A double exposure that covers the entire frame with competing detail is exhausting to look at. The most memorable double exposures have a balance between blended areas and breathing room.
Use profile views for portraits. A side profile provides a stronger, more instantly recognizable silhouette than a front-facing pose. The distinct outline of the forehead, nose, lips, and chin creates a dramatic shape that reads clearly even when filled with a complex texture. Front-facing poses can work, but the features are harder to distinguish once the second image is layered in.
Creative Double Exposure Project Ideas
Double exposure photography lends itself to sustained, thematic projects. Here are several project ideas that go beyond one-off experiments and can develop into cohesive bodies of work.
Seasonal series. Photograph the same person’s profile four times throughout the year, filling each silhouette with the textures of a different season: bare winter branches, spring blossoms, dense summer foliage, and fiery autumn leaves. Displayed together as a set of four, this project visualizes the passage of time through a single human form. It requires patience, you need to commit to shooting across months, but the result is a cohesive, visually unified series.
Nature spirits. Create a series of portraits merged with natural elements, faces dissolving into tree trunks, figures emerging from waterfalls, profiles filled with mountain ridgelines. The goal is to make the human subject appear to be a part of the landscape, as though they are a spirit or guardian of that place. This works particularly well when you can shoot the portrait and the natural texture in the same environment, maintaining consistent lighting and color temperature.
Urban identity. Pair portraits of people with the cities or neighborhoods they call home. A musician filled with neon signs and concert venues. A chef’s silhouette blended with the textures of a busy market. A student’s profile layered with campus architecture. This project uses double exposure as a storytelling device, visually embedding people within the places that define them.
Emotional portraits. Match facial expressions with environments that amplify the emotion. A contemplative expression merged with calm water or fog. A joyful face filled with sunlight filtering through leaves. A tense portrait blended with fractured glass or tangled wire. The texture becomes a metaphor for the internal state, adding psychological depth to what might otherwise be a straightforward headshot.
Self-portrait series. Use yourself as the subject and explore different facets of your identity, interests, or inner life through the textures you choose. This is one of the most accessible double exposure projects because you control every variable, you can shoot the portrait and the texture at your own pace, experiment freely, and reshoot as needed. A tripod, a remote shutter release, and a well-lit background are all you need to get started.
For additional inspiration, explore other approaches to creative photography through long exposure photography and abstract photography, which share the same spirit of bending reality through technique.
Frequently Asked Questions
Can any camera do double exposure in-camera?
Not every camera has a built-in multiple exposure mode. Most mid-range and professional DSLRs and mirrorless cameras from Canon, Nikon, and Fujifilm include this feature. Entry-level models sometimes omit it. Sony cameras generally lack a native multiple exposure mode, though workarounds exist through apps and firmware. Film cameras vary widely, some have a dedicated multiple exposure lever, while others require a manual technique involving the rewind button. Check your camera’s manual or shooting menu for a “Multiple Exposure” option. If your camera does not support it natively, you can always create double exposures in Photoshop with complete control over the result.
Do you need Photoshop to create double exposures?
No. Double exposures predate Photoshop by over a century, the technique was invented on film, and in-camera digital multiple exposure modes make it possible without any software at all. Photoshop simply gives you more precision and flexibility. You can preview blend modes, adjust opacity, use layer masks for selective blending, and try unlimited combinations of images. But many photographers prefer the spontaneity and authenticity of creating double exposures entirely in-camera, whether on film or digital. Both approaches are legitimate, and neither is inherently superior.
What is the difference between double exposure and compositing?
Double exposure and compositing are related but distinct techniques. A double exposure blends two images together so that both are visible simultaneously throughout the frame (or at least throughout the subject area). The images merge and coexist, you can see through one to the other. Compositing, by contrast, combines elements from multiple images into a seamless scene where each element occupies its own distinct space, as though everything existed together in reality. Compositing aims for photorealism; double exposure embraces the surreal. A composite might place a person on a mountain they never climbed. A double exposure fills that person’s silhouette with the mountain itself.
Can you create double exposures on a phone?
Yes. Several mobile apps replicate the double exposure effect with varying degrees of sophistication. Apps like Snapseed (which has an “Double Exposure” tool under the Tools menu), Diana Photo, and BlendPic let you layer two images using blend modes similar to Photoshop’s Screen and Multiply. Some phone cameras also include built-in multiple exposure modes. The quality and control are more limited than a dedicated camera or desktop Photoshop, but phone-based double exposures can produce impressive results, especially for social media sharing and quick creative experiments. The same principles apply: start with a high-contrast primary subject and pair it with a texture-rich second image.