A home darkroom transforms your photography practice. It takes you beyond capturing and developing negatives into the final, most rewarding step: making prints. A darkroom is where you take a thin strip of exposed film and turn it into a physical photograph, controlling every aspect of the image along the way. You decide how bright or dark the print is, which areas to emphasize, how much contrast to apply, and how the final image feels. It is photography in its most complete form. Setting up a darkroom is simpler and less expensive than most people imagine, and this guide will walk you through everything from planning your space to making your first prints.
Why Build a Home Darkroom?
Darkroom printing gives you control that no screen or digital printer can replicate. You interact directly with light and chemistry to create a physical object. Every print is made by hand, one at a time. The decisions you make during printing are creative decisions. Dodging brightens an area. Burning darkens another. Split-grade printing lets you independently control highlights and shadows. These techniques are the original “Photoshop” tools, and they remain remarkably powerful.
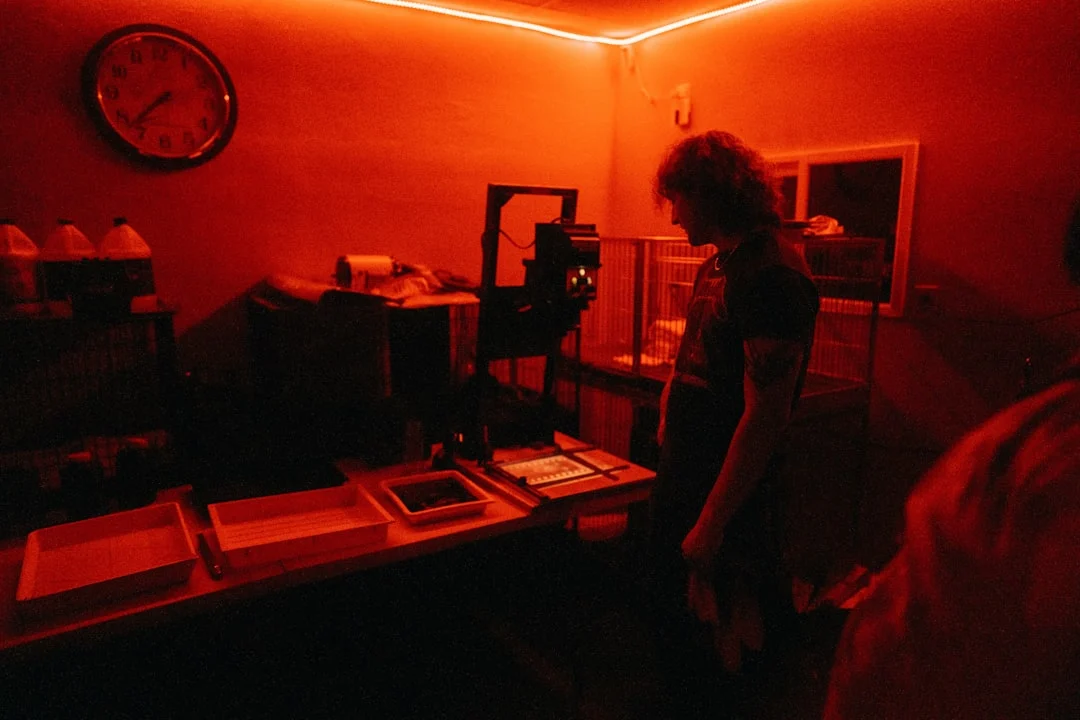
There is also the meditative quality of darkroom work. The dim amber light, the quiet concentration, the slow revelation of an image in the developer tray. Many photographers find darkroom printing deeply satisfying in a way that working at a computer simply is not. The process is physical, tactile, and completely absorbing.
If you have already learned to develop film at home, the darkroom is the natural next step. It completes the analog chain from camera to print.
Choosing Your Space
A darkroom needs two things: total darkness (or near-total, with only safelight illumination) and access to running water. Many photographers convert a bathroom, a basement corner, a closet, or a spare room. A dedicated space is ideal, but a temporary setup that you assemble and take down for each printing session works too.
Space Requirements
You need enough room for a “dry side” (the enlarger and related equipment) and a “wet side” (the processing trays and chemistry). These should be separated to prevent chemical splashes from reaching your enlarger, negatives, and paper. A space of about 6 by 8 feet is comfortable. Smaller spaces work but require more careful organization.
The dry side needs a sturdy table or counter for the enlarger, a flat surface for the easel, and storage for paper and negatives. The wet side needs space for three to four processing trays arranged in order, plus a wash area.
Light-Proofing
The room must be light-tight when working with photographic paper. Even small light leaks can fog your paper and ruin prints. Block windows completely with blackout curtains, plywood panels, or heavy black plastic. Seal gaps around doors with weather stripping or a draft blocker. Cover any electronic indicator lights with tape. After setting up, sit in the dark for five minutes and let your eyes adjust. If you can see any light source, seal it.
Test your light-proofing by placing a sheet of unexposed photographic paper (emulsion side up) on the counter with a coin on top. Leave it for 10 minutes. Develop the paper normally. If the paper is uniformly white with no shadow of the coin visible, your room is light-tight. If you can see the coin outline, light is leaking in somewhere.
Ventilation
Darkroom chemistry produces fumes, particularly the stop bath (acetic acid) and some toners. Adequate ventilation is important for your health. If your space has a window, a light-tight exhaust fan is ideal. If not, a fan drawing air from the room through a door gap (blocked with a light baffle) provides air circulation. At minimum, take regular breaks in fresh air and keep trays covered when not in use.
Essential Equipment
Enlarger
The enlarger is the core of the darkroom. It is essentially a projector that shines light through your negative and projects the image onto photographic paper below. The enlarger has a light source, a negative carrier, a lens, and a focusing mechanism.
There are two main types of enlargers. Condenser enlargers use glass condensing lenses to focus the light through the negative. They produce higher contrast and sharper prints but also show dust and scratches more prominently. Diffusion enlargers use scattered, diffused light. They produce slightly lower contrast (easily compensated for with paper grade), hide dust better, and are gentler on the tonal range.
For 35mm printing, any quality enlarger with a 50mm enlarging lens will work. For medium format, you need an enlarger that accepts the larger negative and a 75mm or 80mm enlarging lens. Common, reliable enlarger brands include Beseler, Omega, Durst, and LPL. Used enlargers are widely available at very low prices because digital printing has reduced demand.
Enlarging Lens
The enlarging lens is as important as your camera lens. A sharp enlarging lens renders fine detail and grain crisply. A poor lens produces soft prints regardless of how good your negative is. The standard focal length is 50mm for 35mm negatives and 75-80mm for medium format.
Recommended enlarging lenses include the Rodenstock Rodagon, Schneider Componon-S, and Nikon EL-Nikkor. These are professional-grade lenses that produce outstanding prints. Used prices are very reasonable, typically $40 to $150. Avoid unbranded or off-brand enlarging lenses when possible.
Easel
An easel holds the photographic paper flat and in position under the enlarger during exposure. Adjustable easels let you set borders and crop the image. A four-blade adjustable easel is the most versatile option. Fixed-size easels are simpler but less flexible. Get an easel that accommodates the largest paper size you plan to use, typically 8×10 or 11×14 inches.
Timer
A darkroom timer controls the enlarger exposure time precisely. It plugs into the enlarger power supply and turns the light on for the set duration. Digital timers are accurate and easy to use. Analog timers with a dial work fine too. Some photographers use their phone timer with a remote switch, but a dedicated darkroom timer is more convenient and keeps your phone away from the chemicals.
Safelight
A safelight provides dim illumination in the darkroom that does not affect photographic paper. Standard black-and-white papers are not sensitive to amber/red light (OC or equivalent filter), so you can work comfortably under a safelight without fogging your paper. Position the safelight at least 4 feet from your work surface. Test it the same way you test for light leaks: expose a sheet of paper under the safelight and check for fogging.
Note that safelights are specific to the paper type. Standard multigrade papers use amber/OC safelights. Some specialty papers require different filters or are not safe under any light until after development. Always check the paper manufacturer’s recommendations.
Processing Trays
You need at least three trays, arranged in order: developer, stop bath, and fixer. A fourth tray for a holding wash is useful. The trays should be slightly larger than your paper size. For 8×10 prints, use 8×10 or 11×14 trays. Plastic trays are inexpensive and durable. Dedicate trays to specific chemicals (label them) to prevent cross-contamination.
Chemistry
Print chemistry is different from film chemistry, though the sequence is similar: developer, stop bath, fixer.
Paper developer: Converts the latent image on the exposed paper into a visible silver image. Common print developers include Ilford Multigrade Developer, Kodak Dektol, and Sprint Quicksilver. Development time is typically 1 to 2 minutes at 20 degrees Celsius.
Stop bath: Halts development. Same principle as film processing. Indicator stop bath changes color when exhausted.
Fixer: Makes the image permanent by removing unexposed silver halides. Fix for the time recommended by the manufacturer, typically 2 to 4 minutes for rapid fixer. After fixing, the print is no longer light-sensitive and can be examined in room light.
Photographic Paper
Photographic paper is the medium for your prints. The two main types are fiber-based (FB) and resin-coated (RC).
Resin-coated (RC) paper has a plastic coating that prevents the paper fibers from absorbing chemicals. This makes it faster to process, wash, and dry. RC paper lies flat and is forgiving to work with. It is ideal for learning, test prints, and general printing.
Fiber-based (FB) paper is traditional photographic paper without a plastic coating. It produces richer tones, deeper blacks, and a more luminous quality than RC. The trade-off is that it requires longer washing (30 to 60 minutes versus 5 minutes for RC), takes longer to dry, and tends to curl. FB paper is the choice for exhibition prints and archival work.
Most modern papers are multigrade (variable contrast). A single box of paper can produce prints at any contrast grade from 0 (very low contrast) to 5 (very high contrast) by changing the color of the enlarger light using filters. This eliminates the need to stock separate boxes of graded paper. Ilford Multigrade RC Deluxe and Multigrade FB Classic are industry standards.
Multigrade Filters
If your enlarger does not have a built-in color head with variable contrast filtration, you will need a set of multigrade filters. These are gelatin or plastic filters in graduated densities from 00 to 5 that slide into a filter drawer under the enlarger lens or above the negative. Ilford sells a complete set for about $30 to $50. They last for years with careful handling.
Other Supplies
Tongs (one pair per tray, to avoid contaminating chemicals with your fingers), a grain focuser (a magnifying device that lets you precisely focus the projected image on the easel by examining the grain structure), a blower brush for cleaning negatives, and a reliable thermometer round out the essentials.
Making Your First Print
The printing process follows a logical sequence: select a negative, set up the enlarger, determine the correct exposure through test strips, and make the final print. Here is the full workflow.
Step 1: Select and Clean the Negative
Choose a negative with good exposure and a range of tones. For your first print, pick a negative with clear detail in both highlights and shadows. Clean the negative with a blower brush or anti-static cloth to remove dust. Every dust speck on the negative will appear as a white spot on the print.
Step 2: Set Up the Enlarger
Place the negative in the carrier with the emulsion side (matte side) facing down, toward the paper. Insert the carrier into the enlarger. Turn on the enlarger and adjust the height to set the image size on the easel. The higher the enlarger head, the larger the projected image. Open the lens to its widest aperture for focusing. Compose and crop the image using the easel blades.
Step 3: Focus
Focus the enlarger by adjusting the focus knob while examining the projected image. Use a grain focuser for precise focusing: place it on the easel, look through it, and adjust focus until the grain of the negative is sharp. The grain should appear as tiny, distinct specks. If you cannot see the grain clearly, your enlarging lens may need cleaning or the enlarger may need alignment.
After focusing, stop down the enlarging lens to the working aperture, typically f/8 or f/11. Stopping down increases sharpness across the print and extends exposure time to a comfortable range (8 to 30 seconds is ideal).
Step 4: Make a Test Strip
A test strip determines the correct exposure time. Cut a strip of paper about 2 inches wide and place it across the easel so it covers a representative area of the image (including both light and dark areas). Using a piece of opaque card, expose the strip in increments. Give the entire strip 4 seconds. Then cover one-fifth of the strip with the card and give another 4 seconds. Continue covering more of the strip and exposing for 4 seconds each time, producing bands of 4, 8, 12, 16, and 20 seconds.
Develop the test strip in the developer tray for the full recommended time (do not pull it early based on how it looks under the safelight). Stop and fix as normal. Examine the test strip in room light. Look for the band where highlight detail is present, shadow detail is maintained, and overall density looks correct. That band’s exposure time is your starting point.
Step 5: Select Contrast Grade
With multigrade paper, you control contrast by changing the filter. Start with grade 2 or 2.5, which is considered “normal” contrast. If the test strip looks flat and gray (low contrast), try a higher grade (3, 3.5, or 4). If the test strip has blocked shadows and blown highlights (too much contrast), try a lower grade (1, 1.5, or 2). Each grade change may require a slight exposure adjustment.
Understanding contrast in printing connects directly to what you know about the exposure triangle and how light works in photography. The principles are the same: controlling the range of tones to create the image you envision.
Step 6: Make the Print
Place a full sheet of paper on the easel, emulsion side up (the emulsion side is the side that curls toward when you flex the paper). Set your timer to the exposure time determined from the test strip. Expose. Slide the paper smoothly into the developer tray and agitate gently. Watch the image appear over 60 to 90 seconds. It is tempting to pull the paper out early or extend the time based on how it looks under the safelight, but resist. Develop for the full recommended time for consistent results.
Transfer the print to the stop bath (30 seconds), then to the fixer (2 to 4 minutes). After fixing, you can turn on the room lights and examine your print.
Dodging and Burning
Dodging and burning are the darkroom printer’s most powerful tools. Dodging means blocking light from a specific area during exposure, making it lighter in the print. Burning means giving extra exposure to a specific area, making it darker.
Dodging: Use a small piece of card on a wire (or your hand) to block light from an area that would otherwise print too dark. Move the tool gently during the dodge to avoid creating a hard-edged mark. Feathering the edge of the dodge creates a seamless transition. The amount of dodging is measured in seconds or as a percentage of the base exposure. A typical dodge might hold back 20 to 30 percent of the exposure from a specific shadow area.
Burning: After the base exposure, use a piece of card with a hole cut in it (or cup your hands to create an opening) to direct additional light onto a specific area. Move the card to feather the edges. Burning is commonly used to darken bright skies, bring down highlights, or add density to the edges of a print (edge burning or “vignetting”).
Dodging and burning are what separate a straight print from a finished print. Even the best negatives benefit from selective control. Ansel Adams famously said that the negative is the score and the print is the performance. Dodging and burning are the interpretation that brings the performance to life.
Split-Grade Printing
Split-grade printing is an advanced technique that gives you independent control over highlights and shadows. Instead of using a single contrast grade for the entire print, you make two exposures on the same sheet of paper: one at a low contrast grade (0 or 00) to set the highlight values, and one at a high contrast grade (4 or 5) to set the shadow values.
The low-grade exposure primarily affects the light tones. The high-grade exposure primarily affects the dark tones. By adjusting each exposure independently, you can achieve a tonal range and contrast balance that is difficult to reach with a single grade. Split-grade printing is particularly useful for negatives with a wide density range or when you want to fine-tune the tonal balance beyond what a single grade allows.
This technique mirrors the principle of controlling aperture and shutter speed independently to shape your exposure in camera. In the darkroom, your “exposure controls” are time, contrast grade, and selective dodging and burning.
Washing and Drying Prints
Proper washing removes residual fixer from the print. Residual fixer causes yellowing and staining over time, degrading the image permanently.
RC paper: Wash for 5 minutes in running water. The resin coating prevents the paper fibers from absorbing chemicals, so a short wash is sufficient. RC prints can be squeegeed and hung to dry, or placed face-down on a clean drying screen. They dry flat and are ready to handle in 15 to 30 minutes.
Fiber-based paper: Wash for 30 to 60 minutes in running water, or use a hypo-clearing agent (like Kodak Hypo Clearing Agent or Ilford Washaid) to shorten the wash to about 10 to 20 minutes. FB prints absorb chemicals deeply into the paper fibers, requiring thorough washing for archival permanence. Dry FB prints on screens or hang them with clips. They will curl as they dry. Flatten them under weight once dry, or use a heated print dryer.
Safety in the Darkroom
Darkroom chemistry is generally safe with basic precautions. Wear rubber gloves to avoid skin contact with developer and fixer. Some people develop sensitivities to darkroom chemicals over time, so minimizing skin contact from the start is wise. Use tongs to handle prints in the trays rather than reaching in with bare hands.
Ventilation is important. Acetic acid stop bath has a strong vinegar smell, and prolonged exposure to concentrated fumes can cause irritation. Keep the room ventilated or take regular breaks. Store chemistry in clearly labeled containers, away from food and drink. Keep the workspace clean and organized. A cluttered darkroom is an unsafe darkroom.
If you have children or pets, keep the darkroom door locked during sessions and store chemicals securely when not in use.
Building a Darkroom on a Budget
Used darkroom equipment is widely available and heavily discounted from original prices. Here is a budget-conscious shopping list.
Enlarger with lens: $50 to $150 used. Look for Beseler 23C (35mm and medium format), Omega B series, or LPL models. These are all quality enlargers that will last decades.
Easel: $15 to $40 used.
Timer: $15 to $30 used. A GraLab 300 or similar.
Trays (3): $10 to $20 new.
Tongs (3 pairs): $5 to $10.
Safelight: $10 to $25 used.
Grain focuser: $15 to $30 used.
Multigrade filter set: $30 to $50 new.
Chemistry (developer, stop, fixer): $20 to $35.
Paper (100 sheets 8×10 RC): $30 to $50.
Total: approximately $200 to $400 for a complete, functional darkroom. Many photographers find free or nearly-free enlargers from darkroom closings, photography clubs, or online marketplaces. The cost of entry is lower than most people expect.
Common Mistakes
Pulling prints from the developer early. The temptation to pull a print when it “looks done” under the safelight is strong, especially for beginners. Resist it. Develop for the full recommended time (typically 60 to 90 seconds for RC, 2 to 3 minutes for FB). Inconsistent development time leads to inconsistent print density, uneven tones, and difficulty reproducing results. If the print is too dark after full development, reduce the exposure time rather than shortening development.
Not making test strips. Guessing at exposure time wastes paper and produces inconsistent results. A test strip takes two minutes and tells you exactly what exposure to use. Make a test strip for every new negative, even if you think you can guess the time.
Ignoring dust on the negative. Every dust particle on the negative prints as a white spot. Cleaning the negative before placing it in the carrier saves significant spotting (retouching) time later. Use a blower brush, not compressed air (which can deposit propellant residue), and handle negatives by the edges only.
Using a dull enlarging lens. The enlarging lens determines print sharpness. A fingerprint, dust coating, or internal haze on the lens degrades every print you make. Clean the lens carefully. If prints are consistently soft despite good focus, the lens may need replacing.
Underestimating the importance of washing. Poorly washed prints yellow and stain within months. RC paper needs 5 minutes. FB paper needs 30 to 60 minutes. Use a hypo-clearing agent for FB paper to ensure thorough fixer removal. If you are making prints you want to last, proper washing is not optional.
Working with expired paper. Photographic paper degrades over time, especially in warm or humid storage. Expired paper shows increased fog (an overall gray tone), reduced contrast, and unreliable exposure. Use fresh paper for your best work.
Try This
Make a contact sheet. Before enlarging individual frames, contact print an entire roll. Place the negative strips directly on a sheet of 8×10 paper under glass, expose, and develop. The resulting contact sheet shows you every frame on the roll at actual negative size. This helps you select the best frames for enlargement. Contact sheets are also a valuable reference and archival tool.
Print one image five ways. Take a single negative and make five prints at different contrast grades (0, 2, 3, 4, 5). Compare them side by side in room light. This exercise teaches you more about contrast control than any explanation can. You will immediately see how contrast grade transforms the mood and impact of an image.
Practice dodging and burning. Choose a negative that needs local adjustment (almost all negatives do). Print it straight, then print it again with dodging to open the shadows and burning to hold the highlights. Compare the straight print to the dodged-and-burned version. The difference is often dramatic and demonstrates why darkroom printers consider these techniques essential.
Try split-grade printing. Once you are comfortable with basic printing, make a split-grade print. Expose the highlights at grade 0 and the shadows at grade 5. Adjust each exposure independently until the print shows a beautiful tonal range with both delicate highlights and rich, deep shadows.
Print a black-and-white image you shot specifically for printing. When you know a negative is destined for the darkroom, you expose and compose differently. Shoot a roll with printing in mind, develop it at home, and bring the best frame into the darkroom. The intentionality of the entire process produces results that surprised and delight.
FAQ
Do I need a dedicated room for a darkroom?
No. Many photographers use a bathroom, laundry room, or basement corner that can be made dark. A temporary setup that you assemble for printing sessions and take down afterward works fine. The key requirements are darkness (blocked light), running water (nearby, not necessarily in the same room), and enough surface area for the enlarger and trays.
Can I print color in a home darkroom?
Color printing (RA-4 process) is possible at home but significantly more complex than black-and-white. It requires precise color filtration, tighter temperature control, complete darkness (no safelight), and more expensive chemistry and paper. Most home darkroom printers focus on black-and-white printing and use digital methods for color output. If you are interested in color darkroom printing, master black-and-white first.
How much does darkroom printing cost per print?
An 8×10 RC print costs roughly $0.50 to $1.00 in paper and chemistry. An 8×10 FB print costs about $1.00 to $2.50. Larger prints cost proportionally more. This does not include test strips and waste paper, which add to the per-session cost. Compared to professional lab printing, home darkroom printing is very affordable, especially for the fine art and exhibition prints that labs charge premium prices for.
What paper should I start with?
Ilford Multigrade RC Deluxe in a glossy or pearl finish is the standard recommendation for beginners. It is affordable, consistent, forgiving, and produces beautiful prints. Buy a 100-sheet box of 8×10 to give yourself plenty of paper for test strips and experiments without worrying about waste.
Can I scan my darkroom prints?
Yes. A flatbed scanner does an excellent job of digitizing darkroom prints for sharing online or creating reproduction prints. Scan at 300 to 600 dpi for high-quality digital copies. This bridges the analog and digital worlds, letting you share your darkroom work on digital platforms while preserving the unique qualities of the hand-printed original. See our scanning guide for more on digitizing analog work.
How long do darkroom prints last?
Properly processed and washed silver gelatin prints are among the most archivally stable photographic media. Fiber-based prints that are properly fixed, washed, and stored can last well over 100 years. Some 19th-century silver prints are still in excellent condition. Use archival paper, wash thoroughly, and store prints in acid-free materials away from heat, humidity, and direct light.
Is darkroom work dangerous?
Not with basic precautions. Wear gloves, maintain ventilation, and handle chemicals responsibly. Darkroom chemicals are no more hazardous than common household cleaning products. The main risks are skin sensitization from repeated developer contact and respiratory irritation from concentrated acetic acid fumes. Gloves and ventilation address both issues effectively.
The Complete Analog Chain
Building a home darkroom completes the analog photography chain. You choose your camera and film, compose and expose in the field, develop the negatives, and print the images by hand. Every step involves creative decisions that shape the final result. No algorithm, no software, no automated process. Just light, chemistry, and your vision.
The darkroom connects you to more than a century of photographic tradition. The same basic process that Ansel Adams, Dorothea Lange, and Henri Cartier-Bresson used is available to you, in your own home, for a modest investment. The equipment is simple, the process is learnable, and the results are uniquely satisfying. Whether you make one print a month or a hundred, the darkroom gives you something no screen ever will: a physical photograph made entirely by your own hands.
Your negatives are waiting. Start printing.