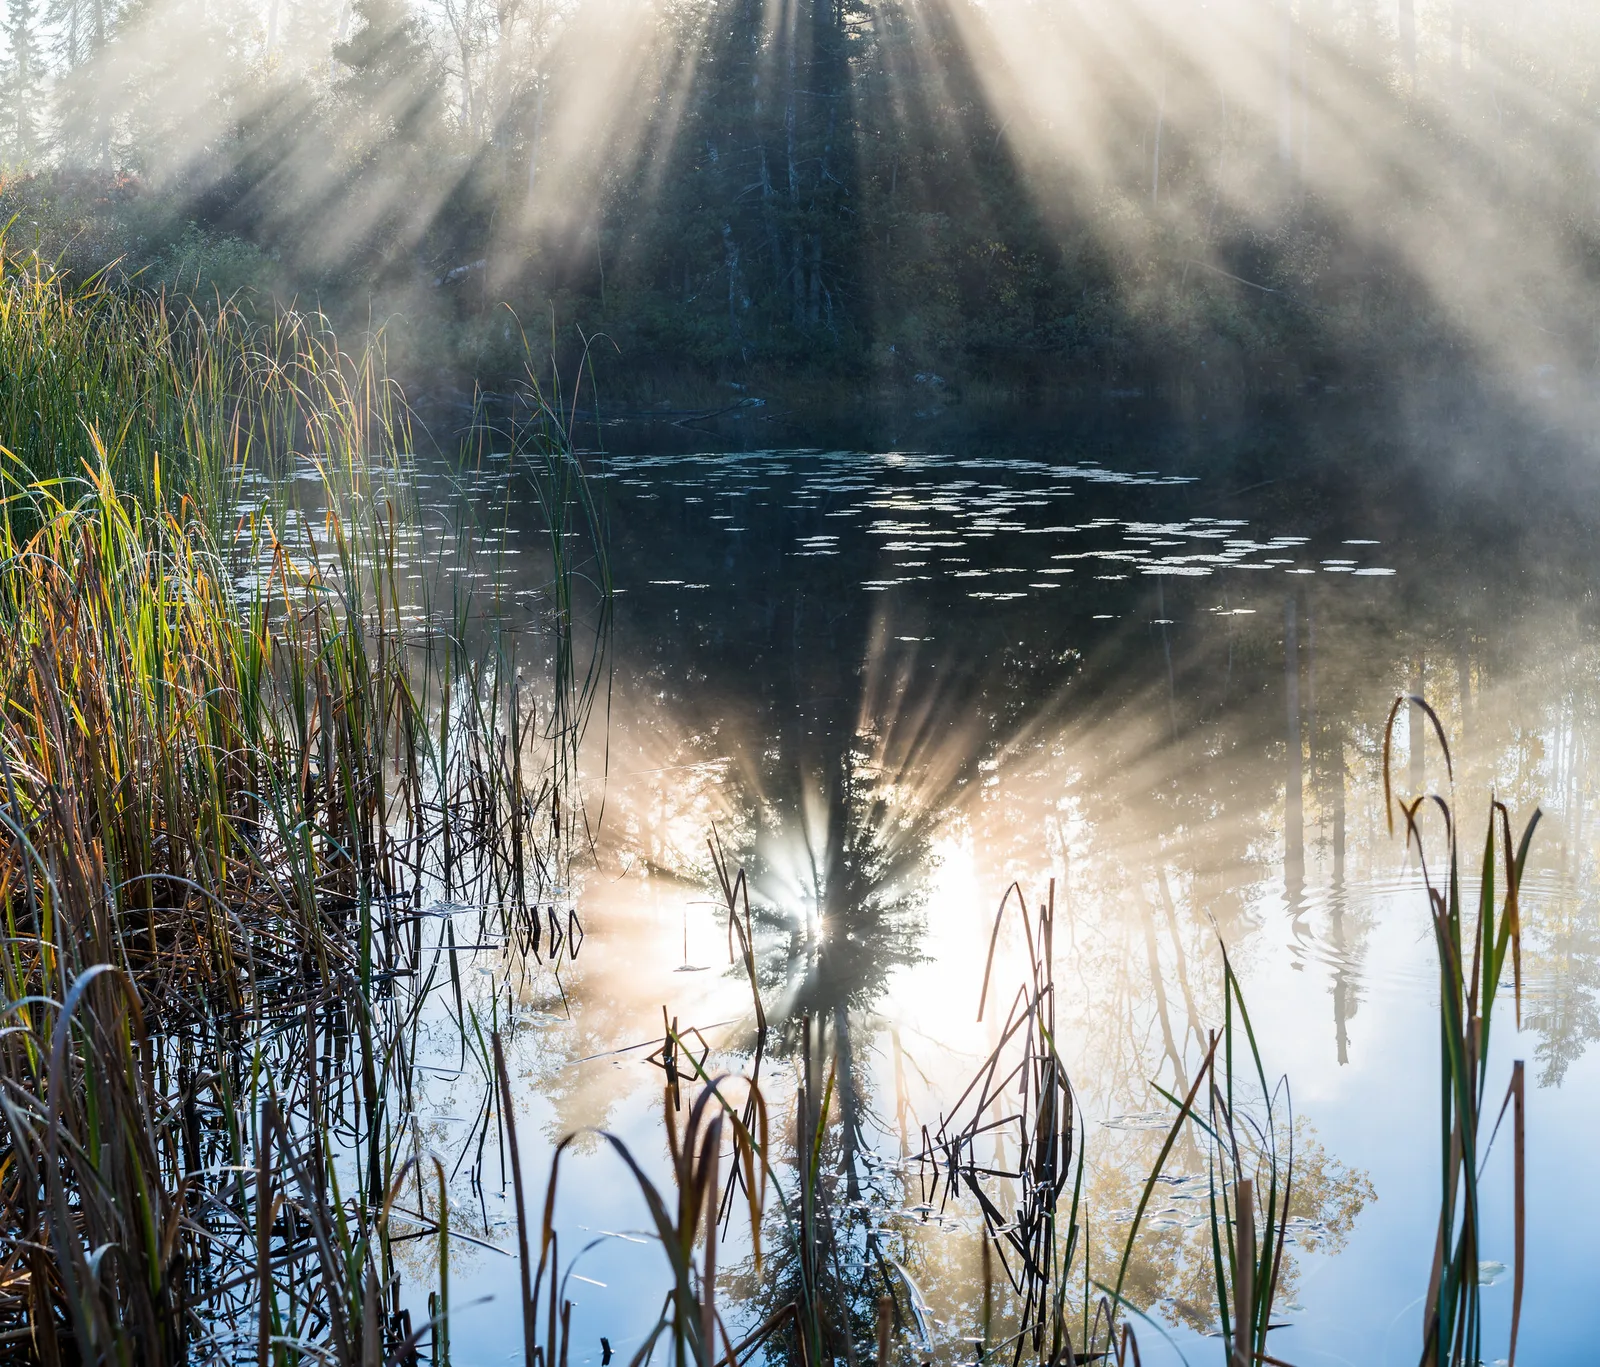
God rays, also called crepuscular rays or sunbeams, are visible shafts of sunlight that appear when light passes through gaps in clouds, trees or buildings into air that contains fog, mist, dust or smoke. To photograph them, look for low sun, gaps in something solid, and hazy air, often in the early morning. Shoot toward the light but hide the sun itself behind a branch or cloud edge, expose for the bright beams using exposure compensation, and keep contrast gentle in editing so the rays stay visible.
There are few sights in nature as striking as beams of light streaming through a forest or fanning out from behind a cloud. People stop in their tracks to look. It is no surprise these beams have earned the name “god rays”.
The good news for beginners is that god rays are not rare or mysterious. They follow simple rules. Once you know what causes them, you can predict when and where they are likely to appear, be there at the right time, and photograph them well.
This guide explains what god rays are, the conditions that create them, where and when to find them, how to compose and expose them, how to edit them, and common mistakes. There is a 10-minute exercise and an FAQ at the end.
What god rays are
Sunlight travels in straight lines. Normally you do not see the light itself, only the things it lands on. But when the air contains tiny particles, such as water droplets in fog, dust, pollen or smoke, those particles catch some of the light and scatter it toward your eyes. Suddenly the path of the light becomes visible.
If something blocks parts of the sunlight, such as leaves, clouds or a mountain, you get alternating stripes: bright beams where light passes through, and darker gaps where it is blocked. Those stripes are god rays.
Scientists call them crepuscular rays. “Crepuscular” means relating to twilight, because these rays are most common when the sun is low, around sunrise and sunset. You might also hear sunbeams, light shafts, sun rays or volumetric light.
Why the rays seem to spread out
Sun rays are almost perfectly parallel, but in photos they usually appear to fan out from the sun. This is perspective, the same effect that makes straight railway tracks seem to meet in the distance. Rays closer to you look further apart; distant ones look closer together.
Occasionally, you can see rays converging on the opposite side of the sky from the sun, at the point directly opposite it. These are called anticrepuscular rays. They are fainter and rarer, but worth looking for at sunset when you see strong rays: turn around.
The three ingredients
God rays need three things at the same time. If you remember these, you will know when to grab your camera.
1. Strong, low sunlight
Direct sun is essential; soft overcast light will not create rays. A low sun works best because the light travels through more air and comes in at a shallow angle, making long, visible beams. That is why the hour around sunrise and sunset, including golden hour, is prime time.
2. Something to break up the light
You need gaps: leaves and branches in a forest, holes in a cloud layer, gaps between buildings, a window, a barn with cracks in its walls, a mountain ridge. The gaps create the separate beams.
3. Particles in the air
This is the ingredient beginners often miss. Without fog, mist, haze, dust, smoke or spray, the light passes invisibly. Good sources include:
- Morning fog and mist, especially near water and in valleys.
- Forests after rain, as moisture rises from the warming ground.
- Dusty barns, workshops and old buildings.
- Haze on warm, humid days.
- Steam, spray from waterfalls, and smoke from campfires or chimneys.
The guide to fog photography covers how to predict and work with fog.
Where to find god rays
Forests
Forests are the classic location. Morning sun streaming through tall trees into mist creates the most famous god ray images. Arrive just after sunrise, especially on a cool morning after a damp night. The forest photography guide has more on shooting under trees, and dappled light explains the patchy light you often find there too.
Skies and clouds
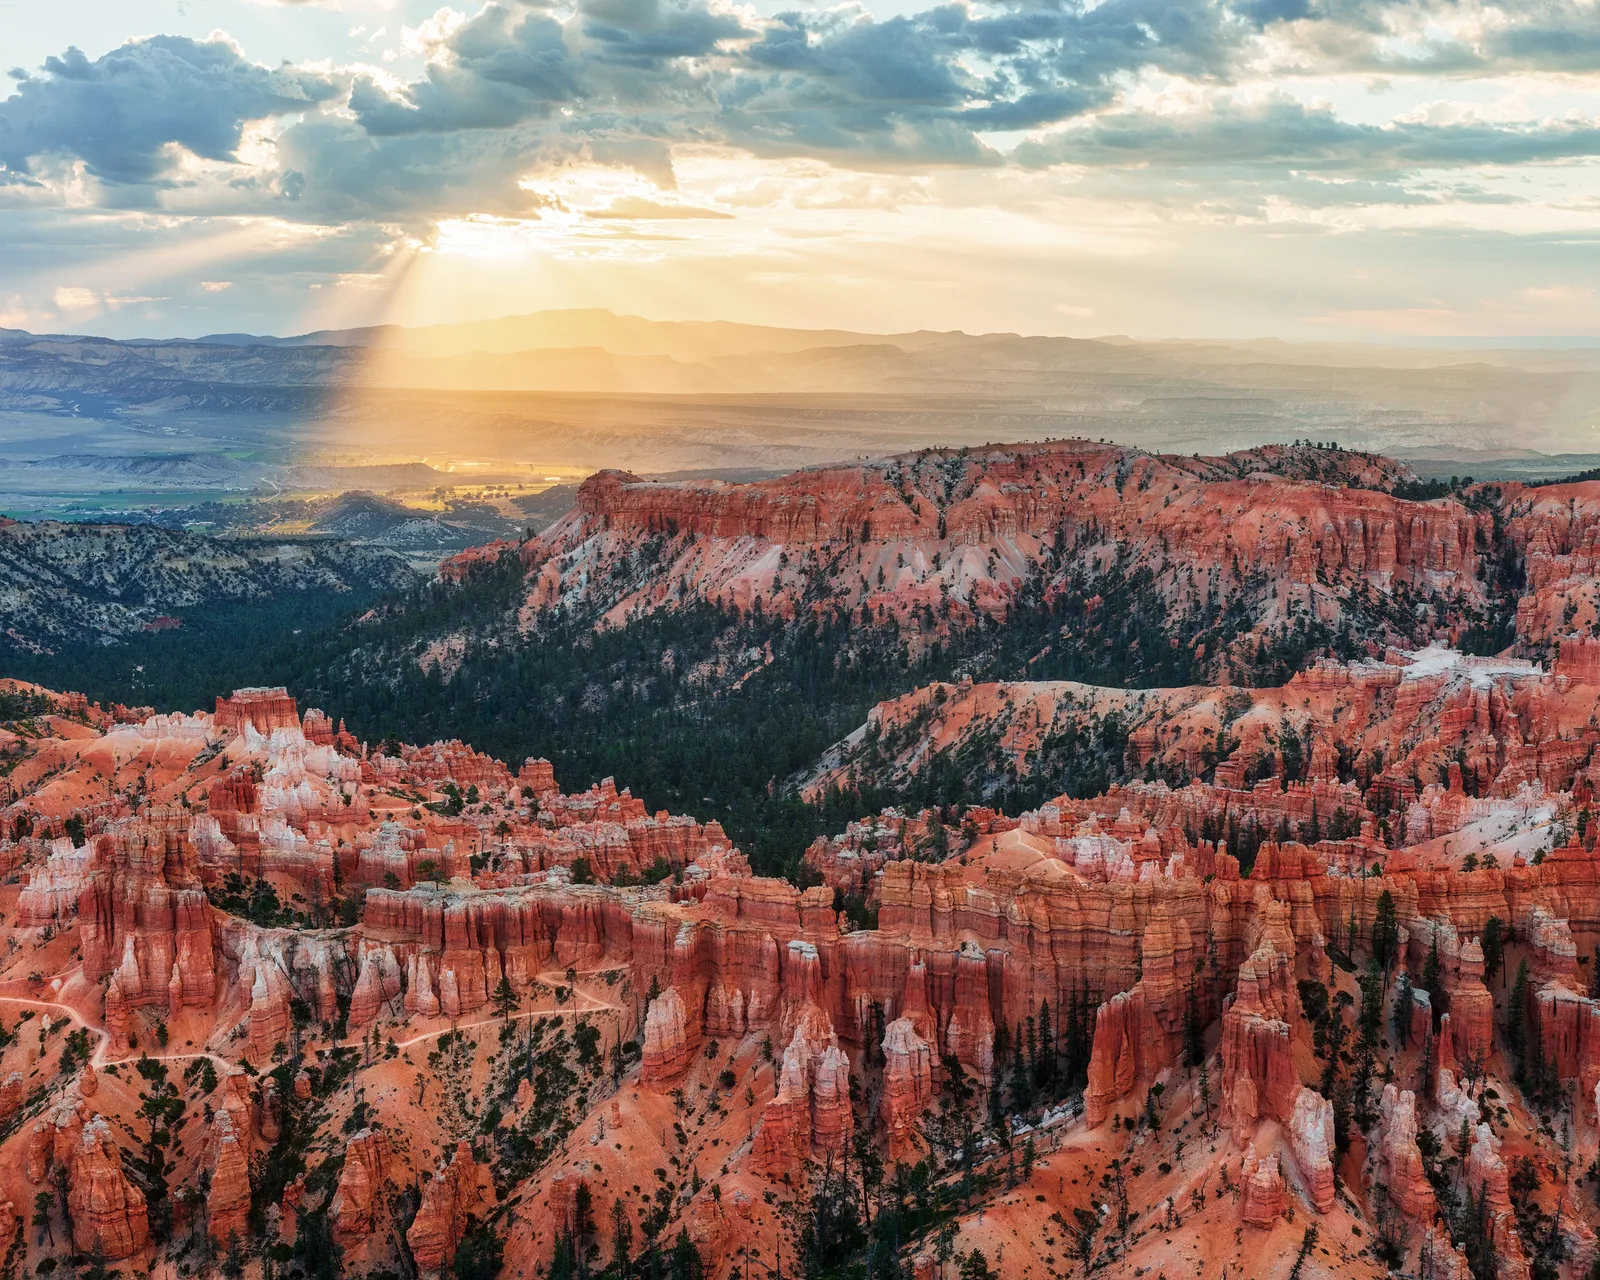
When the sun sits behind a broken layer of cloud, beams fan out across the sky and down to the land, as in the Bryce Canyon photo further down this page. These are common in the late afternoon and around storms. Mountains, canyons and open landscapes make great foregrounds.
Water and mist
Lakes, rivers and marshes produce mist on cool mornings. Light shining through trees onto misty water, like the photo at the top, gives both beams and reflections.
Indoors
Light through windows into a dusty room, church, barn or old factory can create dramatic beams. You can even create them yourself: a little steam from a kettle or a fog machine in a dim room with a single bright window works for creative portraits and still life.
Cities
Low sun between tall buildings, with a little haze, can produce rays down streets. Look along streets that line up with sunrise or sunset.
When to look for them
- Early morning: the best time. Overnight cooling creates fog and mist, and the sun is low.
- Late afternoon and sunset: good for cloud rays, especially on hazy days.
- After rain: moisture rises as the sun warms the ground.
- Around storms: broken storm clouds often let through dramatic beams.
- Cool, still mornings: wind blows mist away; calm air keeps it in place.
God rays can appear and disappear in minutes as the sun climbs and the mist burns off. Arrive early and be ready to shoot quickly.
How to compose god ray photos
Shoot toward the light
Rays are most visible when you face roughly toward the sun, with the light coming toward you. This is called backlight. From the side, rays look fainter. With the sun behind you, they nearly disappear. See the guide to backlighting and direction of light.
Hide or partly hide the sun
The sun is far brighter than the rays. If it is fully in the frame, it will blow out and cause flare, and the camera may darken everything else. Place the sun behind a tree trunk, a branch, a cloud edge or a building. Just a sliver of sun peeking around an edge can make a pleasing starburst.
Use dark backgrounds
Rays show up best against darker areas, such as shaded trees or a dark hillside. Bright skies behind rays make them harder to see.
Include a subject
Rays alone can be beautiful, but a subject gives the photo a focus: a lone tree, a path, a person walking, a deer, a building. Position the subject where rays fall on or near it.
Move around
Small changes in your position change which gaps line up with the sun. Step left or right, crouch or stand on something, and watch the rays change. Often moving a few steps makes the difference between faint rays and strong ones.
Try different focal lengths
A wide-angle lens shows rays fanning out across the scene. A longer lens isolates a few strong beams or a single lit subject.
Camera settings for god rays
God ray scenes have high contrast: bright light and dark shadows. Settings should protect the bright beams while keeping some detail in the shadows.
- Mode: aperture priority is easy. Choose f/8 to f/11 for front-to-back sharpness. Smaller apertures such as f/16 turn the sun into a starburst.
- ISO: low, such as 100, if there is enough light or you have a tripod.
- Exposure compensation: usually minus a half to minus one stop. Darkening the photo makes the rays stand out against the darker surroundings. See exposure compensation.
- Metering: the camera’s meter can be confused by the bright light. Check the result and adjust. Spot metering on a mid-bright area can help.
- Highlight warning: turn on blinkies and check that the rays themselves are not blinking. The sun itself will blink; that is fine.
- RAW: shoot RAW to recover highlights and shadows in editing.
Bracketing for tough scenes
If the contrast is too high for one exposure, take several shots at different brightness levels and blend them later. See bracketing. For beginners, a single well-exposed RAW file is usually enough.
Watch for flare
Shooting toward the sun can cause flare, bright spots or haze across the image from light bouncing inside the lens. A lens hood helps. Shading the front of the lens with your hand, kept out of frame, also works. Clean the front of the lens; smudges make flare much worse.
Editing god rays
Gentle editing can make rays clearer. Heavy editing destroys them.
- Set exposure. Keep the scene slightly dark so beams stand out.
- Recover highlights in the rays so they have texture, not flat white.
- Add a little contrast or use a brush to darken the gaps between rays.
- Be careful with dehaze and clarity. Dehaze removes the very haze that makes rays visible. Use it sparingly or even slightly negatively in the ray area.
- Warmth. A touch of warmth in morning or evening light feels natural.
- Dodge the rays. Lightly brightening beams with a brush, called dodging, enhances them naturally.
Many editing apps also have tools for adding fake light rays. These can look artificial quickly. Real rays photographed well almost always look better.
God rays with a phone
Phones can capture god rays well, but they tend to brighten everything, which washes out the beams. Tap on a bright area near the rays to set exposure, then slide the brightness down until the beams stand out. Hide the sun behind something to avoid flare, and keep the lens clean. In editing, lower the highlights slightly and add a little contrast.
God rays in portraits and everyday scenes
Light beams are not only for landscapes. They can turn a simple portrait or an ordinary room into something special.
- Portraits in a beam. Ask someone to stand where a beam falls, in a forest or by a window. Expose for the lit face so the surroundings fall darker. The beam acts like a natural spotlight. Keep the bright light off the eyes if it makes the person squint.
- Rim light. With the beam behind the person, their hair and shoulders glow at the edges, a look called rim light. Turn them slightly so some light reaches the face, or use a reflector to bounce light back.
- Still life. A cup of steaming coffee in a window beam makes its own tiny god rays from the steam. Shoot against a dark background.
- Workshops and kitchens. Flour, sawdust and steam all catch light. Busy hands in a beam make strong storytelling photos.
- Through water. Swimming pools and clear shallow water can show rippling beams below the surface, though that needs a waterproof camera or housing.
The same rules apply in every case: a strong light, gaps or a single opening, particles in the air, and an exposure that keeps the surroundings darker than the beam. Once you start looking, you will notice beams in kitchens, stairwells and car parks as well as forests.
Safety
Never look directly at the sun, with your eyes or through an optical viewfinder, especially with a telephoto lens. Use the rear screen or electronic viewfinder when composing near the sun, and keep the sun partly hidden. Do not leave a camera pointed at the sun for long periods, as concentrated light can damage the sensor or shutter.
Early morning locations can be wet, slippery and remote. Wear suitable shoes and tell someone where you are going.
Common mistakes
- Going out on clear, dry days. Without haze or mist, rays stay invisible. Look for fog, mist or dust.
- Arriving too late. Morning mist burns off quickly. Be there at sunrise.
- Shooting with the sun behind you. Face toward the light to see rays.
- Leaving the full sun in the frame. It blows out and causes flare. Hide it behind something.
- Overexposing. Bright exposures wash out the beams. Use minus exposure compensation.
- Too much dehaze. It removes the haze that makes rays visible.
- Not moving. A few steps can change faint rays into strong ones.
- Dirty lens. Smudges create flare and haze. Clean the front element.
Try this: a 10-minute god rays session
You can do this outside on a misty morning, or indoors with a sunny window and a steaming kettle.
- Minute 1 to 2: Find a spot facing toward the sun with something to break up the light: trees, a window frame or blinds.
- Minute 3: Check for particles. Outside, look for mist. Indoors, carefully let a kettle steam or shake a dusty cloth in the light (safely and away from electronics).
- Minute 4: Set aperture priority, f/8, ISO 100 or auto, and exposure compensation at zero. Take a photo.
- Minute 5: Set exposure compensation to minus one and take another. Compare how visible the rays are.
- Minute 6 to 7: Move left and right, hiding the sun behind an edge. Take photos from three positions.
- Minute 8: Add a subject into the beam: a plant, a cup, a person’s hand.
- Minute 9 to 10: Review. Which exposure and which position made the rays strongest?
Once you have seen how exposure and position affect rays, you will recognise god ray opportunities everywhere.
Frequently asked questions
What causes god rays?
Sunlight passing through gaps in clouds, trees or buildings into air containing particles such as fog, mist, dust or smoke, which make the beams visible.
What is the best time to photograph god rays?
Early morning, when the sun is low and fog or mist is common. Late afternoon and sunset are also good, especially with broken clouds.
What settings should I use for god rays?
Aperture priority at f/8 to f/11, a low ISO, and minus a half to minus one stop of exposure compensation to make the rays stand out.
Why can I see rays but my camera cannot?
Usually the photo is too bright, which washes the beams out. Reduce exposure and hide the sun behind an edge.
What are crepuscular rays?
The scientific name for god rays. The word refers to twilight, when these rays are most common.
Can I make god rays indoors?
Yes. Use a bright window or single light in a dim room and add a little steam or haze for the beams to show in.
Want to know where and when fog forms so you can catch more rays? Read the fog photography guide.
Curious why the light patches under trees look so spotty? See dappled light photography.