Fog photography works because fog is cloud at ground level: billions of tiny water droplets that scatter light, so every object loses contrast and colour the farther away it is. To photograph it well, go out on a calm morning near water or in a valley, expose brighter than your meter suggests (usually one to two stops), focus on the nearest edge with real contrast, and build the picture around a few near, dark shapes set against the grey.
This guide goes deeper than the fog sections in photography in different weather conditions and photography in bad weather. It explains why fog looks the way it does, which kinds of fog form where, and how to handle exposure, focus, composition, night scenes and wet gear.
What fog does to light, depth and detail
Fog droplets are much larger than the wavelengths of visible light, so they scatter all colours roughly equally. That is why fog looks white or grey rather than blue like a clear sky. Every metre of fog between you and an object does two things: it removes some of the light coming from the object, and it adds scattered light from everything around. The object fades toward the brightness of the fog itself.
The fading is not linear. Each equal step of distance removes the same fraction of the remaining contrast. Meteorologists call it fog when visibility drops below one kilometre and mist when you can see farther than that; visibility is roughly the distance at which a dark object fades until it can barely be seen against the sky. A useful consequence: an object at a fifth of the visibility distance still keeps a bit over half its contrast, while one near the limit is a pale ghost. On a morning when you can see about 100 metres, a tree 20 metres away still looks solid and a tree 90 metres away barely registers.
That gradient gives you three creative effects at once:
- Atmospheric perspective. Near things are dark and crisp, far things are pale and soft. The eye reads that gradient as distance, so fog creates depth even in a flat, telephoto view.
- Simplification. Clutter behind your subject disappears. Power lines, buildings and busy treelines vanish, leaving one shape on a plain field of grey. This is why fog suits minimalist photography.
- Layering. Where objects repeat at different distances, such as rows of trees, ridges or islands, each layer sits at its own tone, lighter as it recedes.
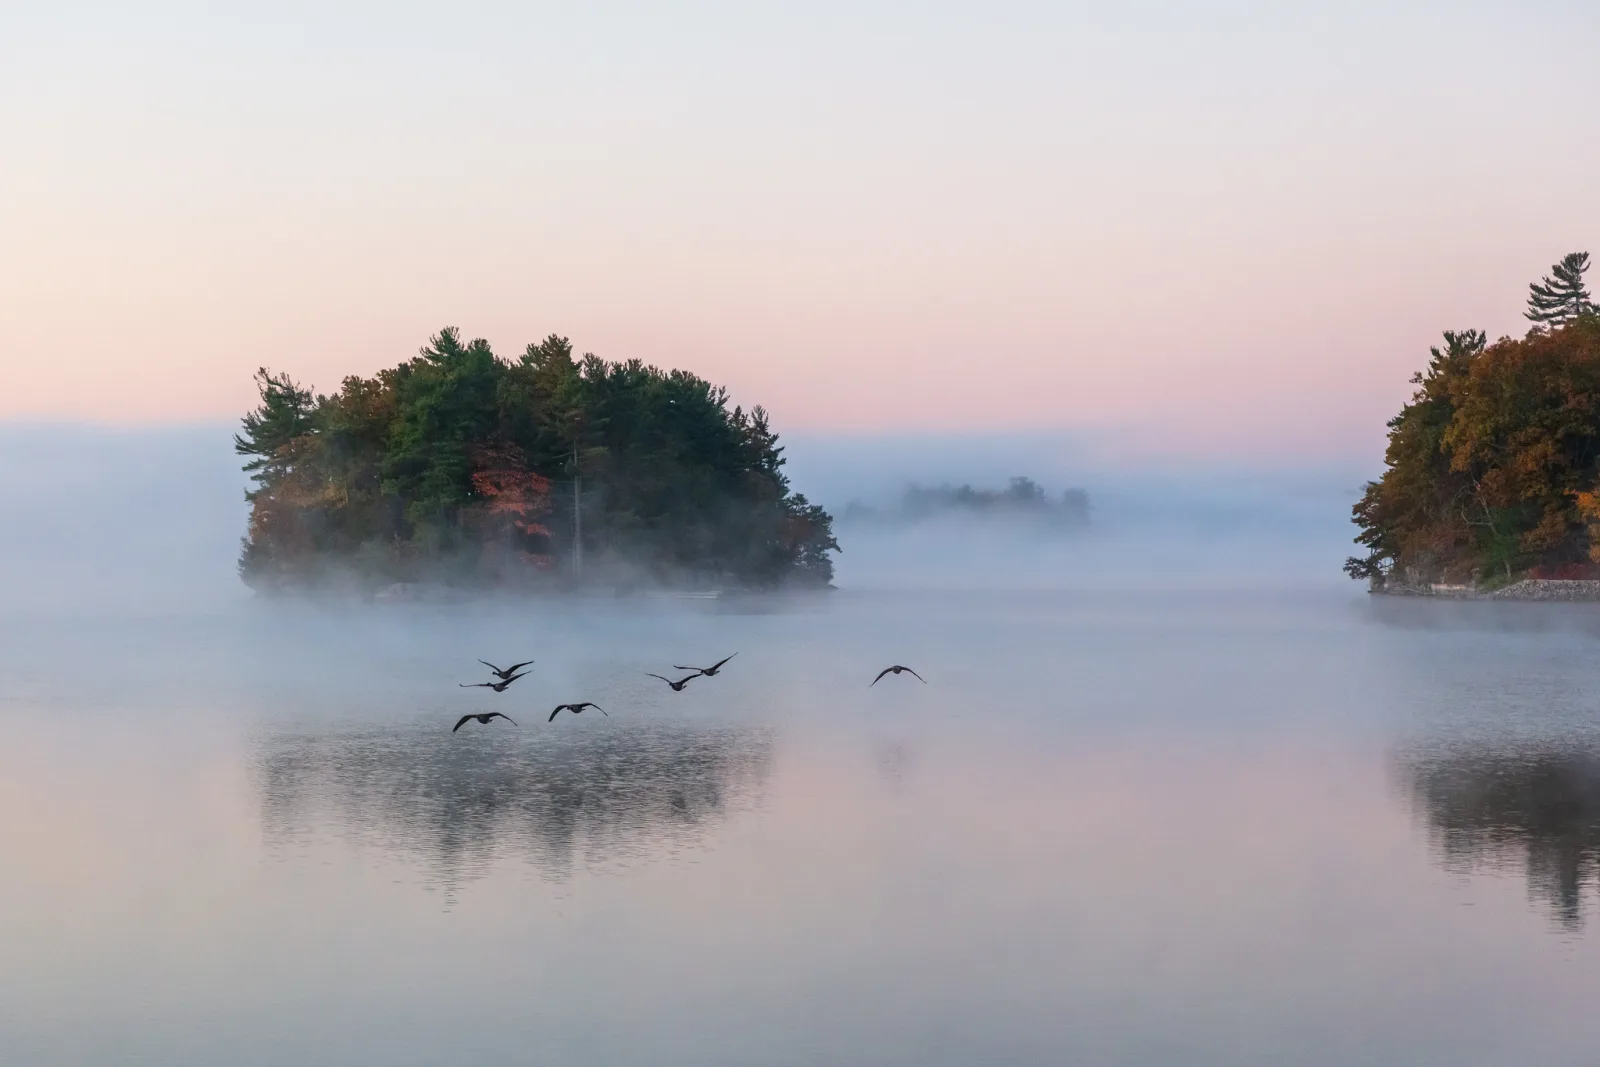
Where and when fog forms
Fog forms when air cools to its dew point, the temperature at which it can no longer hold its water as vapour, or when enough moisture is added to reach it. Different ways of getting there produce different kinds of fog, and each suggests a different place and time to be standing with a camera. For reading forecasts in detail, see planning around the sun, moon and tides.
| Type | How it forms | Where and when to look |
|---|---|---|
| Radiation fog | On clear, calm nights the ground loses heat to the sky and chills the air just above it | Low fields, valley floors, riversides and lakeshores, thickest around dawn, usually thinning within hours as the sun warms the ground |
| Valley fog seen from above | Cold, foggy air settles in low ground under warmer, clear air | Hilltops and ridges above a foggy valley at sunrise, looking down on a sea of cloud |
| Advection fog | Moist air moves over a colder surface, often cold sea water | Coasts and large cold lakes, at any time of day, often drifting in and out for hours |
| Steam fog | Very cold air passes over much warmer water and the evaporating moisture condenses at once | Rivers and lakes on cold autumn and winter mornings, rising in wisps from the surface |
| Upslope fog | Moist air is pushed up a slope and cools as it rises | Hillsides and mountain flanks facing a moist wind |
Radiation fog is the one most photographers meet. The signs are simple: a clear, still night, damp ground (the day after rain is ideal), and an overnight low close to the dew point. Wind is the enemy, because it mixes the cold layer near the ground with warmer air above. Because the coldest part of the night is usually around sunrise, radiation fog often thickens right at dawn before it starts to lift, which gives you both fog and the soft early light at the same time.
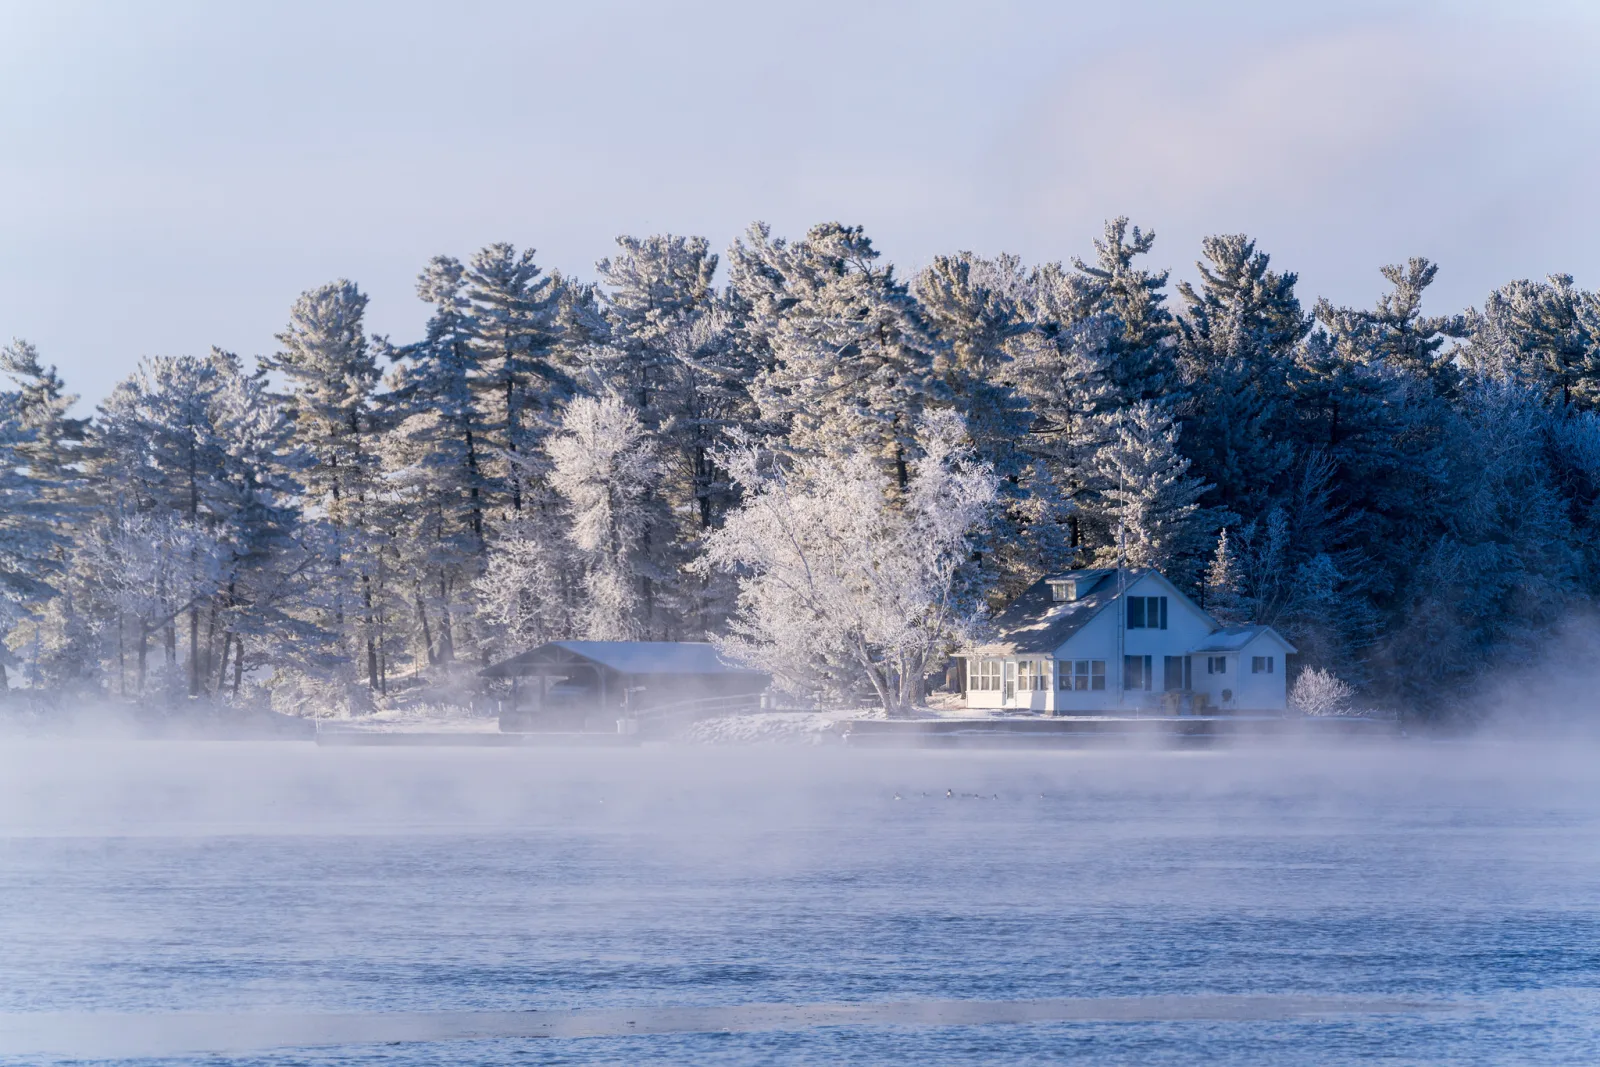
Two practical rules follow. First, go to low ground near water on calm mornings, and go early, because fog can form and disappear quickly. Second, decide whether you want to be in the fog (for intimate, close scenes with a few near subjects) or above it (for layered views of hilltops and treetops floating on a white sea). The same valley on the same morning offers both, a short climb apart.
Exposing fog so it stays bright
A camera’s meter assumes the scene averages out to a middle grey. Fog is brighter than middle grey, so an automatic exposure pulls it down and the result looks dull, dirty and flat. This is the single most common fog problem. The fix is exposure compensation in the plus direction, or a manual exposure set brighter than the meter reading.
| What fills the frame | Starting compensation |
|---|---|
| Mostly bright fog or fog with pale sky | +1.3 to +2 stops |
| Fog with some mid-toned subjects | +0.7 to +1.3 stops |
| Large dark subject or silhouette against fog | 0 to +0.7 stops |
| Night fog with lights in the frame | Set by the lights; check the brightest halos are not clipped |
These are starting points, not answers. Confirm each one with the histogram. A well exposed fog scene usually shows a narrow mountain of data sitting in the right half of the graph, with a small spike of darker tones from any near subject. Push that mountain as far right as you can without piling up against the right edge. If a patch of sunlit fog blinks as clipped, pull back a third of a stop; pure white fog with no texture looks like a hole in the picture.
Three more habits help:
- Shoot raw. Fog pictures live in smooth gradients, and you will usually add contrast afterward. A raw file holds far more tonal steps than a JPEG, which helps avoid banding, the visible stripes that appear when a smooth gradient is stretched too far.
- Keep ISO low when you can. Noise is most visible in smooth, even areas, and fog is almost nothing but smooth, even areas.
- Think about white balance as a choice. Fog takes the colour of the light falling on it: pink or gold at sunrise, blue-grey under overcast, orange or green under street lights. Neutralising every fog to pure grey throws away mood. Decide on the colour you want and set it deliberately.
Focusing when there is almost no contrast
Autofocus needs contrast to lock on, and fog removes it. A lens that hunts back and forth in fog is not faulty; it is looking for an edge that is not there.
- Use a single focus point and put it on the nearest edge with real contrast: a dark trunk against pale fog, a post, a boat’s hull, the edge of a rock.
- If the subject itself is too faint, focus on something at the same distance that is not, then lock focus and recompose.
- If autofocus still hunts, switch to manual focus, magnify the live view on your subject and turn the ring until the edge is as crisp as it will get.
- At night, focus on a light source at roughly your subject’s distance. Lights are the highest-contrast targets available.
Depth of field is rarely the problem in fog. Distant objects are soft from the fog itself, so there is little to gain from stopping down hard to render them sharp. Focus on the subject that matters, and choose an aperture for that subject.
One warning: if everything looks soft and low in contrast even at close range, check the front of your lens before blaming the focus. A film of droplets on the glass looks very much like fog in the picture, and it is the next section’s problem.
Composing in fog: silhouettes, layers and single subjects
The rule for fog composition comes straight from the physics: what is close is strong, what is far is faint. Build your picture around one or two near subjects that hold their shape, and let the fog do the rest.
- One subject, placed with space around it. A lone tree, a bench, a moored boat or a single figure against blank fog carries a picture alone. Give it room; the empty grey is negative space doing real work.
- Silhouettes. Dark shapes read beautifully against bright fog. Choose subjects with a distinctive outline, because interior detail is often lost. See silhouette photography.
- Receding layers. A row of trees, fence posts, pier pilings or overlapping ridges steps from dark to pale. A telephoto lens stacks those layers closer together and makes the tonal steps obvious.
- Lines that disappear. A path, road, bridge or shoreline that fades into nothing invites the viewer to wonder what lies beyond it.
- Sunbeams. When the sun is low and the fog is thin or patchy, light passing between trees or buildings lights up the droplets and shows as visible beams. Shoot toward the light with the sun itself hidden behind a trunk or branch, and protect the highlights. These moments often last only minutes as the fog thins.
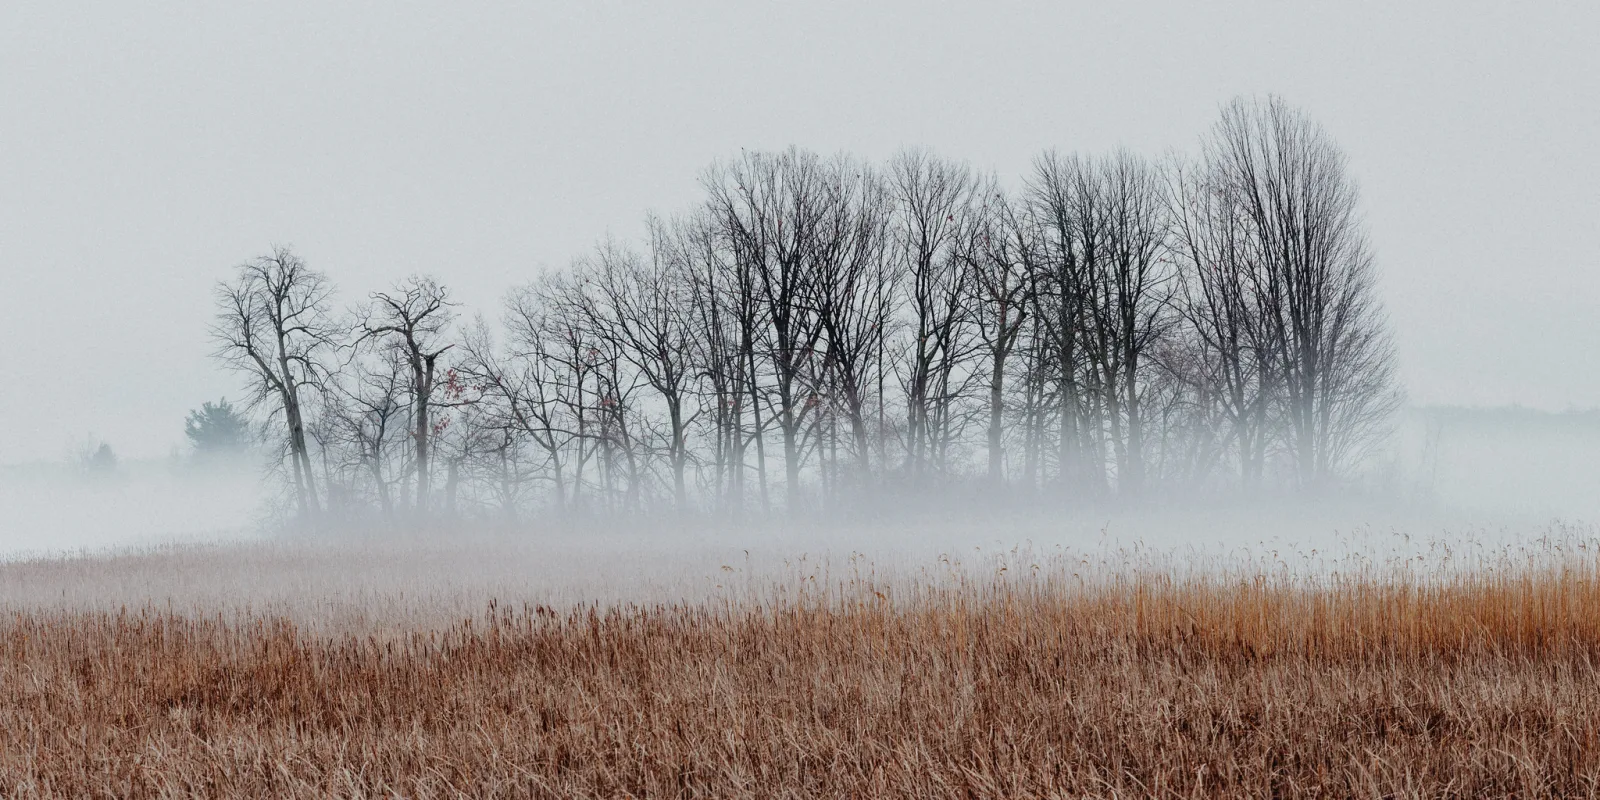
Distance is your main control. If a subject looks too faint, walk toward it; the fog between you shrinks and contrast returns. If it looks too heavy and ordinary, step back and let more fog in. Moving twenty paces can change a picture more than any setting. Watch the edges of a fog bank too: where it is thinning, you often get a clear foreground against a white background, which is the most useful arrangement of all.
Fog at night: halos, beams and glowing streets
At night, fog turns every light into a light source you can see. Street lamps grow soft halos, car headlights throw visible beams, and a lit building becomes a glowing shape floating in darkness. Cities that look ordinary on a clear night become atmospheric in fog, and many photographers treat a foggy night forecast as a reason to go out rather than stay in. The same principles as night photography apply, with a few differences.
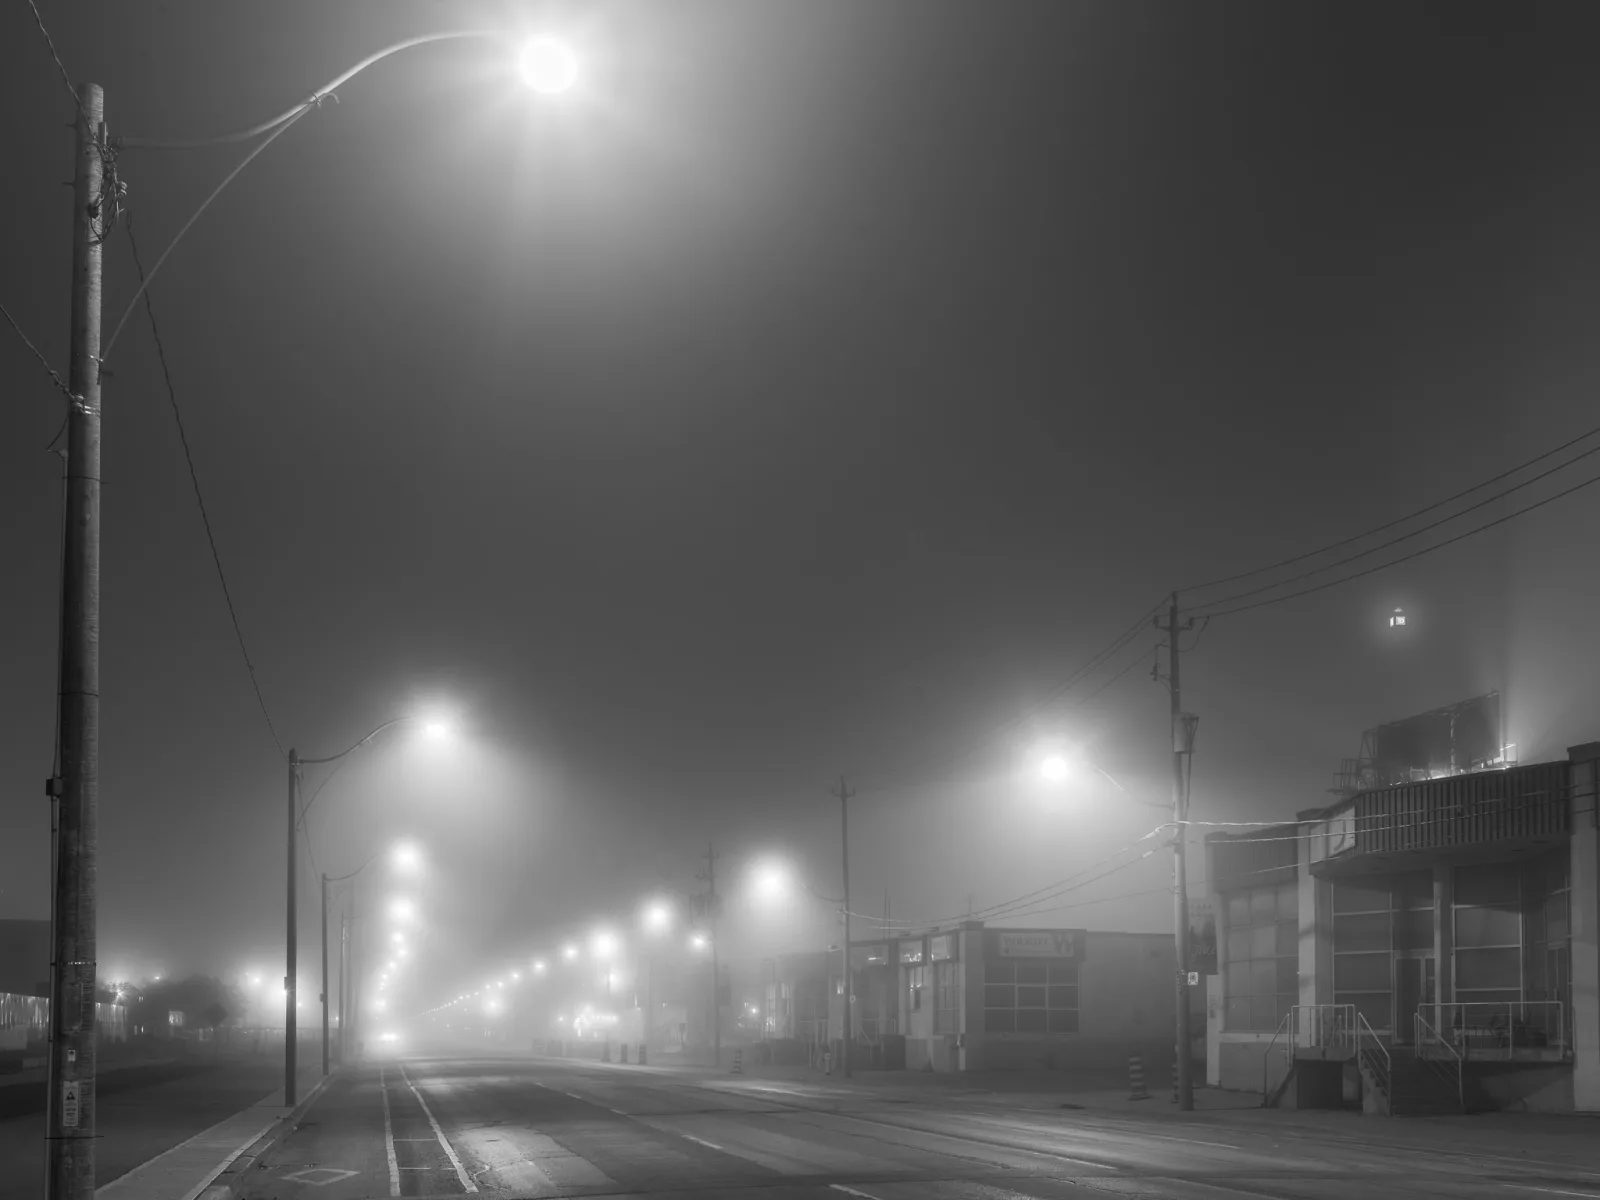
- Expose for the lights and the glow around them. The meter is easily fooled by large dark areas, so check the histogram and highlight warning, and let the shadows stay dark.
- Use a tripod and longer exposures. Fog moves. An exposure of several seconds smooths drifting fog into an even glow; a shorter one keeps its texture. Try both.
- Use lines of lights. A row of street lamps shows atmospheric perspective at night just as clearly as a row of trees does by day.
- Mind mixed colour. Different kinds of street lighting glow in very different colours, and fog spreads each colour into its surroundings. Either embrace the contrast or convert to black and white.
Keeping your camera and lens dry
Fog is suspended water, and it settles on everything, including your front element, filters and viewfinder. It is rarely heavy enough to harm a camera the way rain can, but it quietly ruins pictures by coating the glass.
- Use a lens hood. It blocks some drifting droplets and gives you a moment’s warning before the glass gets wet.
- Check the front element often, especially when pointing the lens into drifting fog, and wipe it with a dry microfibre cloth kept in a sealed pocket or bag so the cloth itself stays dry.
- Beware temperature changes. Condensation forms when cold gear meets warmer, humid air, such as stepping from a cold morning into a warm car or house. Before going inside, seal the camera in an airtight bag and let it warm up slowly; the moisture then condenses on the outside of the bag instead of on and inside the camera.
- For long night sessions, a battery-powered lens warming strip wrapped around the lens keeps the glass slightly above the dew point so moisture cannot settle.
- Dry everything afterward. Leave the bag open and let the gear air out indoors before packing it away.
Fog in black and white
Fog scenes are often nearly monochrome already, so black and white is a natural fit. Without colour, the eye goes straight to what fog is best at: tonal gradients, shapes and layers. The night street above works for exactly that reason.
The key edit is setting the black point on your nearest subject. Fog compresses the whole scene into a narrow band of greys, so let the closest dark object become a true black or very close to it, and let everything else sit in its natural sequence of lighter greys behind it. That single decision restores the sense of depth. Add contrast gently: too much turns smooth fog blotchy and brings out banding. If a fog picture needs more than gentle help, the editing techniques are covered in how to add or remove fog in editing.
Common mistakes
- Grey, muddy fog. The meter underexposed the scene. Fix: add +1 to +2 stops of compensation and check that the histogram sits in the right half.
- A subject too far away. It has faded into the fog and nothing holds the picture together. Fix: walk closer until the subject holds a strong, dark shape.
- Too many elements. Fog simplifies a scene only if you let it. Fix: choose one subject or one line of repeating shapes and exclude the rest.
- Autofocus hunting, then giving up. There was no contrast under the focus point. Fix: focus on a high-contrast edge at the same distance, or switch to manual focus with a magnified view.
- A wet front element. Pictures look soft and hazy even close up. Fix: check and wipe the glass between frames, and use a hood.
- Arriving too late. Radiation fog often starts to lift soon after sunrise. Fix: be in position before first light on calm mornings.
- Over-editing. Heavy contrast and clarity destroy the softness that made the scene. Fix: set the black point, then add contrast in small steps.
Try this
On the next foggy or misty morning, find something that repeats at different distances: a row of trees, lamp posts, fence posts or parked boats. Spend twenty minutes on two small experiments. First, stand still and make three frames of the same composition at 0, +1 and +2 stops of compensation, then compare the histograms and the look of the fog on the camera screen. Second, pick one of the repeating objects and photograph it from three distances: very close, about ten paces back and about thirty paces back. At home, look at how much contrast the subject keeps at each distance. You will come away knowing your own starting exposure for fog and a feel for how close a subject must be to hold the picture.
Frequently asked questions
Why do my fog photos look grey and flat?
The camera exposed the bright fog as middle grey. Add one to two stops of exposure compensation, and include at least one near, dark subject so the picture has a full range from dark to light.
What is the difference between fog and mist?
Both are water droplets suspended in the air. By the standard meteorological definition, fog reduces visibility below one kilometre and mist leaves it at one kilometre or more. Photographers often use the words loosely.
What settings should I use for fog?
There is no single recipe. Use a low ISO, the aperture your subject needs, and plus exposure compensation checked against the histogram. On a tripod, try a long exposure to smooth moving fog and a short one to keep its texture.
Can fog damage my camera?
Ordinary fog rarely harms a camera, but moisture can build up during long sessions and condensation forms when cold gear goes into a warm room. Wipe the glass, keep the camera covered when not shooting, and let it warm up in a sealed bag.
Related guides
- Photography in different weather conditions: rain, snow, storms and overcast light alongside fog.
- Photography in bad weather: protecting gear and finding pictures when conditions turn.
- Planning around the sun, moon and tides: reading cloud and fog forecasts in more detail.
- How to add or remove fog in editing: haze removal, adding believable mist and finishing fog pictures.
- Forest photography: fog and sunbeams among trees.
- Exposure compensation: the control that keeps fog bright.
- Minimalist photography: building pictures from a single subject and space.
- How to find and scout photography locations: finding the valleys and shorelines where fog gathers.