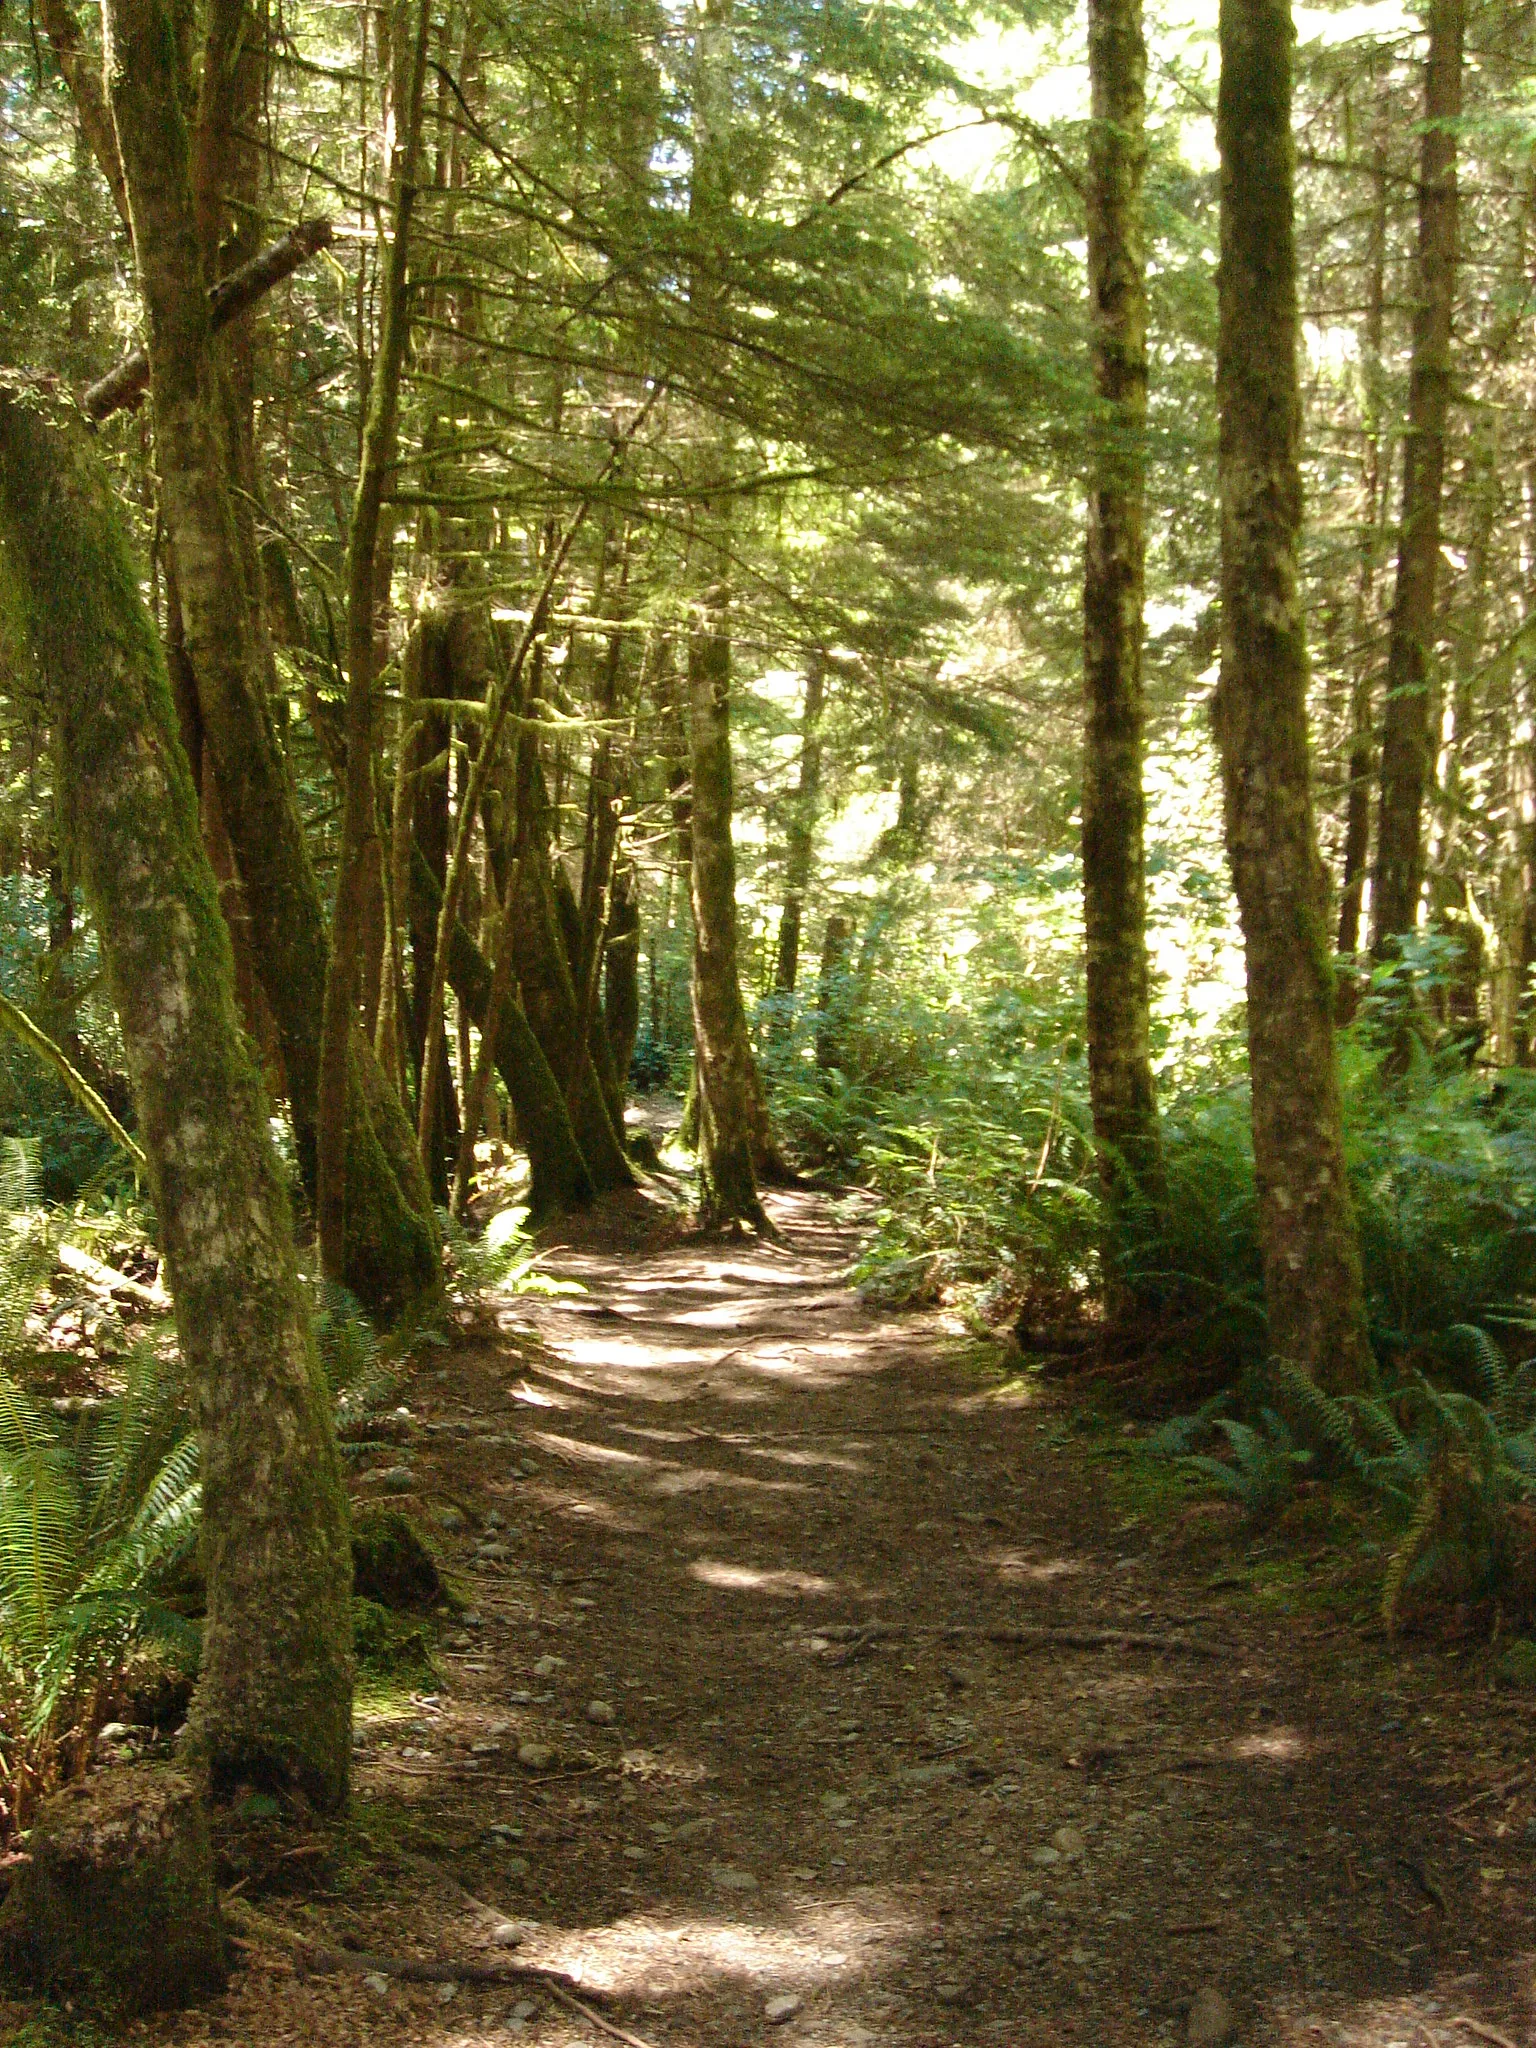
Dappled light is the patchy mix of bright spots and shade you get when sunlight shines through leaves, branches, a pergola or any gappy cover. It can make beautiful, textured photos of forests, paths and gardens, but it is usually unflattering on faces, where it leaves bright blotches on the nose and forehead. To work with it, either use it on purpose for landscapes and details, exposing for the brightest patches you care about, or avoid it for portraits by moving your subject fully into shade or fully into sun, or by blocking the gaps with a diffuser.
You have almost certainly seen dappled light, even if you have never had a name for it. It is the light under a tree on a sunny day, where the ground is covered with little pools of sunshine. Your eyes find it pretty and relaxing. Cameras find it tricky, because the difference between the sunny spots and the shade is huge.
This guide explains what dappled light is, why it causes trouble, when it works beautifully and when to avoid it, how to set your exposure, and how to fix it in editing. By the end, you will know when to walk into those patches of light and when to walk away.
What dappled light is
On a sunny day, direct sunlight is hard light. Hard light comes from a small, bright source, in this case the sun, and casts sharp, dark shadows. The page on hard vs soft light explains the difference.
When that hard light passes through a canopy of leaves, most of it is blocked, but some squeezes through the gaps. Each gap lets a small beam reach the ground. The result is a pattern: bright, sharp-edged patches of direct sun scattered over areas of shade. That pattern is dappled light.
You find it:
- Under trees, especially ones with small leaves or thin canopies.
- Under pergolas, trellises, palm fronds and woven umbrellas.
- Through blinds, lace curtains and fences.
- In forests on sunny days.
Fun fact: the little round spots of light under trees are actually tiny images of the sun. Each gap between leaves acts like a pinhole camera. During a partial eclipse, the spots turn into crescents.
Why cameras struggle with it
The sunny patches can be many times brighter than the shade around them. Your eyes adjust as they look from one area to another, so you see detail everywhere. A camera takes the whole scene with one exposure, and it can only record a certain range from dark to bright, called dynamic range. Dappled light often goes beyond that range.
So the camera has to choose:
- Expose for the shade, and the sunny spots turn pure white with no detail. Photographers call that “blown out” or clipped.
- Expose for the sunny spots, and the shade turns very dark.
- Somewhere in the middle, and you get a bit of both problems.
On top of that, the camera’s light meter, which measures brightness to set the exposure, can be confused by the mix of bright and dark. The exposure can jump around from shot to shot as you move slightly.
Dappled light on people: usually a problem
For portraits, dappled light is one of the trickiest kinds of light. Imagine a friend sitting under a tree. A bright spot lands on their nose, another on one cheek, and their eyes are in shade. In the photo, it looks like they have white paint splashed across their face. The bright patches also pull the viewer’s eye away from the eyes, which are where viewers should look in a portrait.
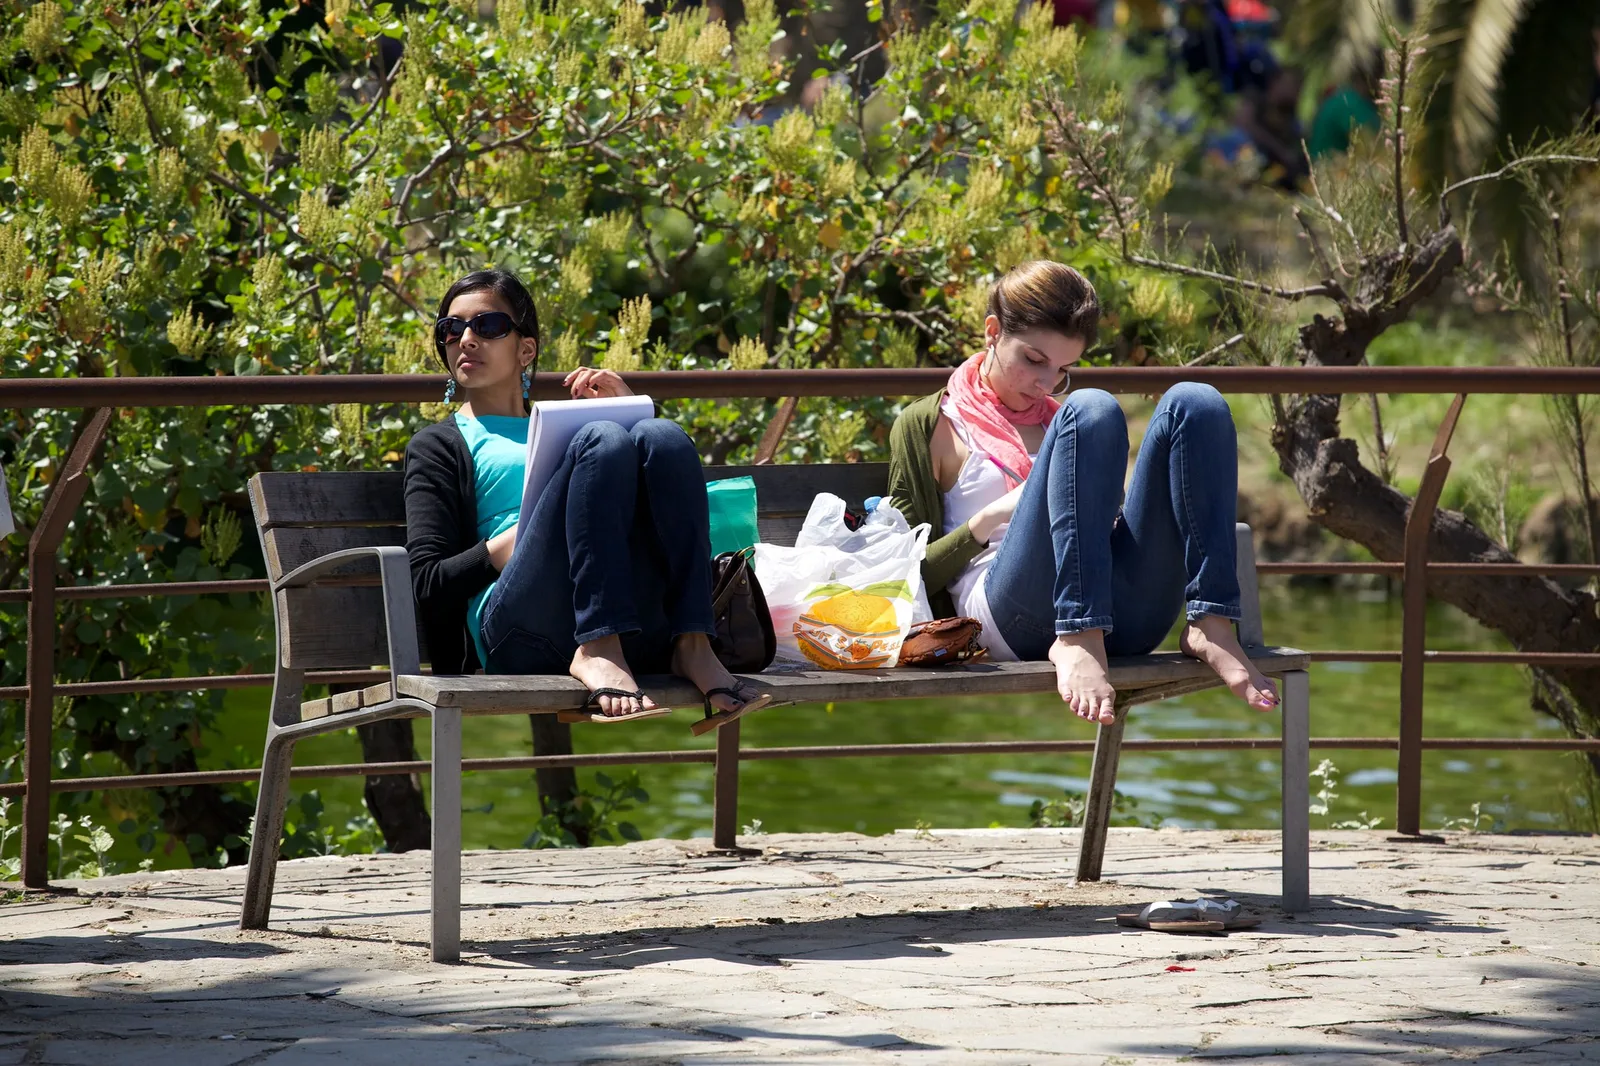
Look at the people on the bench further down this page. Their bodies are covered in patches of sun and shade. In a wide scene like that, it adds atmosphere. In a close-up of a face, the same light would be distracting.
How to fix dappled light for portraits
- Move fully into shade. Find a spot where no sun gets through, such as the shadow of a building or a dense part of the tree. Better still, find open shade, where the subject is shaded but faces bright open sky. This is usually the simplest fix.
- Or move fully into sun. Sometimes even light, even if it is hard, is better than patchy light. Turn the subject so the sun is behind them, lighting their hair, and their face is evenly in their own shadow. The guide on backlighting explains this.
- Block the gaps. Have a helper hold a diffuser, a sheet of thin white fabric in a frame, between the sun and your subject. It turns the patchy light into soft, even light. A white umbrella, a sheet or even a large piece of card can work in a pinch.
- Move the subject a little. Sometimes one step forward or back puts the face in a shaded patch while the sunny spots fall on the background.
- Wait for a cloud. A passing cloud turns dappled light into soft, even light for a few moments. Be ready to shoot.
When dappled light works on people
Dappled light is not always wrong for people. It can work when:
- The person is small in a wide scene, like the bench photo, so the light becomes part of the setting.
- The face is in shade and the dappled light falls only on the background, creating a sparkly, out-of-focus backdrop.
- A single small spot of light lands right across the eyes, like a spotlight. This is rare and needs careful positioning, but it can look stunning.
- You want a playful, summery mood, such as children running through a park or a picnic.
Want the simplest reliable light for faces on a sunny day? Open shade photography shows how to find and use it.
Dappled light on landscapes and details: often beautiful
Away from faces, dappled light can be lovely. It adds pattern, texture and a feeling of warmth and peace. Try it for:
- Forest paths and trails. Pools of light along a path lead the eye into the picture, like the trail photo at the top of this page. The guide to forest photography has more ideas.
- Single lit subjects. A fern, a flower, a mushroom or a leaf caught in a single beam of sun, with darkness around it, can look magical.
- Shadow patterns. Patterns of light and shade on a wall, a path or a floor can be a subject on their own. See shadow photography.
- Light beams in mist or dust. When there is mist, smoke or dust in the air, you may see the actual beams of light streaming through the trees. Early mornings in forests are best.
- Gardens and cafes. Dappled light under a pergola or vine gives a relaxed, summery feel to tables, flowers and food.
Look for the spotlight
The most striking dappled light photos usually have one main area lit by sun, with the rest in shadow. Your eye goes straight to the bright spot, like a spotlight on a stage. Walk around and look for a single beam landing on something interesting, then frame it so that beam is the star.
How to set exposure in dappled light
Exposure means how bright or dark the photo is. In dappled light, the key decision is: which part of the scene matters most?
Expose for the light
For most dappled light photos, expose for the brightest patches you care about, so they keep their color and detail. Let the shadows fall dark. This usually looks the most natural and dramatic.
How to do it:
- Use exposure compensation, the plus and minus control. Dappled scenes often need minus 0.3 to minus 1 to keep sunny spots from turning white.
- Turn on the highlight warning, often called “blinkies”, which makes overexposed areas flash on the screen during playback. If large bright patches blink, lower the exposure.
- Check the histogram. If the graph is pressed hard against the right edge, the brightest areas have lost detail.
- Or use spot metering, which measures just a small area, and point it at a sunlit patch.
On a phone, tap a bright patch to set exposure there, then slide the brightness down a little if it still looks too bright.
Shoot RAW
RAW files keep much more information than JPEGs, so you can recover more detail from the bright patches and the shadows later. If your camera or phone can shoot RAW, use it for dappled scenes.
Take a few versions
If you are not sure, take one photo at normal exposure, one a little darker and one a little brighter. This is called bracketing. Later, you can choose the best one, or combine them.
Composition tips
- Watch the edges. A bright patch at the edge of the frame pulls the eye out of the picture. Move or reframe so the brightest areas are inside the frame, near your subject.
- Avoid bright spots behind the subject’s head. They are distracting, a bit like a pole growing out of someone’s head.
- Use a wide aperture to blur dappled backgrounds into soft circles of light, often called bokeh. The page on depth of field explains how.
- Shoot toward the light for glowing leaves. Leaves lit from behind turn bright green or golden.
- Try black and white. Patterns of light and shadow can be even stronger without color. See the black and white photography guide.
Timing: when dappled light looks best
- Midday: the sun is high and the patches are small, bright and harsh. Best for patterns on the ground, hardest for people.
- Morning and late afternoon: the sun is lower, so beams come in at an angle. Light patches are warmer and longer, and you are more likely to see light beams in the air.
- Breezy days: leaves move, so the pattern dances. Take several shots, or use a faster shutter speed to freeze the moment you like.
- After rain or on misty mornings: moisture in the air shows beams of light.
For warm, low light in general, see golden hour photography.
Fixing dappled light in editing
Editing cannot turn dappled light into perfectly even light, but it can tame it.
- Lower highlights to bring back detail in the bright patches.
- Raise shadows a little to show detail in the dark areas. Do not overdo it, or the photo will look flat and gray.
- Use a brush or mask to darken individual bright spots that distract, especially on faces or at the edges. This is the modern version of dodging and burning.
- Check skin. Sunny patches on skin can look orange or pale compared with shaded skin. Gently even them out with a brush.
- Crop out bright edges that pull the eye away.
Dappled light indoors
You do not need a forest to find dappled light. Indoors, sunlight coming through blinds, shutters, lace curtains, plants on a windowsill or a patterned screen creates the same effect, and it is much easier to control because you can move things.
- Window blinds throw stripes of light across a wall, a floor or a person. Tilt the slats to make the stripes thinner or wider. Stripes across a face can look moody and cinematic if the eyes sit in a bright band.
- Lace and patterned curtains make soft, decorative patterns. They work well on still life subjects like a cup of coffee, a plant or a bowl of fruit.
- Houseplants on a sunny windowsill cast leafy shadows onto a nearby wall, which make a lovely backdrop for small objects.
- Cut-out card lets you create your own pattern. Cut shapes into a piece of card and hold it between a window or lamp and your subject. Photographers call a tool like this a cookie.
Because the sun moves, indoor patterns change quickly. A pattern that looks perfect may slide off your subject within ten or fifteen minutes, so set up first and be ready to shoot. Expose for the bright areas, as you would outdoors, and let the rest of the room fall into shadow for a dramatic look. The page on light and shadow has more ideas for using contrast on purpose.
Common mistakes
- Taking portraits in dappled light. Blotchy faces are the most common problem. Move into even shade or full sun.
- Letting bright patches blow out. Lower the exposure and check the highlight warning.
- Lifting shadows too far in editing. The photo turns flat and loses the beauty of the light.
- Ignoring bright spots in the background. They compete with your subject. Reframe or blur them.
- Not noticing the light at all. Many people only see the problem when they look at the photo later. Train yourself to look at faces and edges before you press the shutter.
- Giving up on dappled light completely. For forests, gardens and patterns, it can be the best light of the day.
Try this: a 10-minute dappled light walk
Find a tree or a pergola on a sunny day.
- Minutes 1 to 2: Photograph the ground under the tree at normal exposure. Look at the screen: are the bright patches white?
- Minutes 3 to 4: Lower exposure compensation to minus 1 and take the same photo. Compare.
- Minutes 5 to 6: Find a single leaf, flower or object lit by one beam of sun with shade around it. Photograph it as your “spotlight” shot.
- Minutes 7 to 8: If you have a willing friend, photograph them in the dappled light, then move them fully into shade and photograph again.
- Minutes 9 to 10: Compare all your photos. Which ones did the dappled light help, and which did it hurt?
Frequently asked questions
What is dappled light in photography?
It is a pattern of small bright patches of sunlight and shade, created when sun shines through leaves, branches or other gappy cover.
Is dappled light good for portraits?
Usually not. It leaves blotchy bright spots on faces. Move the person into even shade, full sun or use a diffuser to soften it.
How do I expose for dappled light?
Expose for the brightest areas you want to keep, usually with minus exposure compensation, and check the highlight warning or histogram.
How do I fix dappled light on a face in editing?
Use a brush or mask to darken the bright patches and gently lift the shaded areas. It helps, but avoiding the problem when shooting works better.
When does dappled light look best?
For landscapes and details, morning and late afternoon give warmer, angled beams. Misty mornings can show visible rays of light.
Can I photograph dappled light with a phone?
Yes. Tap a bright patch to set exposure, slide the brightness down a little if needed, and avoid putting people in the patchy light.
Curious how the direction of the sun changes every scene, not just under trees? Direction of light explains front, side, back and top light.