Why Fireworks Photography Is Different from Other Night Photography
Photographing fireworks is a unique challenge because the subject is a moving, unpredictable light source against a dark sky. Unlike most night photography where you work with existing light, fireworks create their own light, which means your exposure settings are surprisingly specific and consistent. Once you nail the right combination of aperture, shutter speed, and ISO, you can capture stunning fireworks images with remarkable reliability.
The key insight that simplifies everything: fireworks create their own light at a fairly consistent brightness. This means your exposure settings do not change much throughout the show, unlike other night photography where light levels vary dramatically. Master these settings once, and you can photograph any fireworks display.
Essential Gear
Before diving into settings, gather this equipment:
- Tripod: Absolutely essential. Fireworks photography requires multi-second exposures that are impossible to handhold. A sturdy tripod that will not vibrate in the wind is critical.
- Remote trigger or cable release: Pressing the shutter button causes vibration. Use a remote trigger, cable release, or at minimum, the camera’s 2-second self-timer.
- Wide to mid-range lens: A focal length of 24mm to 70mm works well for most fireworks shows. Too wide and the bursts will be tiny; too tight and you will miss the frame.
- Spare batteries and memory cards: Multi-second exposures drain batteries faster than normal, and you will shoot hundreds of frames throughout a show.
- Flashlight or headlamp: You will be setting up in the dark. A red-filtered headlamp preserves your night vision.
Core Camera Settings for Fireworks
| Setting | Value | Why |
|---|---|---|
| Mode | Manual (M) or Bulb (B) | Full control over exposure duration |
| Aperture | f/8 – f/11 | Sharpness across the frame; controls firework brightness |
| ISO | 100 | Fireworks are bright enough; low ISO keeps sky clean |
| Shutter Speed | 2s – 6s (Manual) or variable (Bulb) | Captures the full arc of a firework burst |
| Focus | Manual, set to infinity (or pre-focus on a distant landmark) | Autofocus cannot track fireworks; manual ensures consistent sharpness |
| White Balance | Daylight or Auto (shoot RAW) | Daylight gives clean, accurate firework colors |
| Image Stabilization | OFF | Can cause vibration on a tripod |
| Long Exposure NR | OFF (or ON if you can tolerate the delay) | LENR adds a dark frame delay equal to your exposure time |
| File Format | RAW | Maximum flexibility for color and exposure correction |
Why f/8 to f/11?
Fireworks are surprisingly bright. At ISO 100, an aperture of f/8 to f/11 produces well-exposed firework trails against a dark sky. If you open wider (f/4, f/5.6), the firework trails will be overexposed, turning white and losing their color. If you close tighter (f/16, f/22), the trails become too dim and diffraction softens the image.
Start at f/8 and check your first few shots on the LCD. If the firework trails look too bright or washed out, stop down to f/11. If they look too dim, open to f/7.1. The exact setting depends on the fireworks’ intensity, which varies between shows.
Why 2 to 6 Seconds?
A single firework burst typically takes 2 to 4 seconds from launch to full bloom. A 2 to 4 second exposure captures the full arc: the rising streak, the expanding burst, and the trailing sparks. Shorter exposures capture only part of the burst. Longer exposures can capture multiple bursts in one frame, creating a more complex, layered image.
During the grand finale, when many fireworks launch simultaneously, use shorter exposures (1 to 2 seconds) or close down your aperture to f/16 to avoid overexposure from the accumulated light.
Using Bulb Mode for Maximum Control
Bulb mode gives you the most creative control. In Bulb mode, the shutter stays open for as long as you hold the remote trigger button (or lock it open). This lets you time each exposure to match the fireworks perfectly:
- Open the shutter when you hear the launch (the “whoosh”).
- Keep it open through the burst and the trailing sparks.
- Close the shutter when the sparks fade.
This technique ensures each exposure captures complete bursts with no awkward cut-offs. It also lets you extend the exposure to capture 2 or 3 sequential bursts in a single frame, creating a richer, more complex image.
The Black Card Technique
For advanced control over multiple bursts in a single exposure, use a black card (a piece of stiff black cardboard held in front of the lens). Open the shutter in Bulb mode, hold the black card in front of the lens between bursts (blocking light from reaching the sensor), and remove it when the next burst you want to capture appears. This lets you selectively accumulate specific bursts over a longer period without the sky brightening from ambient light.
This technique requires practice but produces the most impressive results: multiple perfectly timed bursts layered into a single frame with a clean, dark sky.
Focusing for Fireworks
Autofocus will fail spectacularly during fireworks. The bursts are too brief, too unpredictable, and too far away for reliable autofocus. Switch to manual focus and use one of these methods:
Method 1: Pre-Focus Before the Show
Arrive early while there is still light. Use autofocus to lock onto a distant object (a building, tree, or landmark near where the fireworks will launch). Then switch the lens to manual focus. Do not touch the focus ring for the rest of the night. Since fireworks explode at a great distance, anything focused near infinity will work.
Method 2: Focus on the First Bursts
When the first fireworks launch, use Live View on your camera, zoom in on the burst, and adjust manual focus until the trails are sharp. Lock it and do not touch the focus ring again. The first few bursts are your calibration shots, not your final images.
Method 3: Focus on Infinity
Set your lens to manual focus and carefully turn the focus ring to the infinity mark. Many lenses focus slightly past true infinity, so check by taking a test shot of a distant light and verifying sharpness at 100% zoom. Once you find the true infinity point, lock it.
Composition Strategies
Strong composition separates memorable fireworks photos from generic ones. The fireworks themselves are only part of the image.
Include the Environment
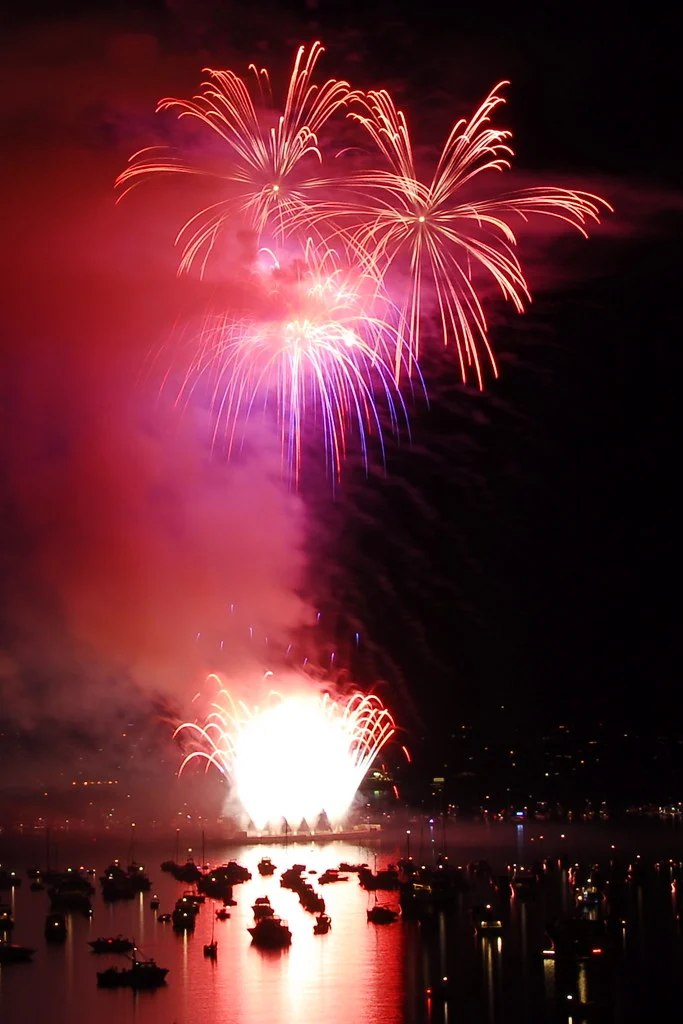
The most compelling fireworks photos include foreground elements that provide context and scale: a city skyline, a lake with reflections, a crowd of spectators, a landmark building. Fireworks against a plain black sky are less interesting than fireworks over a recognizable scene. Scout your location in advance and compose with the foreground in mind.
Reflections
Water reflections double the visual impact of fireworks. Position yourself so that a body of water (lake, river, harbor) is between you and the launch site. The reflected bursts add color and symmetry to the bottom of your frame. Even puddles after a rain can create beautiful reflections.
Leave Room for the Burst
Fireworks expand upward and outward from the launch point. Compose with plenty of empty sky above the launch point. It is better to have too much sky (you can crop later) than to clip the top of a spectacular burst. After a few bursts, you will know approximately how high and wide they spread, and you can tighten your composition accordingly.
Vertical vs. Horizontal
Vertical (portrait) orientation often works better for fireworks, especially from close range, because the burst rises and expands upward. Horizontal (landscape) orientation works better when including a wide foreground like a skyline or shoreline. Take some of each and decide later which works best.
Timing and Positioning
Arrive Early
Get to your location at least 1 to 2 hours before the show. The best spots fill up quickly. You need time to set up your tripod, compose your shot, pre-focus, and take test exposures. Scope out the launch location so you know where to point your camera.
Wind Direction Matters
Position yourself upwind from the launch site if possible. Wind blows smoke from earlier fireworks across the sky, and if that smoke is between you and the bursts, your images will look hazy and the colors will be muted. Downwind positions work for the first few minutes but deteriorate as smoke accumulates.
Distance from Launch Site
Too close and you will need an ultra-wide lens (with fireworks filling the entire frame and foreground options limited). Too far and the bursts will be small. A distance of 200 to 500 meters from the launch site is ideal for most fireworks shows when using a 24mm to 70mm lens.
Post-Processing Fireworks Photos
Fireworks photos benefit from specific post-processing adjustments:
- Increase contrast: Push blacks darker and whites brighter to make the firework trails pop against the sky.
- Adjust white balance: Fireworks can shift warm or cool depending on color. Slight warmth (5500K to 6000K) usually looks best.
- Increase vibrance/saturation: A modest boost makes the colors more vivid without looking unnatural. Be careful not to overdo it.
- Crop tightly: If the burst is small in the frame, crop to feature it prominently. Cropping is much better than having too tight a composition and clipping the burst.
- Layer multiple exposures: Combine several frames in Photoshop using Screen blend mode to stack multiple bursts into one spectacular image. Align the layers based on static elements (buildings, horizon) and the combined bursts will appear as a single, denser display.
Common Fireworks Photography Mistakes
1. Using Autofocus
Autofocus hunts during fireworks, often locking on nothing or refocusing between shots. This ruins images and wastes precious seconds. Switch to manual focus before the show starts and do not switch back.
2. Exposures Too Long
Exposures longer than 6 to 8 seconds accumulate too many bursts, creating a bright, cluttered mess. The sky can also brighten from accumulated ambient light (city glow, reflected firework light). Keep exposures between 2 and 6 seconds for clean results.
3. Not Checking Exposure During the Show
Check your histogram and LCD after the first few shots. If the firework trails are overexposed (white instead of colorful), close your aperture by one stop. If they are too dim, open up. Do not wait until the show is over to discover your settings were wrong.
4. Too Tight a Composition
Fireworks launches vary in height and spread. If you compose too tightly, the best bursts will extend outside your frame. Start wider than you think you need and crop in post. You can always crop a wider image; you cannot add pixels to a clipped burst.
5. Forgetting to Turn Off Image Stabilization
Image stabilization on a tripod can cause small vibrations that create slightly blurry trails. Turn off all stabilization (lens IS/VR and body IBIS) when the camera is on a tripod.
6. Leaving Long Exposure Noise Reduction On
Long exposure noise reduction takes a dark frame after every shot, doubling your capture time. During a fireworks show that lasts 15 to 20 minutes, this means you capture half as many images. Turn it off and handle noise in post. At ISO 100, noise is minimal anyway.
Frequently Asked Questions
Can I photograph fireworks with a phone?
Modern phones with “night mode” or “pro mode” can capture decent fireworks photos if you stabilize the phone on a tripod or solid surface. Use pro/manual mode if available, set ISO to 100, and use a 2 to 4 second exposure. Without manual controls, results will be inconsistent because the phone’s automatic algorithms are not designed for fireworks. A dedicated camera with manual settings will produce significantly better results.
What focal length is best for fireworks?
Start at 35mm to 50mm (full frame equivalent) from a moderate distance. This gives you flexibility to include foreground elements and the full spread of large bursts. If you are far from the display, a 70mm to 100mm range may be needed. Avoid going longer than 100mm unless you specifically want tight crops of individual bursts, because large fireworks spread wider than you expect.
How do I capture fireworks reflections in water?
Position yourself so water is between you and the launch site. Include both the sky bursts and their reflections in your composition (vertical/portrait orientation often works well for this). The reflections add a second “layer” of color and light. Wind that creates ripples on the water will scatter the reflections into interesting patterns, while calm water creates mirror-like reflections.
How do I photograph fireworks and the crowd together?
Use a wider lens (24mm to 35mm) and include the silhouetted crowd in the lower portion of the frame. During the exposure, the fireworks light will illuminate the crowd from above, creating a dramatic scene. You can also use a brief flash burst during a long exposure to light the foreground crowd while the fireworks expose in the background.
Try This: Practice Exercises
Exercise 1: Sparkler Practice Session
Before the big show, practice your long-exposure technique with sparklers. Set your camera on a tripod, use f/8, ISO 100, and a 3-second exposure. Have someone wave a sparkler in front of the camera. Review the light trails and adjust your settings. This builds your confidence with Bulb mode, remote triggers, and manual focus before the real event.
Exercise 2: Multiple Burst Stacking
During a fireworks show, take individual 2 to 3 second exposures of separate bursts. After the show, combine 3 to 5 of your favorite bursts in an image editor using Screen or Lighten blend mode. Compare this composite to your single in-camera exposures. Stacking gives you complete control over which bursts appear and where, often producing more impressive results than any single exposure.
Exercise 3: The Aperture Test
During the early minutes of a fireworks show, shoot the same type of burst at f/5.6, f/8, f/11, and f/16 (keeping ISO at 100 and adjusting shutter speed if needed). Compare the brightness, color saturation, and sharpness of the trails. This gives you a personal reference for your camera and lens combination that you can use at every future fireworks show.
Special Situations
The Grand Finale
The grand finale launches dozens of fireworks simultaneously, creating an overwhelming barrage of light and color. Your normal 2 to 4 second exposure at f/8 will massively overexpose. Prepare by switching to a shorter exposure (1 to 2 seconds) and stopping down to f/11 or even f/16. Alternatively, use the black card technique to selectively capture only the best moments of the finale. The grand finale is the most spectacular part of the show but also the easiest to ruin with overexposure. Being ready with adjusted settings makes the difference.
Fireworks with City Skylines
When the fireworks display is launched over a city, you have an opportunity to include the illuminated skyline as foreground. The challenge is that city lights are much dimmer than fireworks. Shoot during blue hour (when the show starts just after sunset) so the skyline and sky have some ambient brightness. Use f/8, ISO 200, and 4 to 6 second exposures to balance both the skyline lights and the fireworks bursts. If the show starts well after dark, the skyline becomes very dim relative to the fireworks. You may need to exposure-blend two shots: one exposed for the city, one for the fireworks.
Fireworks from a Boat or Moving Platform
If you are watching fireworks from a boat, dock, or any moving platform, long exposures will show camera movement as blurred streaks rather than clean firework trails. Use shorter exposures (1 to 2 seconds maximum) and a wider aperture (f/5.6) to compensate for the reduced exposure time. The results will not be as clean as tripod shots, but you can still capture recognizable and impressive firework bursts. Image stabilization can help for exposures under 1 second.
Related Resources
- Night Photography Hub – Complete guide to shooting after dark
- Night Photography Settings – General settings for all night scenarios
- Shutter Speed Guide – Understanding long exposure techniques
- Tripod Guide – Choosing and using a tripod for long exposures
- Composition Guide – Strengthen your fireworks compositions
- Camera Histogram Guide – Read exposure accurately in the dark
- RAW vs JPEG – Why RAW matters for fireworks post-processing
- Photo Editing Guide – Process your fireworks RAW files