To photograph insects, go out early on a warm, still day, find flowers or water, and move in slowly with your shadow kept off the subject. Use a macro lens of around 100mm, or a telephoto zoom at its closest focus for butterflies and dragonflies. Start at f/8 to f/11 and 1/500 second with auto ISO, and turn the camera until its back is parallel to the wings or body so the whole insect sits in the thin zone of sharp focus.
The optics of close-up work (magnification, tripods, focusing rails, lighting kits) are explained in macro photography, and plant subjects in how to photograph flowers. This guide covers what those pages do not: where and when to find insects, how to get near them, what to do without a macro lens, what butterflies, bees and dragonflies each demand, and how to catch them in flight.
Finding insects: habitat, season and time of day
Insects cannot make their own body heat the way birds and mammals do. Their activity follows the temperature, and that one fact organises the whole day for a photographer.
| Time | What insects are doing | What it means for you |
|---|---|---|
| Dawn to early morning | Cold and still, clinging to grass stems and flower heads, sometimes covered in dew | The easiest approach of the day. A tripod and slow shutter speeds are possible. You have to search, because nothing is moving. |
| Mid-morning | Warming up. Butterflies and dragonflies bask with wings spread toward the sun | The best balance: subjects are visible and posed, but still slow to leave. |
| Midday to mid-afternoon | Fully warm, feeding and patrolling at top speed | Best for behaviour and flight. Approach is hardest and sunlight is harshest. |
| Evening | Slowing down and settling on roosts, often high on stems | A second calm window with warm, low light. |
In temperate climates the season runs from the first warm days of spring to the first frosts, with the greatest numbers in summer. Whatever the season, choose a day with little wind. A breeze that you barely feel swings a flower head through several centimetres, which is far more than the depth of sharp focus you have to work with.
Where to look
- Flowers in sun, out of the wind. A patch of nectar-rich flowers against a warm wall or hedge is the most reliable site there is. Plants with many small florets packed into one head keep an insect busy longest.
- Still or slow water. Ponds, ditches and quiet river margins with reeds are where dragonflies and damselflies hunt, hold territories and lay eggs.
- Edges. Where long grass meets a path, or woodland meets a clearing, you get shelter, sun and flowers together.
- Damp ground. Butterflies gather on wet mud and gravel to drink dissolved minerals. They stay put and often sit with wings open.
- A garden or balcony. A few pots of flowering herbs will bring bees and hoverflies to a spot where you can practise every day.
Stay in one good place instead of walking. Ten minutes beside a single flower bed shows you which flowers are visited, which perch the dragonfly returns to and where the bees arrive from.
Getting close without scaring them off
Insects react to three things: sudden movement, a shadow falling across them and vibration of the plant they are standing on. Manage those and most subjects will let you come surprisingly near.
- Take a first frame from where you are. It may be small in the frame, but it is a record, and it sets your exposure before you move.
- Check where your shadow falls. Come in from the side away from the sun, or low enough that your shadow stays behind you. A shadow sweeping over an insect looks like a bird.
- Move slowly and smoothly. Bring the camera to your eye before the final approach, not at the end of it. Advance while the insect is feeding or grooming and hold still when it stops and lifts its head.
- Do not touch the plant. Brushing a stem that connects to the perch sends a tremor straight to the subject. Watch your knees, your strap and the lens hood.
- Shoot in stages. Take a frame, move a little closer, take another. If the insect leaves, you already have something.
- If it flies, wait. Many insects return to the same flower or perch within a minute. Stay exactly where you are with the camera raised.
Dress in dull colours, and get low early: kneeling down at arm’s length from the subject is a large, sudden movement. Kneel a few metres back and shuffle forward.
Leave the insect as you found it
Do not chill, spray, glue or pin an insect to keep it still, and do not move one to a prettier flower. Do not handle butterflies, whose wing scales rub off, or dragonflies that have just emerged and are still soft. Keep well away from the entrances of bee and wasp nests, where the insects defend themselves. Bees feeding at flowers are occupied and rarely sting unless trapped or swatted.
Lenses and working distance, with and without a macro lens
Two numbers decide what a lens can do here. Magnification is how large the subject is drawn on the sensor: at 1x (also written 1:1) a 15mm bee makes a 15mm image. Working distance is the gap between the front of the lens and the subject. A short gap means you are more likely to scare the insect and to block your own light.
| Subject | Typical size | Magnification to fill about half the width of a full-frame sensor |
|---|---|---|
| Large butterfly, wings open | 60 to 100mm across | About 0.2x to 0.3x |
| Dragonfly | 40 to 80mm long | About 0.25x to 0.5x |
| Bumblebee | 15 to 25mm long | About 0.7x to 1x |
| Honeybee or hoverfly | 10 to 15mm long | 1x or more |
| Ladybird | 5 to 8mm long | More than 1x, or 1x and a crop |
A smaller sensor fills its frame at lower magnification, which is a real advantage for this subject. Butterflies and dragonflies do not need a true macro lens at all, while bees and anything smaller do.
With a macro lens
Macro lenses reach 1x, and their focal length sets the working distance. At 1x a macro lens of around 60mm leaves roughly 10cm between the front of the lens and the subject, one of around 100mm leaves roughly 15cm, and one of 150 to 180mm leaves 25cm or more. The exact figures vary with the design. For live insects, 90mm and longer is far easier than a short macro lens.
Without a macro lens
- A telephoto zoom at its closest focus. Many zooms that reach 300mm or 400mm give about 0.2x to 0.3x at a distance of a metre or more. That is enough for butterflies and dragonflies, and the long working distance makes them the easiest tool for nervous subjects.
- Extension tubes. An extension tube lets any lens focus closer. As a rough guide, the added magnification is the tube length divided by the focal length, so 25mm of tube adds about 0.5x on a 50mm lens but only about 0.12x on a 200mm lens.
- A close-up lens. This screws onto the front like a filter. On a telephoto zoom it is very effective: a +2 close-up lens makes a lens set to infinity focus at 50cm, and at 300mm that gives about 0.6x.
- A phone. Phone macro modes work at a few centimetres, which suits slow, tolerant subjects on cool mornings. See smartphone macro photography.
Settings for sharp handheld close-ups
Almost all insect photography is handheld, because the subject moves before a tripod is in place. Blur comes from three sources at once: your own movement, the insect’s movement and the plant swaying. Magnification enlarges all three.
| Situation | Shutter speed | Aperture | ISO | Focus |
|---|---|---|---|---|
| Cold, still insect at dawn, tripod | Whatever the light gives | f/8 to f/11 | 100 to 400 | Manual, magnified view |
| Basking butterfly or perched dragonfly, handheld | 1/250 to 1/500 | f/8 | Auto, often 200 to 800 | Autofocus, single small point on the head |
| Bee working a flower | 1/1000 or faster | f/8 to f/11 | Auto, often 800 to 3200 | Continuous autofocus, or fixed focus and move the camera |
| Small insect near 1x with flash | The camera’s flash sync speed | f/11 | 100 to 400 | Fixed focus, move the camera |
| Insects in flight | 1/2000 to 1/4000 | f/5.6 to f/8 | Auto, whatever it takes | Pre-focus or tracking |
Use manual exposure with auto ISO, or shutter priority. Keep image stabilization on: it reduces your hand movement, although it does nothing for a swaying flower. Shoot short bursts, because the sharpest frame of four is usually clearly better than the worst.
Light falls away as magnification rises. At 1x, a lens passes about two stops less light to the sensor than the same f-number does at normal distances. This is why ISO climbs so quickly near 1x, and why flash is so widely used for small insects.
Focusing: autofocus or move the camera
Up to about 0.3x, autofocus works well. Use one small point and place it on the head or eye. Closer than that, autofocus tends to rack back and forth. Set the focus by hand to the magnification you want, then lean slowly toward the subject and release the shutter as the eye comes sharp. A lens with a focus limiter can be restricted to its close range to stop long hunts.
Flash for small subjects
A flash solves the light shortage and freezes movement, because a flash at low power lasts a tiny fraction of a second (see flash duration). It must be softened. Bare flash at close range gives hard reflections on shiny wing cases and eyes, so fit a diffuser large enough to look big from the insect’s position. The common fault is a black background: the flash lights the insect but not the scene behind it. Either choose subjects with leaves close behind them, or raise the ISO and slow the shutter until the daylight background is only a stop or two under.
Natural light and clean backgrounds
Thin high cloud or open shade gives soft light with no flash at all. In direct sun, shiny bodies pick up harsh highlights. Low sun behind a butterfly makes the wings glow like stained glass, as explained in backlighting.
The background matters as much as the insect. It turns smooth when it is far behind the subject, so drop lower until distant foliage, not the ground right behind the flower, fills the frame. Moving the camera a few centimetres sideways changes the background completely at these distances. The bokeh page explains why distance behind the subject counts for more than aperture here.
Getting enough depth of field on a tiny subject
At close range, depth of field depends almost entirely on magnification and f-number. Focal length makes very little difference once the subject is the same size in the frame. The figures below are approximate totals for a full-frame camera.
| Magnification | f/8 | f/11 | f/16 |
|---|---|---|---|
| 0.25x (butterfly, dragonfly) | About 10mm | About 13mm | About 19mm |
| 0.5x (bumblebee, small butterfly) | About 3mm | About 4mm | About 6mm |
| 1x (honeybee, hoverfly) | About 1mm | About 1.3mm | About 2mm |
Doubling the magnification cuts the depth to roughly a third or less, and stopping down buys little back. Past f/16, diffraction softens the whole picture, and at 1x it begins to show sooner than that. Three things work better than a very small aperture:
- Align the camera with the subject. Find the flattest plane through the insect (the wings of a butterfly, the side of a dragonfly, the back of a beetle) and hold the camera back parallel to it. A whole butterfly fits inside 10mm of depth when you are square to its wings, and only an edge of it does from an angle.
- Back off and crop. At 0.5x you have three times the depth you have at 1x. A slightly smaller insect that is sharp from head to tail beats a frame-filling one with a sharp eye and nothing else.
- Put the focus on the eye. When not everything can be sharp, the nearest eye must be.
For a cold, motionless insect at dawn, a tripod and several frames focused at slightly different distances can be merged into one sharp image. The method is in the focus stacking guide. It fails the moment an antenna moves.
Butterflies, bees and dragonflies: what each demands
Butterflies
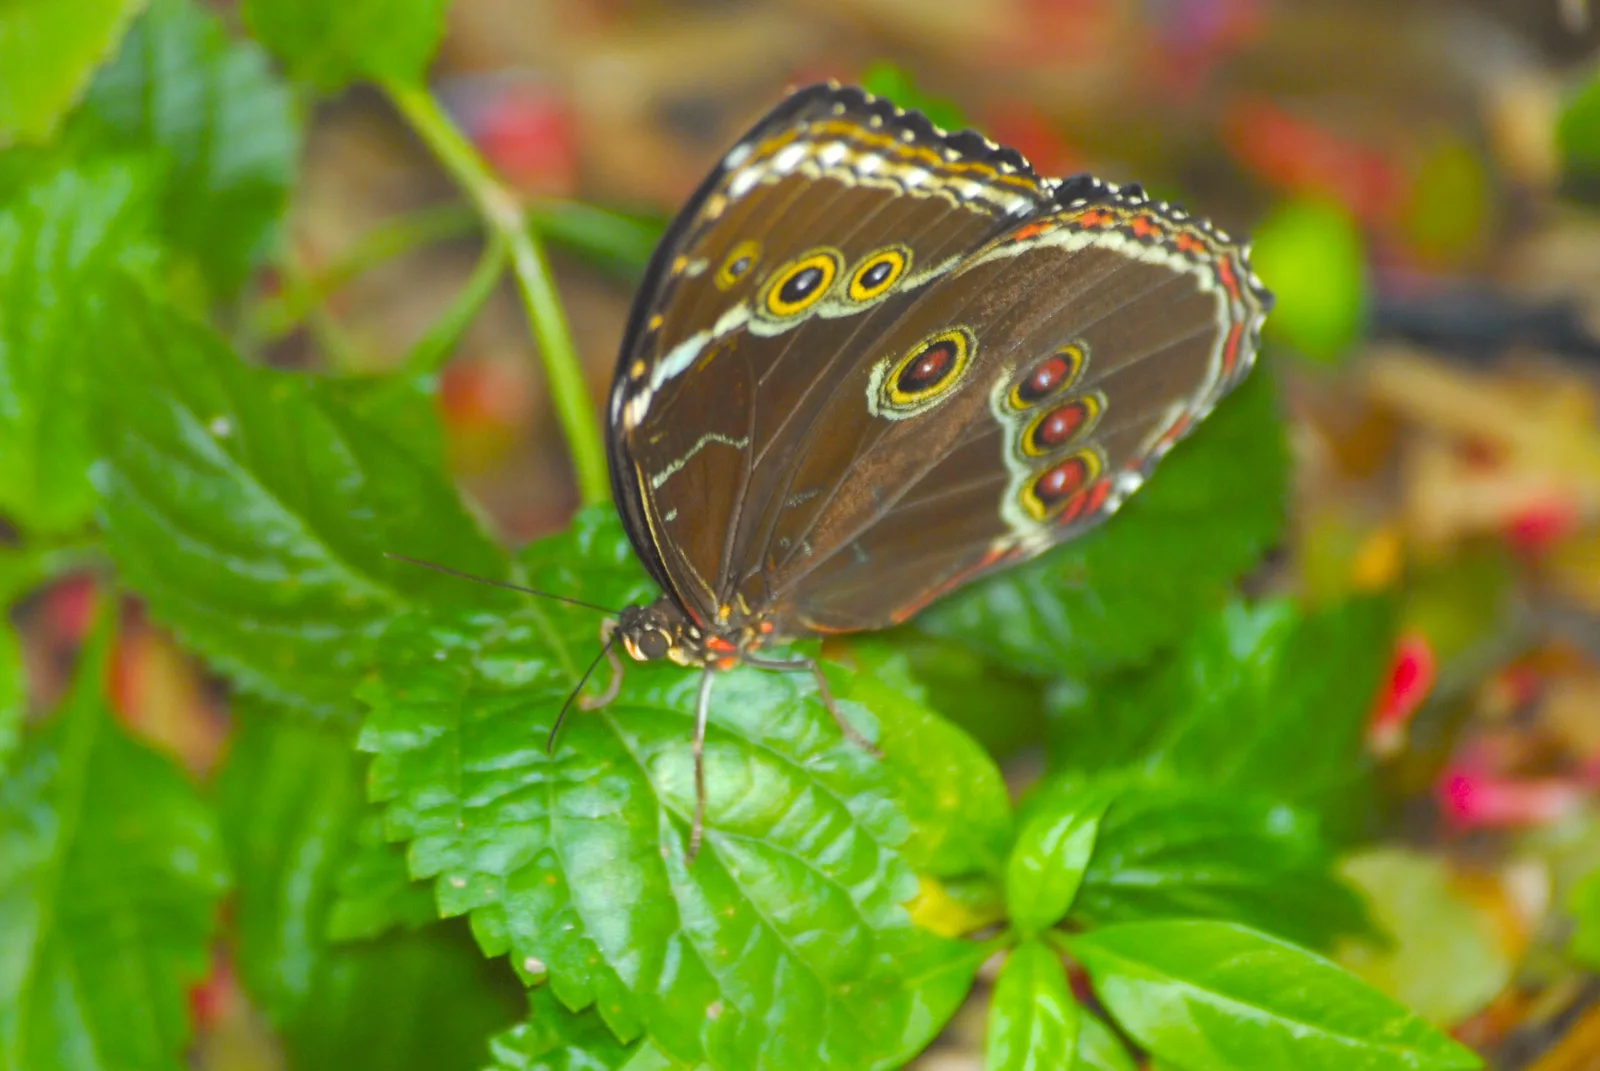
Butterflies give two classic poses. Basking with wings open, they are photographed from directly above. Feeding or resting with wings closed, they are photographed from the side, level with the body, to show the underside pattern. Either way the wings form a flat plane, so being square to them is everything. A feeding butterfly walks around the flower head and opens and closes its wings, so hold your position and wait for the pose to come round instead of chasing it.
Bees
Bees rarely stay more than a few seconds on one flower, and following them from flower to flower fails. Instead choose one good flower, at a comfortable height, with a clean background and other bees working nearby. Focus on it, frame it, and wait for a bee to arrive. Use 1/1000 second or faster. Bumblebees are larger, slower and active in cooler weather than honeybees, which makes them the better subject to learn on.
Dragonflies and damselflies
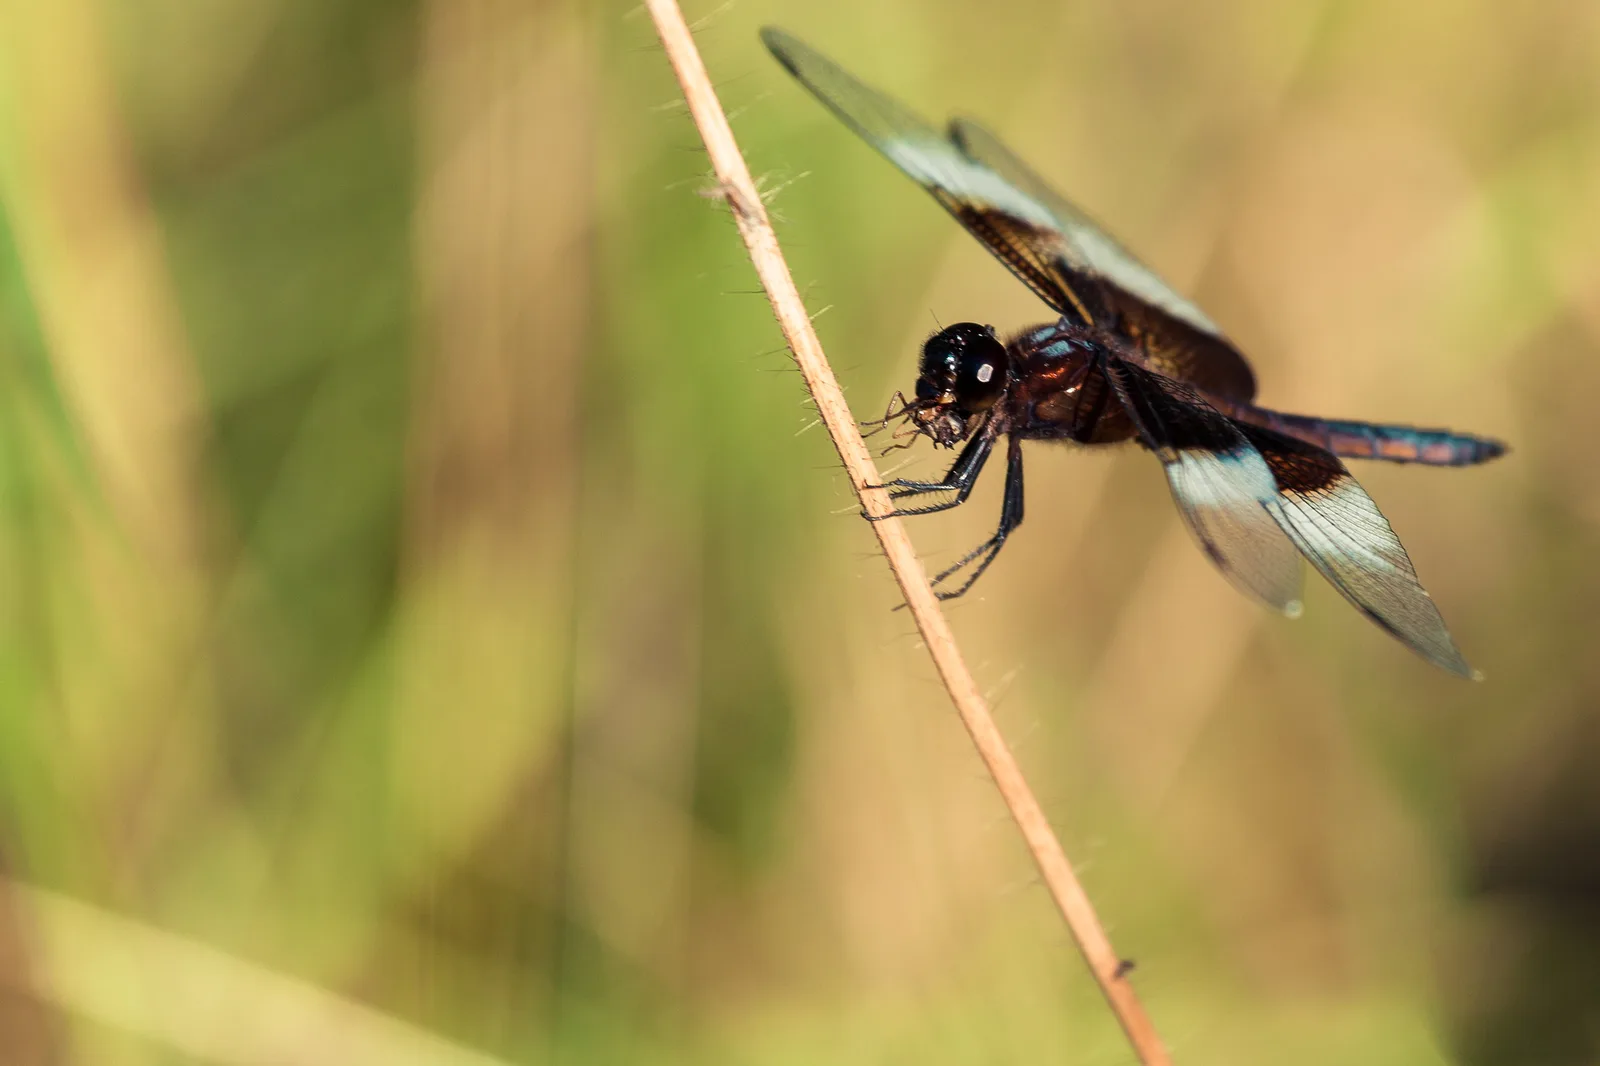
Many dragonflies hunt from a perch: a bare twig or reed tip with a clear view. They fly out, catch something and come back to the same spot, often within seconds. Find the perch, settle at a workable distance, focus on it and let the insect come to you. Others patrol a fixed route along the water’s edge and rarely land in the middle of the day. Look for those hanging from vegetation in the cool of early morning.
At rest, dragonflies hold their wings out flat, so the view from directly above gets body and all four wings sharp together. Most damselflies fold their wings back along the body and are best from the side. In both, the huge eyes are the focal point of a head-on portrait, which needs the highest magnification you have.
Insects in flight
Flight is the hardest shot in this field, and the success rate is low for everyone. The methods that work all rely on prediction, not reflexes.
- Start with hoverers. Hoverflies, and some dragonflies on patrol, hang in one place for a second or more. Focus manually at a set distance, move until the insect is sharp and fire a burst.
- Use the flight path. Bees approach a flower along a fairly straight line. Focus just in front of the flower, hold the camera side-on to the approach and shoot as each bee comes in or lifts off.
- Catch the take-off. Focus on a perched butterfly or dragonfly from the side and fire a burst the instant it flexes. Cameras with a pre-capture or pre-burst mode, which saves frames from just before you fully press the button, make this much easier.
- Give tracking a plain background. Subject tracking holds an insect far better against open water or sky than against vegetation.
Use 1/2000 to 1/4000 second and accept the ISO. A butterfly beats its wings roughly ten times a second and a dragonfly around thirty, so those speeds freeze them. A honeybee’s wings beat more than two hundred times a second, and they will show some blur at any ordinary shutter speed. That blur reads as flight and is no fault.
Common mistakes
- Shooting only at midday. The insects are at their fastest and the light is at its hardest. Fix: go out in the first two hours after sunrise or the last two before sunset.
- A sharp wingtip and a soft head. The camera was at an angle to the insect. Fix: line the back of the camera up with the wings or body, and put the focus point on the eye.
- Getting as close as possible every time. Depth of field collapses and the insect leaves. Fix: stay at 0.3x to 0.5x for larger insects and crop a little.
- A busy background. Bright stems and patches of sky pull the eye away. Fix: get lower and shift sideways until something plain and distant is behind the subject.
- Your shadow on the subject. The insect leaves just as you raise the camera. Fix: approach from the side away from the sun and keep low.
- Black backgrounds with flash. Only the insect is lit. Fix: raise the ISO or slow the shutter to bring the daylight up, or choose a subject with foliage close behind.
Try this
Find one flowering plant that insects are visiting and give it fifteen minutes. For the first five, do not shoot. Watch which flower heads are visited most and where the visitors arrive from. Then choose a single flower with a distant, plain background, set 1/1000 second, f/8 and auto ISO, focus on it and stay put. Photograph every visitor to that one flower for ten minutes, turning the camera each time so its back is parallel to the insect’s body. Afterwards, count how many frames have the eye sharp, and compare the ones taken square-on with the ones taken at an angle.
Frequently asked questions
Do I need a macro lens to photograph insects?
Not for the larger ones. A telephoto zoom at its closest focusing distance gives enough magnification for butterflies and dragonflies. For bees, flies and anything smaller you need about 1x, which means a macro lens, extension tubes or a close-up lens.
What is the best time of day to photograph butterflies?
Mid-morning on a sunny day, when they are basking with open wings and still slow to fly. Early morning and evening are good for finding them at rest on grass stems and flower heads.
What settings should I use for insects?
Start at f/8, 1/500 second and auto ISO for perched insects, and 1/1000 or faster for bees on flowers. For flight, use 1/2000 to 1/4000. Near 1x magnification, f/11 with a diffused flash is the usual answer.
How do I get the whole insect in focus?
Hold the camera so its back is parallel to the insect’s wings or body, use f/8 to f/11, and do not magnify more than you need. For a subject that is completely still, focus stacking on a tripod extends the sharp zone further.
Is it fair to photograph in a butterfly house?
Yes, and it is excellent practice, because the insects are used to people and the species are large. Give your camera fifteen minutes or more to warm up in the humid air so the lens stops fogging, and say where the picture was taken when you share it.
Related guides
- Macro photography: magnification, lighting kits and tripod technique for every close-up subject.
- Focus stacking: merging several frames for more depth of field on still subjects.
- How to photograph flowers: the other half of most insect pictures.
- Smartphone macro photography: close-ups with a phone and add-on lenses.
- Bird photography: the same patience and prediction applied to larger fliers.
- Wildlife photography: fieldcraft and ethics for animals of every size.
- Camera shake: why handheld close-ups blur and how to hold steadier.
- Flash photography: the basics behind a diffused close-up flash.