The Case for Bad Weather
Most photographers put their cameras away when the weather turns. That is a mistake. The conditions that make you want to stay indoors are often the same conditions that produce the most extraordinary photographs. Rain, fog, snow, and storms bring mood, drama, and visual interest that a clear blue sky simply cannot match. If you only shoot when it is pleasant outside, you are missing some of the best light and atmosphere the world has to offer.
Fog is one of the most magical conditions a photographer can encounter. It acts as a natural diffuser, softening light and reducing contrast. It simplifies busy scenes by erasing distant details, creating a sense of depth and mystery through layered planes of visibility. A forest that looks cluttered on a clear day becomes a cathedral of ghostly trunks when fog rolls in. A city street transforms into a scene from a film noir. Fog rewards early risers — it is most common just after dawn, when cool air meets warming ground. If you see fog in the forecast, set your alarm.
Rain brings its own set of gifts. Wet surfaces become mirrors, reflecting light, color, and shapes in ways that double the visual interest of a scene. Puddles on a sidewalk reflect neon signs. Wet roads catch headlights and streetlamps. Rain on a window creates a natural filter that softens and distorts the world beyond it. The light during rain is typically overcast and diffused, which is flattering for many subjects. And rain clears the streets of casual pedestrians, leaving a quieter, more atmospheric stage for your photographs. For specific techniques for working in wet conditions, see How to Photograph Rain.
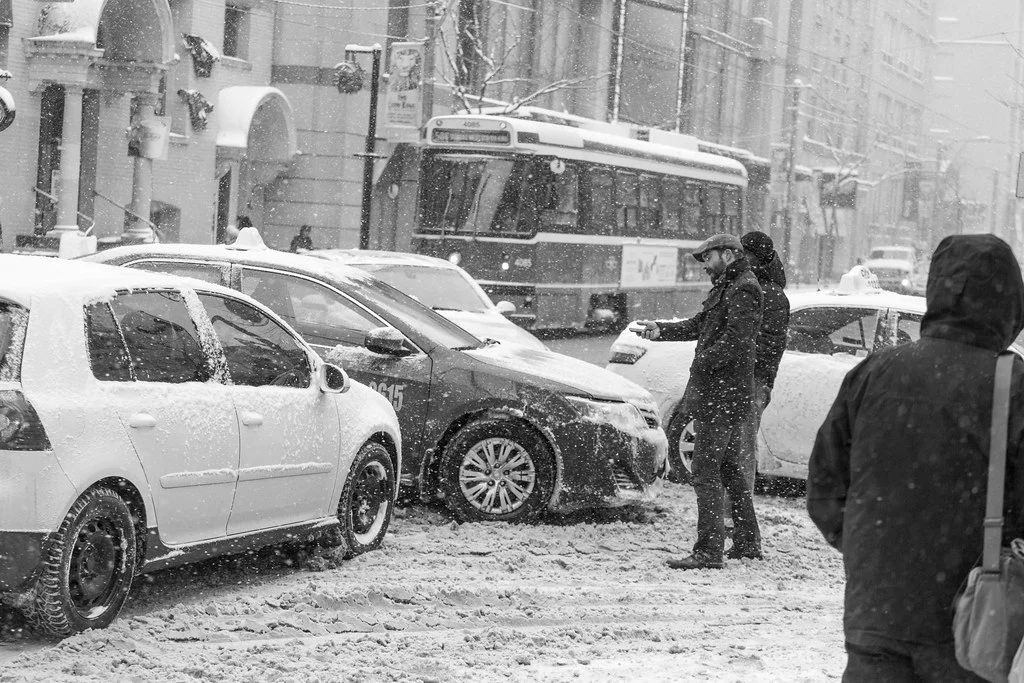
Snow transforms landscapes into studies of simplicity and contrast. A blanket of fresh snow reduces complex scenes to their essential shapes. Dark tree trunks against white fields, a red barn in a white landscape, footprints leading into the distance — snow simplifies and distills. The exposure challenge with snow is real, though. Your camera’s meter sees all that white and tries to make it middle gray, resulting in underexposed, dingy-looking snow. Compensate by adding +1 to +2 stops of exposure compensation. Check your histogram — the snow should push toward the right side of the graph without clipping to pure white.
Storms offer some of the most dramatic light in nature. The minutes before a storm arrives and the minutes after it passes often produce extraordinary skies — dark, moody clouds lit from below by the setting sun, or a break in the clouds that sends a shaft of golden light across an otherwise dark landscape. These moments are brief and unpredictable, which is exactly what makes them powerful. Be ready. Have your camera in your hand, not in your bag. The window of dramatic light may last only a few minutes.
High Contrast and Backlighting
One of the hardest technical challenges in photography is dealing with scenes where the brightest and darkest areas are far apart — what photographers call high dynamic range. A landscape with a bright sky and a shadowed foreground. A portrait taken near a window where the light outside is far brighter than the light inside. These situations exceed your camera’s ability to record detail in both the highlights and the shadows in a single exposure, and you have to decide how to handle that.
The first decision is creative, not technical: what matters most in this scene? If the sky has beautiful clouds and dramatic light, expose for the highlights and let the foreground fall into shadow. If the foreground subject is what the image is about, expose for the shadows and accept that the sky may blow out. The worst choice is usually the one the camera’s meter makes by default — splitting the difference, which often results in highlights that are too bright and shadows that are too dark to be useful.
Silhouettes are one of the most powerful ways to embrace extreme contrast rather than fight it. When you expose for a bright background — a sunset, a lit window, a bright sky — and let your subject go completely dark, the result is a bold, graphic image that communicates through shape alone. Silhouettes work best with subjects that have a strong, recognizable outline: a person in profile, a tree against the sky, a building’s geometry. To create a silhouette, meter on the bright background, lock that exposure, and let the foreground go dark. The result is often more striking than any attempt to “fix” the contrast.
When you need detail in both bright and dark areas, you have several tools. Fill flash adds light to a shadowed subject to bring it closer to the brightness of the background. This is particularly useful for portraits taken in front of windows or in backlit outdoor conditions. A reflector can do the same thing without a flash, bouncing ambient light back into the shadows.
For landscape and architectural photography, HDR (high dynamic range) processing and exposure blending let you combine multiple exposures of the same scene into a single image with detail throughout the tonal range. You take one exposure for the highlights, one for the shadows, and sometimes one for the midtones, then merge them in post-processing. The key to natural-looking HDR is restraint — the goal is to extend the tonal range, not to create a hyper-processed look where everything is equally bright. For detailed guidance on these techniques, see HDR Photography Guide and Exposure Blending.
Backlighting — when the light source is behind your subject — deserves special attention because it is one of the most beautiful and challenging lighting conditions. Backlit subjects are rimmed with light, their edges glowing with a halo of brightness. Hair becomes luminous. Translucent objects glow from within. The effect is gorgeous, but exposure is tricky. Your meter will try to expose for the bright background, turning your subject into a silhouette. If you want detail in the subject, add exposure compensation (typically +1 to +2 stops) or meter directly on your subject’s face or body and lock that exposure.
Low Light Without Flash
There are many situations where flash is either impractical (you are too far away), inappropriate (a church, a theater, a sleeping child), or simply not the aesthetic you want. Learning to work in low light without flash opens up an entire world of atmospheric, moody imagery that flash would destroy.
The first tool is ISO. Raising your ISO increases your sensor’s sensitivity to light, allowing faster shutter speeds in dim conditions. The tradeoff is noise — those speckled, grainy artifacts that become more prominent at higher ISO values. But here is the thing: noise in a well-exposed, compelling photograph is infinitely better than no photograph at all. Do not be afraid to push your ISO higher than feels comfortable. A slightly noisy image of a beautiful moment captured in candlelight is worth far more than a perfectly clean image you never took because you were worried about noise.
That said, know your camera’s limits. Every sensor has a usable high-ISO range, and it varies considerably between camera generations and sensor sizes. Spend some time testing. Shoot the same subject at ISO 1600, 3200, 6400, and 12800. View the results at the size you normally display them. You will likely find that your camera’s high-ISO performance is better than you expected. Modern noise reduction algorithms, both in-camera and in post-processing software, have become remarkably effective at cleaning up high-ISO files while preserving detail.
Image stabilization — whether in your lens or your camera body — helps you shoot at slower shutter speeds without blur from hand movement. A stabilized system might give you two to five extra stops of handheld capability. That is the difference between needing 1/125 and getting a sharp shot at 1/15. Stabilization works well for still subjects, but it does nothing for moving subjects — a person walking, a musician performing, leaves blowing in the wind. For those, you need a fast enough shutter speed to freeze the motion, which means a higher ISO.
Bracing techniques can substitute for a tripod in many low-light situations. Lean against a wall. Rest your camera on a table, a railing, or the top of a car. Press the camera firmly against a doorframe. Use a beanbag on an uneven surface. Even just pressing your elbows against your body and exhaling slowly before pressing the shutter can gain you a stop or two of stability. These are not elegant techniques, but they work.
In extremely dim conditions, your autofocus system may struggle. Contrast-detect autofocus needs visible edges to lock onto, and phase-detect systems lose accuracy in very low light. If your camera is hunting back and forth without locking focus, switch to manual focus. Use your camera’s focus peaking display (if available) or magnify the live view to check focus precisely. In predictable situations — a stage performance, for instance — you can prefocus on the spot where the action will happen and then wait for your moment.
Adopt the “grainy photo vs no photo” mindset. When conditions are tough, it is better to come away with an imperfect image than with nothing. Noise can be reduced in post. Slight motion blur can sometimes add energy. But a missed moment is gone forever. Raise the ISO, brace yourself, and take the shot.
Protecting Your Gear
Shooting in challenging conditions means exposing your equipment to elements that can damage or destroy it. A little preparation goes a long way.
Rain is the most common threat. Professional rain covers are available and worth the investment if you shoot regularly in wet conditions. In a pinch, a plastic bag with a hole cut for the lens works surprisingly well. Secure it with a rubber band around the lens hood. Keep a microfiber cloth accessible to wipe water from the front element between shots. And remember that most modern cameras with weather sealing can handle light rain perfectly well — they are tougher than you think. The real danger comes from heavy, sustained rain or from water entering through connection points like the battery door or card slot.
Cold weather creates its own challenges. Batteries drain dramatically faster in the cold — a battery that lasts all day in mild temperatures may die in an hour or two in freezing conditions. Carry spare batteries in an inner pocket, close to your body, and swap them when the power drops. The other cold-weather danger is condensation. When you bring a cold camera into a warm, humid interior, moisture condenses on and inside the camera, potentially fogging your lens and damaging electronics. The solution is to seal your camera in a plastic bag (or your camera bag with the air squeezed out) before bringing it indoors. Let it warm up gradually inside the sealed container, and the condensation will form on the bag instead of on your gear.
Heat and humidity bring different risks. High humidity can cause fungus to grow on lens elements over time, and it can introduce moisture into your camera’s electronics. In humid environments, store your gear with silica gel packets to absorb moisture. In extreme heat, cameras can overheat, especially during extended video shooting or long exposures. If your camera displays a temperature warning, stop shooting and let it cool down. Do not leave equipment in a hot car — temperatures inside a parked car can exceed 60 degrees Celsius, which is enough to damage lens coatings and electronic components.
Sand and dust are among the worst enemies of camera equipment. Sand particles can scratch lens elements, jam focus and zoom rings, and infiltrate the camera body through every gap. At the beach or in desert conditions, change lenses as little as possible. Keep your camera in a sealed bag when not actively shooting. If you do get sand on your camera, do not wipe it — blow it off with a rocket blower first, then clean gently with a brush. Wiping grinds the particles across the surface.
Finally, know when to put the camera away. Driving rain, sandstorms, extreme salt spray, and some industrial environments pose genuine risks to your equipment that no photograph is worth. If you can feel the conditions degrading — water finding its way past your protection, sand grinding in your zoom ring, your camera overheating repeatedly — stop. Clean and dry your gear. Come back when conditions improve. Equipment is replaceable, but an avoidable repair or a lost camera is frustrating in ways that a missed photograph is not.
Flare, Reflections, and Optical Challenges
Challenging conditions do not only come from weather. The physics of light itself creates optical challenges that you need to understand and manage.
Lens flare occurs when direct light — from the sun, a streetlamp, or any bright source — hits the front element of your lens and bounces between the internal elements. The result is a wash of reduced contrast, colored circles or polygons, or streaks of light across your image. Sometimes this is unwanted. Sometimes it is gorgeous. For more on this topic, see Lens Flare.
To reduce unwanted flare, use a lens hood. It is the simplest and most effective defense, blocking stray light from hitting the front element at oblique angles. When a lens hood is not enough, you can shade the lens with your hand, a hat, or a piece of cardboard, keeping the light source just outside the frame. Check your image on the screen to make sure the shade is not creeping into the corner of your frame.
But flare can also be a creative tool. Intentional flare adds warmth, atmosphere, and a dreamy quality to backlit scenes. Sun flare in a portrait or landscape can transform a good image into a memorable one. The key difference between accidental flare and intentional flare is control. When you use flare creatively, you choose the angle, the intensity, and the placement. Move your camera slightly to shift where the flare falls. Experiment with different apertures — flare patterns change as you stop down because the aperture blades create different shapes.
Shooting through glass presents two challenges: reflections on the glass surface, and autofocus locking onto the glass rather than the scene beyond it. To minimize reflections, press your lens (or lens hood) directly against the glass. This eliminates the air gap where reflections form. If you cannot get that close, shoot at an angle rather than straight on, or use a rubber lens hood that can seal against the glass. For autofocus, switch to manual focus if the camera keeps hunting. Dark clothing and a black lens hood also help reduce your own reflection appearing in the image.
Haze and atmospheric distortion affect sharpness and contrast over long distances. On hot days, heat shimmer makes distant subjects waver and blur. On hazy days, everything beyond a few hundred meters loses contrast and color saturation. A polarizing filter can cut through some haze, and a longer focal length can compress the atmospheric effect. But sometimes the best solution is patience — wait for clearer conditions, or shoot when the air is cooler and more stable, typically in the early morning. The ND Filter Exposure Calculator can help you plan long-exposure shots that work with these conditions rather than fighting them.
Try This — Challenging Conditions Exercises
Comfortable conditions produce comfortable photographs. Growth happens when you push past comfort and learn to work with whatever the world gives you. These exercises are designed to get you out in conditions you might normally avoid.
Rain Walk. The next time it rains, go out with your camera and appropriate protection. Commit to at least 30 minutes of shooting. Focus on the things rain brings that clear weather does not: reflections on wet pavement, the texture of raindrops on surfaces, people with umbrellas, puddles catching streetlights, water streaming down windows. Pay attention to how rain changes the color and mood of familiar scenes. You will almost certainly come home with images that surprise you.
Extreme Backlight. Find a subject and position yourself so the primary light source (the sun, a window, a bright lamp) is directly behind them. Create three deliberately different images from this setup. First, a pure silhouette — meter on the bright background and let the subject go completely dark. Second, a partially-filled backlit image — use positive exposure compensation to bring some detail into the subject while keeping the backlit glow. Third, a balanced image — use a reflector or fill flash to illuminate the subject while preserving the backlit atmosphere. Compare all three and notice how each tells a different story from the same starting point.
High ISO Challenge. Visit a dimly lit interior — a cafe, a museum, a place of worship, a subway station. Photograph with no flash and no tripod. Let yourself push the ISO as high as needed. The goal is twofold: to discover where your camera’s noise becomes truly unacceptable (it is probably higher than you think), and to practice the low-light handheld skills that let you capture moments in places where flash is either impossible or unwelcome. Review the images at the size you would actually display them, not zoomed to 100% looking for flaws. The difference matters.
The best photographs often come from the worst conditions. Rain gives you reflections. Fog gives you mystery. Harsh backlight gives you drama. Low light gives you atmosphere. The photographers who consistently produce striking work are the ones who see challenging conditions not as obstacles but as opportunities. Every time you choose to shoot when others stay home, you are building skills and capturing images that most photographers never will.