When the sun goes down, the city transforms. Neon signs, streetlamps, car headlights, shop windows, and illuminated buildings create a world of color, contrast, and drama that simply does not exist during daylight. Night street photography combines the spontaneity and human element of street photography with the technical challenges of low-light shooting. The result is a genre that rewards patience, adaptability, and a willingness to embrace imperfection.
Shooting after dark forces you to see differently. You stop looking at subjects and start looking at light. A person walking under a streetlamp becomes a pool of warm light surrounded by shadow. A rain-slicked sidewalk becomes a canvas of reflected neon. A foggy alley becomes a scene from a film noir. This guide covers the technical skills, creative approaches, and practical considerations you need to make compelling images on the nighttime streets.
Camera Settings for Night Street Photography
The fundamental challenge of night street photography is getting enough light onto your sensor while keeping your shutter speed fast enough to freeze moving subjects. You need to balance three variables aggressively.
Open your aperture as wide as your lens allows. If you have an f/1.4 or f/1.8 lens, use it wide open. The shallow depth of field at these apertures is actually an advantage at night, as it isolates subjects from busy backgrounds and creates beautiful bokeh from point light sources. A 35mm or 50mm prime lens at f/1.8 is the classic night street photography setup for good reason.
Raise your ISO without fear. Modern cameras produce usable images at ISO 3200, 6400, and even higher. A grainy photo with a sharp subject is infinitely better than a clean photo with motion blur. Noise can even add a gritty, atmospheric quality that suits nighttime street work. Many of the most celebrated night street photographs have visible grain. It is part of the aesthetic.
Keep your shutter speed at 1/125th of a second or faster if you are shooting handheld subjects in motion. If your subjects are relatively still (standing at a bus stop, sitting on a bench), you can drop to 1/60th. Below 1/60th, camera shake from your own hands becomes a problem unless your lens or camera body has image stabilization.
For metering, spot metering often works better than evaluative/matrix metering at night. The large dark areas in nighttime scenes confuse evaluative metering, causing the camera to overexpose. Spot metering on your subject’s face or on the brightest light source gives you more consistent exposures. Alternatively, use manual mode and set your exposure based on test shots, then adjust as the lighting changes from block to block.
Working with Artificial Light Sources
At night, every light source becomes a potential tool. Streetlamps create pools of warm light that naturally spotlight anyone who walks through them. Position yourself near a streetlamp and wait for interesting subjects to pass through the light. This “fishing” technique is one of the most effective approaches to night street photography. You choose the light first, then wait for the subject to enter it.
Neon signs and illuminated shop fronts provide vibrant, colorful light that can transform a mundane scene. The red glow of a bar sign, the blue flicker of a television through a window, the warm yellow of a restaurant interior, these colored light sources add mood and atmosphere that daylight cannot match. Look for subjects silhouetted against these light sources, or positioned so the colored light falls across their faces.
Car headlights and taillights create dynamic streaks when captured with slightly longer exposures. A passing car can paint a streak of white and red light through your frame, adding energy and motion to a static scene. For this effect, use a shutter speed around 1/15th to 1/4 second. You may need a tripod or a wall to brace against.
White balance becomes a creative choice at night rather than a correction. City lights produce a mix of color temperatures: warm sodium vapor lamps, cool fluorescents, blue-white LEDs, and multicolored neon. You can set your white balance to daylight to preserve this color variety, or shift it warmer or cooler to emphasize a particular mood. Many night street photographers prefer a slightly warm white balance that enhances the golden tones of urban lighting.
Crosswalks and intersections are particularly rich locations for night street photography. The convergence of car headlights, traffic signals, pedestrian movement, and storefront illumination creates a complex, layered scene. Position yourself at a corner and watch how the light environment changes with each traffic cycle. The moment when a red traffic light casts its glow across a wet street, or when a green “walk” signal illuminates a waiting crowd, these transient lighting conditions create images that are impossible to plan but deeply rewarding to capture.
Creative Techniques for After Dark
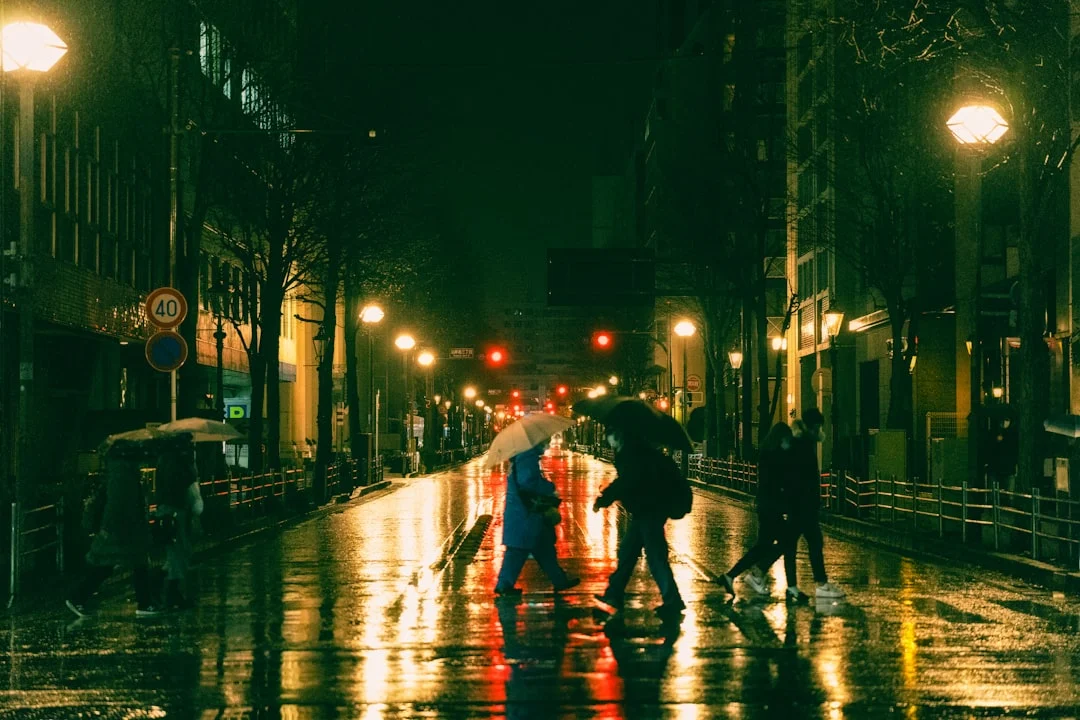
Silhouettes. Position your subject between the camera and a bright background (a lit shop window, a glowing sign, a bright crosswalk). Expose for the background, and your subject becomes a dark silhouette. Silhouettes work especially well at night because the contrast between bright backgrounds and dark figures is naturally high. Look for subjects with recognizable shapes: a person with an umbrella, someone on a bicycle, a couple holding hands.
Reflections. Rain transforms every surface into a mirror. Puddles reflect entire buildings. Wet pavement doubles the light from signs and streetlamps. Even on dry nights, glass windows and polished surfaces create reflections that add depth and visual complexity. Get low to the ground for puddle reflections. The lower your camera angle, the larger and clearer the reflection becomes.
Motion blur. Instead of always freezing motion, experiment with intentional blur. A slow shutter speed (1/8th to 1/2 second) with a steady camera turns moving people into ghostly streaks while keeping buildings and signs sharp. This technique conveys the energy and movement of city life. Use a tripod or brace your camera against a solid surface for best results.
Layers and depth. Nighttime cities naturally create layers of light and shadow. A foreground figure in shadow, a mid-ground illuminated by a streetlamp, and a background of glowing signs creates rich, layered compositions. Train yourself to see in layers rather than focusing on a single subject. The interplay between light areas and dark areas is what gives night photographs their distinctive mood.
Fog and steam. On cold nights, breath becomes visible. Manhole covers emit steam. Car exhaust catches in the air. All of these create atmospheric effects that are beautifully revealed by backlighting. A person exhaling into a beam of light, steam rising through a streetlamp’s glow, these moments are unique to night photography and can transform an ordinary scene into something cinematic.
Safety and Ethics After Dark
Night street photography carries practical considerations that daylight shooting does not. Personal safety comes first, always. Stay in well-lit, populated areas. Know your surroundings. If an area feels unsafe, trust your instincts and move on. Keep your camera strap secure and your bag closed. Be aware of who is around you, especially when you are looking through a viewfinder and your peripheral vision is limited.
Photographing strangers at night raises different ethical questions than doing so during the day. People in dimly lit areas may have a greater expectation of privacy than those walking through a busy daytime street. Be thoughtful about this. If someone notices you photographing them and appears uncomfortable, lower your camera and move on. A good night street photograph is never worth making someone feel unsafe or violated.
Shoot with respect. Avoid photographing vulnerable people in exploitative ways: those who are homeless, intoxicated, or in distress. The fact that someone is in a public space does not automatically make them an appropriate subject for your photography. Ask yourself whether your photo dignifies or diminishes its subject. If the answer is not clearly “dignifies,” do not take the shot.
Travel with a friend when possible, especially if you are exploring unfamiliar neighborhoods. A companion provides safety, conversation, and sometimes even a willing subject. If you are alone, let someone know where you are going and when you expect to return. Keep your phone charged and accessible.
Common Mistakes in Night Street Photography
Being afraid of high ISO. Many photographers keep their ISO at 800 or lower and end up with blurry photos because their shutter speed is too slow. Modern sensor technology makes high ISO settings very usable. Noise is fixable. Motion blur is not. Push your ISO as high as you need to maintain a sharp image.
Relying on flash. On-camera flash kills the atmospheric quality of night photography. It flattens the scene, eliminates the beautiful ambient light, and draws attention to you as a photographer. Learn to work with available light. The mixed, imperfect, colorful light of the city at night is one of your most powerful creative tools.
Shooting everything from eye level. Vary your angles. Shoot from hip level for a more candid, immersive feel. Shoot from below to emphasize buildings and signs looming above your subjects. Shoot from above (bridges, overpasses, balconies) for a more detached, observational perspective. Different angles change the mood of night images dramatically.
Ignoring the background. At night, bright light sources in the background (signs, lamps, car headlights) can overwhelm your subject. Pay attention to what is behind your subject and adjust your position to avoid distracting elements. Move a few feet to the left or right and the background changes completely.
Overediting. Night photos often look dramatic straight out of the camera. Over-processing with heavy contrast, saturation, or HDR effects destroys the natural mood. In post-processing, keep your adjustments subtle. A gentle increase in contrast, a slight lift in the shadows, and a careful white balance adjustment are usually all you need. Shoot in RAW to give yourself the most flexibility.
Try This: Night Street Photography Exercises
Exercise 1: The Single Light Source. Find one streetlamp on a busy sidewalk. Stand near it and photograph everyone who walks through its pool of light for 30 minutes. Do not move from your spot. Focus entirely on how the light falls on different people, how their shadows shift, and how their expressions change in the warm light. This exercise teaches you to see light as your primary subject and people as the element that brings it to life. Pay attention to how warm light tones affect the mood of each frame.
Exercise 2: The Color Walk. Walk through a commercial district at night and photograph only colored light: neon signs, LED displays, traffic lights reflected in wet surfaces, illuminated windows. Focus on how different colors create different emotions. Red feels intense and urgent. Blue feels cool and lonely. Green feels eerie and otherworldly. Try to create a series of 10 images organized by color that captures the chromatic diversity of the nighttime city.
Exercise 3: The Slow Shutter Story. Set your camera to shutter priority at 1/4 second. Brace against a wall, lamppost, or railing. Photograph moving subjects: people walking, cyclists passing, cars turning. Let the motion blur happen. Review your results and identify which images have an interesting balance of blur and sharpness. This exercise pushes you out of the “everything must be sharp” mindset and into a more expressive, artistic approach. Understanding how long exposure principles scale down to handheld speeds opens up new creative possibilities.
Night street photography is not a separate genre from daytime street work. It is the same observational practice with a completely different palette of light, color, and mood. The skills you build shooting at night, working with minimal light, making fast technical decisions, reading artificial light sources, these carry over into every other type of photography you do.
Start by going out for just one hour after sunset. Walk a route you know well and see it with fresh eyes. The city at night is a different world, and it is waiting to be photographed. You will make mistakes. You will come back with blurry, noisy, poorly composed images. That is part of the learning process. Each outing teaches you something about reading light, anticipating moments, and making technical compromises in challenging conditions. Within a few sessions, you will develop an intuition for what works after dark. That intuition is the foundation of all strong lighting awareness, and it will serve you in every genre of photography you pursue.