Most photographers wait for perfect conditions. Clear skies, golden light, calm air. But some of the most dramatic, atmospheric, and emotionally powerful photographs ever taken were made in terrible weather. Rain creates reflections and saturated colors. Snow simplifies compositions and transforms familiar landscapes. Fog adds mystery and depth. Wind brings energy and movement. Bad weather is not something to avoid. It is an opportunity that most photographers miss because they stay home.
Shooting in challenging conditions requires preparation, the right mindset, and a few technical adjustments. This guide covers the creative opportunities and practical considerations for photographing in rain, snow, fog, and wind. You will learn how to protect your gear, adapt your settings, and take advantage of conditions that make most people put their camera away.
Photography in the Rain
Rain transforms the world into a photographer’s playground. Wet surfaces become mirrors, reflecting city lights, neon signs, and headlights in vivid streaks of color. Puddles create perfect reflection opportunities. Colors become more saturated because the layer of water on surfaces eliminates glare and enhances contrast. Streets, sidewalks, and buildings that look ordinary on a dry day suddenly become visually rich.
To capture rain itself in your photos, you need the right shutter speed. A fast shutter speed of 1/500th or higher freezes individual raindrops as sharp streaks. A slower speed of 1/60th to 1/125th shows rain as softer, more atmospheric streaks. Very slow shutter speeds turn rain into a misty haze. Experiment to find the look you prefer. Backlighting rain makes the drops visible. If the rain is falling between you and a dark background, the drops will be nearly invisible. Position yourself so that a light source, a streetlamp, car headlights, or even a bright window is behind the rain, and the drops will glow.
For street photography in the rain, umbrellas become powerful compositional elements. They create shapes, patterns, and pops of color against gray backgrounds. People huddled under awnings, running across crosswalks, and jumping over puddles provide moments of genuine human emotion and energy. Rain changes behavior, and changed behavior makes for interesting photographs.
Protect your gear with a rain cover or a simple plastic bag with a hole cut for the lens. Most modern cameras have some weather sealing, but prolonged rain exposure will eventually find its way in. Keep a microfiber cloth handy to wipe water drops from your front lens element, because even one drop on the glass can ruin sharpness. A lens hood helps keep rain off the front element. Consider using a shorter focal length so you can work closer and spend less time with your camera exposed to the elements.
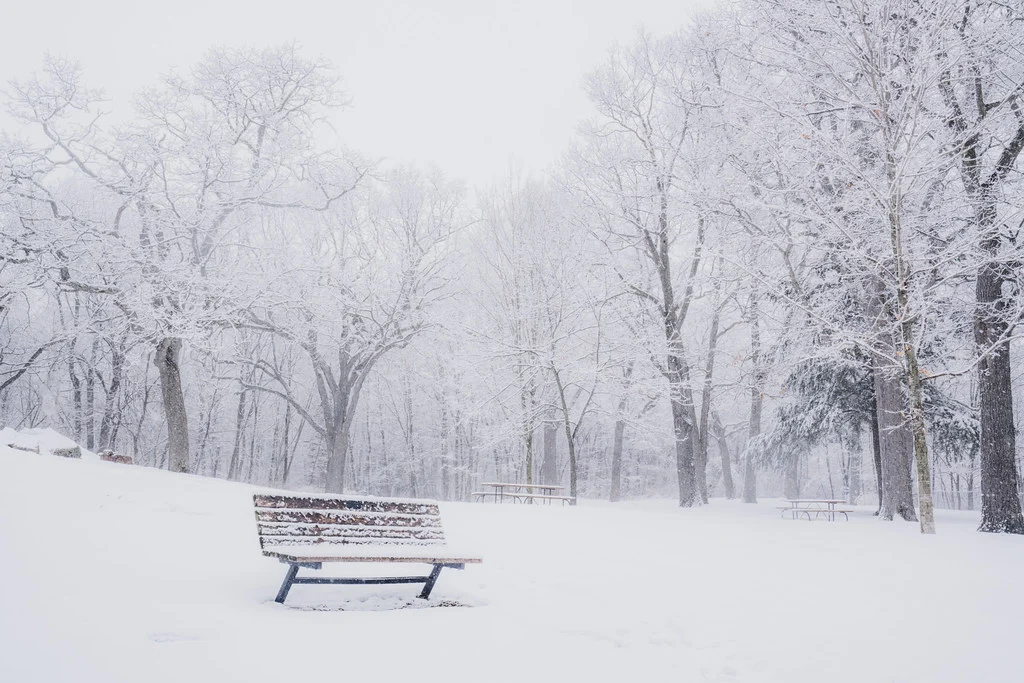
Photography in Snow and Ice
Snow is one of the most visually transformative weather conditions. It simplifies landscapes by covering distracting details under a uniform white layer. Trees become graphic silhouettes. Fences, paths, and structures gain a coating of white that emphasizes their shapes. Footprints in fresh snow create leading lines. The world becomes quieter, cleaner, and more minimal.
The biggest technical challenge in snow photography is exposure. Your camera’s meter sees all that white and tries to make it middle gray, which results in underexposed, dingy-looking snow. Use positive exposure compensation of +1 to +2 stops to keep snow looking white. Check your histogram after your first few shots. The data should be pushed toward the right side without clipping the highlights. If the snow in your photos looks gray, add more compensation. If the highlights are blinking, back off slightly.
Falling snow can be photographed using the same backlighting technique as rain. A flash fired behind falling snow or snowflakes lit by a streetlamp creates a magical, sparkling effect. For landscape photography in snow, overcast skies provide the most even lighting. Direct sun on snow creates extreme contrast that is difficult to manage, with bright highlights on the snow and deep shadows in the trees and rocks.
Cold weather affects your batteries. Lithium-ion batteries lose charge rapidly in freezing temperatures. Carry spare batteries in an inside pocket close to your body where your body heat keeps them warm. Swap batteries frequently. When you bring cold gear into a warm environment, condensation will form on the lens and camera body. Place your entire camera in a sealed plastic bag before going indoors. The condensation will form on the outside of the bag instead of on your equipment. Wait until the camera reaches room temperature before opening the bag.
Photography in Fog and Mist
Fog is one of the most magical conditions for photography. It creates natural depth by separating foreground from background in visible layers. Objects close to the camera appear normally, while objects further away become progressively lighter and less distinct. This layering effect creates a powerful sense of three-dimensional space in a two-dimensional image. Fog also simplifies compositions by hiding cluttered backgrounds, turning ordinary scenes into something ethereal.
Composition in fog favors simplicity. Look for lone trees, single figures, isolated structures, or paths disappearing into the mist. The reduced visibility naturally draws the viewer’s eye to whatever is visible, so a single strong subject can carry an entire image. Negative space becomes a powerful tool when the fog provides a soft, uniform background.
Like snow, fog can fool your camera’s meter. The bright, featureless mist tricks the meter into underexposing. Add +1 exposure compensation as a starting point and adjust from there. White balance in fog tends to shift cool, so experiment with a slightly warm white balance setting to counteract the blue-gray cast if you want a warmer mood.
Timing is everything with fog. Early morning fog often burns off within an hour of sunrise. Check weather forecasts for fog advisories and set your alarm early. River valleys, lakeshores, and low-lying fields are the most likely locations for morning fog. Coastal fog can persist longer but moves quickly, creating dramatic moments where the fog rolls in and out. Shooting from elevated positions looking down into a foggy valley produces stunning layered landscapes.
Moisture is the enemy of your lens in fog. Your front element will fog up constantly, especially if you are moving between warm and cool areas. Keep a lens cloth accessible at all times and check your lens surface before every few shots. A lens hood provides some protection. Some photographers use hand warmers attached to their lens barrel with rubber bands to keep the glass above the dew point.
Photography in Wind and Storms
Wind introduces movement and energy into your photographs. Tall grass bending in a gale, waves crashing on rocks, clouds streaking across the sky, and trees leaning against a strong gust all convey the power of nature in ways that calm conditions cannot. The key is deciding whether to freeze the motion or allow it to blur.
For sharp images in wind, use a fast shutter speed. Flowers, grasses, and leaves move quickly in wind, so 1/500th of a second or faster is often necessary. For intentional blur that conveys movement, try longer exposures with a tripod. A half-second to two-second exposure turns blowing grass into silky streaks and moving clouds into dynamic ribbons. Combine sharp static elements (rocks, buildings, tree trunks) with blurred moving elements (water, clouds, vegetation) for images that show motion within stillness.
Storms produce some of the most dramatic skies you will ever photograph. The period just before and just after a storm is especially productive. Storm clouds breaking apart to reveal patches of blue sky and shafts of sunlight create conditions that landscape photographers wait months to capture. Keep an eye on approaching weather fronts. When a storm is clearing from the west during late afternoon, the low sun can break under the cloud layer and illuminate the landscape with extraordinary warm light while the stormy sky remains dark and dramatic above.
Stability is a challenge in high winds. If you are using a tripod, hang your camera bag from the center column to weigh it down. Position yourself behind a wall, rock, or your car to block wind from hitting the tripod directly. In extreme wind, spread the tripod legs wider and lower the center column. Consider using a wider lens and cropping later, since vibration from wind affects long telephoto lenses much more than short ones.
Common Mistakes in Bad Weather Photography
Not protecting gear adequately. Weather-sealed does not mean waterproof. Extended exposure to rain, snow, or salt spray will eventually damage your equipment. Always use a rain cover, plastic bag, or protective housing in sustained bad weather. Wipe down your gear thoroughly after every session in wet conditions.
Forgetting to adjust exposure compensation. Snow and fog scenes will consistently underexpose if you trust your camera’s automatic metering. Get in the habit of adding positive compensation immediately when you step into bright, overcast conditions. Check your histogram early and often.
Giving up too quickly. Bad weather conditions change rapidly. The most spectacular moments often happen during transitions: when rain stops and sun breaks through, when fog begins to lift and patches of clarity appear, when storm clouds part to reveal light. If you leave at the first sign of difficulty, you miss the best moments. Patience is rewarded more in bad weather photography than in any other situation.
Ignoring personal safety. Dramatic storm photos are not worth getting struck by lightning or swept off a cliff by a wave. Check weather warnings. Stay away from exposed ridgelines in electrical storms. Do not stand on wet rocks near crashing surf. Dress warmly in cold conditions and bring more layers than you think you need. Hypothermia impairs judgment and fine motor skills, both of which you need for good photography.
Using the wrong white balance. Overcast and rainy conditions often have a heavy blue cast. Cloudy or shade white balance presets add warmth to counteract this. Alternatively, shoot in RAW and adjust the color temperature precisely during editing.
Try This: Bad Weather Photography Exercises
Exercise 1: The Rainy Night Walk. Wait for an evening rain in your town or city. Take your camera out for a 30-minute walk, focusing entirely on reflections. Photograph puddles reflecting neon signs, wet pavement mirroring streetlights, and rain-streaked windows with warm interiors glowing behind them. Shoot at a variety of apertures and notice how the out-of-focus highlights in reflections change shape. Try to come back with at least five strong reflection images. This exercise trains you to see the visual opportunities that rain creates.
Exercise 2: The Fog Series. Check your local weather for fog forecasts and set an early alarm. Arrive at a location with good subjects (a park with trees, a bridge, a pier, a field with a lone barn) at least 30 minutes before sunrise. Shoot the same scene repeatedly as the fog lifts, capturing the progression from dense, enveloping mist to wispy patches to clear air. Create a series of six to eight images that show the transformation. This teaches you how quickly conditions change and how different densities of fog affect mood. Understanding golden hour light combined with fog produces especially powerful results.
Exercise 3: The Storm Watcher. Monitor your weather app for an approaching storm. Position yourself in a safe location with a clear view of the sky (a covered porch, a car, an overlook with shelter nearby). Photograph the sky and landscape during the 30 minutes before the storm arrives, during the storm if you can do so safely, and during the 30 minutes after it passes. Notice how the light, color, and atmosphere change through each phase. The “after” period is often the most dramatic. This exercise builds your weather awareness and teaches you to anticipate the best moments.
Bad weather photography is ultimately about changing your mindset. Instead of seeing rain, snow, fog, or wind as obstacles, learn to see them as ingredients that add mood, drama, and visual interest to your images. The photographers who consistently produce extraordinary work are not the ones with the best luck or the most expensive gear. They are the ones who go out when everyone else stays home. Start making bad weather days your favorite shooting days, and your portfolio will be stronger for it.