Winter strips the world down to its essentials. The clutter of leaves and foliage disappears, revealing the bones of the landscape: bare branches, fence lines, stone walls, and the pure geometry of hills and fields. Snow covers imperfections and creates a blank canvas. Ice adds texture and sparkle. The low winter sun paints everything in warm tones that contrast beautifully with the cool whites and blues of the season. For photographers willing to brave the cold, winter offers some of the most striking and graphic images of the year.
Winter photography does require preparation that other seasons do not. Cold weather affects your batteries, your gear, your hands, and your judgment. Snow challenges your camera’s meter. Short days limit your shooting window. But these constraints also focus your work. With fewer hours of daylight and more effort required to get out and shoot, winter teaches you to be deliberate, efficient, and observant. This guide covers the technical, creative, and practical aspects of photography during the coldest months.
Exposing for Snow: Getting White Right
The single most important technical skill in winter photography is exposure. Your camera’s light meter is designed to render everything as middle gray. When it sees a scene dominated by white snow, it reads all that brightness and reduces the exposure, turning your white snow into dull gray. This is not a flaw in your camera. It is how metering systems work. Understanding this is the first step to correcting it.
The solution is exposure compensation. In most snow scenes, add +1 to +2 stops of positive exposure compensation. This tells your camera to let in more light than it thinks it should, keeping the snow white rather than gray. The exact amount depends on how much snow is in the frame. A scene that is mostly snow needs more compensation than one where snow is just a portion of the image.
Check your histogram after your first few shots. In a snow scene, the histogram should be shifted to the right, with the data piled up in the bright region. If the data is centered or shifted left, you are underexposing and your snow will look gray. The histogram is your most reliable tool for getting snow exposure right, because the LCD screen on your camera can be misleading in bright outdoor conditions.
Be careful not to push too far. If the histogram data is clipped against the right edge, you have blown out the highlights and lost detail in the snow. Snow that is pure white with no texture looks flat and lifeless. You want the snow bright but with visible texture, subtle shadows, and gentle gradations. Think of it as the brightest detailed tone in the image, not a featureless white void.
Using RAW format gives you the most flexibility for snow exposure. RAW files contain far more highlight and shadow data than JPEG files, which means you can recover detail in snow that looked slightly overexposed or lift shadows in dark areas without significant quality loss.
Working with Winter Light
Winter light has a character all its own. The sun stays low on the horizon throughout the day, even at midday in northern latitudes. This perpetually low angle creates long, dramatic shadows that add depth and dimension to every scene. The golden hour, that warm, angled light beloved by photographers, is not limited to early morning and late evening in winter. It can extend for hours during the shortest days of the year.
The color of winter light varies more widely than in other seasons. Clear winter days produce warm, orange-toned sunlight that contrasts beautifully with the cool blue shadows on snow. Overcast days produce a soft, even, blue-toned light that can feel cold and somber. Open shade under a clear sky is intensely blue because the blue sky is the primary light source. Understanding these color variations and using appropriate white balance settings gives you control over the mood of your winter images.
Blue hour and twilight are extended in winter. The period of soft, cool light before sunrise and after sunset lasts longer when the sun’s path is at a shallow angle to the horizon. This extended twilight is perfect for cityscapes, snow-covered landscapes with warm building lights, and any scene that benefits from the combination of natural blue light and artificial warm light.
Side-lighting and backlighting are particularly effective in winter. Side light skimming across a snow-covered field reveals texture in the snow surface: footprints, wind patterns, subtle undulations. Backlighting turns snow crystals into sparkling diamonds. Ice on branches, fences, and windows becomes luminous when backlit. Position yourself with the sun to your side or behind your subject to capture these effects. Understanding how light direction shapes texture is fundamental to strong winter photography.
Creative Opportunities in Winter
Minimalism. Snow-covered landscapes naturally lend themselves to minimalist compositions. A lone tree in a white field, a single set of footprints disappearing into the distance, a dark rock breaking through a blanket of white. The simplicity of winter scenes makes them ideal for practicing minimalist photography. Let the empty space speak. Not every square inch of the frame needs to contain information.
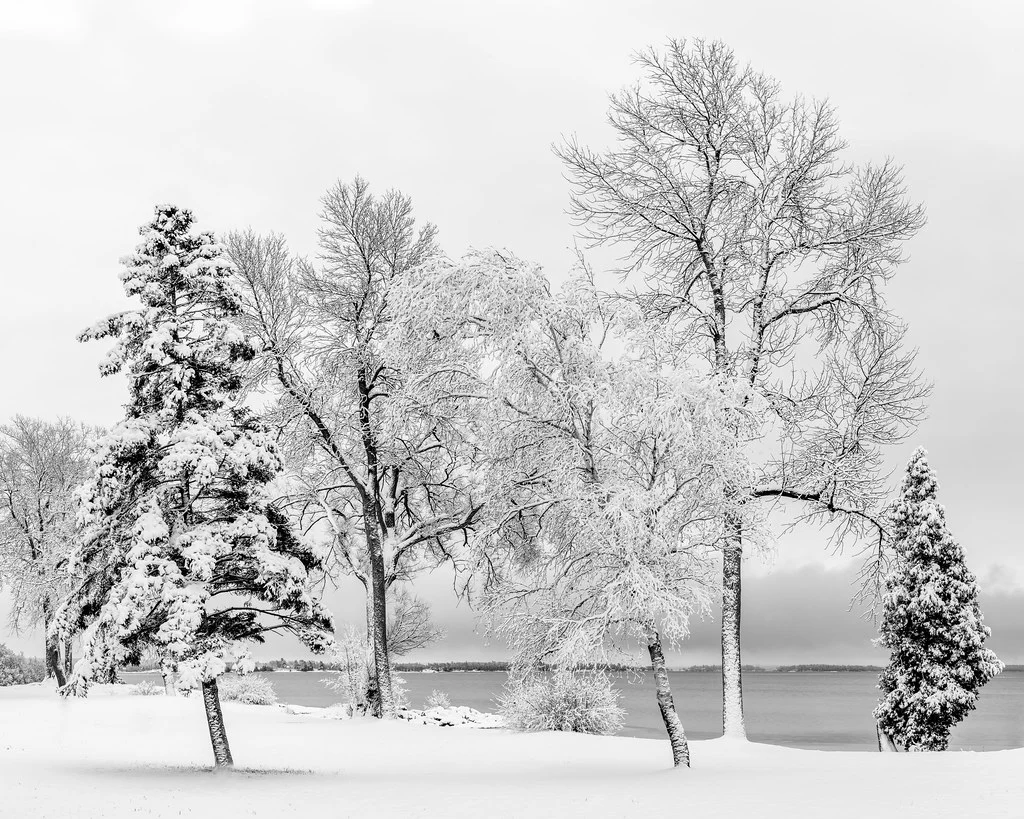
Black and white. Winter scenes often translate beautifully to black and white because the landscape is already largely monochromatic. The contrast between dark trees and white snow, the tonal range from deep shadow to bright highlight, and the graphic quality of bare branches against the sky all work powerfully in monochrome. If you have been wanting to explore black and white photography, winter is the perfect season to start.
Ice and frost. The textures of winter, frost crystals on a window, ice formations on a creek, icicles hanging from a roof, are endlessly photogenic at close range. Use a macro lens or close-focusing technique to capture the intricate patterns that cold temperatures create. Early morning frost is especially dramatic, as it catches the first low-angle light and sparkles before the warming sun melts it away.
Frozen water. Rivers and lakes in various stages of freezing provide fascinating subjects. The boundary between frozen and flowing water is visually dynamic. Ice patterns, air bubbles trapped in clear ice, and the texture of frozen surfaces reveal a hidden world of abstract beauty. Long exposures of partially frozen waterfalls, with silky flowing water beside solid ice, combine motion and stillness in a single frame.
Wildlife in winter. Animals are often more visible in winter because foliage is gone and they stand out against snow. Birds at feeders, deer in snowy fields, foxes crossing frozen landscapes. The contrast of warm, living creatures against cold, white surroundings creates naturally compelling images.
Protecting Your Gear and Yourself
Cold weather is hard on camera equipment. Batteries are the first casualty. Lithium-ion batteries lose capacity in cold temperatures, sometimes dramatically. A battery that lasts all day in summer might die in an hour at freezing temperatures. Carry two or three fully charged spare batteries in an inside pocket close to your body, where your warmth keeps them functional. Rotate batteries: when one dies in the cold, swap it with a warm spare from your pocket and put the cold one against your body to warm up. It will often recover significant charge.
Condensation is the most dangerous threat to your gear in winter. When you bring a cold camera into a warm building, moisture condenses on every surface, including inside the lens and camera body. This moisture can damage electronics and cause fogging that takes hours to clear. The solution is to seal your camera in a plastic bag or airtight case before bringing it indoors. The condensation forms on the outside of the bag rather than on your gear. Wait until the camera reaches room temperature before opening the bag.
Dress in layers. Your ability to handle your camera diminishes rapidly as your hands get cold. Thin liner gloves under heavier mittens work well: you can remove the mittens for fine camera controls while the liners provide basic warmth. Photography-specific gloves with fold-back fingertips are available and work well for most photographers. Keep hand warmers in your pockets for quick rewarming between shots.
Do not breathe on your viewfinder or LCD screen in cold weather. Your breath will fog them instantly and the fog can freeze in extremely cold conditions. Be aware of breath condensation when looking through the viewfinder. If the eyepiece fogs repeatedly, use the LCD screen in live view mode instead.
Your personal safety matters more than any photograph. Watch for ice underfoot, especially near water. Stay hydrated even though you do not feel thirsty in cold weather. Know the signs of frostbite and hypothermia. Tell someone where you are going and when you expect to return, especially if shooting in remote areas. Cold weather reduces your reaction time and judgment, so be more cautious than usual about risky positions and terrain.
For more on this topic, see our guide to spring photography.
For more on this topic, see our guide to summer photography.
Common Mistakes in Winter Photography
Underexposing snow. This is the most universal winter photography mistake. If your snow looks gray, add positive exposure compensation. Check your histogram. The data should be shifted right. Make this correction a habit every time you shoot in snowy conditions.
Forgetting spare batteries. Running out of battery power in the middle of a winter shoot is frustrating and preventable. Always carry at least two spare batteries in an inside pocket. Start every winter shoot with a fully charged battery in the camera and warm spares ready to go.
Causing condensation damage. Bringing a cold camera directly into a warm space without protecting it is a common and potentially expensive mistake. Always bag your gear before going indoors. Five minutes of preparation prevents hours of fogging and potential water damage.
Shooting only on sunny days. Overcast winter days produce soft, even light that is excellent for many subjects. Snowfall itself creates atmospheric, moody conditions. Fog, mist, and flat gray skies all have their place in winter photography. Do not wait for blue skies. Some of the best winter images are made under the most somber conditions.
Including too much sky. A white, overcast sky in a snow scene means you have white above and white below, with no contrast. When the sky is featureless, minimize it in your composition or eliminate it entirely. Focus on the ground, the trees, and the details. Save the sky for days when it has clouds, color, or drama.
Try This: Winter Photography Exercises
Exercise 1: The Exposure Bracket. Find a snow scene with a mix of snow and dark elements (trees, rocks, a dark building). Take three exposures: one at your camera’s suggested exposure, one at +1 stop, and one at +2 stops. Compare the three on your computer screen and identify which one renders the snow most naturally while retaining detail. This exercise calibrates your eye for snow exposure and builds the habit of using exposure compensation. Understanding the exposure triangle becomes especially practical when working in high-contrast winter conditions.
Exercise 2: The Minimalist Series. Go out on a snowy day with the goal of creating five images that each contain only one or two elements against a clean white background. A fence post. A lone bird. A single set of footprints. A bare tree. Force yourself to simplify every composition to its absolute essence. This exercise leverages winter’s natural minimalism and teaches you that great images often come from removing elements, not adding them. Pay attention to how leading lines work in simplified compositions.
Exercise 3: The Warm and Cold Contrast. Create a series of images that deliberately contrast warm and cold elements. A warm light glowing through a frosty window. A person’s warm breath visible in cold air. The orange tones of sunset on blue snow. A red barn against a white field. This exercise trains you to see the inherent color contrast of winter and use it as a creative tool. The interplay between warm natural light and the cool tones of winter is one of the season’s most powerful visual qualities.
Winter photography rewards those who prepare properly and embrace the cold. The simplified landscapes, the dramatic light, the unique textures of ice and frost, and the stark contrast between warm and cool tones all provide creative opportunities that no other season can match. Bundle up, protect your gear, check your exposure, and get out there. The best winter images are waiting in the cold for someone willing to go find them.