Camera shots are named mainly by size, meaning how much of the subject and its surroundings the frame includes. From widest to tightest the standard sizes are extreme wide, wide, full, medium wide, medium, medium close-up, close-up and extreme close-up. Shots are also named by camera angle, by who is in them (single, two-shot, over-the-shoulder, point of view) and by how the camera moves (pan, tilt, push in, track).
This guide defines each shot, shows where the frame edge falls on a person, explains what each size is used for, and then shows how to combine sizes into a sequence in video or in a set of still photographs. Camera height is covered separately in photography angles and perspectives, and the handling of moving shots is covered in video for photographers; this page is the vocabulary that ties them together.
How shots are named: size, angle, content and movement
A full description of a shot answers four separate questions. Keeping them separate removes most of the confusion around the terms.
- Size: how large is the subject in the frame? This is the wide, medium and close-up family.
- Angle: where is the camera relative to the subject’s eye line? Eye level, high, low, overhead or tilted.
- Content or viewpoint: who is in the frame and whose view is it? A single, a two-shot, an over-the-shoulder, a point of view.
- Movement: does the camera stay still, rotate or travel during the shot?
So “a low-angle medium two-shot, slowly pushing in” is one shot described four ways. On a script, shot list or storyboard the sizes are usually abbreviated: EWS, WS, FS, MS, MCU, CU, ECU. The names are conventions, not laws. “Long shot” and “wide shot” mean the same thing, and one crew’s medium close-up is another’s close-up. What matters is that the people working together agree.
Shot size is not the same as focal length
A wide shot does not require a wide-angle lens, and a close-up does not require a telephoto. Size is the result of two things together: the focal length and the distance to the subject. You can frame a person head to toe with a 24mm lens from 2 metres or with a 200mm lens from about 17 metres. The size of the person is the same, but the pictures differ: the short lens shows a broad sweep of background and exaggerates depth, while the long lens shows a narrow slice of background that looks pulled up close behind the subject. Choose the size for what the viewer needs to see, then choose lens and distance for how the background should look. Perspective distortion explains why close camera positions change the shape of faces.
Wide shots: extreme wide, wide and establishing
Extreme wide shot (EWS)
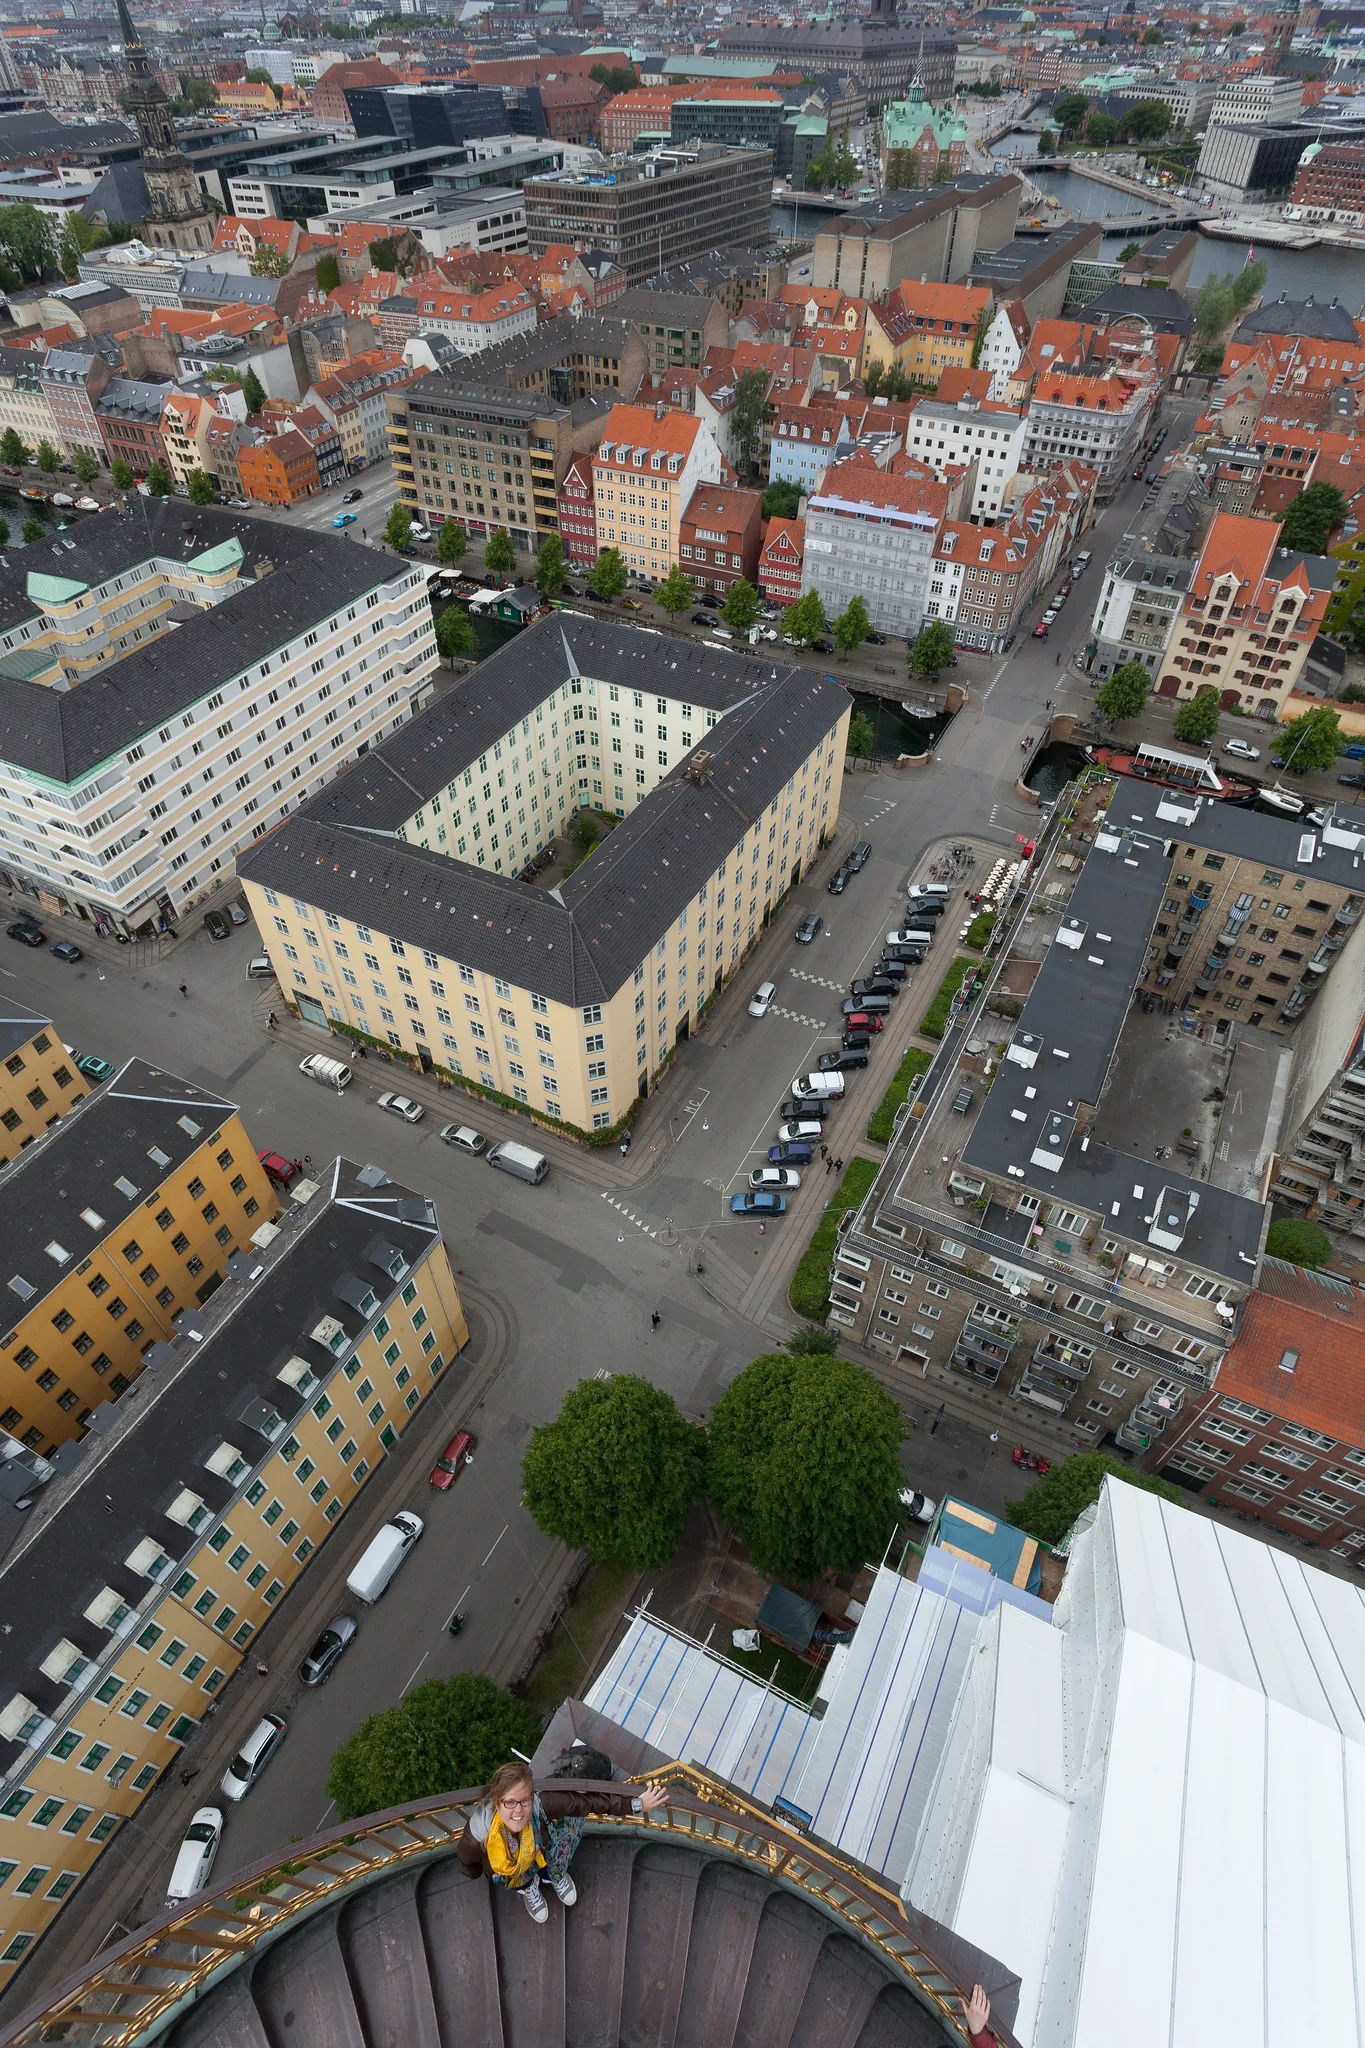
The subject is tiny in the frame or not identifiable at all. The picture is about the place: a city seen from a tower, a valley, a coastline, a stadium from the top row. Use it to show scale, isolation or geography. If a person appears, they occupy a small fraction of the frame height, and the viewer reads them as part of the environment.
Wide shot (WS), also called a long shot
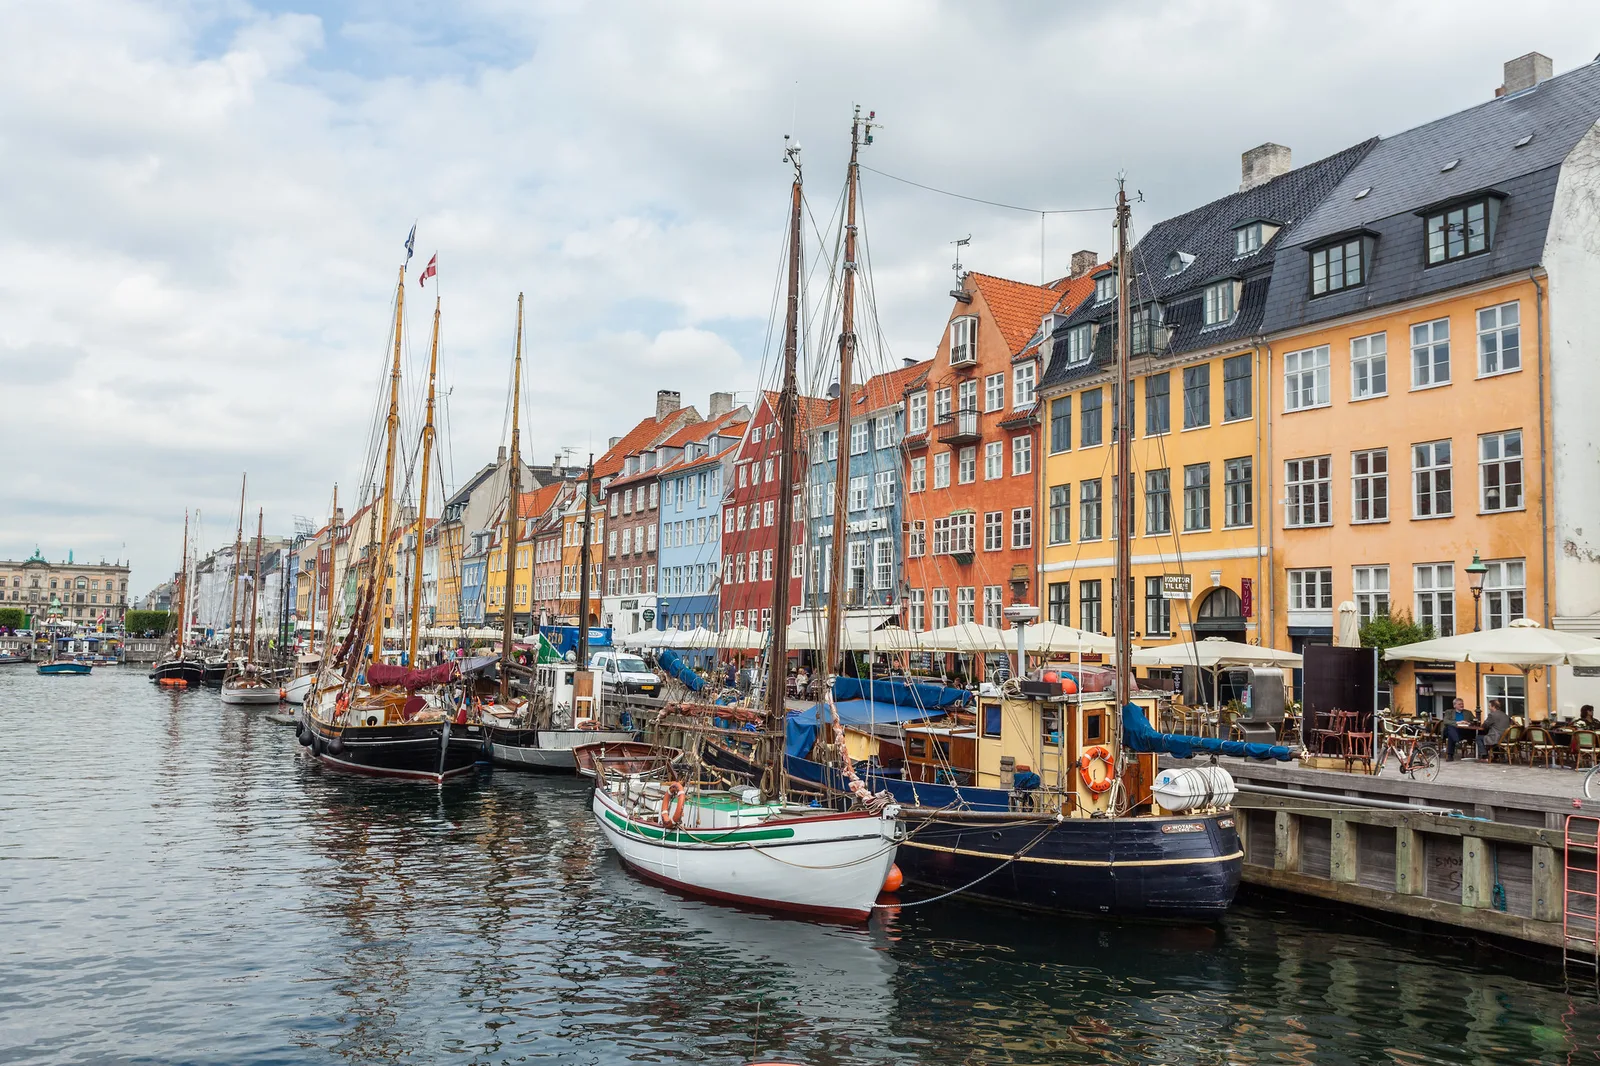
The whole subject is visible with a generous amount of setting around it. For a person, that means the full body with clear space above the head and below the feet, plus enough background to show where they are and what they are doing. For a place, it means the whole street, room or harbour front. A wide shot answers “where are we, and who is here?”
Establishing shot
“Establishing” describes a job, not a size. It is the shot that tells the viewer where and when the next scene takes place, and it is usually an extreme wide or wide shot placed at the start of a sequence: the outside of the building before the conversation inside it, the skyline before the street. Because its purpose is orientation, include something that identifies the location and the time of day. A related term is the master shot, a wide view that covers an entire scene from start to finish, which an editor can return to whenever the closer shots need context.
Wide shots depend on composition more than any other size, because there is so much in the frame. Give the eye a clear path with a foreground element, a leading line or a strong shape; the techniques are collected in photography composition.
From full shot to extreme close-up
The middle and tight sizes are defined by where the bottom of the frame cuts a standing person. The table gives the usual definitions.
| Shot | Abbreviation | What the frame includes | What it is good for |
|---|---|---|---|
| Full shot | FS | Head to toe, with a little space above and below | Posture, clothing, movement, how a person stands in a place |
| Medium wide shot | MWS | From about the knees or mid-thigh up (the mid-thigh version is often called a cowboy shot) | Body language and hands while still showing the setting |
| Medium shot | MS | From about the waist up | Conversation, gestures, people doing something with their hands |
| Medium close-up | MCU | From about the middle of the chest up | Interviews and speech: expression is clear, shoulders give context |
| Close-up | CU | The face, usually with the top of the shoulders | Emotion and reaction; or one object filling the frame |
| Extreme close-up | ECU | Part of the face, such as the eyes, or a small detail | Intensity, texture, a single telling detail |
Full and medium wide shots
A full shot keeps the whole figure. It is the natural size for dance, sport, fashion and anything where the body tells the story. Leave a small margin under the feet; a frame edge that touches the soles of the shoes looks like a mistake. The medium wide shot drops the lower legs. Cut across the thigh or just above the knee, never through the knee itself, because a frame edge on a joint makes the limb look cut off. The same principle applies at every size: cut through the long part of a limb, not at the ankle, knee, wrist or elbow.
Medium shot and medium close-up
The medium shot, from the waist up, is roughly how you see someone you are talking to across a table. It shows the face well enough to read and still includes the arms and hands, so it suits people at work, cooking, playing an instrument or talking. The medium close-up tightens to the chest. It is the standard interview and presenter framing because the face dominates without feeling confrontational. In both, mind the space above the head and in front of the face: headroom and lead room explains how much to leave.
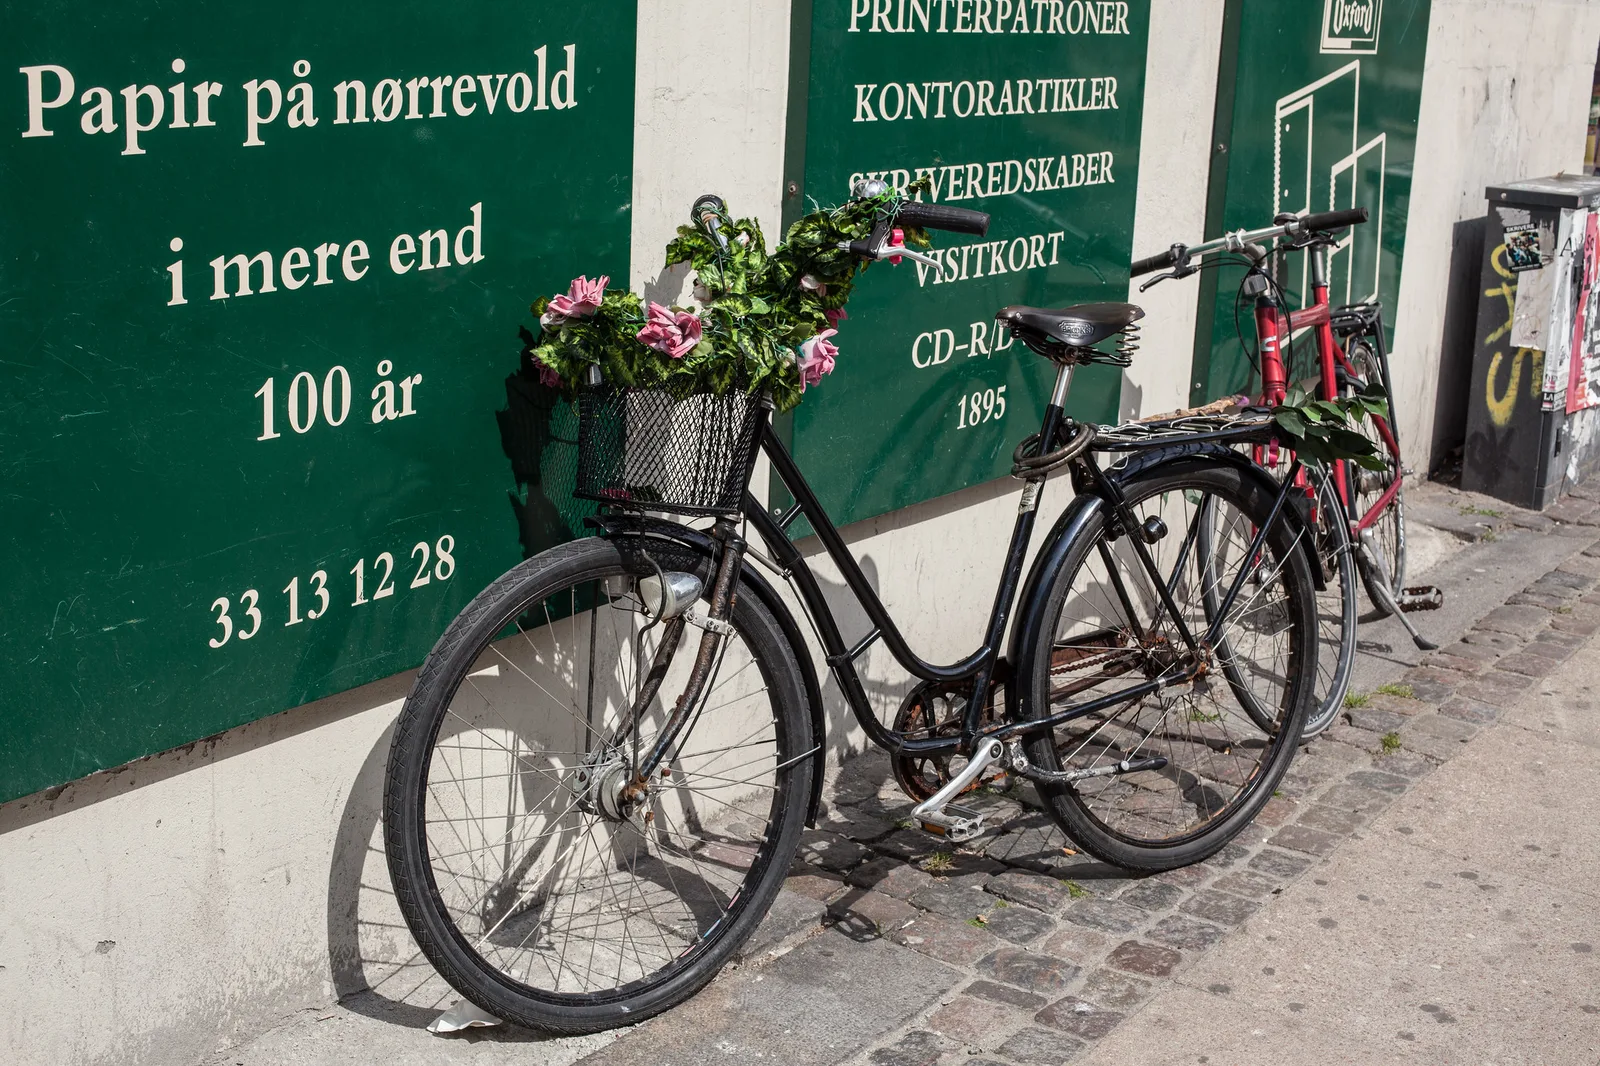
The same sizes apply to things as well as people. A medium frame on an object shows the whole object and a little of what surrounds it.
Close-up and extreme close-up
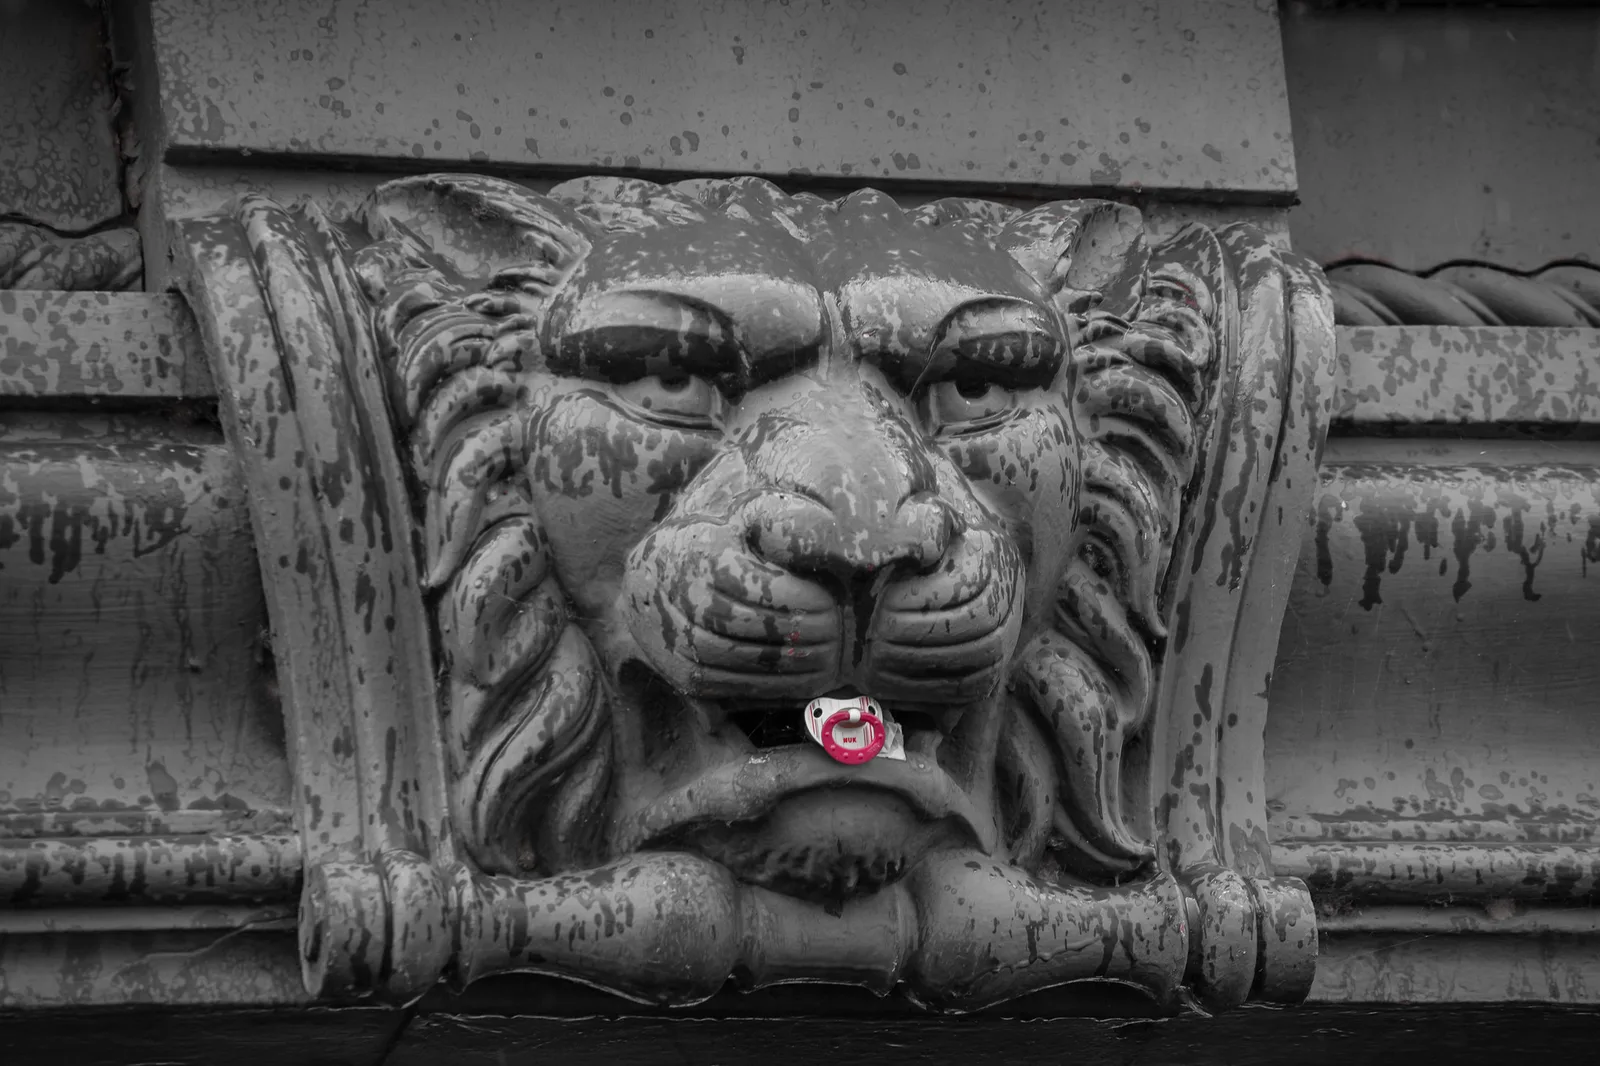
A close-up fills the frame with a face or with one object. Background almost disappears, so the viewer has nothing to look at except expression or detail. It is the most emotionally direct size, and it loses force if overused. The top of the head may be cropped in a tight close-up; keep the chin and keep the eyes in the upper half of the frame. An extreme close-up goes further: only the eyes, a hand on a tool, the texture of a surface. At this distance depth of field is thin and small movements shift the framing, so support the camera and place focus with care. For very small subjects the techniques overlap with macro photography.
Insert and cutaway
Two more terms describe close shots by their job in an edit. An insert is a close view of something inside the scene that the viewer needs to see clearly: the text on a phone, a key turning in a lock, the dial being set. A cutaway is a shot of something outside the main action, such as a listener’s reaction, a clock on the wall or the view from the window, which the editor can cut to and back from. Cutaways are valuable because they hide joins: they let an editor shorten an interview or bridge two takes without a visible jump. In stills, the equivalent is the detail picture that gives a story texture.
Shots named for who is in them and whose view it is
- Single. One person in the frame, at any size. A “clean single” has nobody else visible; a “dirty single” includes a blurred slice of another person at the edge.
- Two-shot and group shot. Two people in one frame is a two-shot, three is a three-shot, more is a group shot. A two-shot shows the relationship: how close they stand, who leans in, who looks away.
- Over-the-shoulder (OTS). The camera looks past the back of one person’s head and shoulder at the person facing them. The foreground shoulder, usually soft, occupies about a third of the frame. It ties two people together in space while concentrating on one face.
- Point of view (POV). The camera shows what a character sees, from where they see it. It is normally paired with a shot of the person looking, so the viewer knows whose eyes they are borrowing.
- Reaction shot. A close-up or medium close-up of someone responding to what was just said or done. Often the reaction tells more than the action.
- Reverse shot. The matching view from the opposite direction. A conversation is commonly covered as shot and reverse shot: an over-the-shoulder on one speaker, then the mirror image on the other.
The 180-degree rule
When you cover two people from several positions, imagine a straight line running through both of them. Keep every camera position on the same side of that line. If you do, the person on the left of the frame stays on the left in every shot and each appears to look toward the other. Cross the line and they swap sides, which makes them seem to be looking the same way and confuses the viewer about where everyone is. The same idea applies to a moving subject: stay on one side of its path and it keeps travelling in the same direction across the screen.
Camera movements: pan, tilt, push in and track
Movements fall into two groups. In the first the camera stays in one place and rotates. In the second the whole camera travels. The difference is visible on screen: when the camera travels, near objects slide past faster than far ones, which gives a strong sense of depth. When it only rotates, that does not happen.
| Movement | What the camera does | Typical use |
|---|---|---|
| Static (locked off) | Nothing; it stays fixed on a support | Interviews, establishing shots, any scene where the action provides the motion |
| Pan | Rotates left or right from a fixed position | Following a subject across a scene, revealing a wide view gradually |
| Tilt | Rotates up or down from a fixed position | Revealing height: a tower, a waterfall, a person from shoes to face |
| Push in and pull out (dolly) | The camera physically travels toward or away from the subject | Drawing attention to a face or detail; revealing surroundings |
| Zoom | The camera stays put and the focal length changes | Changing size without moving; reads as flatter than a push in because the perspective does not change |
| Track (also truck or crab) | The camera travels sideways, or alongside a moving subject | Walking with someone, moving along a row of objects |
| Pedestal, boom or crane | The camera rises or descends without tilting | Lifting over a foreground object, rising to reveal a scene |
| Arc (orbit) | The camera travels in a curve around the subject | Showing a subject from several sides in one shot |
| Handheld | The operator carries the camera, with or without a stabilising rig | Immediacy, following unpredictable action |
Three working rules apply to all of them. Start and end every move on a composed, still frame and hold each for a few seconds, so the editor has a clean way in and out. Move more slowly than feels natural, because moves look faster on screen than they feel behind the camera. And have a reason: a move should follow something, reveal something or change the size of the shot. A gimbal or a fluid video head makes these moves smooth.
One naming trap for photographers: in stills, panning means swinging the camera with a moving subject during a slow exposure to blur the background. That technique is covered in panning photography and is a different thing from a pan in video.
Building a sequence in video or in still photographs
Shot sizes become useful when you combine them. A viewer who sees only wide shots never gets close to anyone; a viewer who sees only close-ups never learns where they are. A sequence moves between sizes so that each picture answers a question raised by the one before.
A simple pattern: wide, medium, tight
- Wide: where are we? Show the whole place.
- Medium: who or what is this about? Show the subject with enough context to see what is happening.
- Tight: what matters here? Show the hands, the face, the tool, the detail.
- Another tight or a reaction: a second detail or the face of someone watching.
- Wide or medium again: step back to close the scene or move to the next one.
The four photographs on this page follow that pattern for one city: the roofs from above, the harbour front, one bicycle, one carved face on a wall. For more on ordering pictures, see photo sequencing.
Change size and angle together
When two consecutive shots show the same subject, make them clearly different. A widely used guideline is to change the shot size by at least one full step (medium to close-up, not medium to slightly tighter medium) and to move the camera position by roughly 30 degrees or more around the subject. Two shots that are almost the same produce a jump cut, where the subject seems to twitch. In a set of stills the same fault shows up as redundancy: two near-identical frames side by side weaken both.
Shot sizes in still photo stories
Photographers use the same vocabulary under different names: scene-setter, medium, portrait, detail. Whether the job is a photo essay, a day of travel photography, a wedding or a set of pictures of a property, the edit is easier if you come home with every size.
- Work each situation three times. Before leaving a spot, make one wide, one medium and one tight frame of it. Move your feet to do it; zooming from one position changes size but not viewpoint, a point explored in how to tell a story using a zoom lens.
- Write the sizes into your plan. A shot list that says “WS of venue at dusk, MS of chef at pass, CU of plating” is quicker to work from than a list of subjects alone.
- Think about layout. A wide shot needs to be shown large to work; details hold up small. On a page or in a slideshow, give the wide frames the space and group details around them.
- Match the frame shape to the size. Very wide frames suit establishing views, and upright frames suit full shots of a standing person. Aspect ratio covers the choice, and cinematic photography shows how film framing carries over to stills.
Common mistakes
- Everything shot at one size. Usually a row of medium-wide frames from standing height. Fix: for every scene, make yourself take one frame that is clearly wider and one that is clearly tighter.
- A wide shot with no subject. The frame takes in a lot and points at nothing. Fix: place one clear anchor, such as a figure, a building or a boat, and compose around it.
- Close-ups that are not close. A “detail” with distracting background still visible. Fix: step in or use a longer lens until only the detail remains.
- Cutting people at joints. The frame edge sits on ankles, knees or wrists. Fix: move the edge to mid-shin, mid-thigh or mid-forearm, or widen to include the whole limb.
- Confusing zoom with a push in. Zooming enlarges the picture without changing perspective. Fix: when you want the viewer to feel they are approaching, move the camera.
- Moving the camera without a reason. Constant pans and wobbling handheld shots tire the viewer. Fix: default to a static frame and move only to follow, reveal or re-size.
- Crossing the line. People swap sides of the screen between shots. Fix: pick one side of the line between your subjects and stay there.
Try this
Choose one subject you can reach in the next quarter of an hour: a person making coffee, a market stall, a parked bicycle, a front door. Using one lens, or a phone without zooming, make seven frames in this order: extreme wide, wide, full, medium, medium close-up, close-up, extreme close-up. Change size only by walking. Then make two more: one from a clearly different angle and one cutaway of something nearby that belongs to the scene. Lay the nine frames out in order and remove any two that look alike. Finally pick the five that tell the story best and note which sizes survived. Most people find they shot the middle sizes by habit and that the extremes are the ones that make the set work.
Frequently asked questions
What are the basic types of camera shots?
The three basic sizes are the wide shot, the medium shot and the close-up. The full list adds the extreme wide shot, full shot, medium wide shot, medium close-up and extreme close-up. Angle, viewpoint and movement are described separately.
What is the difference between a wide shot and an establishing shot?
A wide shot is a size: the whole subject with plenty of surroundings. An establishing shot is a purpose: showing where a scene takes place before it begins. Most establishing shots are wide or extreme wide, but a wide shot in the middle of a scene is not an establishing shot.
What is the difference between a medium shot and a medium close-up?
A medium shot frames a person from about the waist up and includes the arms and hands. A medium close-up frames from about the middle of the chest up, so the face is larger and the hands are usually out of frame.
Is a zoom the same as a dolly shot?
No. In a zoom the camera stays where it is and the lens changes focal length, so everything in the frame enlarges together. In a dolly or push in the camera travels, so near objects grow and shift faster than distant ones and the viewer senses movement through space.
Do shot sizes apply to photography or only to film?
They apply to both. Still photographers use the same range, from scene-setting wide frames to details, whenever they shoot a story, an event or a set of pictures meant to be seen together. Naming the sizes makes it easier to notice which ones are missing.
Related guides
- Photography angles and perspectives: eye level, low, high, overhead and tilted camera positions.
- Video for photographers: frame rates, audio and how to carry out moving shots.
- Headroom and lead room: how much space to leave above and in front of a person.
- How to create a photo essay: planning and shooting a story in stills.
- Photo sequencing: ordering pictures so each one builds on the last.
- Focal length: how lens choice and distance together set the size of the subject.
- Camera settings for video: exposure, shutter and frame rate for moving pictures.
- Visual storytelling in photography: what makes a set of pictures read as a story.