If you already know how to make a great photograph, you are closer to making great video than you think. The core skills transfer directly: understanding light, composing a frame, controlling exposure, and telling a visual story. What changes is the addition of time. A photograph freezes a single moment. Video lets that moment breathe, move, and unfold. This guide will walk you through everything you need to start shooting video with the camera gear you already own, translating your photography skills into confident motion work.
Why Photographers Should Learn Video
The line between photography and video has blurred considerably. Most modern cameras shoot both stills and video at a professional level. Clients increasingly expect both deliverables from a single shoot. Social media platforms prioritize video content. Wedding photographers deliver highlight reels. Portrait photographers create short behind-the-scenes clips. Landscape photographers share cinematic time-lapses.
Learning video does not mean abandoning photography. It means expanding your toolkit. And the transition is smoother than you might expect, because the fundamentals you have already mastered in photography form the foundation of good video work.
What You Already Know (And How It Transfers)
As a photographer, you already understand the three pillars of exposure. The exposure triangle works the same way in video, with one important constraint on shutter speed that we will cover shortly. Your knowledge of aperture and depth of field translates directly. A wide aperture still creates beautiful background blur. A narrow aperture still gives you deep focus across the scene.
Your understanding of composition carries over completely. The rule of thirds, leading lines, foreground interest, and framing all apply to video. In fact, composition becomes even more important in video because the viewer’s eye needs to be guided through a moving scene. A poorly composed video frame is distracting in ways a poorly composed photograph is not, because the viewer is stuck looking at it for seconds or minutes rather than glancing and moving on.
Your experience with lighting is invaluable. Understanding how light direction, quality, and color temperature affect a scene is exactly the same whether you are shooting stills or motion. Natural light behaves the same way. Golden hour is just as beautiful on video as it is in photographs.
The Key Differences Between Photo and Video
While much transfers from photography, video introduces several new concepts and constraints. Understanding these differences upfront will prevent the most common mistakes photographers make when they first pick up video.
Shutter Speed Is (Mostly) Fixed
In photography, shutter speed is one of your most flexible creative tools. You might shoot at 1/4000s for sports, 1/60s for portraits, or 30 seconds for night sky work. In video, your shutter speed is largely determined by your frame rate.
The 180-degree shutter rule is the foundation of natural-looking motion in video. It states that your shutter speed should be approximately double your frame rate. If you shoot at 24 frames per second, your shutter speed should be around 1/50s. At 30fps, use 1/60s. At 60fps, use 1/120s. This creates a natural amount of motion blur per frame that the human eye perceives as smooth, realistic movement.
If your shutter speed is too fast (say 1/1000s at 24fps), each frame is razor-sharp and motion looks stuttery and unnatural, almost like a strobe effect. If your shutter speed is too slow (say 1/24s at 24fps), motion becomes an indistinct smear. The 180-degree rule gives you the sweet spot. For a deeper dive into video-specific camera settings, see our camera settings for video guide.
ISO and Aperture Do the Heavy Lifting
Since shutter speed is essentially locked to the 180-degree rule, you only have two exposure controls left: ISO and aperture. On a bright day at 24fps, maintaining 1/50s at f/2.8 can easily overexpose the image, even at your camera’s lowest ISO. This is why ND (neutral density) filters become essential for video. An ND filter reduces the light entering the lens without affecting color, allowing you to maintain your desired aperture and shutter speed in bright conditions. Think of ND filters as sunglasses for your lens.
White Balance Should Be Set Manually
In photography, you might shoot with auto white balance and correct in post, especially if you shoot RAW. In video, auto white balance can shift mid-clip as the camera reevaluates the scene. This creates visible color shifts that are difficult to fix in editing. Always set your white balance manually before recording. Pick a Kelvin value that matches your lighting situation and lock it in. If the lighting changes significantly (moving from outdoors to indoors, for example), stop recording, adjust white balance, and start a new clip.
Focus Is Continuous, Not One-and-Done
In photography, you lock focus and take the shot. In video, your subject may move toward or away from the camera over the course of a clip. Focus must track with that movement. Many modern cameras offer excellent continuous autofocus for video, with eye tracking and subject detection that works well for interviews, events, and casual shooting. For more controlled, cinematic work, many videographers prefer manual focus with precise focus pulls. Start with your camera’s autofocus system and learn its behavior before attempting manual focus work.
Audio Changes Everything
Photography is a visual-only medium. Video is audiovisual. Bad audio will ruin good video faster than bad video will ruin good audio. Viewers will tolerate slightly soft focus or imperfect exposure, but they will immediately click away from muffled, windy, or echoey sound. If your video includes any spoken word, dialogue, or ambient sound that matters to the story, invest time in understanding audio basics. Even a simple external microphone dramatically improves audio quality over your camera’s built-in mic.
Understanding Frame Rates
Frame rate is how many individual frames (images) your camera captures per second. Each frame rate has a distinct look and specific use cases.
24fps (23.976fps) is the standard for cinema and narrative filmmaking. It has a slightly dreamy, cinematic quality because there is just enough motion blur in each frame to give movement a natural, fluid feel. If you want your video to look like a movie, shoot at 24fps. This is the default choice for most creative video work.
30fps (29.97fps) is common for broadcast television, news, corporate video, and online content. It looks slightly smoother and more “real” than 24fps. The difference is subtle but noticeable. 30fps is a safe, versatile choice for general-purpose video.
60fps captures twice as many frames as 30fps, resulting in very smooth motion. It is the standard frame rate for slow motion at half speed (60fps footage played back at 30fps gives you 2x slow motion). It is also used for fast-paced content like sports coverage and video games where smooth motion is more important than a cinematic feel.
120fps and higher frame rates are used exclusively for slow motion. 120fps played back at 24fps gives you 5x slow motion. These high frame rates demand more light (because your shutter speed increases proportionally) and produce larger files, so use them intentionally for shots where slow motion adds to the storytelling.
A common approach is to set your project frame rate to either 24fps or 30fps for normal-speed footage and switch to 60fps or 120fps only for shots you intend to slow down in editing.
Resolution: How Much Do You Need?
1080p (Full HD, 1920×1080) remains perfectly acceptable for most online video. It produces small file sizes, is easy to edit on any computer, and looks great on phones and tablets. Many professional videographers still deliver in 1080p.
4K (3840×2160) is the current standard for high-quality production. It gives you four times the resolution of 1080p, which means you can crop into footage in post-production without losing quality. Shooting in 4K and delivering in 1080p gives you tremendous flexibility to reframe shots, stabilize shaky footage by cropping, or pull closer on a subject in editing.
Higher resolutions like 6K and 8K exist but are unnecessary for most photographers entering video. They generate enormous files, require powerful computers to edit, and offer diminishing returns for online delivery. Start with 4K and only move higher when you have a specific need.
Essential Camera Movement Techniques
Camera movement is what separates a video from a slideshow. In photography, you frame a composition and press the shutter. In video, how you move (or intentionally hold still) during the clip communicates meaning and emotion.
The Static Shot
A locked-off, tripod-mounted shot with no camera movement at all. This is underrated and underused by beginners. Static shots feel stable, deliberate, and professional. They force the viewer to focus on the action within the frame rather than being distracted by camera movement. Use static shots for interviews, establishing shots, and any moment where the subject’s movement is the focus.
The Pan
A horizontal rotation of the camera from left to right or right to left, typically on a tripod. Pans reveal a wide scene gradually, guide the viewer’s eye across a landscape, or follow a subject moving horizontally. Pan slowly and smoothly. A common beginner mistake is panning too fast, which makes footage feel rushed and disorienting.
The Tilt
A vertical rotation of the camera, looking up or down while the camera stays in place. Use tilts to reveal tall subjects like buildings, waterfalls, or people. A slow tilt up from feet to face can be a dramatic reveal. Like pans, keep tilts slow and purposeful.
The Dolly / Push In
Moving the entire camera physically forward (pushing in) or backward (pulling out). A push in draws the viewer into the scene and creates a sense of intimacy or tension. A pull out reveals more context and can create a sense of isolation or scale. In cinema, this is done on a dolly track. For photographers, a simple slider or even steady handheld walking can achieve the same effect.
The Tracking Shot
Moving the camera alongside a subject as they move. Walking with a subject, following a car, or keeping pace with a runner are all tracking shots. These create energy and keep the viewer connected to the subject. Gimbals and stabilizers make tracking shots accessible to solo shooters.
Handheld
Shooting without a tripod or stabilizer adds a raw, documentary, “you are there” quality. Some gentle camera movement and breathing motion feels natural and intimate. Excessive shake feels amateur. If you shoot handheld, brace your elbows against your body, use a wider focal length (which is more forgiving of movement), and bend your knees slightly to absorb your footsteps while walking.
Audio Basics for Photographers
Audio is the area where photographers have the steepest learning curve, because there is simply no equivalent in still photography. Here are the fundamentals you need to know.
Types of Microphones
Shotgun microphones mount on your camera’s hot shoe or on a boom pole and capture sound primarily from the direction they are pointed. They reject sound from the sides and rear, making them good for isolating a subject in noisy environments. This is the most common first microphone for photographers getting into video.
Lavalier (lapel) microphones clip to a subject’s clothing near their chest. They capture clean, close voice audio regardless of how far the subject is from the camera. Essential for interviews, talking-head content, and any situation where clear voice recording matters. Both wired and wireless options exist.
Built-in camera microphones pick up everything: your breathing, your hand touching the camera body, wind noise, and ambient sound from all directions. They are acceptable for casual behind-the-scenes clips but not for anything where audio quality matters.
Audio Monitoring
Always monitor your audio with headphones while recording. Your camera may show audio levels on screen, but levels alone do not tell you about problems like wind noise, background hum, or clothing rustle on a lavalier mic. Plug headphones into your camera’s headphone jack (or your external recorder) and listen to what you are actually capturing.
Audio Levels
Set your recording levels so that normal speech peaks around -12dB to -6dB on your audio meter. This gives you headroom for louder moments without clipping (distortion from audio that is too loud). Clipped audio cannot be fixed in post. It is always better to record slightly too quiet than too loud, because you can boost quiet audio in editing but cannot repair clipped audio.
Storytelling and Shot Sequences
The biggest conceptual shift from photography to video is moving from single images to sequences. A photograph tells a complete story in one frame. Video tells a story across many shots edited together. Learning to think in sequences is the most important skill a photographer can develop when transitioning to video.
The Five-Shot Sequence
A classic framework for capturing any action or event. Shoot these five shots and you will have enough coverage to edit a coherent sequence:
- Close-up of hands (or the action): A tight shot showing the detailed action. Hands typing, pouring coffee, adjusting a camera dial.
- Close-up of face: The subject’s expression and reaction. Emotion, concentration, joy.
- Wide shot: The full scene, establishing where the action takes place and how the subject relates to the environment.
- Over-the-shoulder: The subject’s point of view, showing what they see. This connects the viewer to the subject’s experience.
- Creative angle: A low angle, high angle, or unusual perspective that adds visual variety and interest.
This framework forces you to vary your shot sizes and angles, which is essential for smooth editing. A sequence of all wide shots feels distant. A sequence of all close-ups feels claustrophobic. Mixing shot sizes creates rhythm and keeps the viewer engaged.
B-Roll
B-roll is supplementary footage that supports and enriches your main footage (A-roll). If you are filming someone talking about their pottery studio, the A-roll is them speaking to camera. The B-roll is footage of their hands shaping clay, finished pieces on shelves, the kiln, their tools, the studio space. B-roll makes video visually interesting and allows you to cover audio edits seamlessly. Always shoot more B-roll than you think you need. You will use it all.
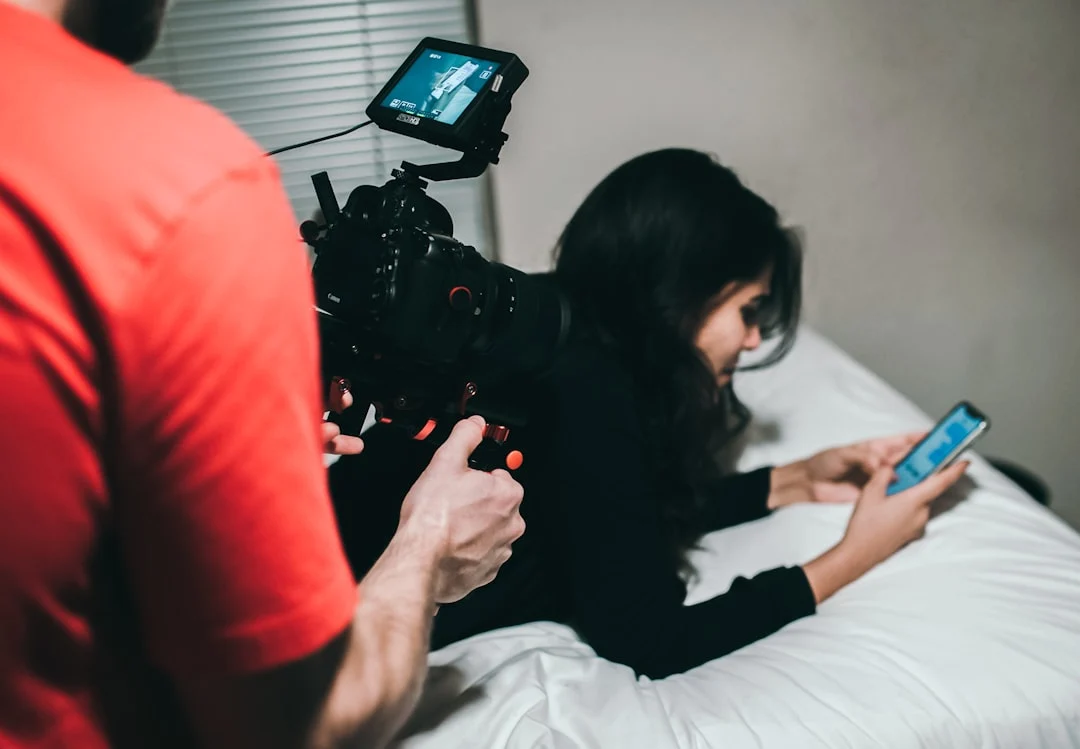
Essential Video Gear for Photographers
The good news is that you already own the most important piece of gear: your camera. Here is what else you might need, listed in order of priority.
What You Already Have
Your camera body and lenses work for video. Your tripod works for video. Your understanding of light works for video. Memory cards you already own likely work, though video benefits from faster write speeds.
First Purchases
An external microphone. A hot-shoe mounted shotgun mic is the single best first investment. It dramatically improves audio quality over built-in mics and requires minimal setup.
Extra batteries and fast memory cards. Video drains batteries significantly faster than photography. A single battery might last hundreds of photos but only 30-60 minutes of continuous recording. Fast memory cards (V30 or V60 rated minimum for 4K) prevent dropped frames and recording failures.
A variable ND filter. This lets you maintain the 180-degree shutter rule in bright conditions without stopping down to tiny apertures. A variable ND adjusts from roughly 2 to 8 stops of light reduction by rotating the filter ring.
Second Round Purchases
A fluid-head tripod. Your photography ball-head tripod works for static shots, but smooth pans and tilts require a fluid head. Fluid heads have internal viscous damping that creates drag, allowing slow, even movements without the jerky starts and stops you get with a ball head.
A gimbal or stabilizer. For moving shots, a 3-axis motorized gimbal smooths out walking motion and allows cinematic tracking shots. These are not essential starting out, but they open up creative possibilities once you are comfortable with the basics.
LED continuous lights. Your flash equipment does not work for video (a flash fires for a fraction of a second, while video needs continuous illumination). Battery-powered LED panels are the video equivalent of your speedlights. Start with a single panel and expand as needed.
Video Settings Checklist
Before you hit record, run through this checklist. These settings form the foundation of every video clip you shoot. For a complete breakdown of each setting and why it matters, see our detailed camera settings for video guide.
- Resolution: 4K for maximum quality and flexibility, or 1080p for smaller files and easier editing.
- Frame rate: 24fps for cinematic look, 30fps for general content, 60fps or higher for slow motion.
- Shutter speed: Double your frame rate (1/50 at 24fps, 1/60 at 30fps, 1/120 at 60fps).
- White balance: Set manually in Kelvin. Do not leave on auto.
- Aperture: Set for your desired depth of field, just as you would for a photograph.
- ISO: Set for proper exposure after locking shutter speed and aperture. Use ND filters in bright conditions rather than stopping down or increasing shutter speed.
- Focus mode: Continuous AF with face/eye detection for run-and-gun shooting. Manual focus for controlled, planned shots.
- Audio: External mic connected, levels set to peak around -12dB, monitoring with headphones.
- Picture profile: Standard or flat profile (more on this in the camera settings guide).
Your First Video Project
Theory only takes you so far. The best way to learn video is to shoot a simple project with constraints that force you to apply the fundamentals. Here is a straightforward first project that builds on your photography skills.
The “Process” Video
Film someone doing something they know how to do well. A barista making a latte. A friend cooking a meal. A musician tuning a guitar. A painter mixing colors. Choose something with visible, interesting hand movements and a clear beginning, middle, and end.
- Shoot a wide establishing shot of the space.
- Shoot a close-up of hands doing the action.
- Shoot a close-up of the subject’s face while they work.
- Shoot an over-the-shoulder or point-of-view shot.
- Shoot one creative angle (low, high, through something).
- Hold each shot for at least 10 seconds.
- Keep the camera steady (tripod or very stable handheld).
Edit these clips together into a 30-60 second sequence set to music. This simple exercise teaches you shot variety, holding shots long enough for editing, and the basics of assembling a sequence.
Editing Basics
Video editing is to video what photo editing is to photography: a necessary second half of the creative process. You do not need expensive software to start. Most computers come with basic editing software (iMovie on Mac, Photos on Windows). Free and affordable options are available for every platform.
The fundamentals of editing are simpler than they appear. Import your clips, arrange them on a timeline, trim the beginnings and endings, add transitions (use simple cuts, not flashy effects), adjust color, add music, and export. The same principles of restraint that apply to photo editing apply here: less is more. Clean cuts between shots look more professional than elaborate transitions.
Just as shooting RAW gives you more flexibility in photo editing, some cameras offer LOG or flat picture profiles that capture a wider dynamic range for video, giving you more latitude in color grading. This is an advanced topic, but worth knowing about as you progress. Our camera settings for video guide covers picture profiles in detail.
Video and Social Media
For many photographers, the first encounter with video is through social media. Platforms reward video content with greater reach, making it a powerful tool for building an audience around your photography. If social media is your primary motivation for learning video, you may also want to explore vertical video for social media and short-form video content creation, which cover platform-specific techniques in depth.
The principles covered in this guide apply regardless of where your video ends up. Whether you are creating cinematic travel films, client wedding highlights, or quick social media clips, the fundamentals of exposure, composition, movement, audio, and storytelling remain the same. For tips on presenting your still photography effectively across platforms, see our photography for social media guide.
Common Mistakes
These are the errors photographers make most often when starting video. Recognizing them upfront will save you hours of frustration.
- Not holding shots long enough. Photographers are trained to capture a moment and move on. In video, each clip needs to be held for at least 5-10 seconds to be usable in editing. A two-second clip, no matter how beautiful, gives the editor nothing to work with. Count slowly to ten after you start recording before you move to the next shot.
- Ignoring the 180-degree shutter rule. Shooting video at 1/1000s because it is still bright outside produces stuttery, unnatural footage. Lock your shutter speed to double your frame rate and use ND filters to control exposure.
- Leaving white balance on auto. Auto white balance shifts mid-clip create color inconsistencies that are tedious to fix in editing. Set it manually.
- Neglecting audio. Beautiful footage with terrible audio is unwatchable. Invest in an external microphone before you invest in any other video accessory.
- Over-moving the camera. Beginners tend to pan, tilt, and zoom constantly, as if the camera has to be in motion at all times. Static shots are powerful. Let the action within the frame provide the movement. When you do move the camera, do it slowly and with purpose.
- Not shooting enough B-roll. You will always need more supplementary footage than you expect. For every minute of final edited video, you might need 5-10 minutes of raw footage. Shoot everything: details, textures, wide shots, reactions.
- Using a photography tripod head for video. Ball heads lock and unlock with jerky movement. Fluid video heads provide smooth, damped motion for pans and tilts. If you plan to do any camera movement on a tripod, a fluid head is essential.
- Recording without monitoring audio. If you do not listen through headphones, you will not know about problems until you are editing, when it is too late to re-record.
- Trying to learn everything at once. Start with static, well-lit, properly exposed clips. Add camera movement once you are comfortable. Add audio once movement feels natural. Layer skills gradually rather than attempting cinematic production on your first outing.
Try This
These exercises are designed to build your video skills incrementally, starting with what you already know as a photographer.
- Exercise 1: The Silent Film. Shoot a 30-second video with no audio at all. Focus entirely on visuals: exposure, composition, shot variety, and smooth camera work. Use the five-shot sequence framework. This isolates the visual skills you already have and lets you practice them in a video context without worrying about audio.
- Exercise 2: One Location, Five Shots. Go to a single location (a cafe, park, or your home) and shoot exactly five clips of 10 seconds each, using five different shot sizes: extreme close-up, close-up, medium, wide, and extreme wide. This trains you to think about shot variety, which is the building block of good editing.
- Exercise 3: The 180-Degree Shutter Test. Shoot a moving subject (a person walking, a car driving past, flowing water) three times: once with the correct shutter speed per the 180-degree rule, once with a much faster shutter speed (1/1000s or faster), and once with a slower shutter speed. Compare the three clips. Seeing the difference firsthand cements why the rule matters.
- Exercise 4: Audio Comparison. Record the same person speaking the same sentence using your camera’s built-in microphone, then with an external shotgun mic, then with a lavalier mic. Play them back-to-back. The difference in quality will convince you that audio matters more than any other technical upgrade.
- Exercise 5: Edit a Sequence. Take your clips from Exercise 2, import them into any free editing app, trim them, and arrange them into a 30-second sequence with music. The goal is not perfection. The goal is completing the full workflow: shoot, import, edit, export.
FAQ
Do I need a separate camera for video?
No. Most modern mirrorless and DSLR cameras shoot excellent video. The camera you use for photography almost certainly shoots 4K video. Use what you have and only consider dedicated video equipment once you have outgrown your current camera’s video capabilities.
What frame rate should I start with?
Start with 24fps if you want a cinematic look, or 30fps if you want a clean, neutral look for general content. Pick one and stick with it until you understand why you might want the other. Do not mix frame rates within a project unless you are intentionally shooting slow-motion footage at a higher frame rate.
Can I use my photography lenses for video?
Yes. Your existing lenses work perfectly for video. Faster lenses (wider maximum aperture) are particularly useful because video often demands more light due to the shutter speed constraint. Your 50mm f/1.8 or 35mm f/1.4 will be among your most-used video lenses.
Do I need to shoot in LOG or flat picture profiles?
Not when starting out. LOG profiles capture more dynamic range but require color grading in post to look good. Start with your camera’s standard picture profile. Once you are comfortable with the shooting and editing workflow, experiment with flatter profiles for more post-production flexibility.
How much storage do I need for video?
Significantly more than photography. A single minute of 4K video at standard bit rates generates roughly 350-750 MB depending on your codec and settings. A one-hour shoot can easily produce 20-50 GB of footage. Invest in fast, high-capacity memory cards and an external hard drive for archiving.
What is the single most important thing for a photographer learning video?
Hold your shots longer. This is the most universal struggle for photographers moving to video. Train yourself to let clips run for at least 10 seconds before cutting. Your editing self will thank your shooting self.
Should I worry about color grading?
Not initially. Color grading is the video equivalent of detailed color grading in photography. Get your exposure and white balance right in-camera first. Simple color adjustments in editing (contrast, saturation, white balance tweaks) are all you need starting out. Dedicated color grading is an intermediate skill to develop after you are comfortable with the shooting and editing fundamentals.
How do I share my video work?
Export at the resolution and frame rate you shot in. For online sharing, H.264 or H.265 codec at a high bitrate produces excellent quality with reasonable file sizes. Upload to the platform of your choice. If you are creating content specifically for social media, our guides on vertical video and short-form video cover platform-specific optimization.