Jewelry photography demands precision. Tiny, reflective subjects amplify every flaw in your lighting, background, and focus. But with the right setup and technique, you can capture rings, necklaces, and watches with the sparkle and detail that makes buyers click “add to cart” or stops a viewer mid-scroll.
Whether you are shooting for an online store or building a creative portfolio, this guide covers everything from lighting rigs to post-processing for professional jewelry images.
Why Jewelry Is One of the Hardest Subjects to Photograph
Metals reflect everything around them. Gemstones refract light unpredictably. The subjects are small, so even slight focus errors show. And customers expect to see fine detail, accurate color, and realistic sparkle all in a single frame. Understanding these challenges is the first step toward solving them.
Essential Gear for Jewelry Photography
Camera and Lens
Any camera with manual exposure control works. The lens matters more than the body. A dedicated macro lens (90mm to 105mm) is ideal because it focuses close enough to fill the frame with a ring while maintaining sharpness across the subject. If a macro lens is not in your budget, extension tubes mounted between your camera body and a standard lens offer an affordable way to achieve close-focus capability.
Tripod and Remote Shutter
At macro distances, even the tiniest camera movement ruins sharpness. A sturdy tripod is non-negotiable. Pair it with a remote shutter release or your camera’s self-timer to eliminate vibration from pressing the shutter button. If your camera or lens offers image stabilization, turn it off when shooting on a tripod, as it can actually introduce micro-vibrations.
Backgrounds
White backgrounds are the standard for e-commerce because they keep attention on the product and integrate seamlessly into website layouts. Black backgrounds create drama and make gold and silver pop. Textured surfaces like marble, slate, or linen add context for editorial or lifestyle shots. Keep a selection of clean, wrinkle-free background options ready.
Lighting for Jewelry: The Most Critical Element
Diffused Light to Control Reflections
The biggest enemy in jewelry photography is harsh, direct light. It creates blown-out hotspots on metal and muddy reflections that obscure detail. The solution is diffusion. A light tent or softbox wraps soft, even light around the piece, minimizing sharp reflections while still revealing the form and texture of the metal.
A simple light tent (a translucent fabric cube) with one or two continuous lights positioned outside works well for most pieces. Position lights at roughly 45-degree angles on either side. Adjust one light slightly brighter than the other to create subtle dimension rather than completely flat illumination.
Light Painting for Sparkle
For gemstones, diffused light alone can make diamonds look lifeless. Light painting introduces targeted sparkle. In a darkened room, set a long shutter speed (several seconds) and move a small LED penlight or flashlight around the jewelry during the exposure. This creates pinpoint highlights that bring gems to life. It takes practice to control, but the results are striking.
Reflection Cards and Blockers
Small white cards bounced near the jewelry fill in dark shadows. Small black cards (flags) placed near reflective surfaces absorb light and add definition to curved metal. This push-pull between white and black cards gives you fine control over how light wraps around the piece.
Camera Settings for Jewelry
Depth of field is your primary challenge. At macro distances, even f/8 or f/11 may not keep an entire ring in focus from front to back. Shoot in manual or aperture priority mode.
- Aperture: Start at f/8 and check focus across the piece. Go to f/11 or f/16 if you need more depth. Beyond f/16, diffraction softens the image, so avoid very small apertures.
- ISO: Keep it as low as possible (100 or 200) for maximum sharpness and minimal noise. Since you are on a tripod, slow shutter speeds are fine.
- Shutter speed: Whatever the exposure requires. On a tripod with a remote release, shutter speed is not a limiting factor.
- White balance: Set a custom white balance or shoot in RAW for full control in post. Accurate white balance is critical for metals. Gold should look warm but not orange. Silver should look neutral, not blue.
Focus Stacking for Maximum Sharpness
When a single aperture cannot keep the entire piece sharp, focus stacking is the answer. Take multiple shots at the same aperture, shifting the focus point slightly between each frame. Then blend them in post-processing so every part of the jewelry is tack-sharp. Many cameras offer built-in focus bracketing to automate this. Combine the images using the focus stacking tools in your editing software.
Styling and Composition
How you present the jewelry matters as much as the technical execution. For e-commerce, keep it clean and consistent. Center the piece, maintain the same background and lighting across all products, and shoot at a consistent angle. Buyers want to compare items easily.
For editorial or portfolio work, you have more creative freedom. Try these approaches:
- Props: Fabric, flowers, stones, or wooden surfaces that complement without competing. Keep props subtle.
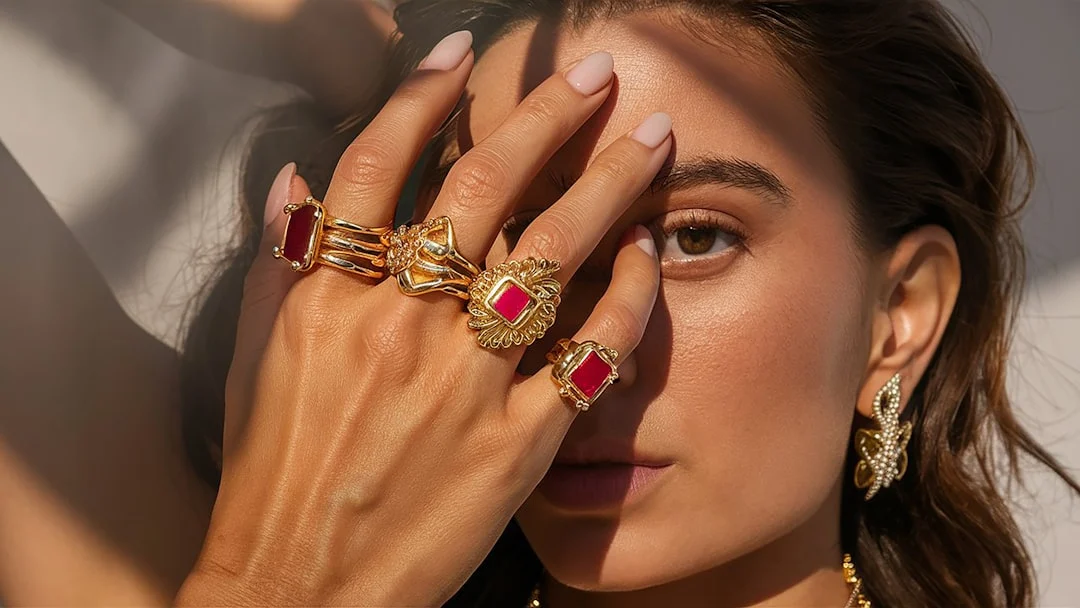
- Worn shots: Jewelry on a model’s hand, neck, or ear adds scale and context. Skin tones also add warmth.
- Groupings: Style a collection together for a cohesive look. Use odd numbers of items for a more natural arrangement.
- Angles: Shoot from directly above for flat-lay layouts, at 45 degrees for a natural viewing perspective, and straight-on for profile views of rings and bangles.
Managing Reflections
Polished metal acts like a mirror. Everything in the room, including your camera, your shirt, and the ceiling, shows up in the surface. Here is how to handle it:
- Shoot through a hole: Cut a small hole in a white card and shoot through it. The jewelry reflects white instead of your camera and face.
- Dulling spray: A light coat of anti-reflection spray reduces glare on highly polished pieces. Use sparingly and test on a non-visible area first.
- Angle adjustments: Tiny changes in camera angle dramatically alter what a reflective surface shows. Move in small increments until unwanted reflections disappear.
- Post-processing: Clone and heal tools can remove stubborn reflections, but getting it right in-camera saves significant editing time.
Shooting for E-Commerce vs. Editorial
E-commerce images need to be clean, consistent, and informative. Shoot on white, keep lighting identical across all pieces, include multiple angles (front, back, side, detail), and show scale. These images sell the product.
Editorial images tell a story. Play with dramatic lighting, creative backgrounds, styled scenes, and bold color choices. These images build your brand and attract attention on social media. Most jewelry photographers need both skill sets. Master the e-commerce fundamentals first, then experiment with editorial creativity.
Post-Processing Jewelry Images
Post-processing for product photography focuses on accuracy and clarity:
- White balance correction: Fine-tune so metals and gems look true to life.
- Exposure and contrast: Lift shadows slightly to show detail in dark metal areas. Add contrast to make gems pop.
- Sharpening: Apply targeted sharpening to edges and fine details. Jewelry benefits from slightly more sharpening than most subjects.
- Retouching: Remove dust spots, fingerprints, and minor scratches. For e-commerce, the piece should look pristine.
- Background cleanup: Ensure white backgrounds are pure white (RGB 255, 255, 255) for marketplace listings.
Common Mistakes to Avoid
- Using direct flash: On-camera flash creates blinding hotspots on metal. Always use off-camera, diffused lighting.
- Ignoring dust and fingerprints: Clean every piece thoroughly before shooting. Micro-fiber cloths and canned air are your best friends.
- Shooting too wide: Wide-angle lenses distort small objects. Stick to focal lengths of 60mm or longer.
- Inconsistent color: Mixed lighting (daylight plus tungsten, for example) creates color casts that are difficult to fix. Use a single, consistent light source.
Building a Jewelry Photography Workflow
Efficiency matters, especially when shooting entire collections. Develop a repeatable workflow:
- Clean and inspect every piece before it goes on set.
- Set up your lighting, background, and camera position. Lock everything down.
- Shoot a test frame and check focus, exposure, and reflections on your monitor.
- Photograph each piece in the same order: hero angle, alternate angles, detail close-ups.
- Review images on a calibrated monitor before breaking down the set.
- Process images in batches using consistent editing settings.
Jewelry photography rewards patience and precision. Every detail, from the angle of a light card to the placement of a focus point, shapes the final image. Start with the fundamentals in this guide, and refine your technique with each shoot until capturing sparkling, professional jewelry images becomes second nature.