Newborn photography captures a fleeting window. Babies change dramatically in their first weeks, and the soft, curled poses that define this genre are only possible for a short time. Done well, these images become some of the most treasured photographs a family will ever own.
But photographing newborns comes with unique responsibilities. These are the most vulnerable subjects you will ever work with, and safety must guide every decision you make on set.
Safety First: The Non-Negotiable Foundation
Before discussing any creative technique, understand this: newborn safety overrides every other consideration. No image is worth risking a baby’s well-being.
- Never leave a baby unsupported. A spotter (parent or assistant) must always have hands within reach of the baby, even if those hands will be edited out later.
- Composite dangerous-looking poses. Images where a baby appears to be balanced on hands, suspended in a hammock, or propped in an unstable position are almost always composites. Two or more images are merged in post-processing. The baby is fully supported in every individual frame.
- Support the head at all times. Newborns cannot support their own heads. Every pose must account for this.
- Watch for breathing restrictions. Avoid poses that press the chin to the chest, which can restrict the airway. The chin should always be slightly lifted.
- Keep the room warm. Babies lose body heat quickly, especially when unclothed. Maintain the shooting room at approximately 75-80°F (24-27°C). A portable space heater near the posing area helps.
- Sanitize everything. Wash all blankets, wraps, and props before use. Clean your hands frequently. Newborns have underdeveloped immune systems.
If you are new to newborn photography, consider assisting an experienced newborn photographer before working on your own. Handling technique and safety awareness are skills that take practice.
Timing: When to Schedule the Session
The ideal window for posed newborn sessions is between 5 and 14 days after birth. During this period, babies are still very sleepy, naturally curl into those classic newborn poses, and have minimal skin peeling or baby acne. After two weeks, babies become more alert and less flexible, making posed sessions significantly more challenging.
Book the session while the parents are still expecting, with the understanding that the exact date will be confirmed after birth. Check out our maternity photography for more details. Build flexibility into your schedule for this genre.
Lighting for Newborn Photography
Soft, gentle light defines the newborn aesthetic. Harsh shadows and contrasty lighting feel wrong for this subject. Natural light from a large window is the most popular and effective approach.
Natural Light Setup
Position your posing area near a large window with sheer curtains or a white sheet to diffuse direct sunlight. North-facing windows (in the Northern Hemisphere) provide consistent, soft light throughout the day. The baby should be angled so light falls across them at roughly 45 degrees, creating gentle dimension without harsh shadows.
Place a white reflector on the shadow side of the baby to bounce light back and fill in dark areas. A simple white foam board works well. The goal is soft, even illumination with just enough shadow to show the baby’s form.
Studio Lighting Alternative
If natural light is unavailable or inconsistent, a single large softbox or umbrella positioned to mimic window light works well. Use continuous lights rather than strobes so you can see exactly how light falls on the baby without startling flashes. Keep lights at a moderate power to avoid overheating the baby.
Camera Settings
Newborn photography settings prioritize a soft background, accurate skin tones, and enough shutter speed to handle small movements.
- Aperture: f/2.0 to f/4.0 for individual baby shots. This creates a soft, blurred background that keeps attention on the baby. For parent-and-baby shots, stop down to f/4 or f/5.6 to keep multiple faces sharp.
- Shutter speed: 1/160s or faster. Even sleeping babies make small, sudden movements. A faster shutter speed prevents motion blur.
- ISO: As low as your lighting allows. In natural light, you may need ISO 400-800. Prioritize correct exposure and shutter speed over the lowest possible ISO.
- White balance: Set to match your light source, or shoot in RAW and adjust later. Accurate white balance is essential for natural-looking skin tones.
- Focus: Use single-point autofocus and place the focus point on the baby’s eye closest to the camera. Eye sharpness is critical in portrait photography of any kind.
Lens Selection
A 35mm, 50mm, or 85mm prime lens with a wide maximum aperture is ideal. The 50mm is the most versatile for newborn work, offering a natural perspective without the distortion of wider lenses. The 85mm creates beautiful background blur but requires more room to work. Avoid wide-angle lenses for close-up baby portraits, as they distort facial features.
Posing Newborns Safely
Posing is the most skill-intensive part of newborn photography. Never force a baby into a position. If a baby resists a pose, move on to something else and try again later, or skip it entirely.
Back Pose
The safest starting position. Place the baby on their back on a soft posing beanbag or blanket. Gently tuck legs and arms into a curled position. This is comfortable for almost every baby and produces clean, classic images.
Side Pose
Gently roll the baby onto their side with one arm supporting the head. Tuck legs into a fetal curl. Place a rolled blanket behind the baby for subtle support. This pose shows the baby’s profile beautifully.
Tummy Pose
With hands tucked under the chin and legs curled beneath, the tummy pose is a newborn classic. The baby’s head must be turned to one side with the chin slightly lifted for clear breathing. A spotter’s hands must remain close at all times. This pose works best when the baby is deeply asleep.
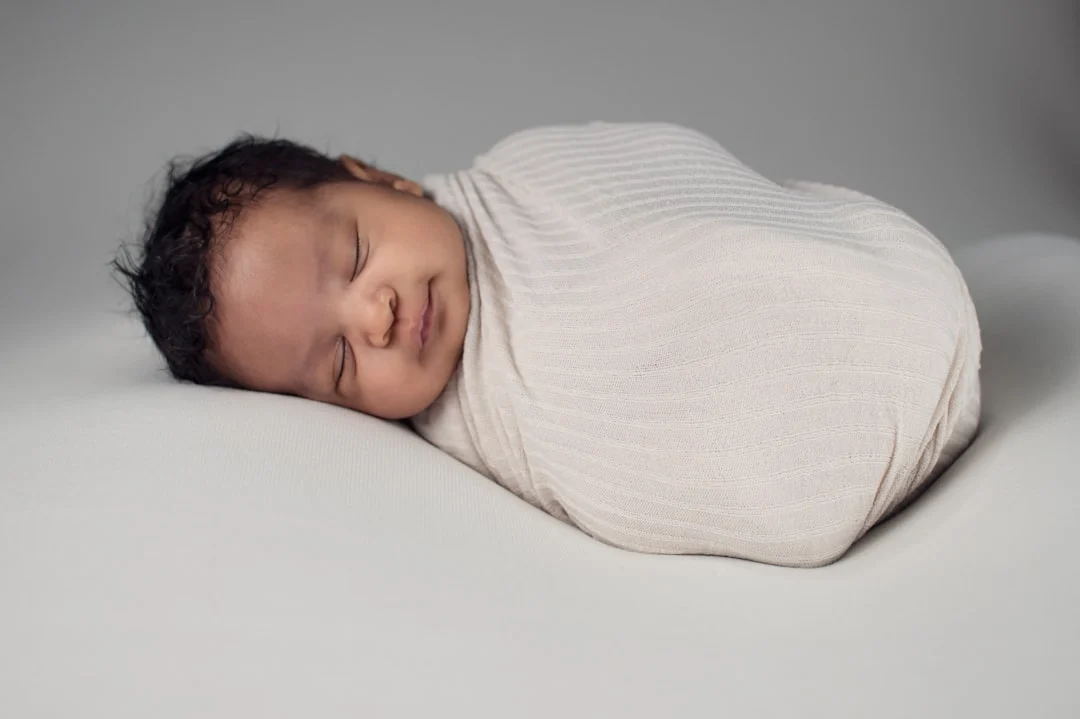
Wrapping
Swaddling the baby in a soft stretch wrap provides security and warmth. It also creates a clean, simple look. Leave the face and sometimes the hands and toes exposed. Wrapping can help settle a fussy baby and simplifies posing by keeping limbs contained.
Props, Wraps, and Backgrounds
Keep props simple and safe. Every prop must be sturdy, clean, and large enough to be stable:
- Baskets and bowls: Line with soft fabric. Always weight the bottom for stability. Never place a basket on an elevated surface.
- Blankets and fabrics: Stretch knit fabrics drape smoothly over posing beanbags. Stock neutral tones (cream, gray, tan) and a few accent colors.
- Headbands and hats: Tiny accessories add variety. Ensure nothing is tight or restrictive.
- Natural elements: Dried flowers, wooden accents, and soft greenery complement organic themes. Avoid anything with sharp edges or small parts.
Less is almost always more. The baby is the subject. Props should support, never compete.
Parent and Sibling Shots
Include family shots in every newborn session. These images often become the most cherished. Keep them natural: parent holding baby close, baby on dad’s chest, sibling gently kissing the baby’s forehead. Coach parents to close their eyes and lean in. These moments feel intimate and real.
For sibling shots with toddlers, prioritize the toddler’s comfort and cooperation. Let them sit comfortably with the baby placed on their lap (always with a parent’s hands nearby, edited out later if needed). Keep toddler sessions short and flexible.
Editing Newborn Photos
Newborn editing should enhance softness and warmth without making images look artificial:
- Skin tone correction: Newborns often have red, blotchy, or jaundiced skin. Gentle color correction in the HSL panel (reducing red and orange saturation slightly) evens out skin tones naturally.
- Skin smoothing: Reduce clarity or texture slightly for a softer look. Avoid heavy skin smoothing that makes the baby look plastic.
- Blemish removal: Heal away temporary skin issues like flaking, scratches, or baby acne. These are temporary and parents appreciate clean images.
- Warmth: A slightly warm color grade suits the genre. Shift white balance gently toward yellow/warm if the image feels cool.
- Background cleanup: Smooth out wrinkles in blankets and remove distracting elements.
- Composite work: Merge frames to remove spotter hands, combine focus points, or create safe-looking poses from supported originals.
Session Flow and Workflow Tips
- Prepare the room before the family arrives. Set up lighting, heat the room, lay out wraps and props.
- Start with parent and family shots while the baby is awake or being fed. This gives the baby time to settle.
- Feed and settle. Allow time for a feeding and burping. A full, comfortable baby sleeps more deeply.
- Begin posing with the easiest positions first (back pose on beanbag). Work toward more involved poses as the baby settles into deeper sleep.
- Stay flexible. Some babies sleep through everything. Others wake repeatedly. Adapt your plan to the baby, not the other way around.
- Allow 2-3 hours for a full newborn session. Rushing leads to frustration and missed shots.
Building Confidence with Newborns
Newborn photography combines technical skill with hands-on baby handling, and both take practice. Start with babies of friends or family in low-pressure settings. Invest in a posing doll to practice transitions and wrapping techniques. Attend workshops that include live baby sessions with experienced mentors.
The most important skill in this genre is not photography at all. It is the ability to keep a tiny person safe, warm, and comfortable while creating images their family will treasure for a lifetime. Master that, and the photography will follow.