What is Macro Photography?
There is an entire world hiding in plain sight, a world of intricate patterns, vivid textures, and astonishing detail that most people walk past every day without noticing. Macro photography is your key to that world. It takes the familiar and makes it extraordinary, transforming a dewdrop into a crystal sphere, a butterfly wing into a stained-glass window, and a patch of moss into a forest canopy.
In strict technical terms, true macro photography means capturing a subject at a 1:1 magnification ratio or greater, meaning the subject appears on your camera’s sensor at its actual size or larger. A ladybug that is five millimeters long takes up five millimeters of sensor space. At this magnification, the world looks completely different from what your naked eye perceives. But in common usage, “macro” is applied more broadly to any extreme close-up photography that reveals detail invisible at normal viewing distances. Whether you are working at true 1:1 magnification or simply getting closer than usual, the principles and challenges are the same.
What makes macro photography so rewarding is the way it reshapes your perception. Once you start looking for macro subjects, you will find them everywhere, in the grain of weathered wood, in the veins of a leaf, in the bubbles rising through a glass of water, in the texture of rust on an old gate. It connects to the idea explored in Lesson 1: Re-Discovering Your World, the art of truly seeing, of looking at the everyday world with fresh, curious eyes. Macro photography takes that concept to its most literal extreme.
Close-up photography, which does not quite reach 1:1 magnification, is a natural stepping stone into the macro world. Many zoom lenses offer a close-focus mode that lets you fill the frame with a flower or insect from a moderate distance. This is an excellent starting point. As your fascination with the small world grows, you can explore dedicated macro equipment that brings you even closer.
Equipment Options at Every Budget
One of the great things about macro photography is that you can get started with almost any camera, including your phone. Most modern phones have a close-focus or macro mode that produces surprisingly detailed images of small subjects. It will not match the quality or magnification of dedicated macro gear, but it is a wonderful way to develop your eye for small-world subjects and composition before investing in specialized equipment.
A dedicated macro lens is the gold standard for this kind of photography. These lenses are specifically designed to focus at very close distances and achieve true 1:1 magnification while maintaining excellent sharpness and minimal distortion. They typically come in focal lengths ranging from around 50mm to 200mm. Shorter focal lengths require you to get physically closer to your subject, which can be challenging with skittish insects. Longer focal lengths give you more working distance, the space between the front of the lens and the subject, which makes it easier to photograph live creatures without disturbing them. Both produce excellent results; the choice depends on what you plan to shoot most often.
If a dedicated macro lens is beyond your current budget, extension tubes are an excellent alternative. These are hollow tubes that fit between your camera body and your existing lens, moving the lens further from the sensor and allowing it to focus much closer than it normally could. They contain no glass elements, so they do not degrade image quality. A set of extension tubes is one of the best value investments in photography, relatively inexpensive and capable of turning lenses you already own into macro tools.
Close-up filters, sometimes called diopter lenses, screw onto the front of your existing lens like a filter and act as a magnifying glass. They are affordable and portable, though the optical quality varies. Higher-quality close-up filters with multi-element designs produce noticeably better results than single-element versions. For the adventurous, a reversing ring lets you mount a lens backward on your camera body, turning a standard or wide-angle lens into a surprisingly powerful macro optic. Lens stacking, mounting one lens reversed on the front of another, can achieve extreme magnification, though it requires patience and experimentation.
Regardless of which equipment path you choose, support gear matters enormously in macro photography. A sturdy tripod is invaluable for static subjects like flowers, textures, and objects. A focusing rail, a device that lets you make tiny, precise adjustments to your camera’s position, is particularly useful at high magnification, where even a millimeter of movement can shift your focus point dramatically. For more tips on equipment and approach, see 10 Macro Photography Tips.
Mastering the Technical Challenges
Macro photography presents a unique set of technical challenges that you will not encounter in other genres, and understanding them is essential to getting consistently good results. The most significant of these is depth of field. At macro magnification, depth of field becomes extraordinarily shallow. Even at a small aperture like f/16 or f/22, you may have only a few millimeters of the scene in sharp focus. At wider apertures, the zone of sharpness can be thinner than a sheet of paper.
This razor-thin depth of field is both a challenge and a creative tool. It means that precise focus placement is critical: the difference between a sharp image and a soft one can be a barely perceptible shift in camera position. But it also creates a beautiful separation between your subject and the background, rendering everything behind and in front of your focus point into a smooth, painterly blur known as bokeh. Learning to use this selective focus deliberately, placing the sharpest point exactly where you want the viewer’s eye to land, is one of the core skills of macro photography.
When you need more depth of field than a single exposure can provide, focus stacking is the solution. This technique involves shooting a series of images at different focus distances, each one capturing a thin slice of sharpness through the subject, and then combining them in post-processing software to create a single image that is sharp from front to back. It requires a steady camera (ideally on a tripod or focusing rail), a cooperative subject, and some patience, but the results can be stunning. Many modern cameras have a built-in focus bracketing mode that automates the capture process.
Wind is the macro photographer’s nemesis. When you are working at high magnification, even a gentle breeze will cause a flower stem to sway enough to move your subject in and out of the focus plane. Some photographers carry a small windbreak, a piece of cardboard or a planting tray, to shield their subject. Others simply wait for lulls between gusts, timing their shutter press to the brief moments of stillness. Early mornings often offer the calmest air, which is one reason why experienced macro photographers tend to be early risers.
The exposure tradeoffs at macro distances are worth understanding. Stopping down to a small aperture gives you more depth of field, but it also reduces the light reaching your sensor, requiring slower shutter speeds or higher ISO settings. And at very small apertures, diffraction, a physical property of light passing through a tiny opening, actually reduces overall sharpness. There is a sweet spot for every lens, usually between f/8 and f/16, where you get a reasonable balance of depth of field and sharpness. Beyond that, you may gain depth but lose crispness.
Camera shake is amplified dramatically at macro distances. At 1:1 magnification, vibrations that would be invisible in normal photography become clearly visible as blur. Use the sturdiest tripod you can, and consider using a remote shutter release or your camera’s self-timer to avoid the vibration caused by physically pressing the shutter button. Mirror lock-up (on DSLR cameras) can also help by eliminating the small vibration caused by the mirror slapping up before the exposure.
Lighting for Macro
Light is crucial in macro photography, perhaps more so than in any other genre. At high magnification, you are often working with very small apertures and need plenty of light to keep your shutter speeds manageable. At the same time, the quality of light dramatically affects the mood and impact of your close-up images. Hard, direct light can create harsh shadows and blown-out highlights on small subjects, while soft, diffused light reveals texture and detail beautifully.
Natural light is the starting point for most macro photographers, and it can be superb. Open shade, the soft, even illumination found under a tree canopy, on the north side of a building, or on an overcast day, is ideal for revealing the fine details of flowers, insects, and textures without the complexity of harsh shadows. When working in direct sunlight, a small diffuser held between the sun and your subject softens the light dramatically. Even a translucent white plastic bag or a sheet of tracing paper can serve as an improvised diffuser in a pinch.
A small reflector, or even a white card, a piece of aluminum foil, or your hand, can bounce light back into shadowed areas of your subject, lifting dark tones and revealing detail that would otherwise be lost. In macro photography, the size of the reflector can be tiny because your subjects are small. A business-card-sized white card positioned just outside the frame can make a significant difference.
When natural light is not enough, dedicated macro lighting tools come into play. Ring lights that mount on the front of your lens provide even, shadowless illumination that is particularly useful for recording fine detail, though the flat light can sometimes look clinical. Twin flash units, positioned on either side of the lens, offer more control and allow you to create directional light with depth and modeling. LED panels and even desk lamps can work well for indoor macro photography, where you have full control over your setup.
One of the challenges specific to macro is controlling specular highlights, those bright, reflective hotspots that appear on shiny surfaces like insect eyes, wet petals, or metallic objects. Diffusing your light source is the primary solution. The larger and softer your light relative to your subject, the smaller and more manageable those highlights become. Polarizing filters can also help reduce reflections on non-metallic surfaces, though they cost you some light.
Backlighting can be particularly dramatic in macro work. Translucent subjects like flower petals, leaves, and insect wings glow when lit from behind, revealing internal structures, veins, and textures that are invisible with front lighting. Position yourself so the light source is behind your subject, meter for the subject itself rather than the bright background, and watch your subject come alive with luminous color and detail.
Finding and Composing Macro Subjects
Macro subjects are everywhere, and part of the joy of this genre is discovering them in unexpected places. The obvious candidates, insects, flowers, and small creatures, are endlessly rewarding, but the macro world extends far beyond nature. Textures in peeling paint, the weave of fabric, the corrosion on old metal, bubbles in soap, the crystalline structure of salt or sugar: any surface or object, examined at close range, becomes a source of abstract beauty and visual fascination.
When photographing insects, approach slowly and deliberately. Many insects are more tolerant of a photographer who moves smoothly than one who makes sudden jerky movements. Early morning is often the best time, when cooler temperatures make insects sluggish and less likely to fly away. Dew-covered insects at dawn are a classic macro subject, combining the beauty of the creature with the sparkle of water drops. Photograph insects at their eye level whenever possible. This creates a sense of connection and intimacy. And always be ethical: do not handle, chill, or restrain insects for a photograph. Let them be, and if they move away, let them go.
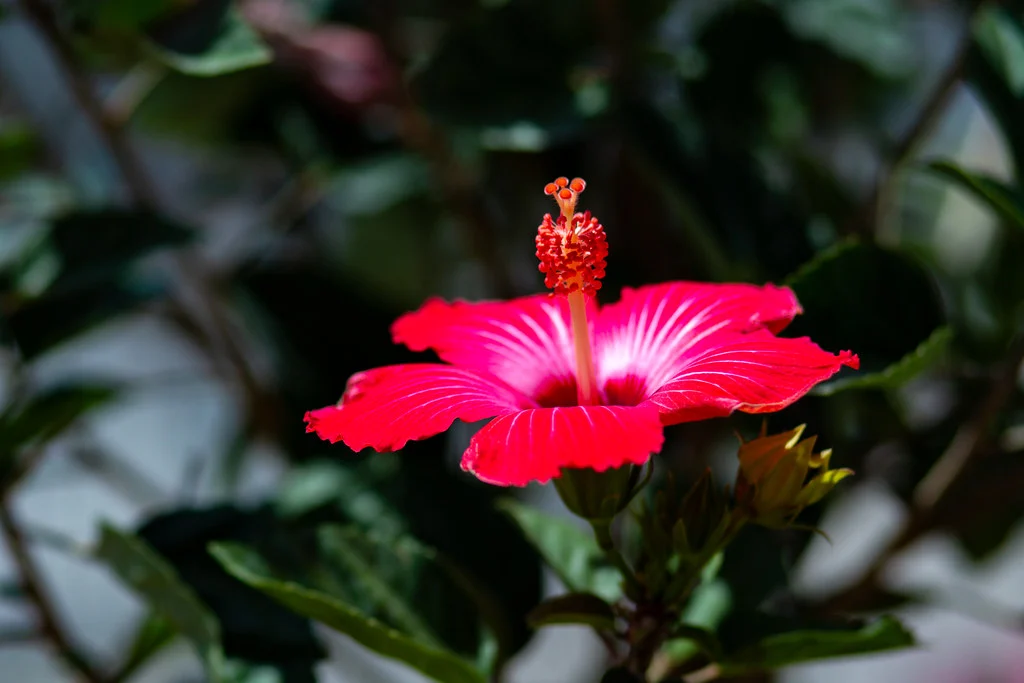
Flowers and botanical subjects offer extraordinary macro opportunities. The interior of a flower reveals structures, stamens, pistils, pollen grains, that are invisible at normal viewing distances. Backlit petals glow with translucent color. Wilting flowers can be as beautiful in macro as fresh ones, with their curling edges and fading tones offering a poignant, painterly quality. Timing matters: flowers often look their best in the first day or two after opening, and shooting in the morning, before the sun is too harsh, gives you the most pleasing light.
Water drops are among the most popular macro subjects, and for good reason. They act as tiny lenses, reflecting and refracting the world around them. You can find them naturally in morning dew, or create them with a spray bottle for more controlled results. Frost and ice crystals, when winter arrives, offer an entirely different macro world of geometric patterns and crystalline structures.
Composition at macro scale follows many of the same principles as composition at any scale, but the execution feels different. Simplicity is paramount. With such shallow depth of field, a cluttered background will destroy even the most beautiful subject. Look for clean, uncluttered backgrounds and use your wide aperture to blur any distractions into a smooth wash of color. Diagonal lines, whether created by a stem, an insect’s leg, or the edge of a petal, add dynamism. And negative space, areas of soft, empty blur around your subject, gives the eye room to rest and the subject room to breathe.
Try This: Macro Exercises
Kitchen Macro
Without leaving your home, photograph five different close-up subjects found in your kitchen. Look at food textures: the surface of bread, the cross-section of a fruit, the pattern of seeds. Examine utensil details: the tines of a fork, the edge of a knife, the spiral of a whisk. Capture water drops on a surface, steam rising from a cup, or the texture of a linen napkin. Your goal is to make these ordinary objects look extraordinary through extreme close-up perspective. Shoot each subject from multiple angles and distances before moving on to the next.
Garden Explorer
On a warm, calm morning, take your camera into a garden, park, or any green space and photograph the small world. Search for insects: look on flowers, under leaves, on fences, and in the grass. Approach each subject slowly and carefully. Aim for at least one image where you capture an insect’s eye or face in sharp focus. If the insects prove too flighty, turn your attention to flowers, lichen, moss, bark, or spider webs. Spend at least an hour; the longer you look, the more you will find.
Texture Collection
Create a series of six abstract images by photographing textures and surfaces at extreme close range. The viewer should not immediately recognize what the subject is. The goal is pure visual abstraction. Look at fabrics, food surfaces, rust, wood grain, stone, soap bubbles, ice, or any other textured material. Fill the entire frame with the texture, eliminate any context clues, and focus on the interplay of pattern, color, and form. When you display the images, challenge viewers to guess what each one actually shows.
Focus Stacking Practice
Choose a small, detailed object: a coin, a key, a piece of jewelry, or a small flower. Set up your camera on a tripod and photograph the object using focus stacking. Take a series of 5 to 10 images, each focused on a slightly different plane through the subject. Then combine the images in post-processing software to create a single frame with full front-to-back sharpness. Compare the stacked result with a single-shot version taken at the smallest aperture your lens allows. This exercise teaches you the power and limitations of both approaches and gives you a practical skill you will use repeatedly in serious macro work.