
Ruins hold a special power. Weathered columns on a hilltop, crumbling castle walls, abandoned mission churches, overgrown temple stones and the twisted remains of old bridges all invite us to imagine the people who built them and the centuries that passed since. Ruins photography blends architecture, landscape and history, and it asks for patience, good light and deep respect for fragile places. Done well, a picture of ruins can make a viewer feel the weight of time.
This beginner guide covers why ruins are so moving, finding and visiting sites, planning around light, showing scale, telling the story of a place, working with crowds, details and textures, nature and ruins, night views, respect and rules, settings, phones, editing, common mistakes and a short practice exercise. For abandoned buildings of later times, see the guide to urban exploration photography.
Why ruins are so moving
Ruins are buildings that have become part of the landscape again. They carry a quiet beauty that freshly built places rarely have.
- History. Every stone hints at the hands that shaped it and the lives lived around it.
- Imperfection. Broken columns, missing roofs and fallen walls create interesting shapes and gaps.
- Texture. Weathered stone, moss, lichen and worn carvings reward close study.
- Mood. Ruins suit quiet, reflective and dramatic pictures alike.
- Setting. Many sites sit on hilltops, coasts, deserts or forests with grand views.
Ruins also remind us of change. A picture that shows both what remains and what has been lost can be deeply moving, even to people who have never visited the place.
Kinds of ruins
Ruins come in many forms, and each suggests a slightly different approach.
- Ancient sites. Temples, theaters, forums and citadels from early civilizations.
- Castles and forts. Stone walls, towers and gateways on hills and coastlines.
- Abbeys and churches. Roofless arches and windows open to the sky.
- Cliff dwellings and pueblos. Stone and mud brick homes built into canyon walls and mesas.
- Industrial ruins. Old mills, mines, kilns and collapsed bridges reclaimed by nature.
- Homesteads. Lonely stone cottages and chimneys standing in fields.
Learn a little about the site before you go. Knowing what a building was used for, who built it and why it fell helps you decide what to emphasize, from grand scale to tiny carved details.
Not every ruin needs to be famous. A roofless stone barn, an old mill by a stream or a lonely chimney in a field can be just as moving as a great temple, and these smaller places are often quiet, free and close to home. Practicing on local ruins builds the skills you need for a once in a lifetime trip.
Finding and visiting sites
- Heritage organizations. National and local heritage bodies list protected sites, opening hours and rules.
- Parks. Many ruins sit inside national or state parks with trails and viewpoints.
- Local museums. Small museums often know lesser visited ruins nearby.
- Maps. Look for symbols marking castles, abbeys and archaeological sites.
- Guided tours. Some sites allow access to special areas only with a guide.
Check opening times, ticket rules and any photography restrictions before you travel. Some sites ban tripods or drones, and some offer early or late entry for photographers. Arriving right at opening time often means softer light and fewer people. The guide to location scouting explains how to plan a visit.
Planning around light
Light transforms old stone, so plan your visit around it.
- Golden hour. Warm, low light makes stone glow and reveals carved detail. See the guide to golden hour photography.
- Side light. Light raking across walls brings out texture and depth.
- Overcast light. Soft light suits shaded forest ruins and fine carvings.
- Storms and fog. Dark clouds and mist add drama and mystery to lonely sites.
- Blue hour. Floodlit ruins balance beautifully with a deep blue sky after sunset.
Notice which way the main facade or view faces, and choose morning or evening accordingly. Midday sun can still work inside deep ruins, where pools of light fall through broken roofs and windows.
Ruins through the seasons
Season and weather change the character of a site. Spring brings wildflowers among the stones and fresh green on surrounding hills. Summer gives long evenings and warm stone, though often more visitors. Autumn adds golden light, colorful leaves and mist in valleys. Winter can dust ruins with snow, which outlines walls and carvings beautifully and keeps crowds away. If you can visit a favorite site more than once, try to see it in different seasons and moods.
Showing scale
Ruins can be enormous or tiny, and showing scale helps the viewer understand them.
- Wide views. Step back to show the whole site in its landscape.
- A distant viewpoint. A neighboring hill or lookout shows how a citadel or castle dominates its surroundings.
- People for scale. A small figure beside a giant column shows its height.
- Looking up. Shooting upward from the base of a wall or column makes it soar.
- Compression. A long lens from far away stacks ruins against mountains or a city.
Keep vertical lines straight when the ruins are the main subject, or tilt boldly for drama. The guide to architecture photography covers straight lines and perspective.
Telling the story of a place
The best ruins pictures hint at what the place once was.
- Doorways and windows. Empty openings framing the sky suggest lost rooms and lives.
- Steps and paths. Worn stone stairs show the feet of countless visitors over centuries.
- Past and present. Ruins beside a living city show how the past and present meet.
- Fallen pieces. Toppled columns and scattered stones show how the building came down.
- Light through gaps. Sun pouring through a broken roof recalls the spaces that once stood there.
Choose one idea for each picture. A frame that shows grandeur, loss or the slow return of nature is stronger than one that tries to say everything at once.
Composition ideas
Try several approaches at every site. Use an arch or doorway to frame a distant view. Line up rows of columns so they recede in a strong diagonal. Place a broken column in the foreground with the rest of the site behind it for depth. Shoot straight up into a roofless tower for a dramatic circle of sky. Look for symmetry in temple fronts and gateways, and stand exactly in the center to make it count. Finally, step far back and show the ruin small in a vast landscape, which can be the most powerful view of all.
Working with crowds
Famous ruins are often busy. A little planning helps.
- Go early or late. Opening and closing times are quietest and have the best light.
- Visit off season. Shoulder seasons bring fewer visitors and often moody weather.
- Shoot high or low. Angle up toward columns and sky to leave people out of the frame.
- Use details. Close views of carvings and textures avoid crowds entirely.
- Include people well. A single visitor gazing up can add story, while crowds can show the popularity of a site.
A tripod and long exposure can blur moving people into faint ghosts, where tripods are allowed. The guide to photographing crowded landmarks has more strategies.
Patience is the most useful tool of all. Crowds move in waves, often arriving with tour groups and leaving together. Set up your composition, then wait a few minutes for a gap. Many famous ruins have quiet corners away from the main viewpoints, where you can work calmly while the crowds gather elsewhere.
Details and textures
Move in close, and ruins reveal centuries of craft and weather.
- Carvings. Faces, letters, leaves and patterns carved in stone reward side light.
- Mosaics and tiles. Faded colors in old floors and walls make lovely close ups.
- Weathering. Lichen, moss, cracks and erosion create rich textures.
- Masonry. Different stones, bricks and repairs show how the building changed.
- Tool marks. Chisel lines and mason marks bring the builders close.
A longer lens helps reach carvings high on walls without climbing. Pair a few detail pictures with a wide view to tell a complete story of the site. The guide to texture in photography explains how light reveals surfaces.
Nature reclaiming ruins
Many ruins are slowly being taken back by plants and weather.
- Roots and vines. Trees growing through walls make powerful images of time.
- Wildflowers. Flowers among fallen stones add color and life.
- Grass and moss. Green carpets over old floors soften harsh stone.
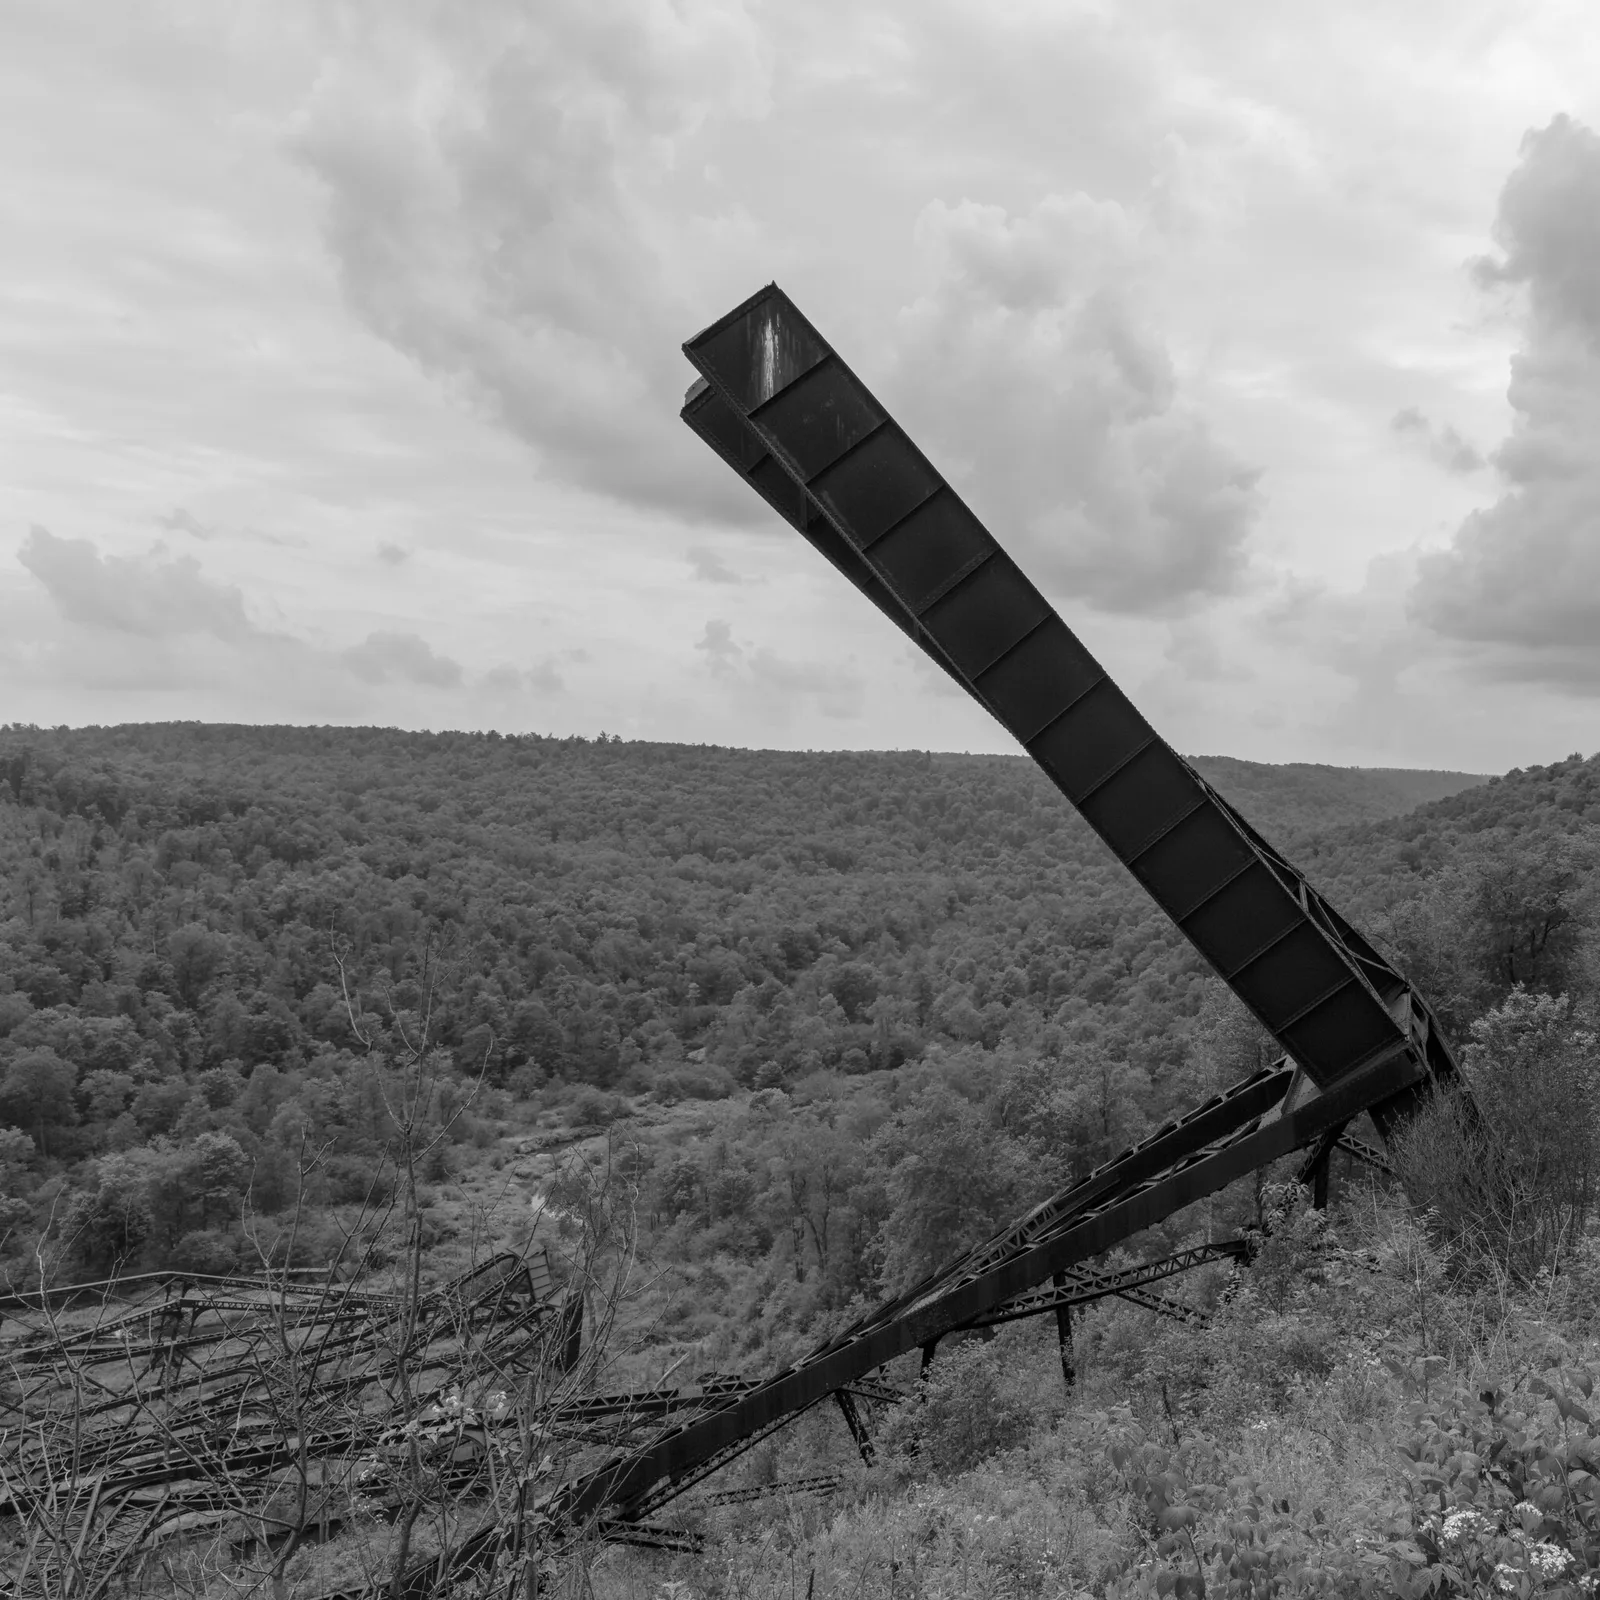
- Collapsed structures. Steel and stone brought down by storms show the power of nature.
These scenes often suit soft, overcast light, which shows greens and stone texture evenly. Black and white can also be striking, emphasizing shapes and tones.
When photographing plants on ruins, keep to paths and never pull or move growth for a clearer view. Roots and vines can be part of the structure now, and disturbing them can damage the stone.
Ruins at night
Many famous ruins are floodlit at night, and some remote sites sit under dark, starry skies.
- Blue hour. Shoot floodlit ruins soon after sunset, while the sky still holds color.
- From above. A nearby hill or rooftop shows lit ruins rising above city lights.
- Under the stars. Remote ruins make dramatic foregrounds for the night sky.
- Tripod. Long exposures keep stone sharp and noise low.
Check whether a site is open after dark before visiting, and never enter closed areas. The guide to blue hour photography explains timing and exposure.
Dreaming of ruins under the Milky Way? The guide to astro landscape photography shows how to pair stars with a foreground.
Respect and rules
Ruins are fragile and often irreplaceable. Protecting them matters more than any picture.
- Stay on paths. Footsteps wear away stone and damage buried remains.
- Never climb. Walls and columns can be loose, and climbing causes harm.
- Touch nothing. Oils from hands damage carvings and paint.
- Take nothing. Leave every stone, shard and tile where it lies.
- Follow photography rules. Respect bans on tripods, drones or flash.
- Respect sacred places. Many ruins are still holy to living communities.
What to bring
Ruins visits often mean long walks in sun, wind and dust. Comfortable shoes, water, a hat and sunscreen keep you going. A lens cloth handles dust and spray, and a small bag keeps your hands free on uneven ground. A compact travel tripod is useful where allowed, and a spare battery helps on long days. A small notebook or phone notes app is handy for recording what you photographed and what you learned about each part of the site.
Settings and lenses
- Wide lens. Interiors, courtyards and dramatic skies.
- Standard lens. Natural views of walls, doorways and paths.
- Telephoto lens. Distant hilltop ruins, compressed views and high carvings.
- Aperture. f/8 to f/11 for sharp detail from front to back.
- ISO. Low in daylight and on a tripod, higher in dark interiors.
- Polarizer. Deepens blue skies and reduces glare on stone.
Many sites stand in bright, open places where the sky is far brighter than shaded stone. Bracketing a few exposures, or using a graduated approach in editing, helps keep detail in both. In dark interiors, raise the ISO rather than resting the camera on ancient stone.
Using a phone
Phones are ideal at sites where tripods are banned. Turn on the grid to keep walls straight, tap on bright stone to set exposure and use night mode for floodlit ruins. The ultra wide lens works well in tight courtyards, and portrait orientation suits tall columns and towers.
Editing ruins photos
Straighten verticals and horizons first. Lower highlights to save bright skies and pale stone, and lift shadows in doorways and arches. A touch of texture brings out carvings. Warm tones suit golden hour stone, while black and white suits dramatic skies and weathered surfaces. Keep edits honest, and avoid removing parts of the site itself.
Common mistakes
- Midday glare. Visit early or late for warmer, softer light.
- Crowded frames. Go early, angle up or focus on details.
- No sense of scale. Include a person, a wide view or a distant viewpoint.
- Climbing for a view. Never risk the site or yourself.
- Only one view. Mix wide, detail and setting pictures.
- Skipping the story. Learn about the site and let that guide your choices.
Try this: a 10-minute ruins study
At any old ruin, from a famous site to a crumbling farm wall, make five pictures in ten minutes.
- A wide view showing the ruin in its landscape.
- A doorway, window or arch framing the sky or view beyond.
- A close detail of carving, masonry or weathering.
- A picture that includes nature growing among the stones.
- A view that shows scale, with a person or a low angle.
Together, these five tell a fuller story than any single picture.
Want to turn a visit into a story? The guide to travel photography covers planning, people and a sense of place.
Frequently asked questions
When is the best time to photograph ruins?
Early morning and late afternoon for warm light and fewer people, and blue hour for floodlit sites.
Can I use a tripod at historic sites?
It depends on the site. Check rules before you go, and use a phone or higher ISO where tripods are banned.
How do I avoid crowds in photos of famous ruins?
Arrive at opening time, angle the camera upward and focus on details.
What lens is best for ruins photography?
A standard zoom covers most views, with a wide lens for interiors and a telephoto for distant sites.
Can I fly a drone over ruins?
Many heritage sites ban drones. Check local rules and site policies first, and never fly without permission.
Should ruins photos be in color or black and white?
Color suits golden stone and blue skies. Black and white suits weathered textures and stormy, dramatic scenes.
Interested in places built for worship and learning? The guide to museum and church photography covers interiors and quiet spaces.
For terms such as compression, polarizer and blue hour, see the photography glossary.