A tangent is where two edges in a photograph just touch without overlapping, and a merger is where two separate things fuse into one confusing shape, like a pole growing out of someone’s head. Both happen because the camera flattens a three-dimensional scene into two dimensions, so objects meters apart can line up perfectly in the frame. You fix them by giving each important shape a clear gap or a decisive overlap, and by scanning all four edges of the frame before you press the shutter.
Why the camera creates problems your eyes never saw
Standing in front of a scene, you see with two eyes, you move your head slightly, and your brain uses both to know that the lamp post is twenty meters behind your friend. The post and the head are obviously separate things. The camera has one eye and no memory of depth. It records only where edges fall on a flat rectangle, and on that rectangle the post now rises straight out of your friend’s skull.
This is why edge problems are so common and so hard to see at the time. Your attention is on the subject, and your brain is quietly correcting the very overlaps the camera will record faithfully. The skill is learning to look at the viewfinder or screen as a flat picture, the way a viewer will, instead of as a window onto a place you understand.
There are four families of edge problem, and each has its own fix:
- Tangents: edges that touch at a point or run along each other.
- Mergers: separate objects that fuse into one shape because they share tone or overlap badly.
- Edge intrusions: things poking into the frame from outside, or cut off by it.
- Border hot spots: bright or saturated patches at the edges that pull the eye out of the picture.
Tangents: when edges kiss
A tangent happens when two lines or shapes meet at exactly one point, or run along the same line, without clearly overlapping. The top of a hat just touching the horizon. The tip of a finger just touching the edge of a table. A roofline running exactly along the top of a distant hill. A subject’s shoulder just grazing the frame edge.
Tangents bother the eye for two reasons. First, a point of contact is a point of tension; the eye goes to it and sits there, the way it goes to a gap in a fence. Second, a tangent destroys depth. When two edges touch perfectly, the viewer cannot tell which object is in front, so the scene flattens into a pattern of joined shapes instead of objects in space.
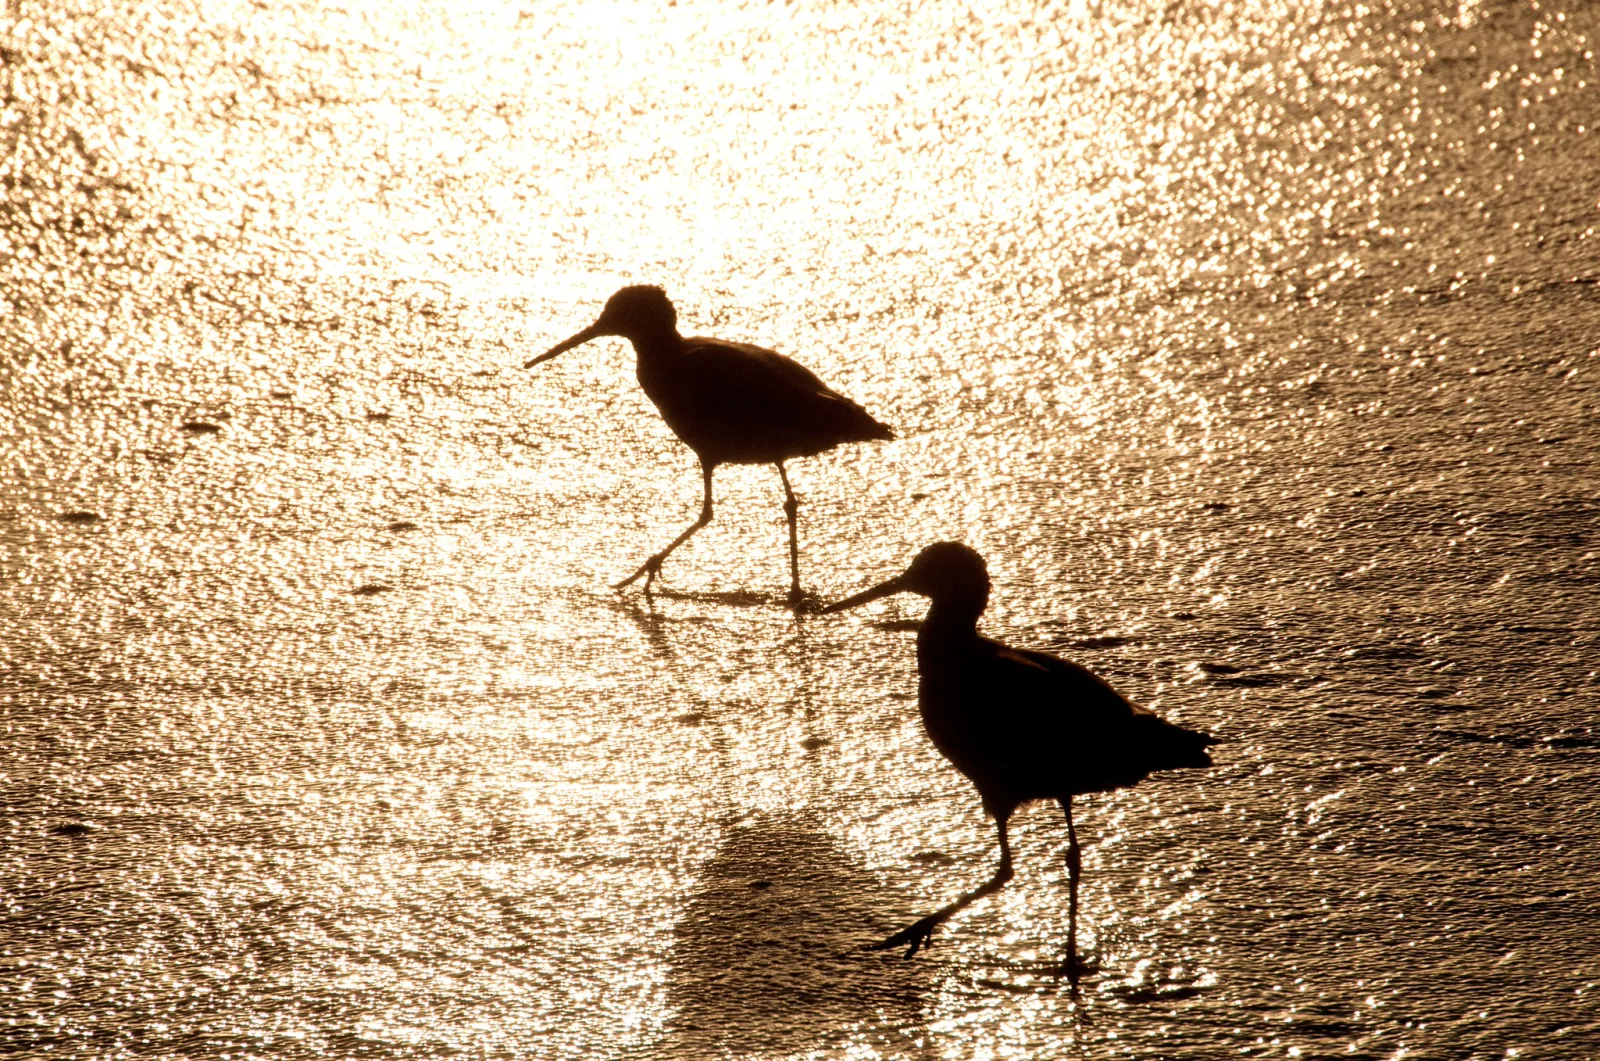
Look at where your eye goes in that photograph. Two clean bird shapes on bright water, and yet attention keeps returning to the one spot where the bill meets the foot. A fraction of a second earlier or later, or a small step to either side, and the two silhouettes would read as two birds instead of one joined shape.
The rule: give space or overlap
For any two shapes that nearly touch, choose one of two clear states:
- Space. Leave a visible sliver of background between them, enough that it is obvious at thumbnail size, not just when zoomed in.
- Overlap. Let one shape clearly pass in front of the other, far enough that the overlap reads as depth, not accident.
The in-between state, a near-touch, is the one to avoid. A gap of a few pixels looks like a mistake; a clear gap looks like a decision.
Mergers: the pole out of the head
A merger is two separate objects fusing into one shape. The classic is the tree, pole or sign growing out of a head, but there are several kinds:
- Line mergers. A vertical post, tree trunk or building edge rising from behind someone’s head or shoulders. A horizontal line (horizon, railing, wall top) cutting through the neck or eyes.
- Tonal mergers. A subject blending into a background of the same tone: dark hair against a dark doorway, a white shirt against a white wall. The edge between them disappears, and so does part of the subject.
- Figure mergers. Two people overlapping so that it becomes hard to tell whose arm or leg belongs to whom. Common in crowds and group photos.
- Silhouette mergers. Two dark shapes against a bright sky that touch or overlap become one dark blob. In silhouette work this is the most common way to lose a subject.
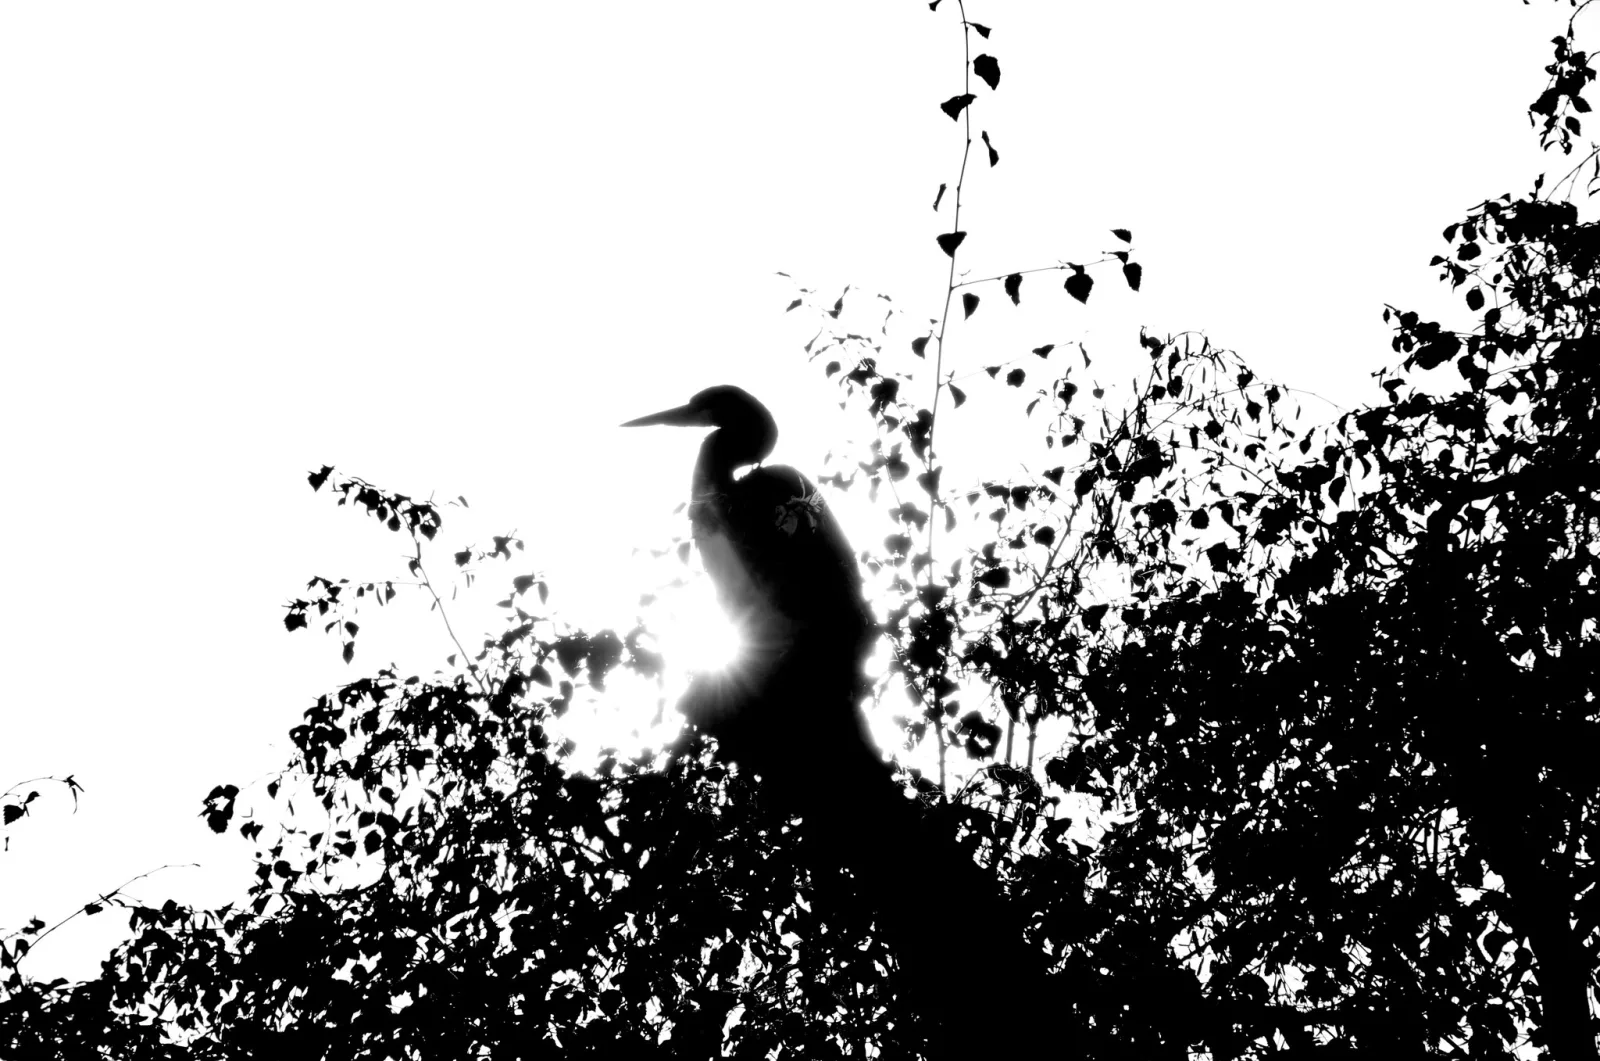
This photograph shows both sides of the problem in one frame. The heron’s head and bill sit against clean sky, and you recognize the bird instantly from that part of the outline. Lower down, where bird and leaves are both pure black, there is no edge at all. The eye has to infer where the heron ends. In a silhouette, the only information is the outline, so every place the outline touches another dark shape is information lost.
Mergers are worse than tangents because they can make the subject look deformed or absurd. A person with a lamp post for an antenna is funny for the wrong reason, and once a viewer notices it they rarely see anything else. The general principles of keeping a subject distinct from its surroundings are covered in how to separate your subject from the background.
Horizons and strong lines through heads
The single most common line merger outdoors is the horizon, or a sea wall, railing or tree line, running straight through a person’s neck or eyes. Because the horizon is the strongest line in most landscapes, it acts like a knife wherever it crosses a body.
The fix is simple once you know it is coming: move the camera up or down. On level ground, a distant horizon always appears at the height of your lens. Shoot a standing adult with the camera at your eye level and the horizon will pass through their head or neck at any distance, which is why this merger is so common. The subject does not control it; your camera height does. Crouch and the horizon drops below your subject’s shoulders, putting their head against sky. Stand on something, or step back and shoot down, and the horizon rises above their head, putting them against water or land.
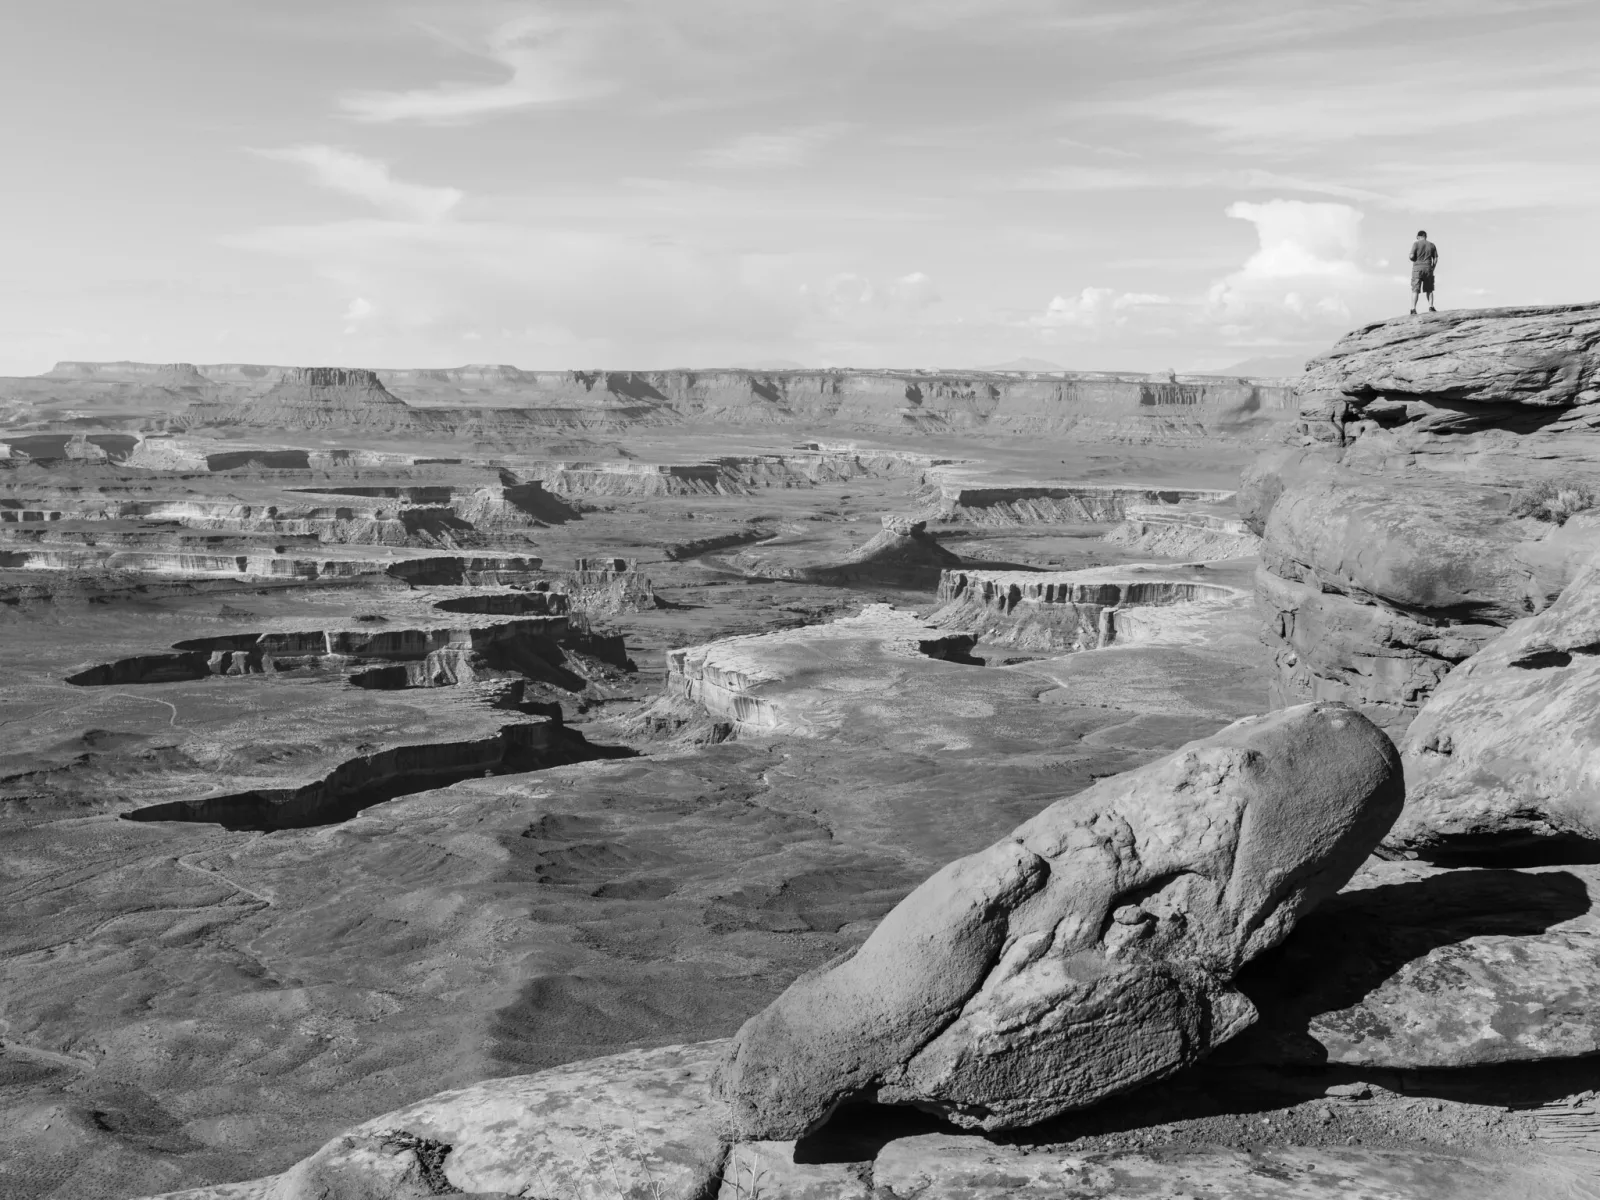
The figure here is tiny, only a few millimeters tall in a print, and still reads immediately as a person. That is because the entire body sits against sky. Put the same figure a little lower, with the horizon crossing its waist or neck, and it would dissolve into the canyon detail. The smaller the figure, the more its outline has to be kept clean.
The same logic applies to any strong line: the top of a wall behind a seated person, a shelf edge behind a head in an interior, a window frame behind a face. Pick a camera height that puts the line clearly above the head, clearly below the chin, or out of the frame.
Edge intrusions and hot spots at the borders
The edges of the frame are where most unplanned things live, because that is where your attention was not. Typical intruders:
- A slice of a person, car or bicycle entering from the side.
- A branch, leaf or wire poking in from the top corner.
- The corner of a sign, a trash can or a lamp base at the bottom.
- A subject’s hand, foot or the top of their head clipped by the frame. Where not to cut a body is covered in amputation in photography, and how much space to leave above a head in headroom and lead room.
Anything cut by the frame edge makes the viewer wonder about what is outside the picture. That is fine when it is deliberate (a road leading out, a figure walking off). It is a leak when it is a random fragment.
Bright spots and color at the borders
The eye is drawn to the brightest and most saturated areas of a picture. Near the center, that helps you. At the border, it pulls the viewer’s attention toward the exit. Common culprits: a patch of white sky showing through trees in a corner, a bright window at the frame edge in an interior, a sunlit car bonnet at the bottom of a street scene, a red sign half in the frame. Even a small hot spot at the edge competes with a large subject in the middle.
Fixes in order of preference: reframe to exclude it, move so something darker blocks it, or tone it down afterward with a local adjustment brush or a gentle edge darkening. How brightness and color decide where the eye travels is covered in visual hierarchy.
Border patrol: scanning the frame before the shutter
Most edge problems are invisible because you never looked for them. The habit that catches nearly all of them is a quick, deliberate scan, sometimes called border patrol, and it belongs at the end of every composition you make. Once the composition feels right, and before you press the shutter:
- Run your eye around all four edges, slowly, starting at a corner. Ask of every object you meet: do I want this here, and is it cut in a good place?
- Trace your subject’s outline, especially the head and hands. Is anything touching it, growing out of it, or blending into it?
- Check the lines behind the subject: horizon, walls, railings, poles, tree trunks. Where do they cross the subject?
- Look for the brightest spot in the frame. Is it the subject? If it is in a corner, deal with it.
- Look at near-touches between separate shapes. Choose space or overlap.
With practice this takes two or three seconds. For moving subjects like street scenes and events, do the scan while you wait for the moment, so that when it arrives only the subject needs your attention. Turning on the rule of thirds grid overlay helps, because the grid lines give your eye a path to follow around the edges.
If you only remember one step, make it the first. The center of the frame gets your attention by default; the edges only get it if you insist.
Fix it with your feet, not the crop
Edge problems come in two kinds, and they have different fixes.
Problems inside the frame (tangents, mergers, poles out of heads, horizons through necks) cannot be fixed by cropping. The objects are lined up in the picture itself. Only changing the camera’s position before the shot will separate them, or retouching afterward, which is slow and often visible.
Problems at the border (intrusions, hot spots, awkward cuts) can often be cropped away later, but every crop costs resolution and may force a different aspect ratio. Fixing them in the camera is still better.
How far do you need to move?
Less than you think, because of parallax. When you step sideways, near objects shift across the frame much more than distant ones. Worked example: your subject is 3 meters away, a pole is 30 meters behind them, and you are using a 50mm lens on a full-frame camera, which sees about 40 degrees across. Step 30 centimeters to the side. The subject shifts about 5.7 degrees across your view; the pole shifts only about 0.6 degrees. The pole has moved roughly 5 degrees relative to the head, about one eighth of the frame width. One small step is enough to slide the pole clear.
The same principle gives you a menu of moves:
- Step sideways to slide background objects out from behind the subject.
- Raise or lower the camera to move horizons and wall tops off the head.
- Step closer or back (and adjust the zoom) to change how large the background looks behind the subject. A longer focal length from farther away shows a narrower slice of background, which makes it easier to find a clean patch.
- Wait for moving elements (people, cars, birds, branches in the wind) to clear.
- Ask the subject to move a step or turn, if you can.
Blurring the background with a wider aperture softens a merger, but it rarely removes it. A blurred pole behind a head is still a pole behind a head, just a softer one. Position first, then depth of field.
When a tangent or merger is the point
Deliberate alignments are a whole genre. Forced perspective photographs, where a tourist appears to hold up a leaning tower or pinch the sun between two fingers, are tangents on purpose. Street photographers wait for a passerby’s head to line up with a painted face on a billboard. A tree branch that exactly continues the line of a raised arm can be a visual joke or a quiet rhyme.
The difference is intent and precision. A deliberate alignment is exact and obviously chosen, so the viewer smiles. An accidental one is slightly off and reads as carelessness. If you are going to line things up, line them up perfectly; if you are not, leave clear space.
Common mistakes
- Only looking at the subject. The subject is fine; the edges are the problem. Fix: do a full border scan every time you settle on a composition.
- Trying to crop out a merger. Cropping cannot separate objects that overlap inside the frame. Fix: move the camera before the shot.
- Near-touches between people in group photos. Heads and shoulders just grazing look awkward. Fix: have people overlap slightly and intentionally, or step apart.
- Horizon through the neck at the beach. Fix: crouch to put the head against sky, or shoot from higher to put it against water.
- Ignoring a bright corner. A patch of white sky in a corner draws the eye out. Fix: reframe, or darken it gently afterward.
- Relying on blur to hide a pole. Soft is still visible. Fix: step sideways first, blur second.
Try this
Find a spot with a single vertical object in the background: a lamp post, a tree trunk or a door frame. Put a subject (a person, or a bottle on a wall) in front of it, about three meters from you.
- Line up the camera so the post rises straight out of the top of the subject. Take the photograph.
- Step sideways in small increments, taking a photograph each time, until the post is clear with a generous gap.
- Now crouch and stand on tiptoe to see how camera height moves any horizontal lines relative to the subject.
- Finally, frame a composition you like and do a slow border scan before shooting. Count how many things you notice at the edges that you had not seen.
Compare the series on a large screen. Note how few centimeters it took to fix the merger. That distance is your reflex from now on.
Frequently asked questions
What is the difference between a tangent and a merger?
A tangent is two edges touching at a point or running along the same line. A merger is two separate objects fusing into one shape, either by overlapping badly or by sharing the same tone. A near-touch is the most common cause of both.
Can I fix a pole growing out of someone’s head in editing?
Sometimes, with a cloning or healing tool, if the background around the pole is simple. Against complex backgrounds the repair is usually visible. It is much faster to take one step sideways before you shoot.
How much gap should I leave between shapes?
Enough to see at thumbnail size. If you have to zoom in to confirm the gap exists, it is too small. Either widen it or commit to a clear overlap.
Is it always wrong for a subject to touch the edge of the frame?
No. Cropping into a subject deliberately, like a tight face crop, is fine. What looks wrong is a subject that just grazes the edge, as if it were squeezed in. Give it space or crop into it decisively.
Related guides
- Amputation in Photography: where not to let the frame cut a body.
- Headroom and Lead Room: how much space to leave around a subject.
- Subject Separation: making the subject stand apart from the background.
- Photography Composition: the larger framework these checks belong to.
- Composition Cheat Sheet: the main rules on one page, for quick reference.
- Why Does My Photo Look Like This?: diagnosing other common problems by symptom.
- Visual Hierarchy: why hot spots at the edges steal attention.