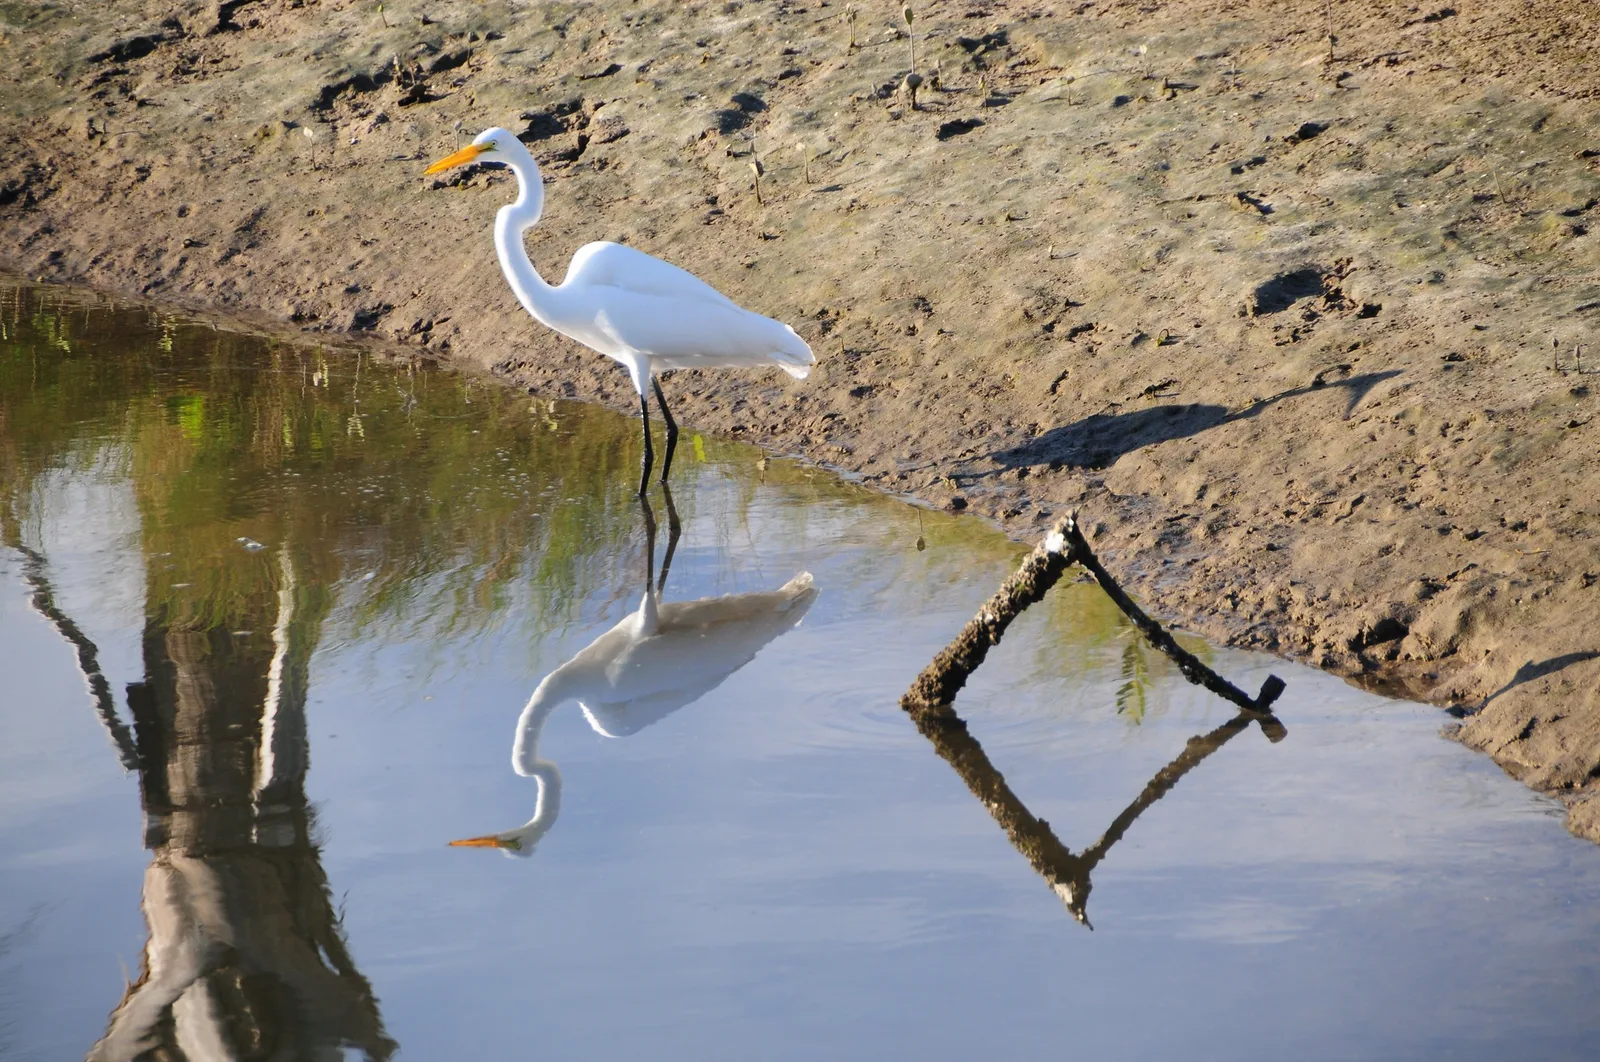
Herons and egrets are some of the most rewarding birds a beginner can photograph. They are large, they stand still for long stretches, they hunt in open water where they are easy to see and they move with a slow, deliberate grace that gives you time to think. A tall white egret stalking through a marsh at dawn or a gray heron frozen at the edge of a pond can make a picture as calm and elegant as a painting.
This guide covers where to find herons and egrets, how to approach them, low angles and clean backgrounds, reflections, catching the strike, birds in flight, light, behavior, settings and editing. For bird photography in general, see the guide on how to photograph birds, which introduces wading birds among many other groups. This page goes deeper into herons, egrets and their relatives.
Why herons and egrets make great subjects
Wading birds offer an ideal mix of size, patience and beauty, which makes them perfect for learning the skills that all wildlife photography depends on.
- They are big and easy to see. Herons and egrets stand tall in open water and along shorelines, so you spend more time photographing than searching.
- They are patient. A hunting heron may stand motionless for minutes at a time, giving you a chance to adjust settings, angle and composition.
- They have beautiful shapes. Long necks, dagger bills, slender legs and flowing breeding plumes make graceful lines in any frame.
- They live in lovely places. Marshes, ponds, rivers, beaches and lakes offer water, reflections and soft light.
- They have dramatic moments. A lightning strike at a fish, a wide-winged landing or a squabble over a hunting spot all reward patience.
Herons also teach a valuable habit: waiting. Much of the art of photographing them lies in settling in, watching and anticipating, which is the same skill that improves every other kind of wildlife picture.
Where to find herons and egrets
Wading birds live wherever there is shallow water and food. Park ponds, lake edges, slow rivers, canals, marshes, mangroves, tidal flats and beaches all hold them in many regions. City parks are a great place to start, since herons there are often used to people walking past and tolerate a closer approach than wild birds in remote marshes.
Wildlife refuges and wetland reserves are especially good. Many have boardwalks, viewing platforms and blinds placed right beside the water, and the birds are used to people standing still on them. Coastal areas are productive around low and rising tides, when fish and crabs move through shallow channels. As the guide to wildlife photography notes, herons often return to the same hunting spots at the same stage of the tide, so a little observation pays off quickly.
Learning the regulars
Most ponds and marshes have regular birds. Visit a few times and you will notice where each one likes to hunt, when it arrives and where it roosts. With that knowledge you can be in place before the bird appears, with the light where you want it. Herons are creatures of habit, and that makes them easier to photograph than almost any other wild bird. Keeping a few notes on times, tides and weather turns those habits into a reliable plan.
A slow, patient approach
Herons can be wary, and a bird that flies off takes the picture with it. The key is to move slowly and make yourself predictable.
- Approach at an angle. Walking straight at a bird looks like a threat. Move along a diagonal and stop often.
- Stay low. A crouching person seems less threatening than a standing one.
- Watch the bird’s body language. If it stops hunting, stretches its neck tall, raises its crest or starts walking away, stop and wait, or back off.
- Let the bird come to you. Often the best approach is to sit quietly at the water’s edge in a likely spot and wait for a heron to work its way toward you while hunting.
- Use cover. Reeds, bushes and trees break up your outline. A car parked beside a marsh can also act as a blind.
A longer lens helps keep a comfortable distance. The guide to telephoto photography explains how longer focal lengths let you work without disturbing wildlife.
Low angles and clean backgrounds
The difference between an ordinary heron picture and a beautiful one often comes down to where you stand. A picture taken from standing height looks down on the bird and the water around it. A picture taken from low to the ground, ideally close to water level, puts you in the bird’s world, with a soft band of out of focus water in front and behind it.
Watch the background just as carefully. A heron standing in front of a tangle of branches or a bright patch of sky can look cluttered. Move a few steps left or right until the bird stands against open water, a dark shadowed bank or a smooth stretch of reeds. The guide to tangents and mergers shows how a bird’s head against clean sky reads instantly, while the same head against a busy background disappears.
White birds against dark backgrounds
White egrets look their best against dark water or shaded banks. The contrast makes them glow and simplifies the frame. Look for spots where the bird is in light and the background is in shade, especially early and late in the day.
Reflections
Still water and wading birds go together beautifully. On calm mornings a heron or egret and its mirror image make a simple, symmetrical picture with strong lines. Get low so the reflection grows taller in the frame, and include the whole bird and its whole reflection.
Wind and ripples break the reflection into patterns of color and light, which can be lovely too. The best time for mirror reflections is usually early morning, before the breeze picks up. The guide to reflection photography has more ideas for working with water.
Hoping to catch wading birds in soft morning mist? The guide to fog photography explains how to expose hazy scenes over water.
Catching the strike
The most dramatic heron moment is the strike, when the bird spears a fish in a flash of water. It happens fast, but it is predictable once you know the signs.
- Watch the neck. A hunting heron slowly leans forward, draws its neck back into an S shape and fixes its gaze on one spot.
- Get ready. Set a fast shutter speed, at least 1/1600 second, and use continuous autofocus on the head.
- Shoot a burst as it strikes. Keep shooting as the bird lifts its head, since the moment with the fish held in the bill and water dripping is often the best frame.
Many strikes miss, so be patient. After a successful catch, herons often toss the fish to swallow it headfirst, which is another great moment to catch. The guide to burst mode explains how to time quick sequences.
Herons and egrets in flight
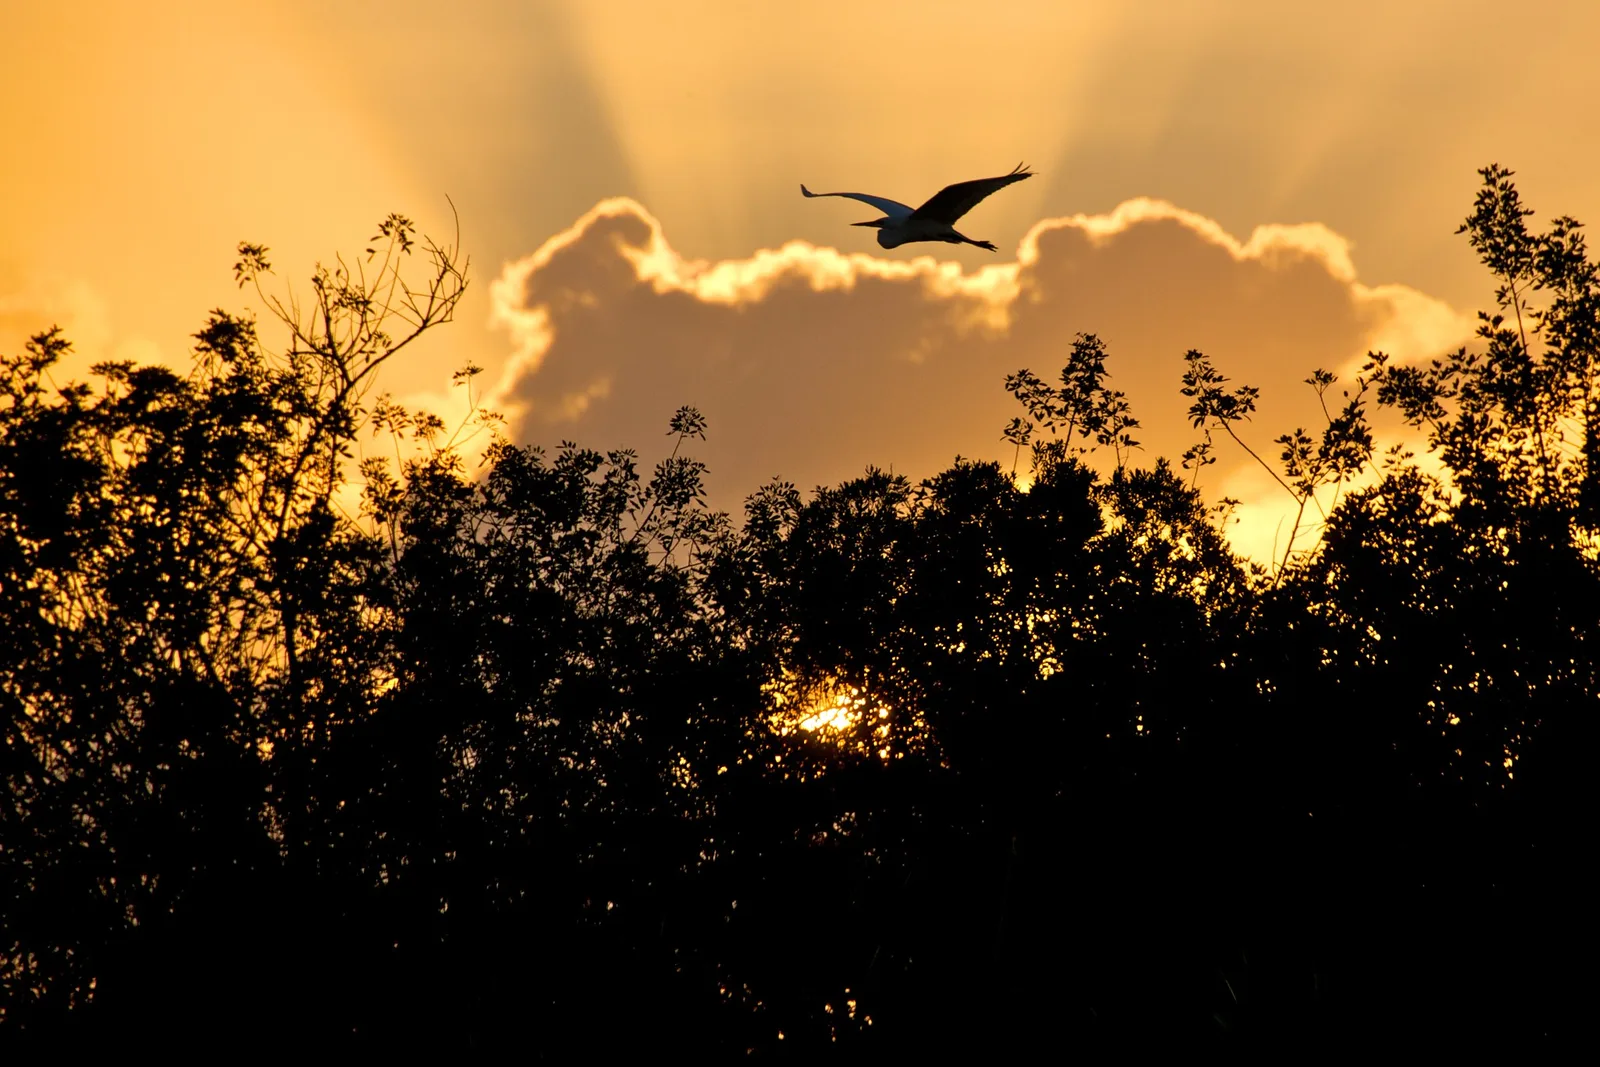
Herons are large, slow fliers with deep wingbeats, which makes them good subjects for practicing flight photography. They often fly with necks folded and legs trailing, a shape that is instantly recognizable even in silhouette.
- Watch for takeoff signs. A heron about to fly often crouches, leans forward and may relieve itself first.
- Use a fast shutter speed. 1/1600 to 1/2000 second freezes wings, as the guide to the best camera settings for wildlife suggests for large birds.
- Track smoothly. Follow the bird with continuous autofocus and keep panning after you press the shutter.
- Leave space ahead. Give the bird room in the frame to fly into.
Landings are another favorite moment: wings spread wide, legs reaching forward. Herons coming in to land at a roost or a hunting spot often follow the same path, so watch where they come from and be ready.
Light for wading birds
Early morning and late afternoon give the best light, warm and low, bringing out texture in feathers and giving the water a soft glow. These are also the times when herons are most active. Midday sun is harsh, especially on white egrets, which lose feather detail quickly.
Backlight creates beautiful silhouettes of herons against sunrise or sunset skies, and rim light outlines plumes and feathers. Overcast days are excellent for white birds, holding detail across the plumage. For exposure, watch the highlights on white birds and use negative exposure compensation in bright light, as the guide to exposure compensation explains.
Behavior worth watching for
Watching herons for a while reveals many expressive moments beyond hunting:
- Breeding plumes. In the nesting season many egrets grow long, lacy plumes, which they display by raising and fanning them.
- Preening. Herons twist their long necks into elegant curves as they groom.
- Stretching and yawning. A heron stretching its wings or opening its bill wide makes a lively picture.
- Squabbles. Herons defend hunting spots by chasing rivals with wings raised.
- Stalking. The slow, high-stepping walk through shallow water is graceful and easy to photograph.
- Roosting. Many herons gather in trees at dusk, which can make lovely silhouette scenes.
Keep extra distance from nesting colonies, which are sensitive to disturbance.
Herons in the landscape
Close portraits are satisfying, but some of the most memorable heron pictures show the bird small in a wide scene. A lone heron at the edge of a misty lake, an egret glowing white against a dark mangrove, a line of birds flying over a marsh at sunset or a single gray shape on a frozen river all tell a story about the place as much as the bird.
Zoom out or use a shorter lens and place the bird on a third of the frame, with plenty of open water, reeds or sky around it. Herons have such distinctive shapes that they stay recognizable even when small, which makes them perfect for this kind of picture. Wait for the bird to stand clear of busy backgrounds, and watch the horizon so the waterline stays level and does not run through the bird’s head. Quiet, empty space around a single heron can make a picture feel calm and timeless.
Drawn to simple scenes with lots of empty space? The guide to minimalist photography explains how to build calm, uncluttered pictures.
Settings for herons and egrets
- Standing and stalking birds: 1/500 to 1/1000 second, aperture f/5.6 to f/8.
- Strikes, takeoffs and flight: 1/1600 to 1/2000 second or faster, continuous autofocus and burst mode.
- Silhouettes: expose for the bright sky.
- ISO: auto ISO with a sensible upper limit for changing light at dawn and dusk.
- Lens: 300mm to 500mm is ideal, though park herons can be photographed with shorter lenses.
- Focus: a single point on the eye for portraits, a small zone for flight.
Editing heron photos
Keep editing gentle. Recover highlights in white plumage, lift shadows on gray feathers and keep water a believable color. Crop to give the bird room to look or walk into, and level the waterline carefully. A subtle vignette can help a white egret stand out against darker water, but avoid heavy effects that make the scene look artificial. If several frames of a strike look similar, choose the one where the eye is sharpest and the bill and fish are clearly separated from the water.
Need a simple editing workflow for your bird pictures? The guide to photo editing for beginners walks through the basic steps in order.
Common mistakes
- Walking straight at the bird. Approach slowly at an angle and stop often.
- Shooting from standing height. Get low for softer backgrounds and a more intimate view.
- Blown white feathers. Watch the highlights and use negative exposure compensation in bright sun.
- Cluttered backgrounds. Move until the bird stands against clean water or shade.
- Cutting off legs or reflections. Include the whole bird and its whole reflection.
- Shutter too slow for the strike. Use 1/1600 second or faster.
- Leaving too soon. The best moments often come after a long wait.
Try this: a 10-minute heron watch
Find a pond, marsh or river with a heron or egret and give yourself ten minutes:
- Minutes one to three: sit or crouch quietly at a respectful distance and watch. Notice how the bird hunts and where the light falls.
- Minutes four to seven: make a few portraits from as low as possible against a clean background, focusing on the eye.
- Minutes eight to ten: set a fast shutter speed and wait for a strike, a stretch or a takeoff.
At home, compare the patient portraits with the action frames. Both show something different about the same bird.
Frequently asked questions
What lens is best for herons and egrets?
A 300mm to 500mm lens is ideal for wild birds, while herons in city parks can often be photographed with shorter lenses.
How do I get close to a heron?
Approach slowly at an angle, stay low and stop often. Better still, sit quietly where herons hunt and let them come to you.
What shutter speed freezes a heron’s strike?
At least 1/1600 second, with continuous autofocus and burst mode.
How do I keep white egrets from looking overexposed?
Photograph in soft light where possible, watch the highlight warning and dial in negative exposure compensation in sun.
When are herons most active?
Early morning and late afternoon, and often around certain stages of the tide on the coast.
What is the difference between a heron and an egret?
Egrets are members of the heron family, usually white and often a little smaller. Photographing them uses the same skills.
Can I photograph herons with a phone?
In city parks, where herons are used to people, a phone can capture the bird in its setting. For close portraits and action, a camera with a longer lens works much better. Never approach closer just to fill a phone frame.
Where should I focus on a heron?
On the eye. A sharp eye with a small catchlight makes the whole picture feel sharp, even if the body or legs soften slightly.
For terms such as burst mode, exposure compensation, telephoto lens and continuous autofocus, see the photography glossary.