Why Camera Settings Matter for Sports Photography
Sports photography is a high-pressure genre where every millisecond counts. Athletes move at incredible speeds, the action is unpredictable, and the decisive moments last a fraction of a second. You get one chance to capture the winning goal, the perfect catch, or the triumphant finish, and your camera settings determine whether that moment is razor-sharp or a blurry disappointment.
The good news is that once you understand the core principles and set up your camera before the event starts, sports photography becomes about anticipation and timing rather than fumbling with dials. This guide covers the exact aperture, shutter speed, and ISO settings for every major sports scenario, from outdoor daytime games to dimly lit indoor gyms.
Quick Reference: Sports Photography Settings Cheat Sheet
| Scenario | Aperture | Shutter Speed | ISO |
|---|---|---|---|
| Outdoor Daytime (football, soccer, track) | f/2.8 – f/5.6 | 1/1000s – 1/2000s | 100 – 800 |
| Outdoor Overcast | f/2.8 – f/4 | 1/1000s – 1/2000s | 800 – 3200 |
| Indoor Gym (basketball, volleyball) | f/2.8 (widest available) | 1/500s – 1/1000s | 3200 – 12800 |
| Indoor Arena (hockey, boxing) | f/2.8 – f/4 | 1/500s – 1/1000s | 1600 – 6400 |
| Swimming/Water Sports | f/2.8 – f/5.6 | 1/1000s – 1/2000s | 400 – 1600 |
| Motorsports | f/5.6 – f/8 | 1/1000s (freeze) or 1/125s (pan) | 100 – 800 |
| Night Games (under floodlights) | f/2.8 | 1/1000s | 1600 – 6400 |
Shutter Speed: The Foundation of Sports Photography
Shutter speed is the single most important setting in sports photography. Your primary goal is freezing action, and that requires fast shutter speeds. Everything else, aperture and ISO, serves the shutter speed.
How Fast Is Fast Enough?
Different sports move at different speeds, and the shutter speed you need depends on both the speed of the action and the direction of movement relative to your camera:
- 1/500s: Adequate for slower actions like a basketball player standing at the free-throw line, a golfer addressing the ball, or a runner jogging.
- 1/1000s: Good general-purpose sports speed. Freezes most running, jumping, and moderate-speed actions. This is the standard starting point.
- 1/2000s: Freezes fast action cleanly. Sprinters at full speed, tennis serves, soccer kicks, football tackles. This is the sweet spot for most competitive sports.
- 1/4000s: Freezes the fastest action, including baseball bat swings, golf club impact, and water splashes. Use this for the most demanding freeze-frame requirements.
Direction matters: An athlete running across your frame (perpendicular to the camera) requires a faster shutter speed than one running toward or away from you. Movement across the frame is more apparent than movement in depth.
Intentional Motion Blur: Panning
Not every sports photo needs to be frozen. Panning, where you track a moving subject with a slower shutter speed, creates a sharp subject against a motion-blurred background. This conveys speed and dynamism that a frozen image cannot.
For panning, use 1/60s to 1/250s depending on the speed of the subject. Track the subject smoothly by rotating your body (not just your arms), and keep the shutter button pressed during the pan. The subject stays relatively sharp because the camera moves with it, while the background blurs into streaks.
Panning is especially effective for motorsports, cycling, and running events. Start with 1/125s and adjust. Faster shutter speeds make panning easier (more forgiving of imperfect tracking); slower speeds produce more dramatic blur but require very smooth tracking technique.
Aperture for Sports Photography
Aperture in sports photography has two jobs: gathering enough light for fast shutter speeds and separating the athlete from the background.
Wide Open (f/2.8)
Most professional sports photographers shoot at f/2.8 for the majority of their work. This lets in the maximum amount of light (critical for indoor and evening events) and creates beautiful background blur that isolates the athlete from crowded stands, sideline clutter, and other distractions.
At f/2.8 with a 200mm or 300mm lens, the depth of field is narrow enough that a single player is sharp while the others blur into soft shapes. This draws the viewer’s eye directly to the action.
Moderate Apertures (f/4 to f/5.6)
In bright outdoor conditions where light is abundant, stopping down to f/4 or f/5.6 gives you more depth of field (useful for group action like a rugby scrum or a pack of runners) and sharper images across the frame. Most zoom lenses produce their sharpest results at f/5.6 to f/8.
Aperture and Lens Quality
A fast lens (f/2.8) is considered essential for professional sports photography because it provides both light-gathering ability and subject isolation. The difference between an f/2.8 and an f/5.6 lens is two full stops of light, which at ISO 3200 means the difference between ISO 3200 and ISO 12800. That gap in light-gathering ability is why professional sports lenses are large, heavy, and expensive.
ISO: The Variable That Makes It Work
ISO is the flexible element in your sports exposure. Once you have set your shutter speed (fast enough to freeze the action) and aperture (as wide as your lens allows), ISO bridges whatever gap remains.
Outdoor Daylight Sports
In bright sunlight, ISO can stay low. With f/2.8 and 1/2000s, you might only need ISO 200 to 400 on a sunny day. On overcast days, ISO 800 to 1600 is typical. Outdoor daytime sports are the easiest scenario for managing ISO.
Indoor Sports
Indoor gyms and arenas are where ISO climbs dramatically. A typical high school gym is 10 to 50 times dimmer than outdoor daylight. At f/2.8 and 1/1000s, you might need ISO 6400 to 12800. This is where camera bodies with excellent high-ISO performance pay for themselves.
Night Games Under Floodlights
Stadium floodlights vary enormously. Professional stadiums can be very bright (ISO 1600 at f/2.8, 1/1000s). High school fields under basic floodlights may need ISO 6400 or higher. Always check your first test shot and adjust.
Auto ISO: The Standard Approach
Auto ISO with a defined range is the standard for sports photography. Set your camera to Manual mode with a fixed shutter speed and aperture, and let Auto ISO handle exposure variations as athletes move between sun and shade, or as clouds pass overhead. Set the minimum ISO to 100 and the maximum to whatever your camera handles acceptably (6400, 12800, or higher).
Autofocus Settings for Sports
After shutter speed, autofocus is the most critical factor in sports photography. The best exposure settings in the world are worthless if the image is out of focus.
Continuous AF (AF-C / AI Servo)
Always use Continuous AF for sports. This mode continuously adjusts focus as the subject moves, predicting where the subject will be at the moment of exposure. Modern cameras use sophisticated algorithms that track motion and anticipate acceleration and deceleration. Never use Single Shot AF for sports, since the subject will move between the time you lock focus and the time the shutter fires.
Focus Area Selection
The right focus area mode depends on the sport and situation:
- Dynamic Area / Expanded Point: You select a focus point, and surrounding points assist if the subject moves slightly. Best for action where you can keep the subject near the center of the frame.
- Group AF: A cluster of points works together. Good for team sports where multiple players are moving.
- Wide Area / Zone: A larger zone of the frame is active for focusing. Best for very fast, unpredictable action like tennis or boxing.
- Subject Tracking / 3D Tracking: The camera locks onto a subject and follows it across the entire frame. Works best against clean backgrounds. In crowded sports scenes, it can get confused by other players.
Back-Button Focus for Sports
Back-button focus is used by nearly all professional sports photographers. It separates the focus function from the shutter button, allowing you to track focus independently of shooting. Press and hold AF-ON to track the subject; release to stop tracking; press the shutter to shoot at any time. This gives you instant control over when the camera focuses, which is invaluable when players cross paths or the ball enters the frame.
Scenario-Specific Settings
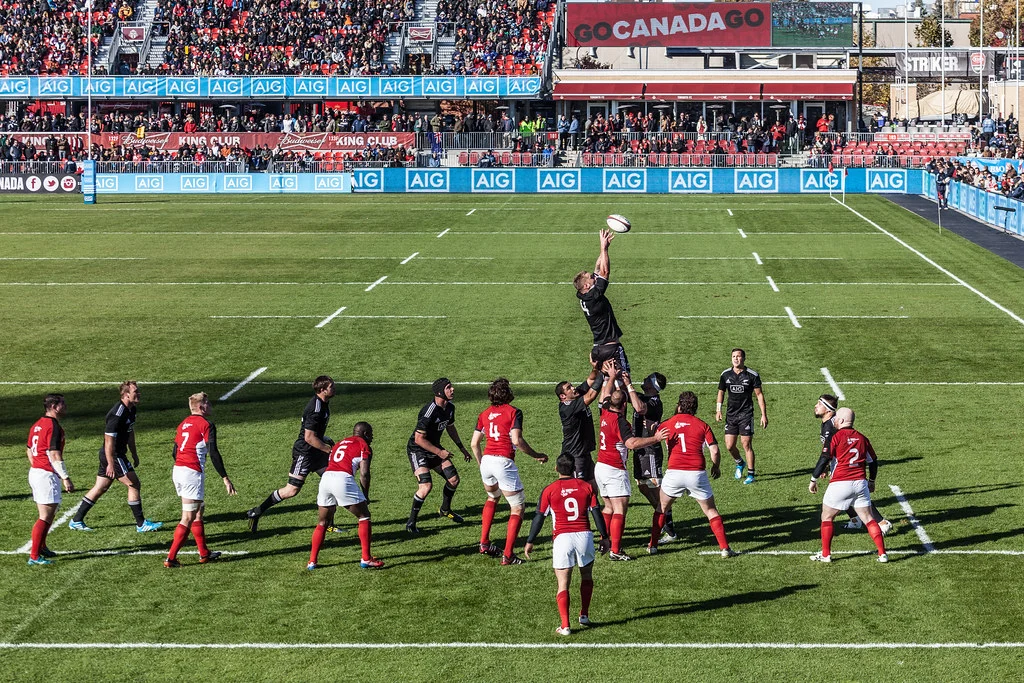
Football, Soccer, and Rugby
| Setting | Value |
|---|---|
| Aperture | f/2.8 – f/4 |
| Shutter Speed | 1/1000s – 1/2000s |
| ISO | Auto (100 – 6400) |
| Focus Mode | Continuous AF + Dynamic Area |
| Focal Length | 70-200mm from sideline; 300mm+ from end zone or far side |
Position yourself at the end zone or behind the goal for action coming toward you (more dramatic images). Sideline positions at the 40-yard line or midfield give you access to the most action. Shoot in bursts of 5 to 10 frames during tackles, catches, and shots on goal. Anticipate plays by watching the action develop and pre-positioning your lens.
Basketball
| Setting | Value |
|---|---|
| Aperture | f/2.8 (widest available) |
| Shutter Speed | 1/500s – 1/1000s |
| ISO | 3200 – 12800 (gym dependent) |
| Focus Mode | Continuous AF + Wide Area / Zone |
| Focal Length | 70-200mm from baseline; 24-70mm from courtside |
Basketball is one of the most challenging indoor sports to photograph. The action is fast, the lighting is often poor, and the court is surrounded by distracting backgrounds. Sit at baseline (behind the basket) for the most dramatic dunks and drives. The best moments happen around the basket: dunks, layups, blocks, and rebounds. Pre-focus on the hoop area and wait for players to enter the zone.
Track and Field
| Setting | Value |
|---|---|
| Aperture | f/2.8 – f/5.6 |
| Shutter Speed | 1/1000s – 1/2000s (sprints); 1/500s (throws/jumps at apex) |
| ISO | 100 – 800 (outdoors) |
| Focus Mode | Continuous AF + Dynamic Area |
| Focal Length | 200mm – 400mm |
Track events are somewhat predictable, which helps. Sprinters follow lanes. Jumpers have approach runs and known takeoff points. Throwers release from a fixed area. Use this predictability to pre-focus on the finish line, the high jump bar, or the landing pit, then shoot in bursts as the athlete reaches that point.
Motorsports
| Setting | Value |
|---|---|
| Aperture | f/5.6 – f/8 (freeze) or f/8 – f/11 (pan) |
| Shutter Speed | 1/1000s+ (freeze) or 1/60s – 1/250s (pan) |
| ISO | 100 – 400 (outdoor daylight) |
| Focus Mode | Continuous AF + pre-focus on a corner or straightaway |
Motorsports benefit enormously from panning technique. A frozen image of a race car looks like a parked car. A panned image at 1/125s shows the car sharp against a streaked, blurred background, conveying speed and energy. Practice panning by tracking the car smoothly with your body rotation, keeping the car in the same position in the frame throughout the pan.
Anticipation: The Secret to Great Sports Photos
The best sports photographers do not just react to action. They anticipate it. This means understanding the sport well enough to predict what will happen next, positioning yourself where the action will be, and having your camera ready before the moment arrives.
Study the Sport
Learn the patterns of the sport you are shooting. In basketball, most scoring happens around the paint. In soccer, the action centers on the penalty area during attacks. In tennis, the best shots come at the net and during serves. In football, the quarterback, running backs, and wide receivers produce the most dynamic images.
Pre-Focus on Key Zones
Identify the areas where action will happen, the goal, the basket, the finish line, the landing zone, and point your camera there. When athletes enter that zone, you are already composed and focused. This is far more reliable than trying to follow action randomly around the entire field.
Shoot Through the Play
Do not stop shooting after the “obvious” moment. The celebration after a goal, the reaction to a missed shot, the coach’s expression after a controversial call. These emotional moments often make stronger images than the action itself. Keep shooting for 2 to 3 seconds after each play ends.
Common Sports Photography Mistakes
1. Shutter Speed Too Slow
The most common mistake, period. If your images are consistently soft, check your shutter speed first. Bump it up to 1/1000s minimum and see if sharpness improves. Sacrifice ISO before shutter speed, always.
2. Not Using Burst Mode
Sports moments last milliseconds. A single-frame approach guarantees you will miss the peak moment. Shoot in continuous high-speed bursts. Professional sports photographers might take 2,000 to 5,000 frames at a single game and deliver 20 to 50 keepers. That ratio is normal.
3. Wrong Focus Mode
Using Single Shot AF (AF-S) instead of Continuous AF (AF-C) for moving subjects is a guaranteed formula for out-of-focus images. Single Shot locks focus at one distance and holds it. By the time the shutter fires, the athlete has moved past that distance. Always use Continuous AF for sports.
4. Shooting from the Wrong Position
Your position relative to the action matters more than your lens. The best sports photos are taken at eye level or slightly below, facing into the action. Shooting from the stands produces a distant, top-down perspective that looks amateurish. Get as close to the field, court, or track as permitted and shoot at the athletes’ eye level.
5. Only Shooting the Stars
While the top athletes make for great subjects, do not ignore the emotion and stories happening everywhere else: the bench reactions, the coach’s intensity, the crowd’s energy, the handshake after the match. These “moments between the moments” add depth to your coverage and often produce the most compelling individual images.
Frequently Asked Questions
What is the best camera mode for sports?
Manual mode with Auto ISO is the most popular choice among professional sports photographers. Set your shutter speed (1/1000s to 1/2000s), set your aperture (f/2.8 to f/4), and let Auto ISO handle exposure changes. Some photographers use Shutter Priority (S/Tv) with Auto ISO, which is simpler but gives less control over depth of field.
Do I need a monopod for sports photography?
For long telephoto lenses (300mm f/2.8 and up), a monopod is highly recommended. These lenses are heavy, and holding them for hours causes fatigue and shake. A monopod takes the weight off your arms while allowing you to follow action quickly. For shorter lenses (70-200mm), handheld shooting is usually fine.
How do I deal with bad lighting at indoor games?
Push ISO as high as your camera allows while maintaining acceptable quality. Use the widest aperture your lens offers. Accept that shutter speed may need to drop to 1/500s instead of 1/1000s. If the lighting has a color cast (common in gyms), set white balance to a specific Kelvin temperature and correct in post. Some photographers bring a speedlight for sideline portraits but flash is typically prohibited during active play.
What drive speed do I need?
Higher is better for sports. Cameras that shoot 10+ frames per second give you the best chance of capturing peak action within a burst. However, even 5 to 7 frames per second is usable with good timing. The key is to start your burst just before the peak moment, not during it. Anticipation compensates for lower burst rates.
How do I handle mixed indoor lighting that flickers?
Many indoor venues use fluorescent or LED lighting that flickers at the power line frequency (50Hz or 60Hz). This can cause uneven exposure and color banding across burst sequences. Some cameras have an “anti-flicker” mode that times the shutter to fire at peak light output. If your camera has this feature, enable it for indoor sports. If not, shooting at shutter speeds that are multiples of the flicker frequency (1/125s, 1/250s, 1/500s for 60Hz) can help.
Try This: Practice Exercises
Exercise 1: Panning Technique
Go to a road with moderate traffic. Practice panning on passing cars at 1/125s. Track each car smoothly by rotating from your waist, pressing the shutter during the pan. Review your images: the car should be sharp while the background streaks horizontally. Once you can consistently nail sharp panning shots at 1/125s, try 1/60s for more dramatic blur.
Exercise 2: Burst Mode and Timing
Photograph someone jumping (or bouncing a basketball). Shoot a 10-frame burst starting just before they jump. Review the burst and identify the single best frame: the peak of the jump, ball at the highest point, most dynamic body position. This teaches you how burst timing works and why starting the burst early produces the best single frames.
Exercise 3: AF Tracking Drill
Have a friend run toward you from 50 feet away while you shoot in Continuous AF with burst mode. Start tracking them at 50 feet and shoot continuously as they approach. Review which frames are sharp and which are not. Try different focus area modes (Dynamic Area, Zone, Tracking) and compare hit rates. This reveals which AF mode works best on your specific camera for approaching subjects.
Related Resources
- Shutter Speed Guide – Understanding motion freeze and creative blur
- Aperture Guide – Depth of field control for subject isolation
- Understanding ISO – Managing noise at high ISO values
- Focus Modes Guide – AF-C, tracking, and focus area modes explained
- Back Button Focus – Essential technique for sports tracking
- The Exposure Triangle – How aperture, shutter speed, and ISO work together
- Wildlife Settings Guide – Similar techniques for fast-moving animal subjects
- Camera Histogram Guide – Verify exposure in changing light conditions