Drone photography has opened up a perspective that was once reserved for helicopter pilots and hot air balloon passengers. A camera drone lets you capture landscapes, cityscapes, coastlines, and architectural scenes from angles that ground-based photography simply cannot reach. The combination of accessible technology, falling prices, and ever-improving camera quality means that aerial photography is now within reach of any photographer willing to learn the rules of the sky. This guide covers everything from choosing your first drone and understanding airspace regulations to mastering aerial composition, camera settings, and editing techniques that make your aerial images stand out.
Choosing Your First Drone
The drone market has converged around a few key manufacturers, with DJI dominating the consumer and prosumer space. Your choice should balance camera quality, flight performance, portability, and budget.
Entry level: DJI’s sub-250-gram Mini series is the ideal starting point for most photographers. These lightweight drones avoid many registration and regulation requirements in the US and other countries. Despite their small size, current models carry capable cameras with large sensors, shoot high-resolution stills and 4K video, and offer intelligent flight modes. If you want to explore aerial photography without a heavy investment, start here.
Enthusiast: DJI’s mid-range Air series steps up with larger sensors, dual cameras at different focal lengths, improved obstacle avoidance, and longer flight times. If you know you will be serious about aerial photography and want room to grow, this tier offers the best balance of quality and portability.
Professional: DJI’s flagship Mavic series and similar professional drones carry multiple cameras with different focal lengths (including medium telephoto), larger sensors (up to Micro Four Thirds), and shoot in RAW and professional video codecs. These are the drones of choice for professional landscape, real estate, and commercial photographers who need the absolute best image quality from the air.
Regardless of which tier you choose, prioritize camera quality over flashy features. A drone with a larger sensor, RAW shooting capability, and adjustable aperture will always produce better results than one loaded with gimmicks but carrying a tiny sensor. Also consider flight time, 30+ minutes per battery is standard now, and carrying two or three batteries ensures you never cut a session short.
Regulations and Airspace Rules
Before you fly, you must understand the rules. In the United States, drone operations are regulated by the FAA, and the rules depend on whether you are flying recreationally or commercially.
Recreational flyers must register their drone (if over 250 grams), pass the TRUST (The Recreational UAS Safety Test), fly below 400 feet AGL (above ground level), maintain visual line of sight, yield to manned aircraft, and avoid restricted airspace. You cannot fly over people, moving vehicles, or in controlled airspace near airports without authorization through the LAANC (Low Altitude Authorization and Notification Capability) system.
Commercial operators, and this includes anyone selling their aerial photos or using them for business purposes, need a Part 107 Remote Pilot Certificate. This requires passing an FAA knowledge exam covering airspace classification, weather, regulations, and flight operations. The test is not difficult with a few weeks of study, and the certificate is valid for two years (renewable with a recurrent exam). Part 107 pilots have more flexibility in some areas but must still follow altitude, line-of-sight, and airspace restrictions.
Check your local regulations before every flight. Use apps like B4UFLY, Aloft (formerly Kittyhawk), or DJI Fly to check airspace restrictions at your planned location. Many popular photography locations, national parks, stadiums, government buildings, and areas near airports, have specific drone restrictions. Ignorance of the rules is not a defense, and fines for violations are steep.
Camera Settings for Aerial Photography
Drone cameras share the same exposure principles as any other camera, but the aerial environment introduces specific considerations.
Aperture: Many consumer drones have a fixed aperture (typically f/2.8). Higher-end drones offer adjustable aperture, in which case f/5.6 to f/8 is the sweet spot for landscape-style aerial shots, sharp across the frame with minimal diffraction. At aerial shooting distances, depth of field is rarely an issue since everything is far from the camera.
ISO: Keep ISO as low as possible: 100 to 200 for daylight shooting. Drone sensors are smaller than those in full-frame cameras, so they generate more noise at higher ISO values. Drone images often need cropping, which magnifies noise further.
Shutter speed: For still photography, use whatever shutter speed gives you correct exposure at your chosen aperture and ISO. Since drones are inherently less stable than a tripod on the ground, avoid excessively slow shutter speeds, 1/250s or faster is ideal in moderate wind. For video, the 180-degree shutter rule applies (shutter speed double your frame rate), which is where ND filters become essential.
File format: Always shoot RAW. Aerial scenes often have extreme dynamic range, bright sky, shadowed valleys, reflective water, and RAW files give you the latitude to recover highlights and lift shadows in post-processing.
ND Filters for Drones
Neutral density (ND) filters are darkened glass that reduces the amount of light entering the lens, allowing you to use slower shutter speeds or wider apertures in bright conditions. For drone video, ND filters are essential, without them, your shutter speed in bright daylight will be far too fast, creating jittery, uncinematic footage.
For drone photography, ND filters are useful when you want to create long-exposure effects from the air, smoothing water or clouds during a stable hover. An ND64 or ND256 filter lets you achieve multi-second exposures even in daylight. Polarizing filters also work well on drones, cutting glare from water and glass and deepening blue skies, though the effect varies with your angle to the sun and the drone’s orientation.
Most drone manufacturers sell filter sets designed to snap onto their specific models. Invest in a set that includes ND4, ND8, ND16, ND32, and ND64, this range covers virtually any lighting condition from overcast to harsh midday sun.
Composition from Above
Aerial photography demands a completely different compositional mindset than ground-level shooting. The principles of composition still apply, but the subjects and perspectives change dramatically.
Leading lines: Roads, rivers, coastlines, fences, and pathways become powerful compositional elements when seen from above. A winding road through a forest or a river cutting through a canyon creates a natural leading line that draws the viewer through the frame.
Patterns and textures: The aerial perspective reveals patterns invisible from the ground, agricultural fields, rooftops, parking lots, forest canopies, and wave patterns on a beach. These repeating patterns create visually arresting abstract images that do not even need a traditional subject.
Scale and isolation: Including a single small element, a person, a car, a boat, in a vast aerial landscape immediately conveys scale and creates a focal point. A lone surfer on a huge expanse of ocean or a single red car on a desert highway tells a story that a pure landscape cannot.
Top-down vs oblique angles: Shooting straight down (nadir) creates abstract, map-like images that emphasize patterns and shapes. Shooting at an oblique angle (30-60 degrees) preserves the sense of depth and three-dimensionality that viewers expect from a photograph. Most drone photography benefits from the oblique angle, but top-down shots are powerful for specific subjects like beaches, pools, intersections, and agricultural patterns.
Altitude matters: Do not default to maximum altitude. Some of the most compelling drone photographs are taken at 30 to 100 feet, high enough to reveal a scene from a fresh perspective but low enough to retain detail and intimacy. Experiment with different altitudes for every subject.
Golden Hour and Weather
The magic hours around sunrise and sunset are even more dramatic from the air than from the ground. Low-angle light rakes across landscapes, creating long shadows that reveal terrain, texture, and dimension. From a drone’s vantage point, you can see both the warm light hitting the tops of hills and the cool shadow filling the valleys below, a dynamic range of light and color that is impossible to experience at ground level.
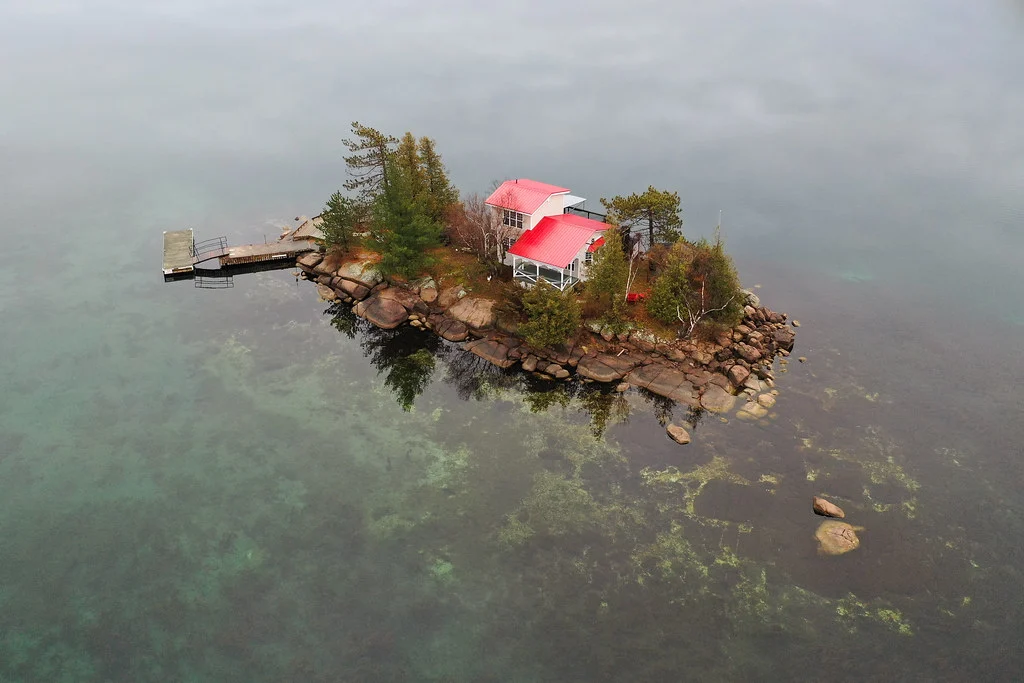
Fog and mist are transformative for aerial photography. A drone hovering above a fog-filled valley captures a scene of ethereal beauty, treetops and hills emerging from a white blanket like islands in a cotton sea. If you see morning fog in the forecast, get up early and fly. These conditions produce some of the most spectacular aerial images possible.
Storm fronts, dramatic cloud formations, and the golden light after rain are all worth chasing from the air. However, always prioritize safety, do not fly in high winds (above 20-25 mph for most consumer drones), rain, or near thunderstorms. Check weather conditions and wind forecasts at altitude (wind is often significantly stronger 200-400 feet up than at ground level).
Panoramas and HDR from Drones
Most modern drones have built-in panorama and HDR modes that automate multi-image capture and stitching. These modes produce images with significantly higher resolution and dynamic range than a single frame.
Sphere panoramas capture a full 360-degree view that can be viewed interactively. Wide-angle panoramas stitch multiple images into a single ultrawide frame. Both work best in calm air with consistent lighting, a moving cloud casting shifting shadows across your scene will create stitching artifacts.
For maximum quality, shoot your panorama frames in manual mode to lock exposure, white balance, and focus across all frames. Then stitch in Lightroom, PTGui, or dedicated panorama software rather than relying on the drone’s in-camera processing. The same applies to HDR, shooting bracketed exposures in RAW and merging in Lightroom or Photoshop gives you far more control than the drone’s built-in HDR JPEG.
Editing Aerial Images
Aerial images often need more aggressive editing than ground-level photography due to atmospheric haze, high dynamic range, and the flat look caused by shooting through more atmosphere.
Start by removing haze: the dehaze slider in Lightroom is your best friend for aerial work. It cuts through atmospheric murkiness and reveals color and contrast that the RAW file captured but the preview image hides. Be careful not to overdo it, as heavy dehaze can introduce ugly color shifts and artifacts.
Lift shadows and recover highlights to handle the extreme dynamic range typical of aerial scenes. Drone sensors have less dynamic range than full-frame cameras, so shooting in RAW is critical, you need every bit of data the sensor captures. Graduated filters in Lightroom (dragged from the top of the frame to darken the sky) are particularly useful for aerial landscape images.
Lens correction profiles for drone lenses are built into Lightroom and should be applied by default, drone lenses, especially on smaller models, have significant barrel distortion and vignetting that the correction profile eliminates. Finally, aerial images benefit from generous sharpening, as the combination of atmospheric haze and the compact sensor can make images look softer than they are.
Safety and Etiquette
Being a responsible drone pilot protects you legally and ensures continued access to airspace for all drone photographers.
- Pre-flight checks. Inspect your drone before every flight, propellers for damage, battery charge level, firmware updates, and GPS signal lock. A pre-flight checklist takes two minutes and prevents crashes that cost hundreds or thousands of dollars.
- Maintain visual line of sight. You must be able to see your drone at all times. Flying beyond visual range is illegal for most operators and dramatically increases the risk of collision or loss.
- Respect people’s privacy. Do not hover over private property, photograph people without their awareness, or fly in ways that make people uncomfortable. A drone is loud and conspicuous, if someone asks you to stop, respect their request.
- Yield to manned aircraft. If you see or hear a helicopter, plane, or other manned aircraft, immediately descend and land. Manned aircraft always have right of way.
- Be mindful of wildlife. Drones disturb birds and other animals. Maintain distance from nesting sites, wildlife reserves, and marine mammals. Many wildlife areas prohibit drone use entirely.
- Consider insurance. Drone insurance (both hull coverage for your drone and liability coverage for damage you might cause) is affordable and strongly recommended. For Part 107 commercial operators, liability insurance is often required by clients.
Building Your Aerial Portfolio
The aerial photography market is growing rapidly, with demand from real estate, construction, tourism, agriculture, environmental monitoring, and editorial clients. To build a portfolio that attracts paying work, focus on developing a distinct visual style rather than collecting generic aerial snapshots.
Some photographers specialize in abstract top-down compositions. Others focus on epic landscape vistas. Some target the commercial real estate market with polished property aerials. Identify the subjects and styles that excite you and shoot them consistently. A focused portfolio of 20 exceptional aerial images from a specific niche will attract more clients than a scattered collection of 200 mediocre shots from everywhere.
Stock photography platforms are another avenue: aerial images of popular locations, coastlines, and urban landscapes sell well as stock. The key is finding perspectives and compositions that are not yet oversaturated on the major platforms. Unique angles of well-known locations or beautifully captured scenes in unexpected weather conditions stand out.
Frequently Asked Questions
Do I need a license to fly a drone for photography?
In the United States, recreational drone pilots must pass the free TRUST test and register their drone (if over 250 grams). If you sell your photos or use them commercially in any way, you need an FAA Part 107 Remote Pilot Certificate, which requires passing a knowledge exam. Rules vary by country, always check your local aviation authority’s requirements before flying.
What is the best beginner drone for photography?
DJI’s Mini series is the best starting point for most photographers. These drones weigh under 250 grams (avoiding many regulations), carry capable cameras that shoot RAW and 4K video, and cost significantly less than flagship models. The Mini line offers the best balance of image quality, portability, regulatory simplicity, and price for someone entering aerial photography.
Can I fly my drone anywhere?
No. Drone flight is restricted near airports, in controlled airspace, over national parks, over crowds, near stadiums during events, and in many other areas. Always check airspace restrictions before every flight using an app like B4UFLY or Aloft. In controlled airspace, you may be able to get authorization through the LAANC system, but this must be obtained before takeoff.
What camera settings should I use for drone photography?
For aerial stills in daylight, use ISO 100, aperture f/5.6 to f/8 (if adjustable), and let the shutter speed adjust for correct exposure. Keep the shutter speed at 1/250s or faster to prevent motion blur from drone vibration and wind. Always shoot RAW for maximum editing flexibility. For video, follow the 180-degree shutter rule (shutter speed double your frame rate) and use ND filters to achieve the correct exposure.
How do I deal with wind when flying a drone?
Modern drones handle moderate wind well through GPS stabilization and gimbal systems. However, strong wind degrades image quality (more vibration), reduces flight time (the drone uses more power to hold position), and increases crash risk. Check wind conditions at altitude before flying, apps like UAV Forecast provide wind speed at different altitudes. Most consumer drones perform well in winds up to 15-20 mph. Avoid flying when winds exceed your drone’s rated wind resistance.
Continue Learning
Drone photography combines traditional photographic skills with the unique opportunities of an aerial perspective. Strengthen your foundation with these related guides: